
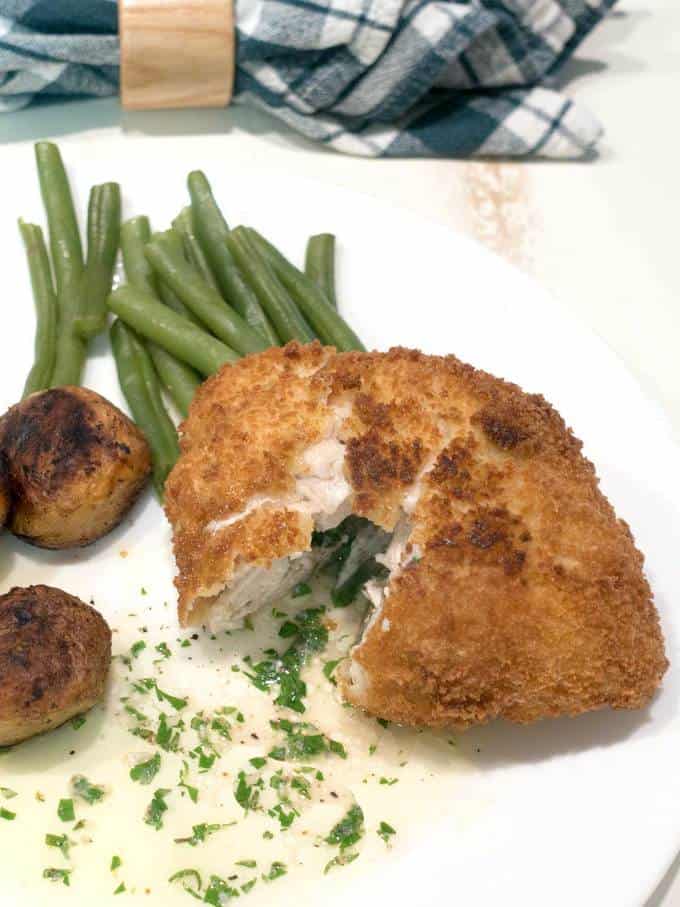
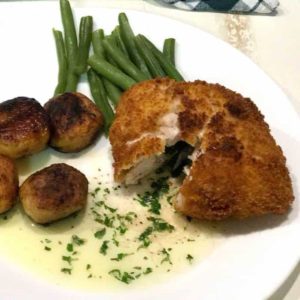
Chicken Kiev is elegant dish made with a breaded tender chicken breast wrapped around an oozing core of herbed butter. Done correctly, the crispy Chicken Kiev releases a flowing stream of herbed butter when you cut into it.
Susan's birthday was Friday, and I asked her if she'd like anything special for dinner. She immediately said that she would like Chicken Kiev, Roasted Potatoes with Onions, and steamed fresh green beans. I used to make Chicken Kiev a lot. For some reason, however, it had been some time since I last made it. It does take a bit of work, and luck to produce the perfect Chicken Kiev, but it is totally worth it!
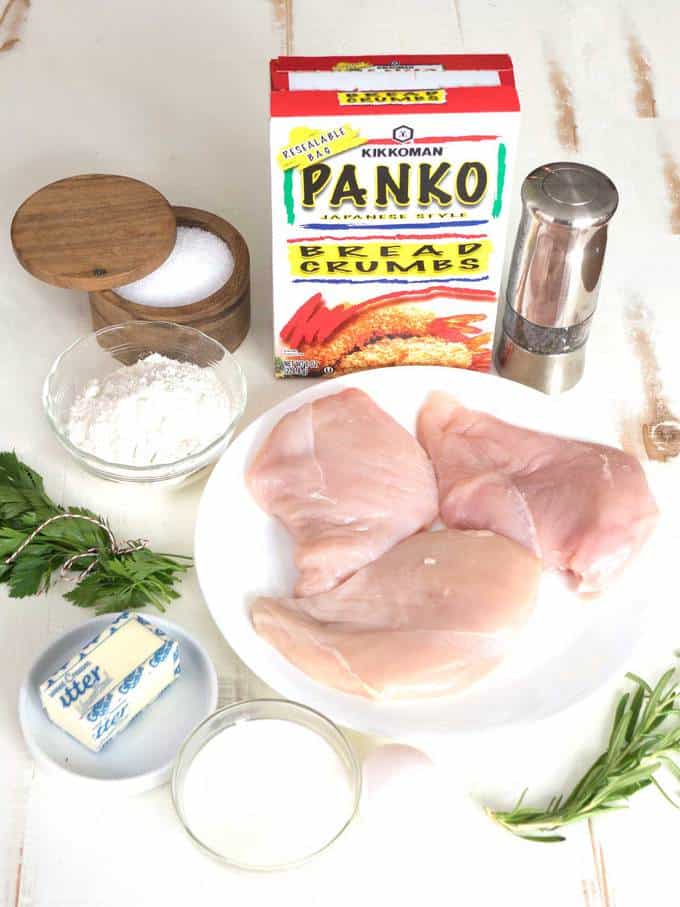
Ingredients for Chicken Kiev:
I used the following ingredients: Boneless and skinless chicken breasts, unsalted butter, fresh parsley, fresh rosemary, salt, freshly ground black pepper, all-purpose flour, egg, milk, and Panko bread crumbs. You could also use regular bread crumbs.
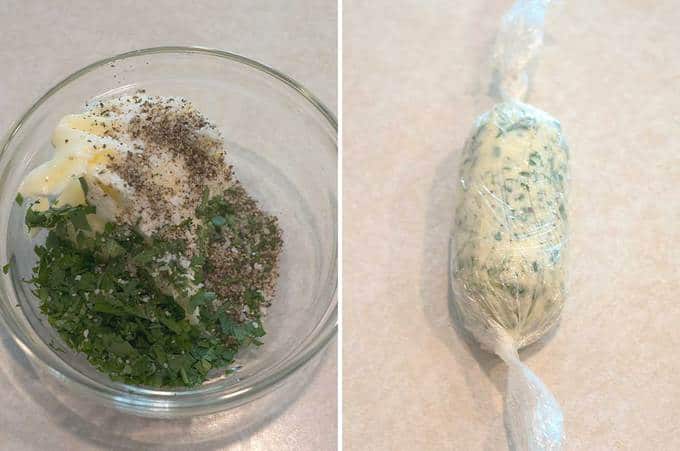
Making the Herbed Butter:
First, I made the herbed butter by combining the unsalted butter, parsley, rosemary, salt, and pepper in a small bowl. Then, I placed the butter mixture on a piece of plastic wrap, and wrapped it into a cylinder shape. I put it in the freezer for the butter to harden.
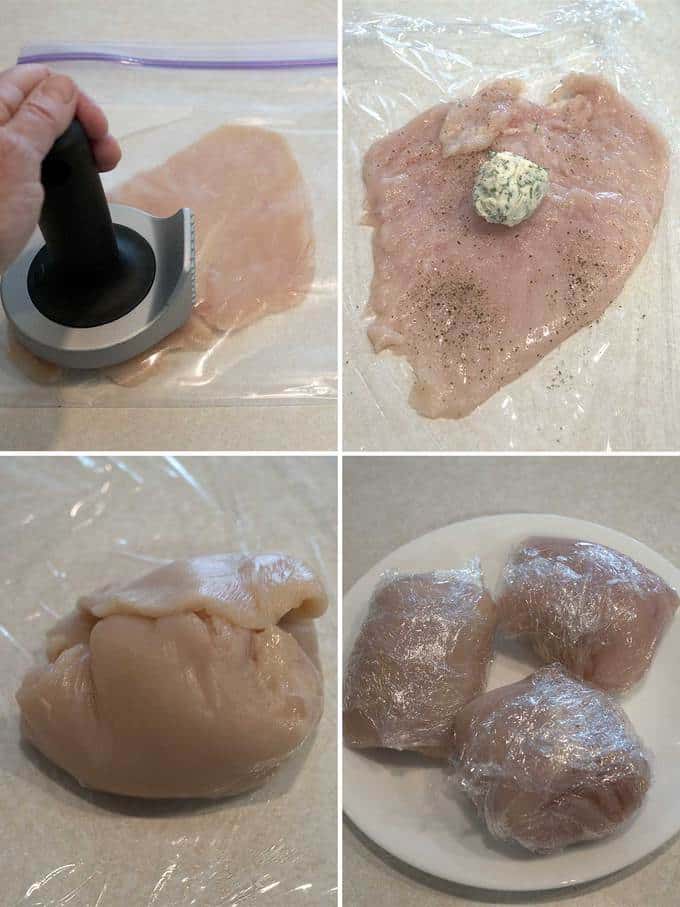
Preparing the Chicken:
While the butter was hardening, I turned my attention to the chicken breasts. I placed one of the breasts in a gallon ziploc bag, and pounded it to a thickness of about ¼-inch. Then, I removed the chicken breast from the ziploc bag, placed it on a piece of plastic wrap, and sprinkled it with salt and pepper. I repeated the process with the remaining chicken breasts.
Next, I removed the butter from the freezer, and cut it into three equal sized pieces - since there were only three of us, I only made three Chicken Kievs. I placed the butter towards the top of the larger end of the chicken, and folded the chicken around it. I made sure that the butter was fully encased. Then, I tightly wrapped the chicken bundle in the plastic wrap, and put it in the freezer for about 30 minutes. The reason for putting the chicken in the freezer was to ensure that the gathered ends of the chicken held together. In the past, I've used toothpicks to hold the chicken together, but have found that this technique actually works better.
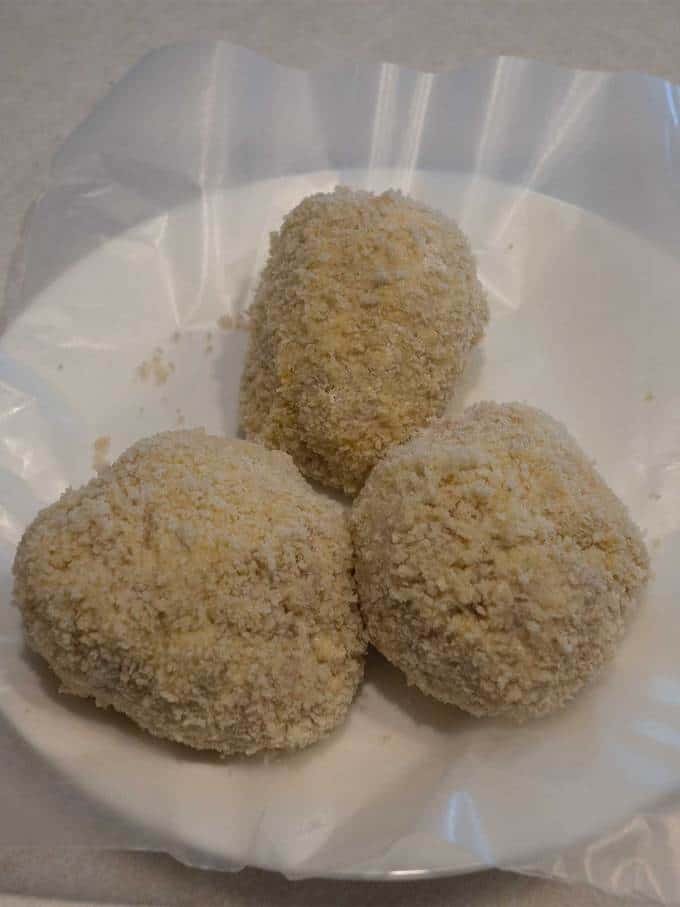
To bread the chicken, I started by coating the chicken balls in all-purpose flour that had been seasoned with salt and pepper. Then, I dipped the chicken in a mixture of egg and milk. I again rolled the chicken in the flour. Next, I dipped the chicken in the egg/milk mixture again. Finally, I coated it in the Panko bread crumbs. As I was doing this, I made sure to press the gathered edges together. I placed the breaded chicken on a wax paper lined plate, and put it in the refrigerator for about an hour. This is important to give the breading time to set.
Cooking the Chicken Kiev:
I started by heating about 1-½ inches peanut oil in a Dutch Oven to 375° F, and preheating the oven to 400° F. Then, I lined a baking sheet with aluminum foil.
When the oil was hot, I added the chicken, gathered side down. I cooked the chicken until it was golden brown on both sides. This only took about a minute per side. Next, I drained the chicken on paper towels, and transferred it to the prepared baking sheet, gathered side up.
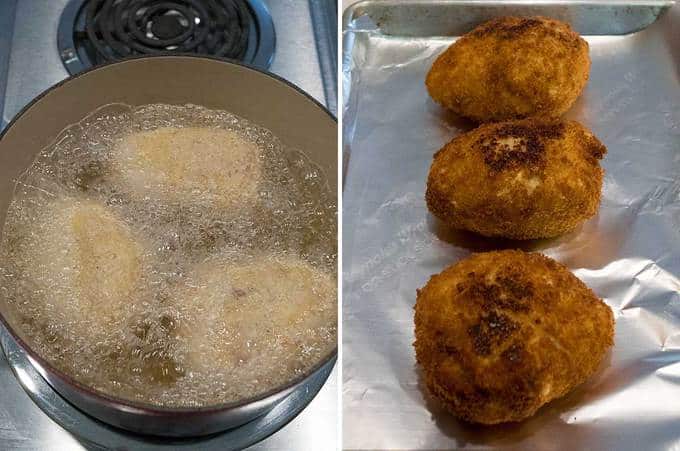
I finished the chicken in the oven for about 20 minutes. After 20 minutes, I could see that some of the butter had started seeping out, so I knew that it was done! I let it rest for about five minutes before serving the chicken.
As requested, I served the Chicken Kiev with Roasted Potatoes with Onions, and steamed fresh green beans. When the moment of truth arrived, we cut into our Chicken Kiev, and were delighted to see the flowing stream of herbed butter. The chicken was tender and flavorful, perfectly cooked, and absolutely delicious. Yum!

Recipe
Want to Save This Recipe?
Enter your email & I’ll send it to your inbox. Plus, enjoy weekly doses of culinary inspiration as a bonus!
By submitting this form, you consent to receive emails from Pudge Factor.
Elegant Chicken Kiev
Ingredients
- 3 chicken breasts (boneless and skinless) trimmed of all fat
- ½ stick 2 ounces unsalted butter, room temperature
- 1 teaspoon fresh rosemary finely chopped
- 1 Tablespoon fresh parsley finely chopped
- ¼ teaspoon salt
- ¼ teaspoon freshly ground black pepper
- Additional salt and freshly ground black pepper
- 1 egg
- ¼ cup milk
- ¾ cup all-purpose flour
- 1 cup Panko bread crumbs
- Peanut oil for frying
Instructions
- Place chicken breast in 1 gallon ziploc bag. Pound to ¼-inch thickness. Place on piece of plastic wrap; sprinkle with salt and freshly ground black pepper. Repeat with additional chicken breasts.
- Combine butter, parsley, rosemary, salt, and pepper in a small bowl. Transfer to piece of plastic wrap. Form into cylinder. Freeze for 15 minutes, or until butter hardens.
- Divide herbed butter into three pieces. Place one piece of butter at widest part of flattened chicken breast. Gather chicken breast around butter to totally enclose it. Freeze for 30 minutes.
- Season flour with ¼ teaspoon of salt and ⅛ teaspoon of pepper. Combine egg and milk.
- Bread the chicken bundles as follows: (1) coat with seasoned flour; (2) coat with egg/milk mixture; (3) coat again with seasoned flour; (4) coat with egg/milk mixture; (5) coat with bread crumbs. During the breading, press gathered seams together.
- Place breaded chicken bundles on wax paper lined plate; refrigerate for at least an hour.
- Heat 1-½ inches of oil in Dutch Oven. Preheat oven to 400° F. Line baking sheet with aluminum foil; set aside.
- Fry breaded chicken bundles, seam side down first, in hot oil until golden brown on both sides, about one minute per side. Drain on paper towels.
- Place chicken bundles, seam side up, on prepared baking sheet; bake at 400° F for 20 minutes, or until herbed butter begins to seep out. Remove from oven; let sit for 5 minutes.
- Yield: 3 servings.

Deborah F. says
Perfect and fabulously delicious. This is the same recipe that my mother-in-law taught me to make close to 40 years ago. The only difference is that I don’t put milk in the egg wash. Tiny difference that comes out the same. Love this recipe. Thank you for making it the traditional and in my opinion, correct way, lol.
Chula King says
Thank you so much Deborah! I've always added milk to the egg when I bread things such as this - not sure why. However, I'm so pleased that it turned out well for you!
Chula