
Tired of store-bought chips and crackers? These Homemade Toasted Pita Wedges are a game-changer. With just a few simple ingredients and 10 minutes in the oven, you can transform plain pita bread into a crunchy, buttery snack that's full of flavor.

Whether you're scooping up your favorite dip, serving them as a side with soup, or setting out a quick appetizer for guests, these toasted pita wedges are sure to impress.
Jump to:
Why You'll Love This Recipe
- Quick and Easy: Just 10 minutes in the oven with no flipping required.
- Flavor-Packed: Garlic butter and Kosher salt turn plain pita wedges into a crave-worthy snack.
- Versatile: Perfect on their own, or when paired with garbanzo bean dip, hummus, soups, or salads.
- Customizable: Add herbs, cheese, or spice blends to elevate the taste.
Simple Ingredients
| Ingredient | Why it Matters |
| 8-inch pita bread rounds | Forms the sturdy base |
| Garlic butter (melted butter + minced garlic | Adds rich, savory flavor and promotes browning. |
| Kosher salt | Enhances flavor and adds a subtle crunch. |

How to Make Homemade Toasted Pita Wedges
Simple steps for maximum flavor.
- Prep oven and Pita Bread: Preheat the oven to 350°F. Cut the pita bread rounds into 8 wedges. Cut away the thick outside edge and gently separate the top and bottom layers for crispier results.

- Make the Garlic Butter: Place the butter and garlic in a microwave-safe measuring cup. Cover the measuring cup with a paper towel and microwave on high for 30 seconds or until the butter is melted. Strain the garlic butter through a fine-mesh strainer to remove the garlic.

- Brush and Season: Place the separated pita wedges, smooth side down, on a foil-lined half-sheet baking pan. Brush each piece with garlic butter and sprinkle with Kosher salt. The aluminum foil makes cleanup a breeze!

- Bake: Bake at 350°F for 10 minutes or until golden brown and crispy. No need to flip!

- Cool and Serve: Remove the pita wedges from the oven and let them cool slightly before serving. They'll crisp up even more as they cool.
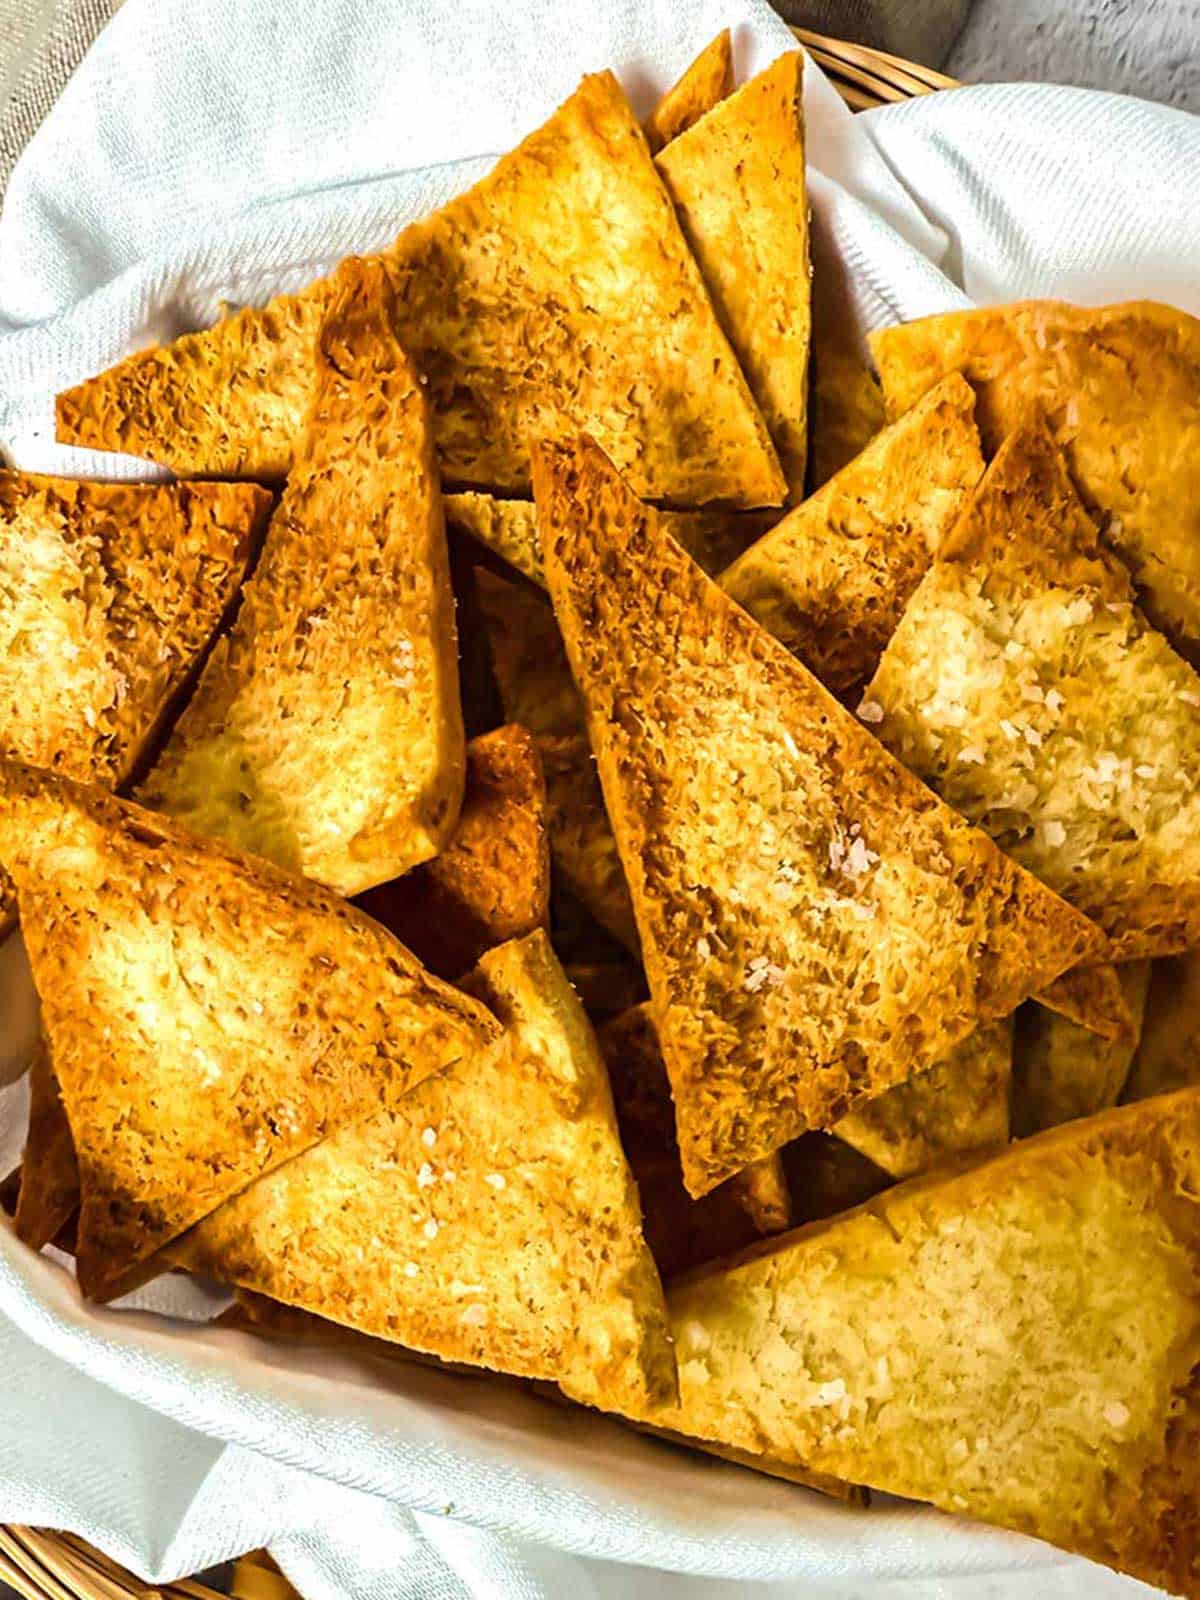
These homemade Toasted Pita Wedges are a simple yet irresistible snack that takes minutes to make and disappears even faster. They're a great way to elevate plain pita bread into something truly special.
Keep a batch on hand for entertaining, or whip them up anytime you need a quick and satisfying crunch. Yum!

Frequently Asked Questions
The outside edges of the pita wedges tend to be thick. Removing the outside edges promotes a uniform thickness for even crispiness.
Yes, just warm it slightly before brushing so it spreads easily.
I like thin, crispy pita wedges. Separating the layers results in thinner, crispier wedges.
I like to store mine in a Ziploc bag at room temperature. They should remain crisp for up to 3 days.
Recipe Tips and Tricks
- Watch carefully when melting the butter in the microwave. Depending on the water content, the butter may sputter and pop, and make a mess if the container isn't covered with a paper towel. Alternatively, you can melt the butter with the garlic in a small saucepan on the stovetop.
- Use day-old pita bread. It's slightly firmer and easier to cut cleanly.
- Sometimes, when I make these toasted pita chips, I use olive oil and omit the garlic in place of the melted garlic butter. The taste is slightly different, but still delicious.
- For even tastier toasted pita wedges, sprinkle with finely grated Parmesan cheese before baking.
Did you make this recipe? We'd love to know how it turned out! Leave a review below. Then, share a picture on Instagram and tag @pudgefactor so we can see it.
Don't forget to follow us on Pinterest, Facebook, YouTube, Flipboard, and Instagram.
Thank you so much for visiting PudgeFactor. We hope you'll come back!
Recipe
Want to Save This Recipe?
Enter your email & I'll send it to your inbox. Plus, enjoy weekly doses of culinary inspiration as a bonus!
By submitting this form, you consent to receive emails from Pudge Factor.

Easy Homemade Toasted Pita Wedges
Equipment
- Half-sheet pan lined with aluminum foil
- Bread Knife
- Pastry Brush
- Microwave safe bowl
- Small fine wire mesh strainer
Ingredients
- 2 8-inch white pita bread rounds (See Tip 1)
- ¼ cup unsalted butter
- 1 clove garlic, minced
- ¼ teaspoon Kosher salt
Instructions
- Preheat oven to 350°F. Line a half-sheet pan with aluminum foil for easy cleanup. Set aside.
- Cut the pita bread rounds into 8 wedges with a bread knife. Cut away the thick outside edges and gently separate the top and bottom layers.
- Add the butter and garlic to a microwave-safe measuring cup or bowl. Cover with a paper towel and microwave on high for 30 seconds or until the butter is melted. Watch carefully. (See Tip 2)
- Pour the melted garlic butter through a fine mesh strainer to remove the pieces of garlic.
- Place the pita wedges, smooth side down, on an aluminum foil-lined half-sheet pan. Brush with melted garlic butter and sprinkle with Kosher salt.
- Bake at 350°F for 10 minutes, or until golden brown. Remove from the oven; cool.
- Serve with your favorite dip or soup, or enjoy as a snack.
- Yield: 32 Toasted Pita Wedges (See Tip 3)
Video
Tips/Notes
- May substitute whole wheat pita bread rounds. However, the toasted pita wedges will not be quite as crispy.
- When melting the butter in the microwave, watch closely. Depending on the water content, it may sputter and pop. Therefore, cover with a paper towel. Alternatively, melt the butter with the garlic in a small saucepan on the stovetop.
- Toasted pita wedges will remain crisp up to three days if stored in an airtight container at room temperature. I like to use a Ziploc bag for this.


Leave a Reply