
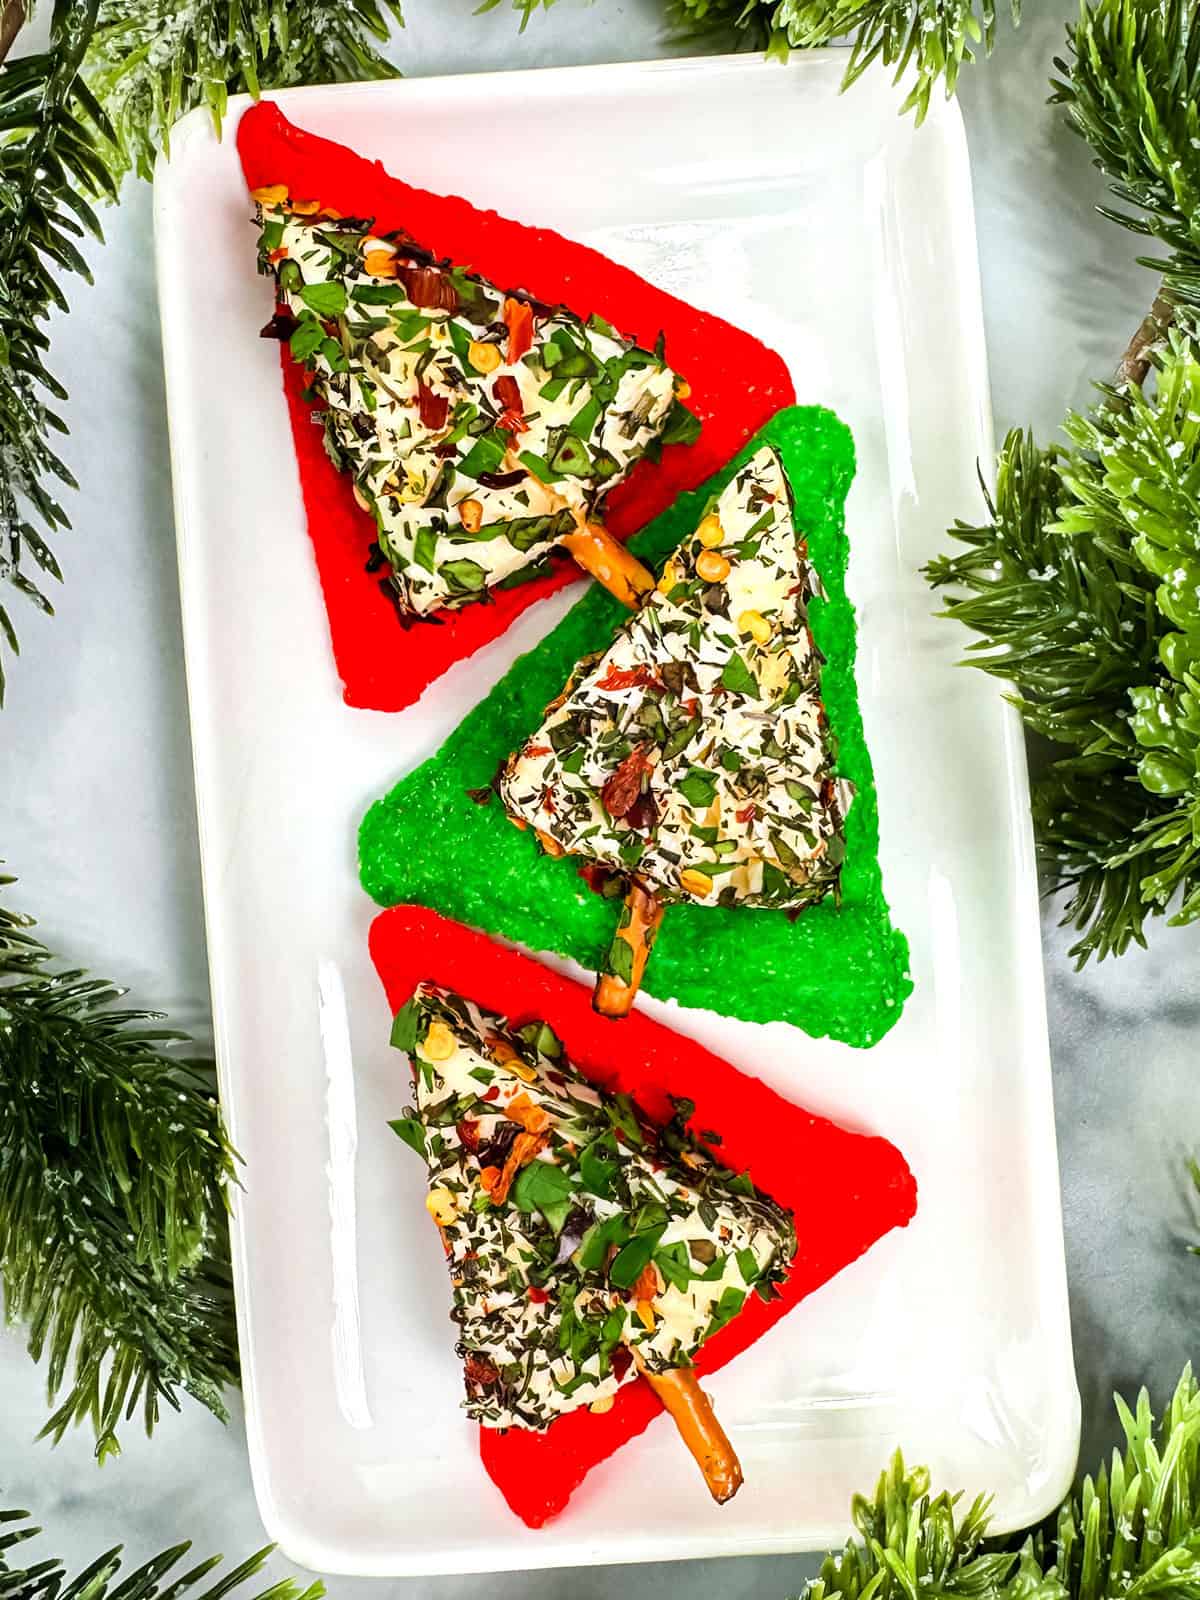
Looking for a show-stopping yet easy holiday appetizer that will wow your guests? These festive Christmas cheese trees are the perfect solution. Whether you're hosting a formal Thanksgiving dinner, a casual Christmas party, or a New Year's Eve bash, this no-cook vegetarian snack is a delightful addition to any holiday charcuterie board. With a fresh herb crust and a playful design, these trees are as delicious as they are beautiful.

Jump to:
Why You'll Want to Make Quick & Easy Holiday Cheese Trees
- Low-Calorie Treat: At only 69 calories per serving, this is a guilt-free alternative to heavy holiday dips.
- No Cooking Required: Save your oven space for the turkey or ham; these are assembled in minutes.
- Kid-Friendly & Fun: Children love the "tree" shape, making it a great way to get them to eat fresh herbs.
- Customizable: You can easily swap herbs or toppings to match your personal taste or what's in your pantry.
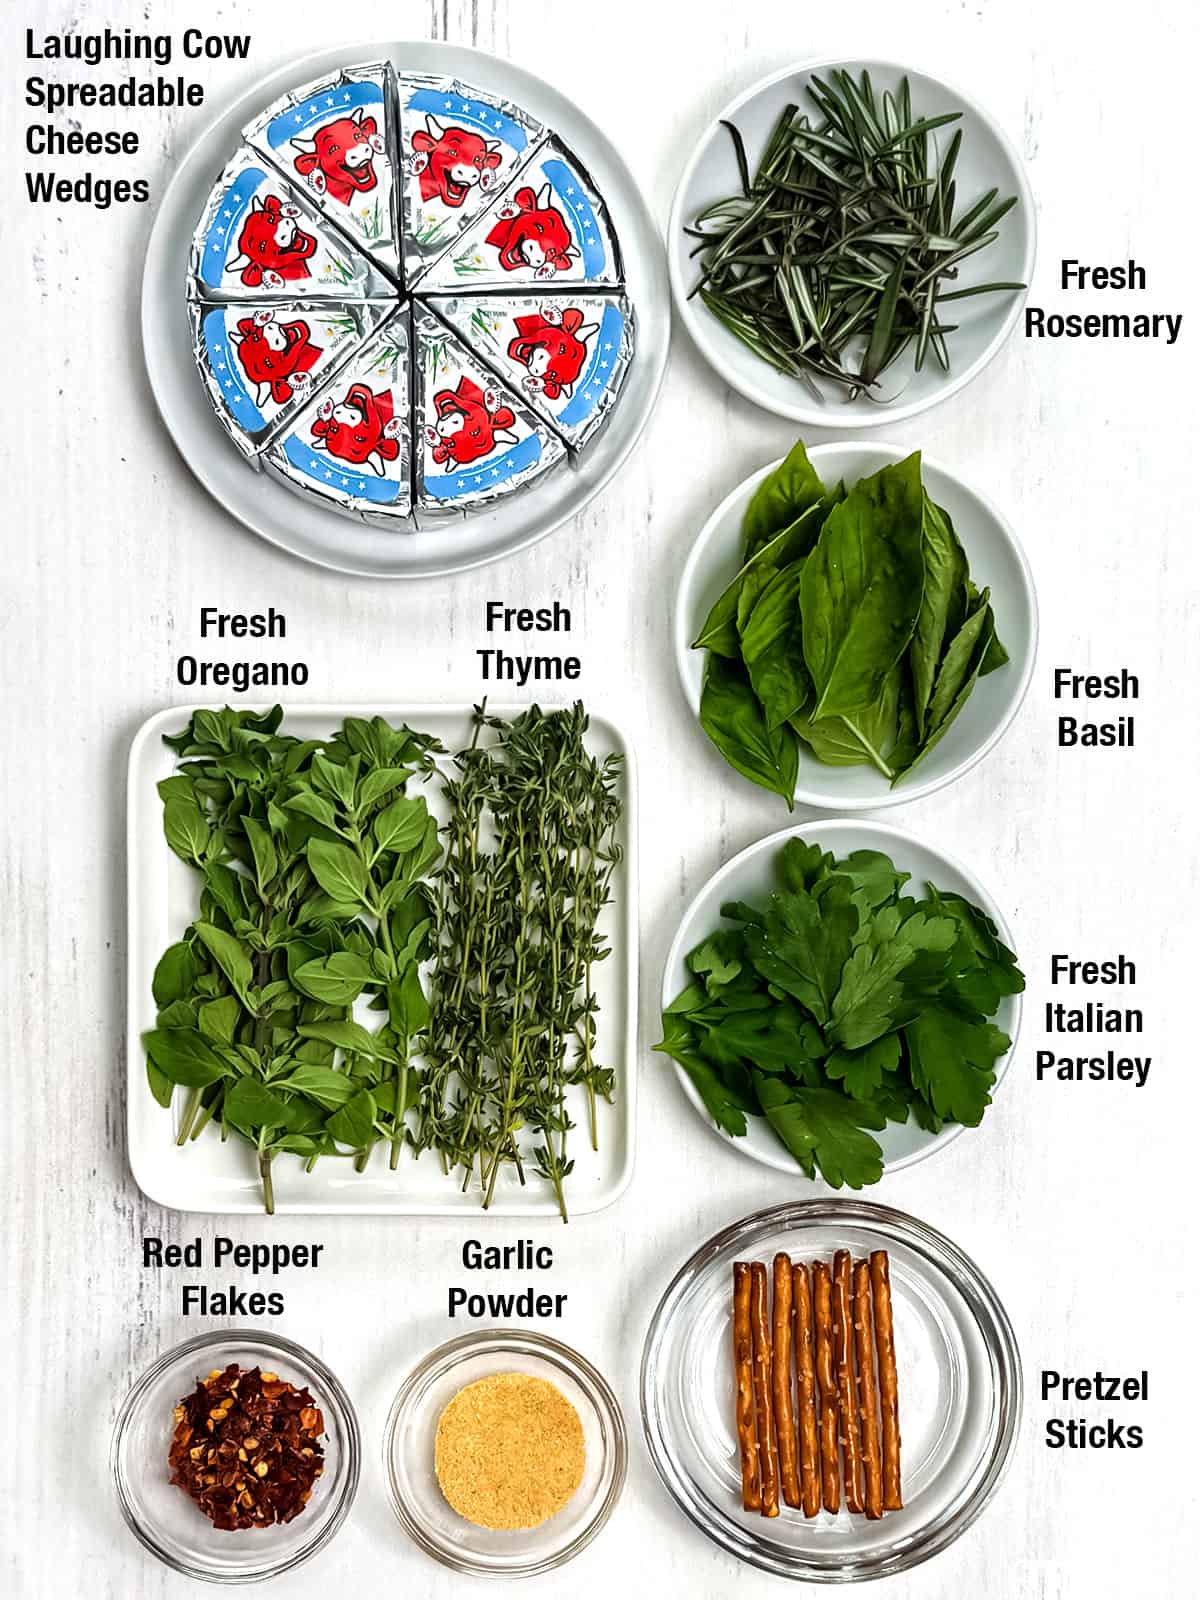
Ingredients - Here's What You'll Need
Steps to Make Quick & Easy Holiday Cheese Trees
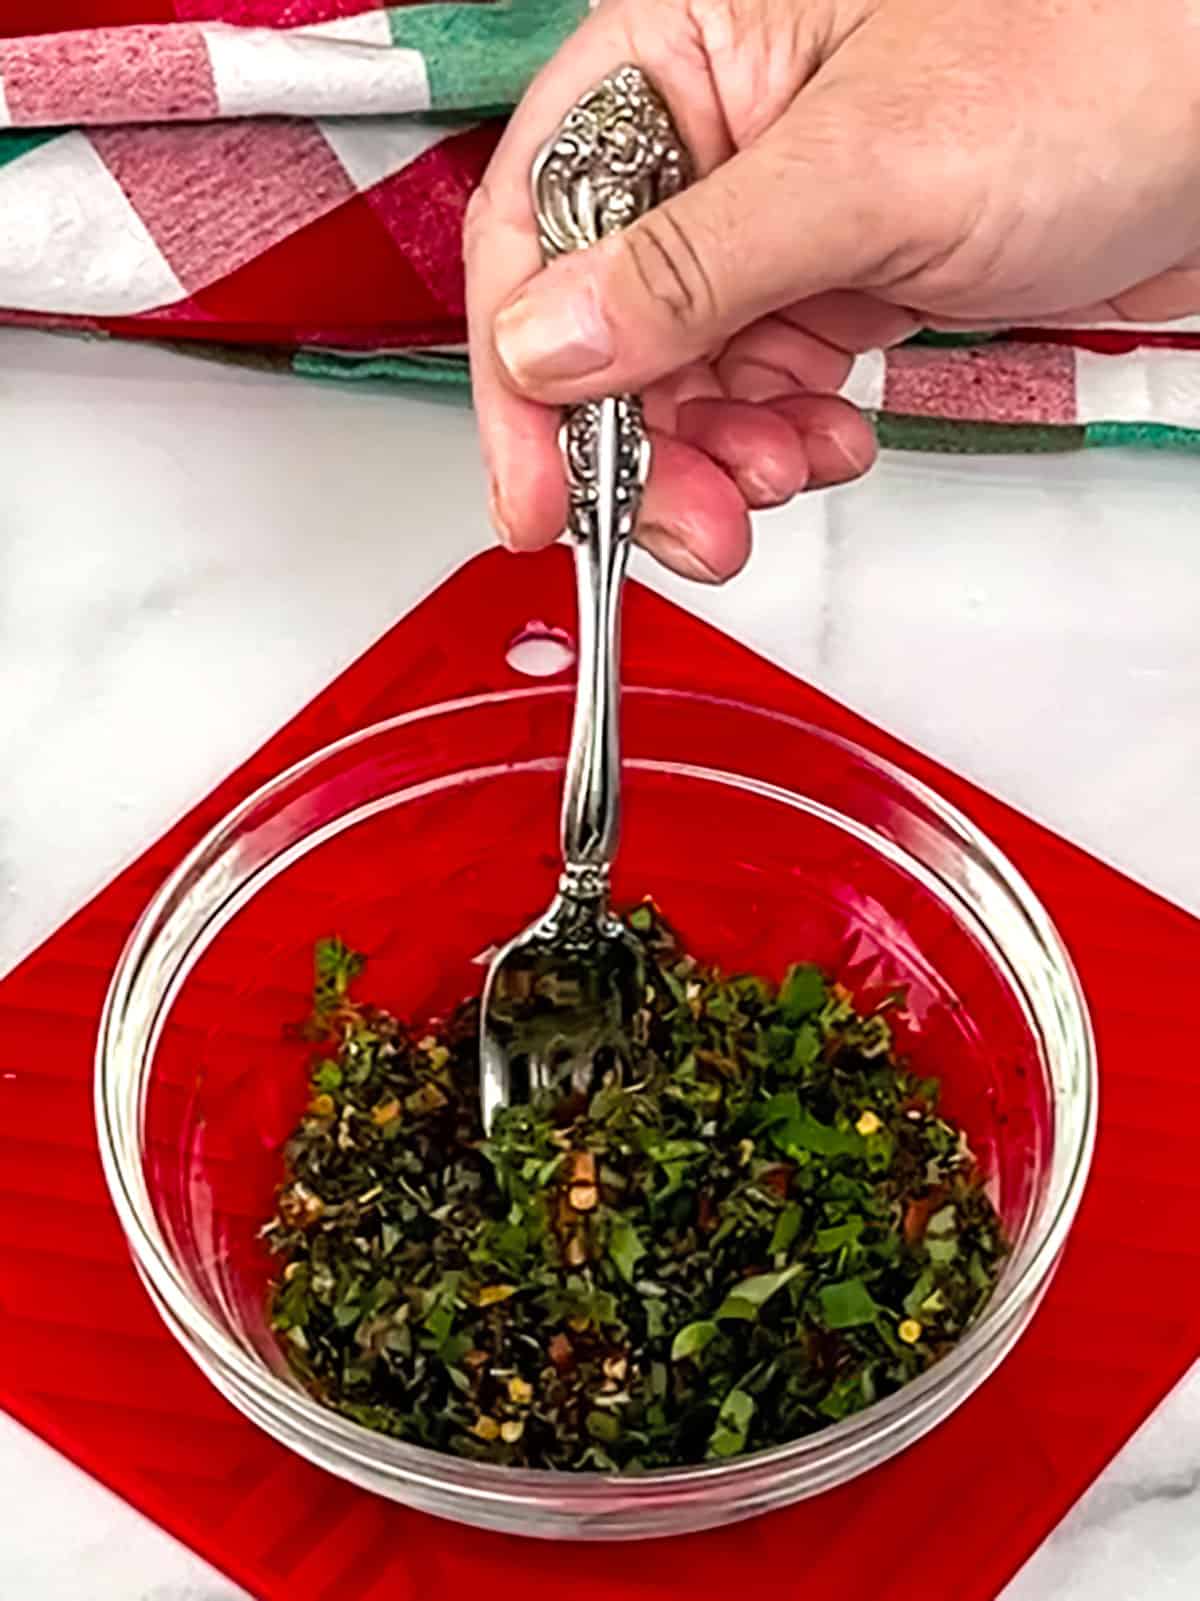
- Finely mince fresh Italian Parsley, Basil, Oregano, Rosemary, and Thyme. Then, add all to a wide shallow bowl along with Red Pepper Flakes.
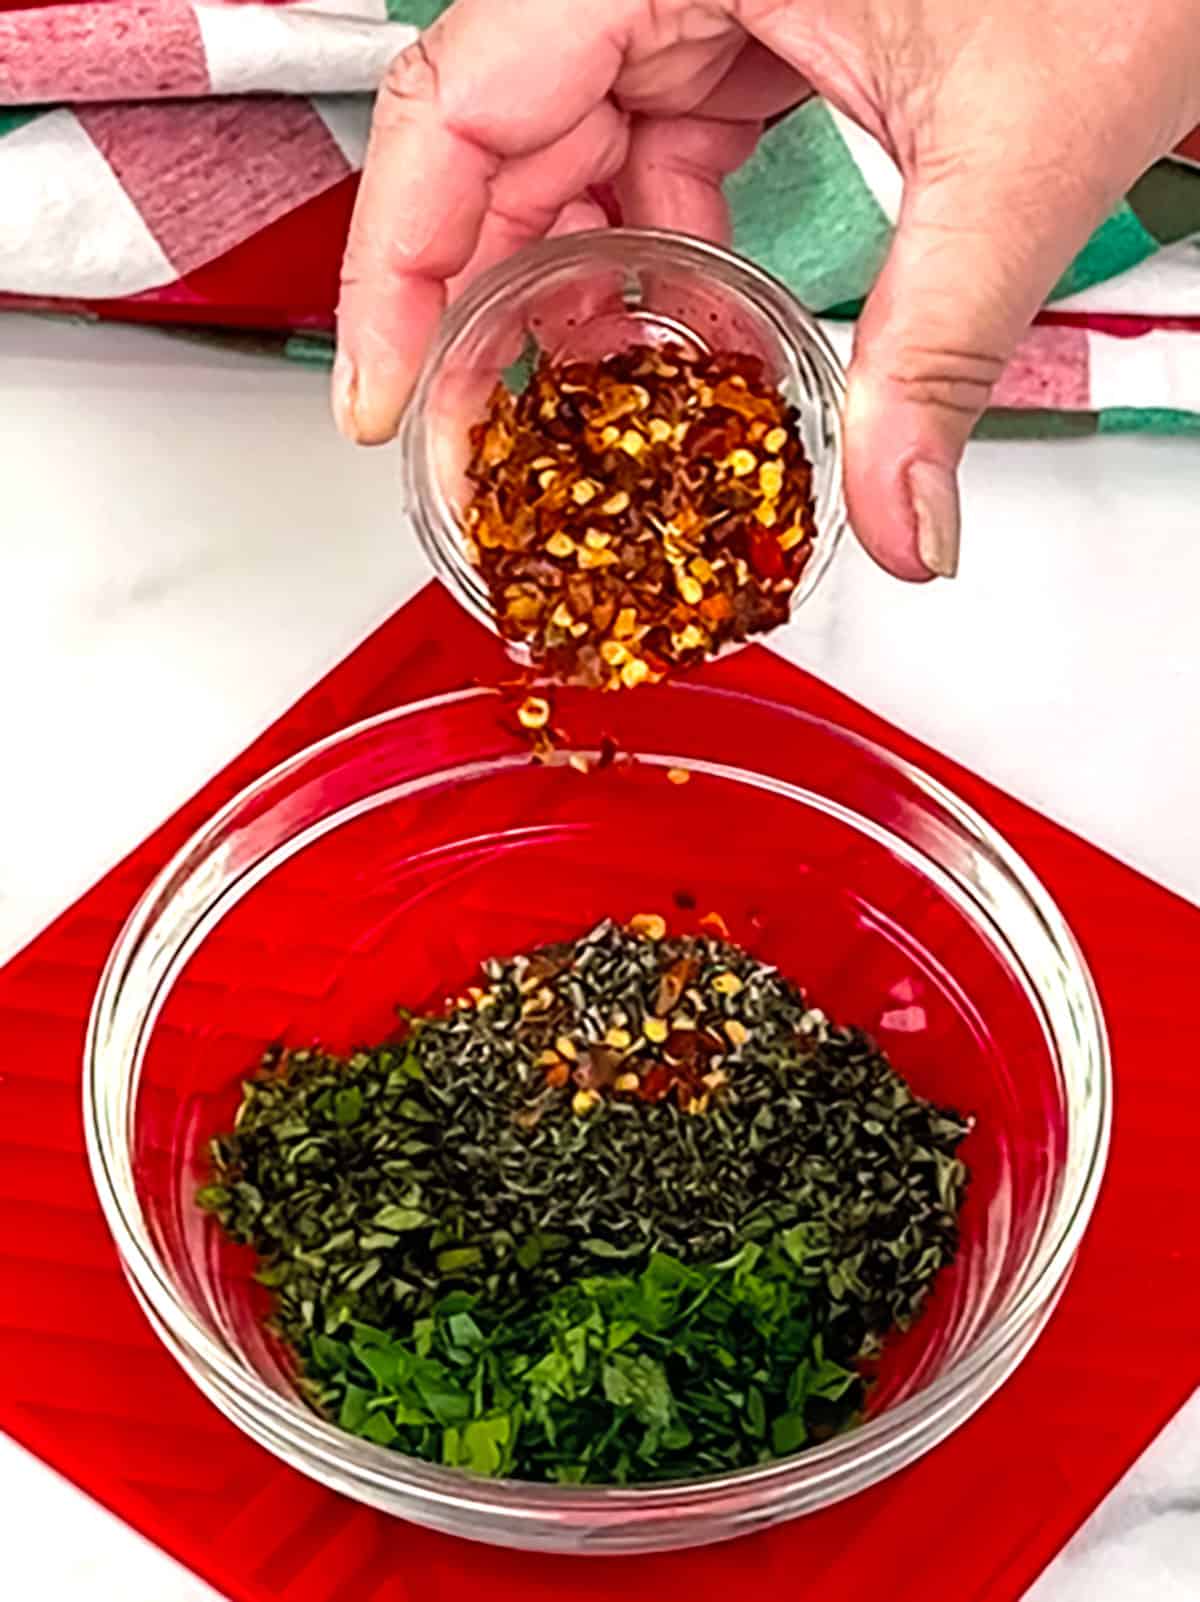
- Use a fork to combine everything together. Set the bowl aside until ready to use.
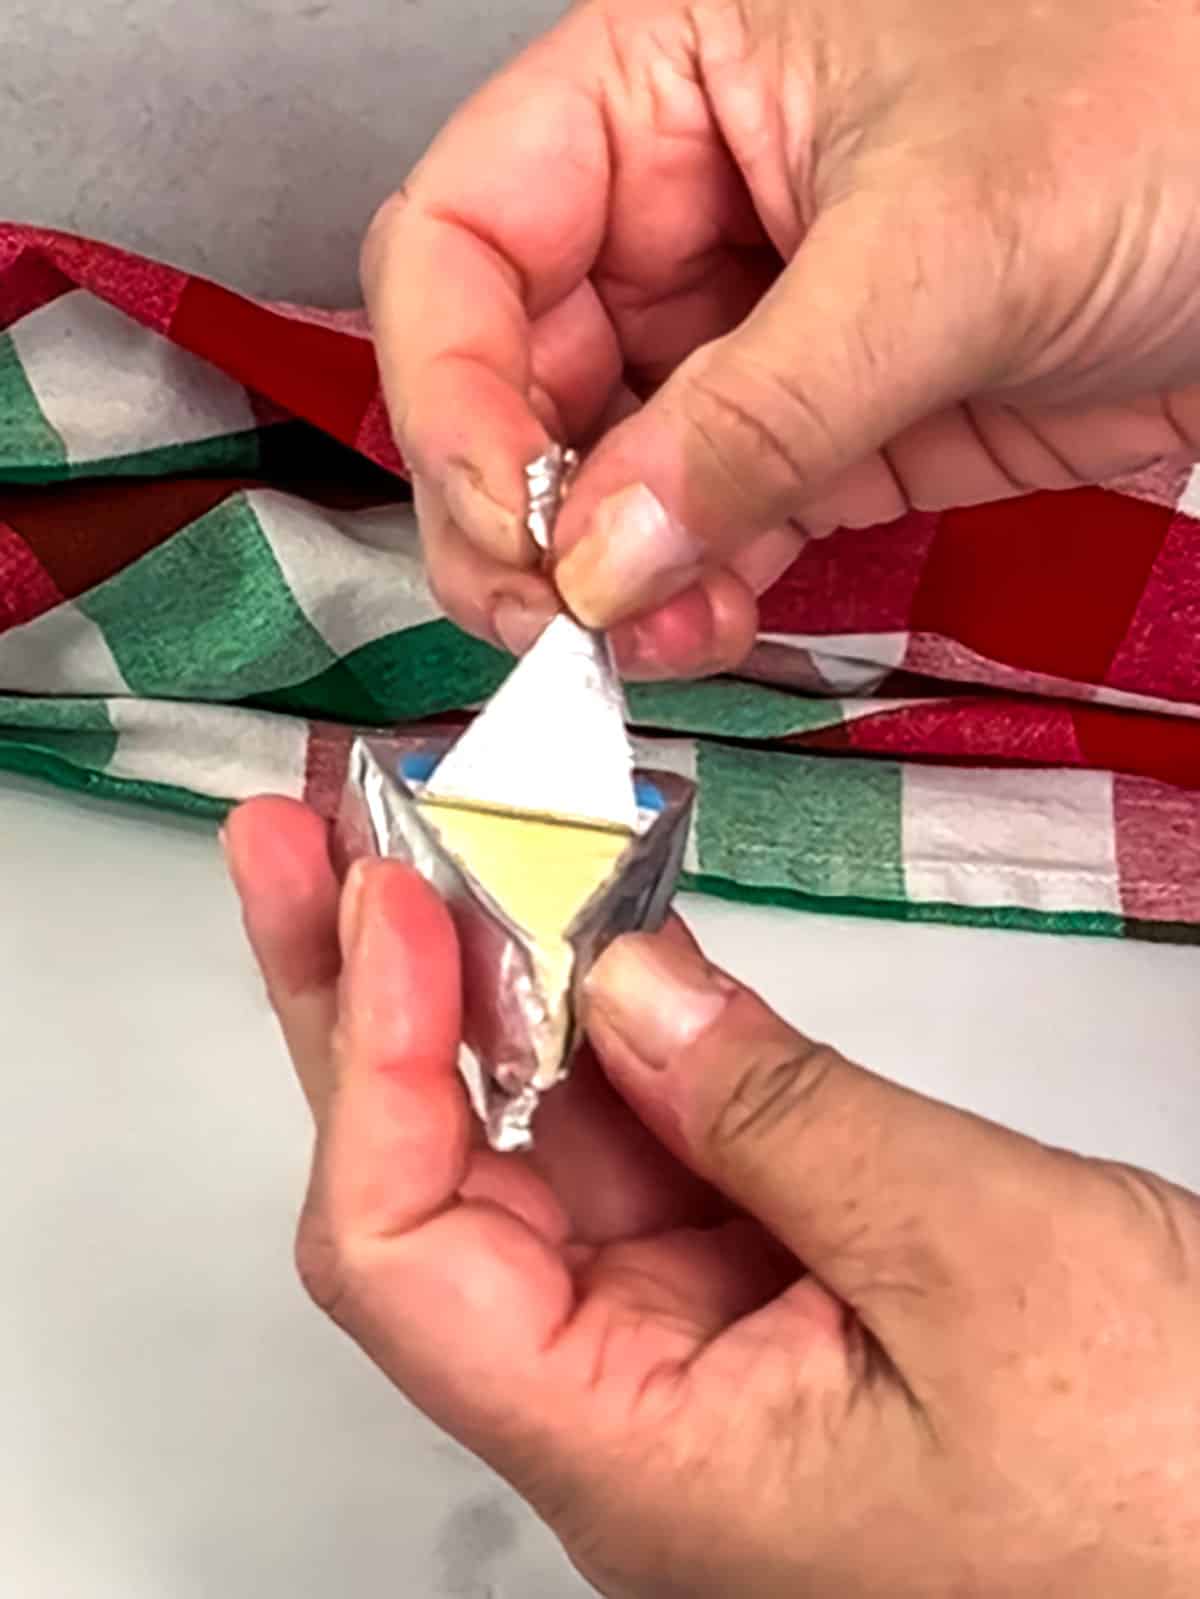
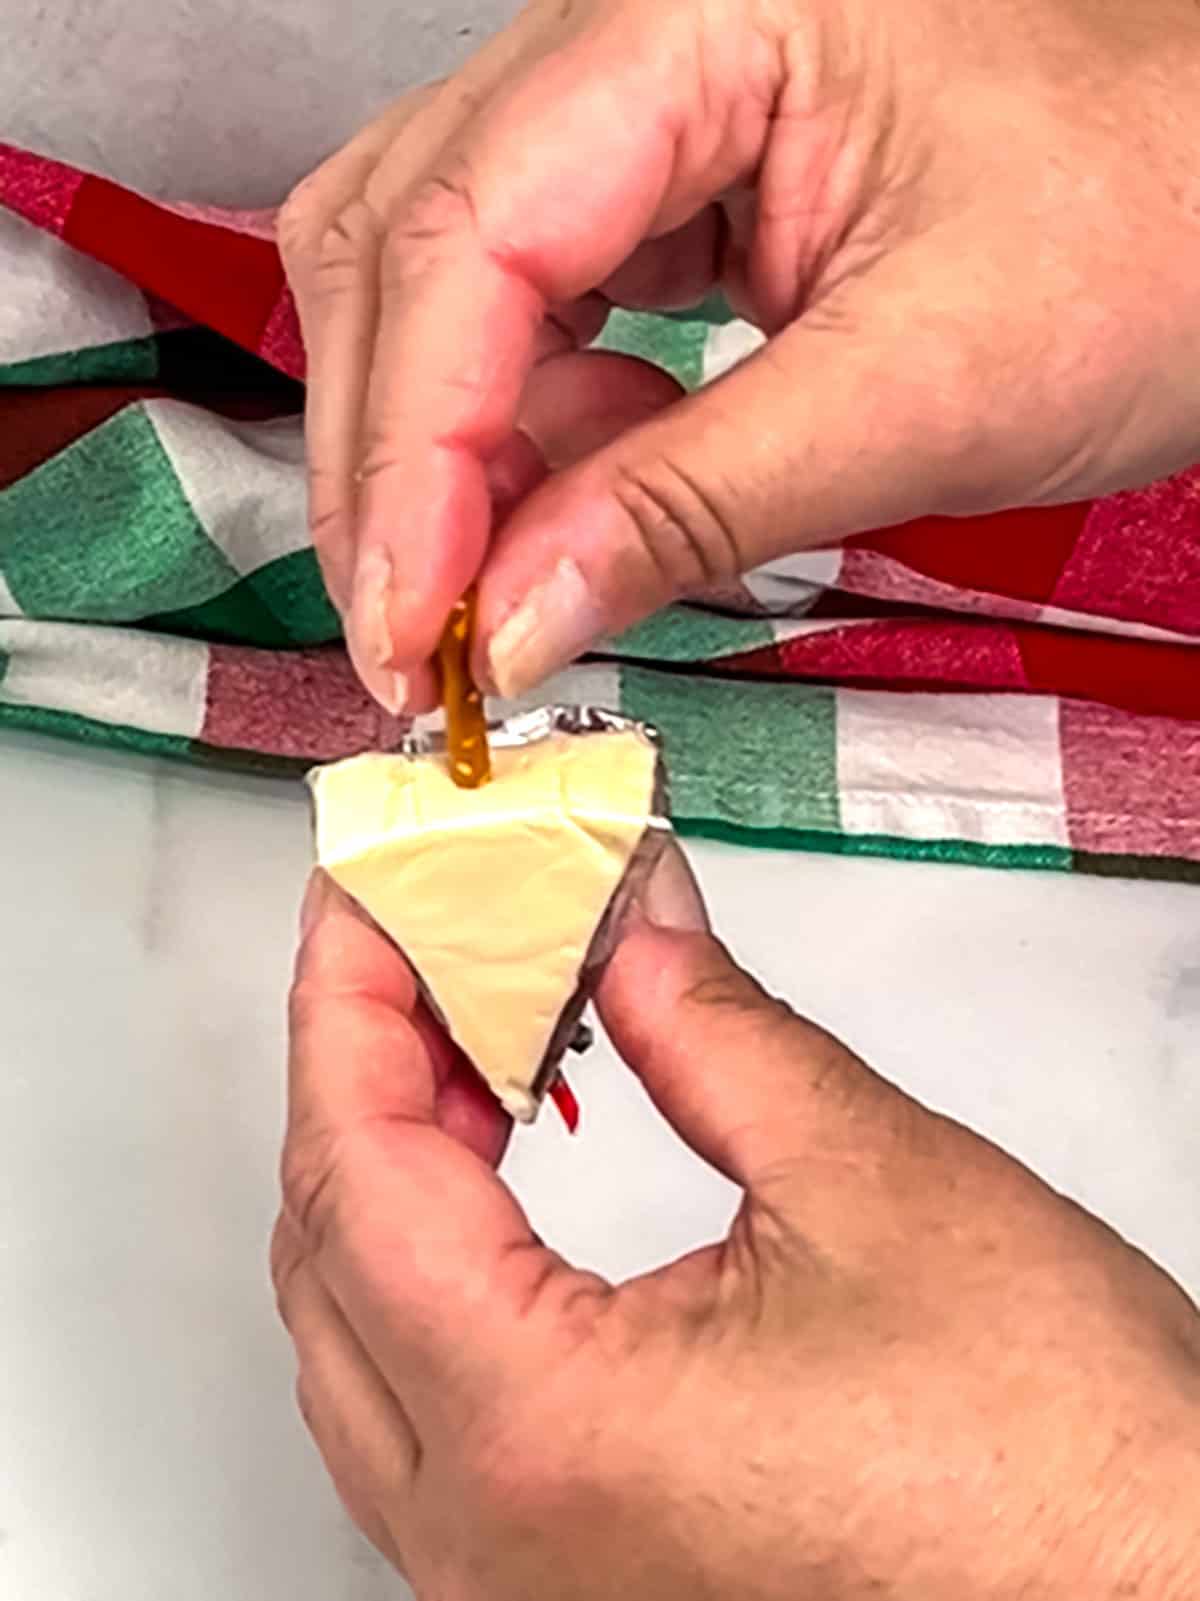
- Partially unwrap one Laughing Cow Spreadable Cheese Wedge by removing the foil from the front and bottom.
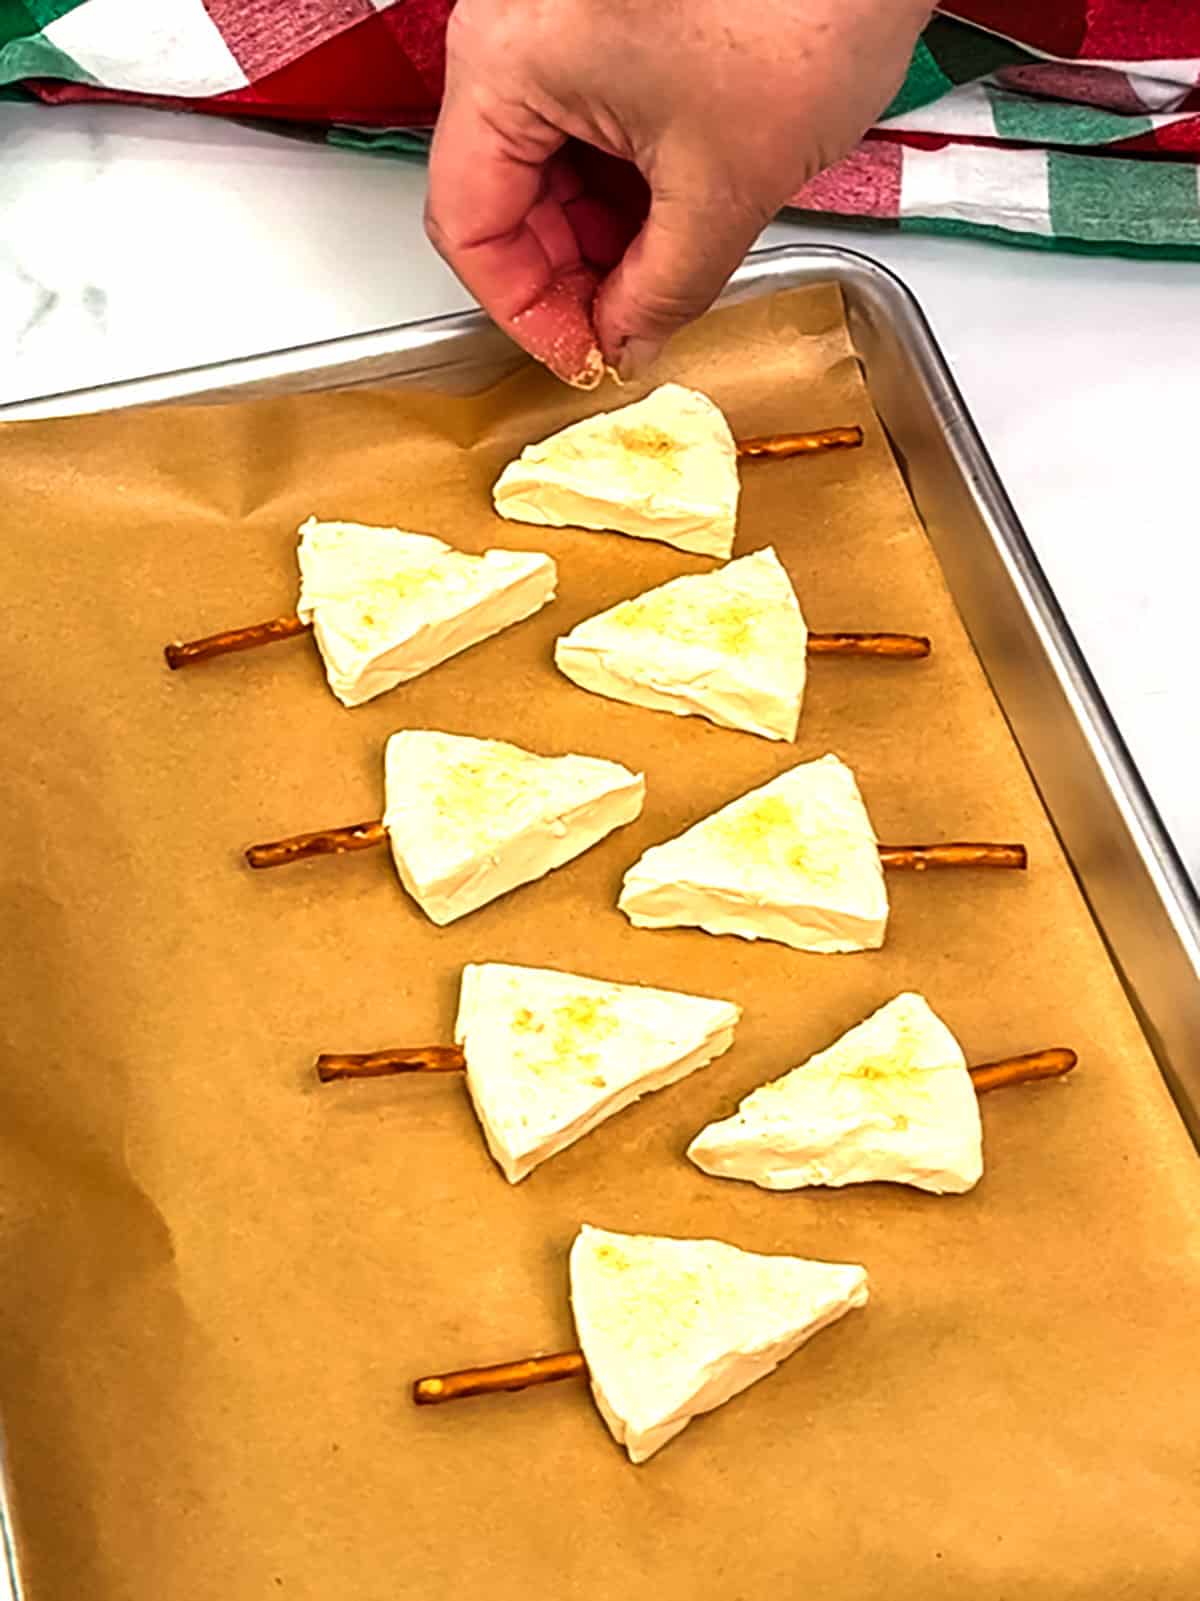
- Break a pretzel stick in half and insert the half into the center of the bottom of the cheese wedge. Carefully remove the remaining foil and place the cheese on a parchment-lined baking sheet.
- Sprinkle the tops of the cheese wedges with a pinch of Garlic Powder.
- Holding the pretzel, carefully place the cheese wedge into the prepared herbs.
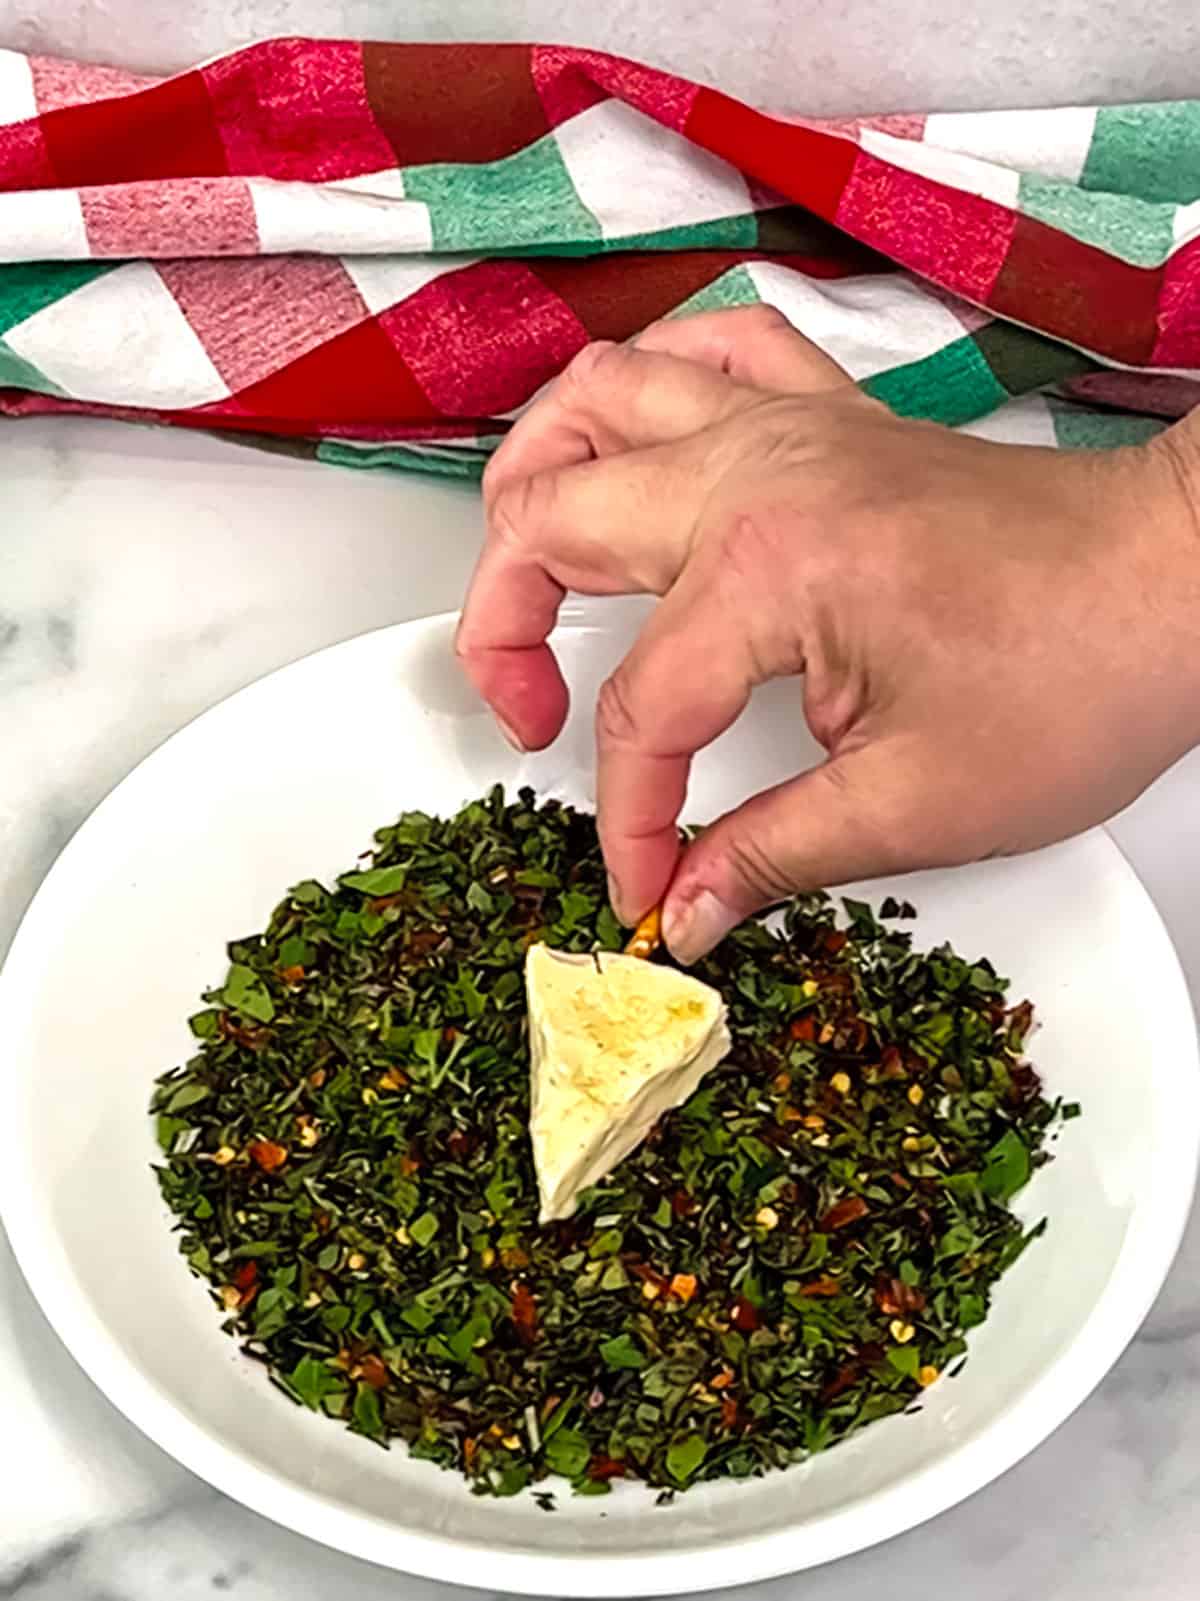
- Roll the cheese wedge around several times until all sides are coated in the herb mixture.

- Place the coated cheese wedge on a parchment-lined baking sheet. Repeat steps three through seven with the remaining cheese wedges. Serve immediately.
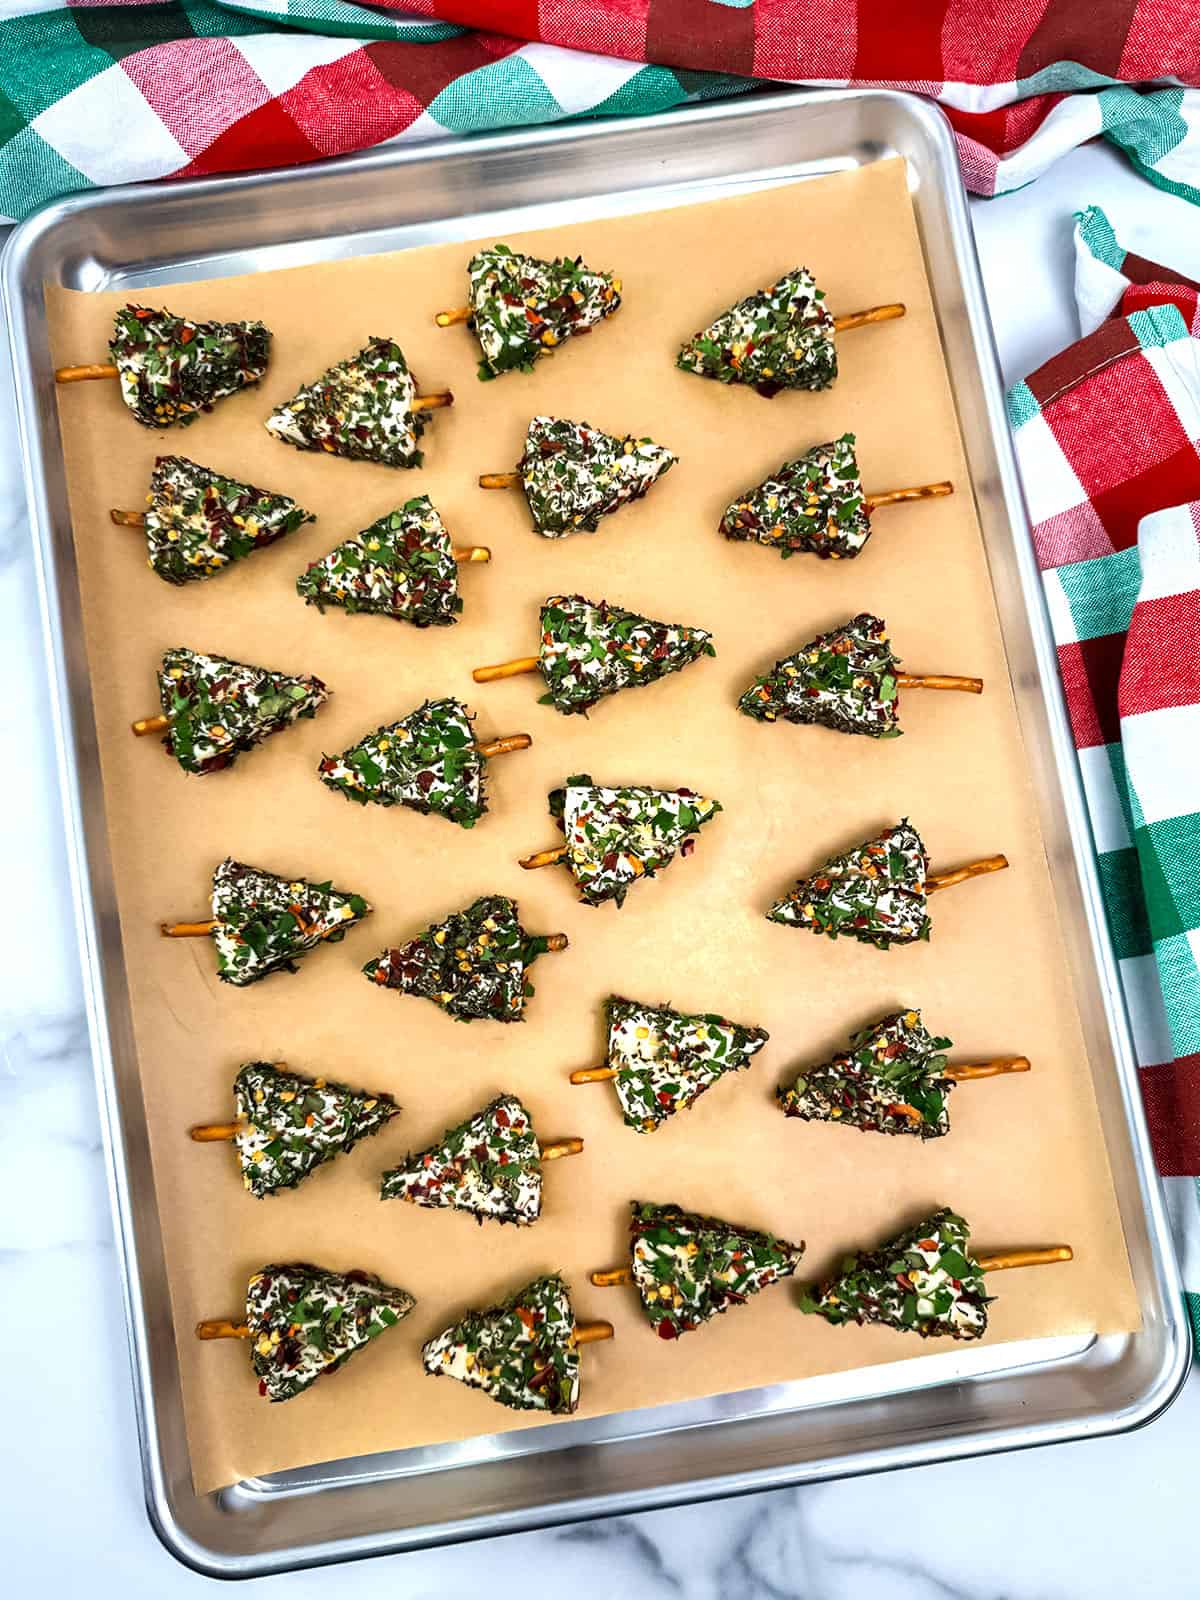
Elevate your holiday gathering with this Quick and Easy festive Cheese Tree appetizer. Whether you need a last-minute Christmas snack or a creative addition to your New Year's Eve appetizer spread, these herb-crusted cheese trees are a guaranteed hit. They prove that you don't need hours in the kitchen to create a delicious centerpiece that is both healthy and impressive.
Frequently Asked Questions
Yes! You can coat the cheese wedges in herbs and store them in an airtight container in the fridge for up to 24 hours. Just wait to add the pretzel stick "trunk" until you're ready to serve so it stays crunchy.
Fresh herbs are essential for the vibrant green color. We recommend a mix of flat-leaf parsley for bulk, and rosemary or thyme for that classic "evergreen" look and scent.
While Laughing Cow is the easiest to work with due to its triangular shape, you can use any firm-but-spreadable cheese wedge or even cut a block of white cheddar into triangles (though the herbs won't stick quite as easily).
To make this recipe 100% gluten-free, simply swap the traditional pretzel sticks for your favorite gluten-free pretzel brand.
Recipe Tips and Tricks
- Chop Herbs Finely: To ensure the herbs stick to the cheese and look like "needles," mince them as finely as possible.
- Use a Mini Star Cutter: For the most professional-looking stars, use a tiny fondant cutter on your red bell pepper.
- Keep Cheese Cold: Keep the cheese wedges in the refrigerator until the very moment you are ready to unwrap them; they are much easier to handle when firm.
- Wait to Add Pretzels: If you are making these more than an hour in advance, wait to add the pretzel sticks until just before serving to prevent them from getting soggy.
Other Great Holiday Appetizers
- Festive Cranberry Brie Pull-Apart Wreath
- Easy Three Cheese Sausage Balls with Maple Dijon Dip
- Festive Caprese Wreath: A Holiday Appetizer
- Fried Cheese Balls (Crispy, Gooey, and Totally Irresistible)
- Quick & Easy Mini Christmas Tree Pizzas
- Quick and Easy Sweet & Tangy BBQ Meatballs
- Festive Pull-Apart Christmas Tree
- Southern Style Deviled Potatoes with a Potato Salad Twist


Did you make this recipe? We'd love to know how it turned out! Leave a review below. Then, share a picture on Instagram and tag @pudgefactor so we can see it.
Don't forget to follow us on Pinterest, Facebook, YouTube, Flipboard, and Instagram.
Thank you so much for visiting PudgeFactor. We hope you'll come back!
Recipe
Want to Save This Recipe?
Enter your email & I'll send it to your inbox. Plus, enjoy weekly doses of culinary inspiration as a bonus!
By submitting this form, you consent to receive emails from Pudge Factor.

Quick & Easy Holiday Cheese Trees
Ingredients
- 24 Laughing Cow Spreadable Cheese Wedges
- 12 Pretzel Sticks
- 1 tbs Fresh Italian Parsley minced
- 1 tbs Fresh Basil minced
- 1 tbs Fresh Oregano minced
- 1 tbs Fresh Rosemary minced
- 1 tbs Fresh Thyme minced
- t tbs Red Pepper Flakes
- 1 teaspoon Garlic Powder
Instructions
- Finely mince fresh Italian Parsley, Basil, Oregano, Rosemary, and Thyme and add them to a wide, shallow bowl along with Red Pepper Flakes. Then, use a fork to combine everything. Set the bowl aside until ready to use.
- Partially unwrap one Laughing Cow Spreadable Cheese Wedge by removing the foil from the front and bottom. Break a pretzel stick in half and insert the half into the center of the bottom of the cheese wedge. Carefully remove the rest of the foil and place it on a parchment-lined baking sheet.
- Sprinkle the tops of the cheese wedges with a pinch of Garlic Powder.
- Holding the pretzel, carefully place the cheese wedge into the prepared herbs. Roll the cheese wedge around several times until all the sides are coated in the herb mixture.
- Place the coated cheese wedge on a parchment-lined baking sheet. Repeat steps two through four with the remaining cheese wedges. Serve immediately.
- Yield 24 servings
Tips/Notes
- The cheese will get soft very quickly, so it's best to put most of it in the refrigerator. You should work with the wedges in batches, only a couple at a time.
- If the cheese wedges begin to crack or separate, gently use your fingers to press the cheese back together.


Leave a Reply