Homemade Sauerkraut is a probiotic-rich, gut-healthy side dish made with just two ingredients: fresh cabbage and natural sea salt. This simple fermentation process creates a tangy, crunchy condiment that's perfect for sandwiches, sausages, salads, or enjoying on its own.
I first blogged about homemade sauerkraut in 2012. Fast forward to now, with 13 years of continued experimentation. So far, we have consumed gallons of the sauerkraut, with more jars fermenting away! Unlike the original experiment, we've learned a few things along the way and have produced a consistently better product.
Jump to:
Why You'll Love This Homemade Sauerkraut
- Two Ingredients, Endless Flavor: Just cabbage and salt transform into a tangy, crunchy, probiotic-packed superfood.
- Gut-Healthy Goodness: Rich in vitamins and beneficial bacteria to support digestion.
- Customizable Fermentation: Control the texture, tanginess, and saltiness to your taste.
- Budget-Friendly: Cheaper and fresher than store-bought sauerkraut with sea salt as the additive.
Ingredients for Homemade Sauerkraut
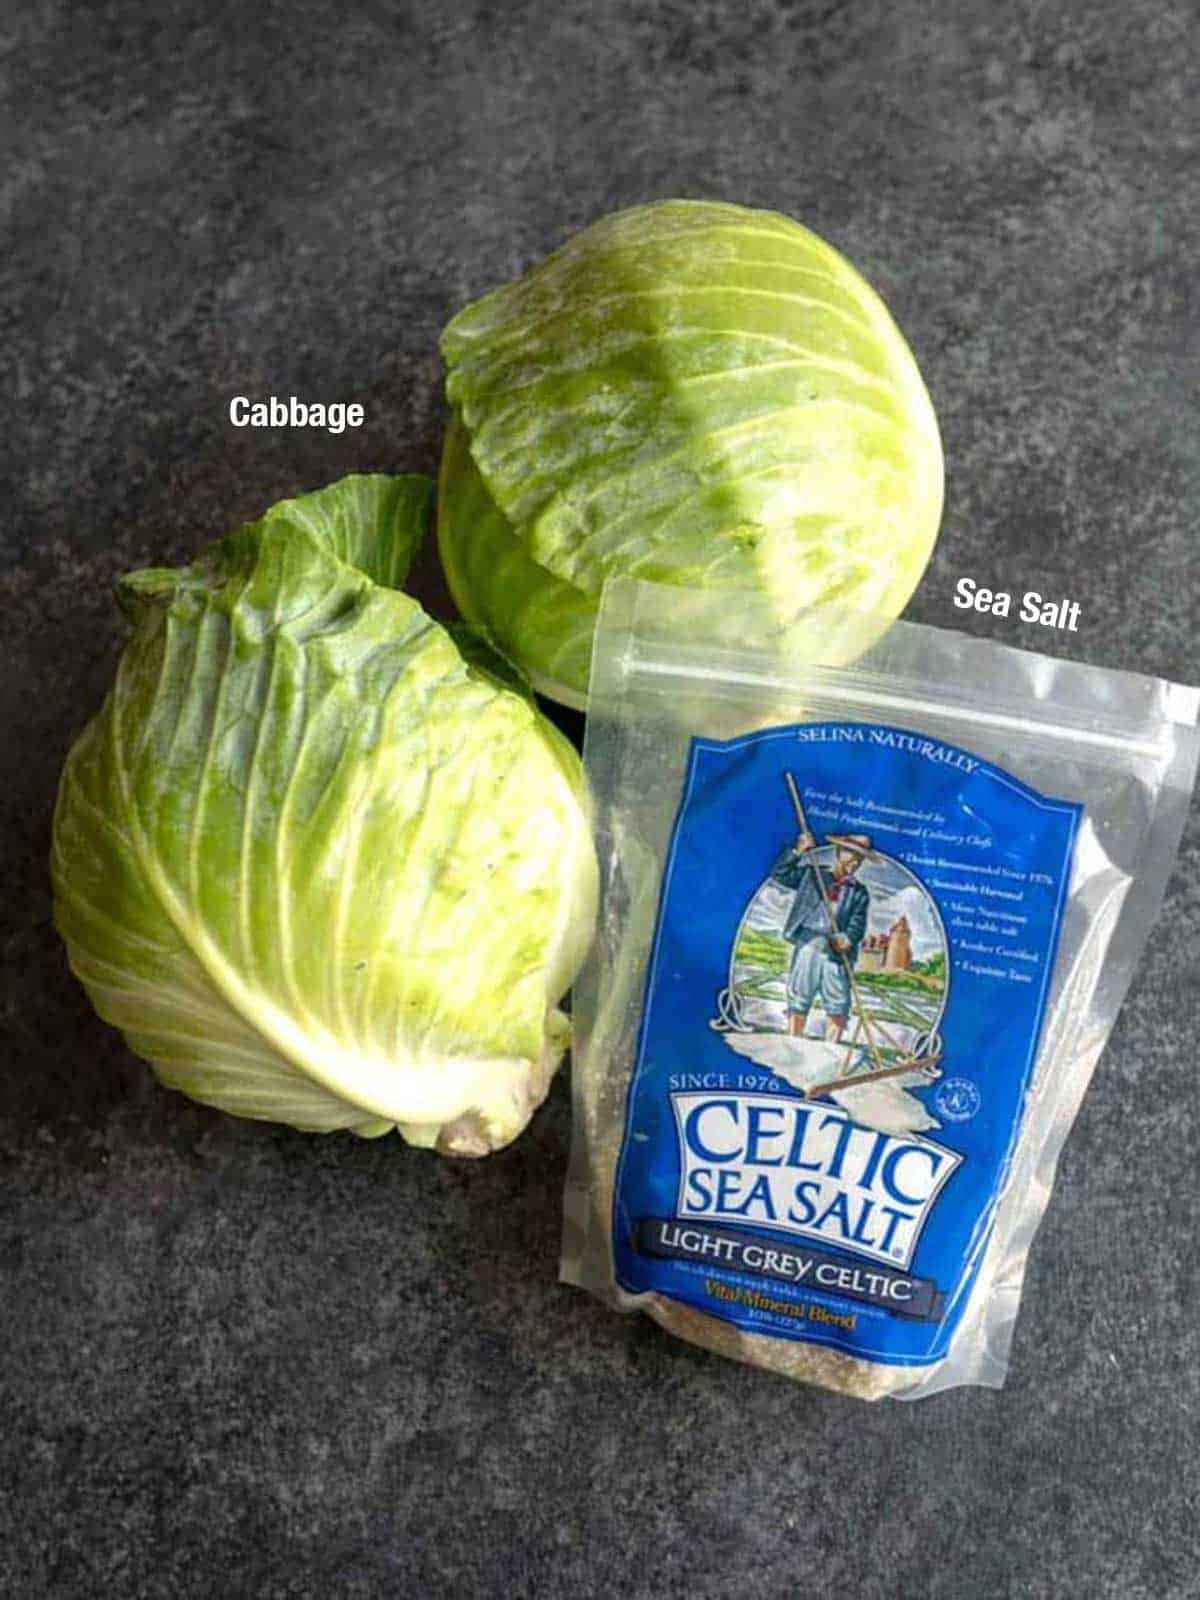
As I previously indicated, the ingredients for homemade sauerkraut are simple - cabbage and salt.
Step-by-Step Instructions:
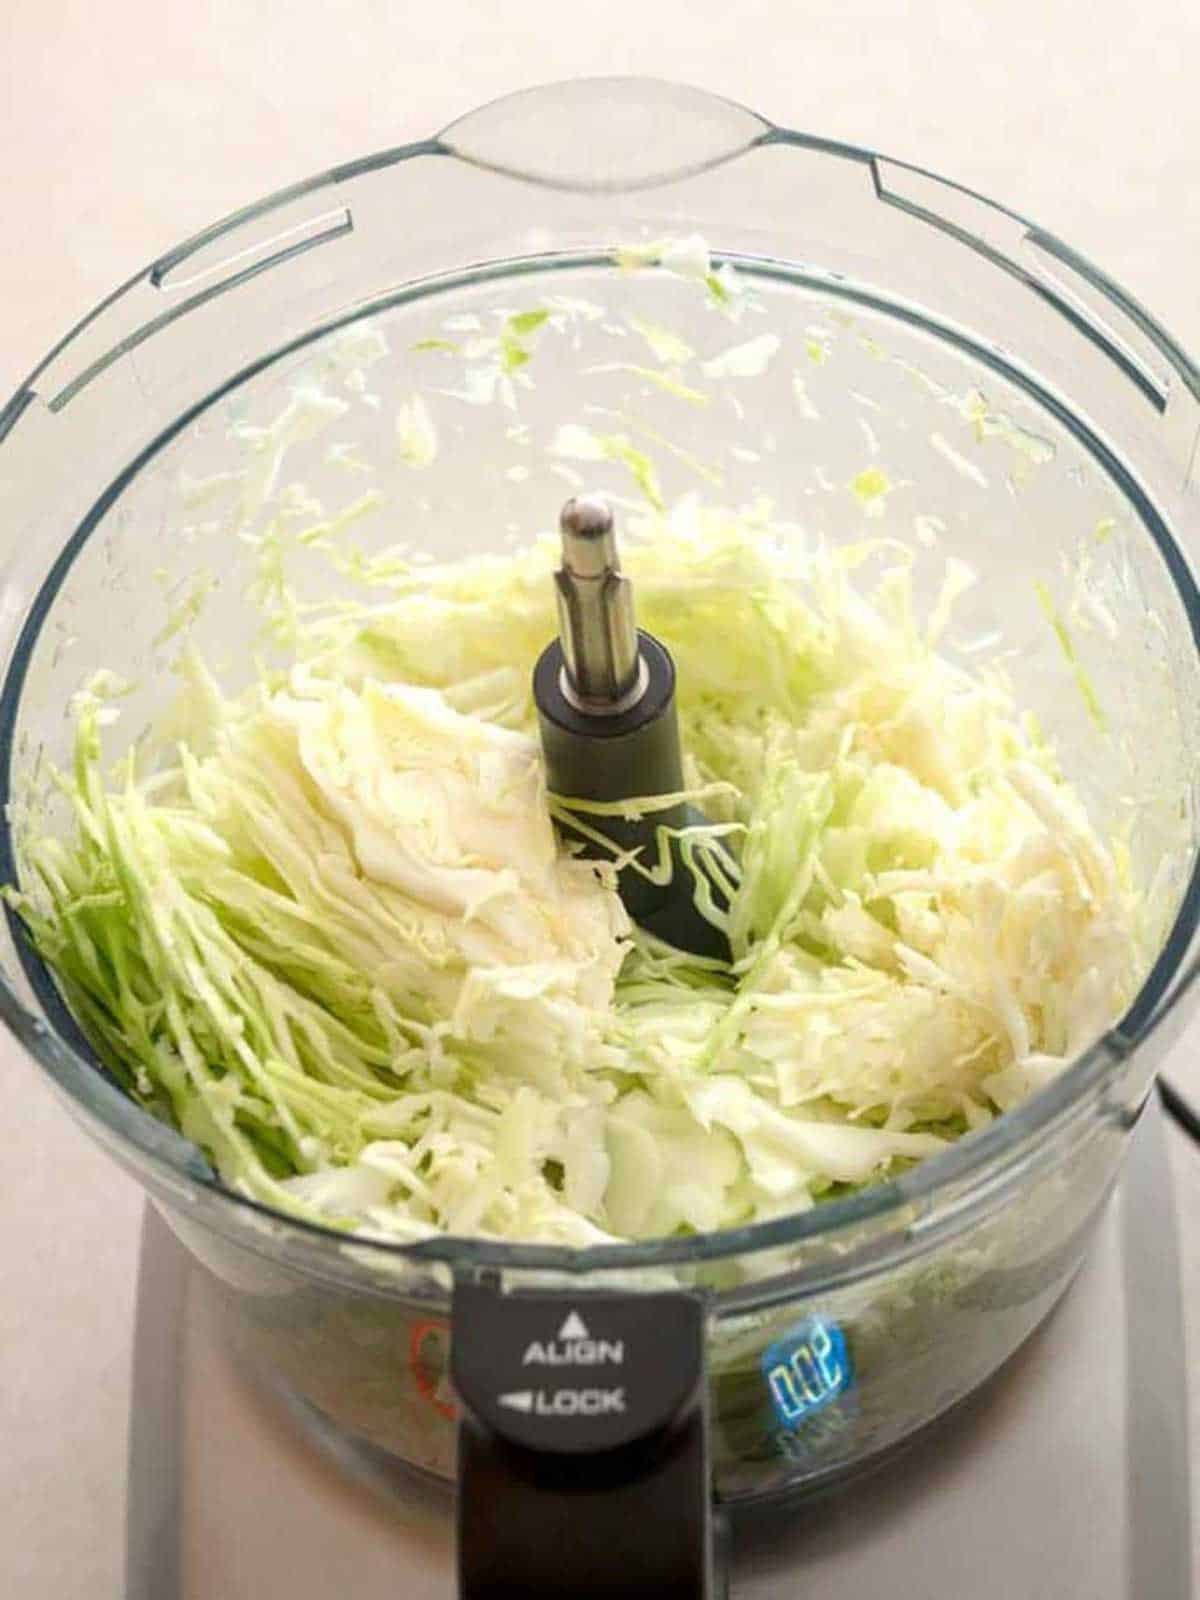
- Shred the Cabbage: Quarter the cabbage, remove the core, and slice into thin shreds. A food processor with a 1 mm slicing blade works best, but a sharp knife works too. Fresher cabbage = better flavor and more brine.
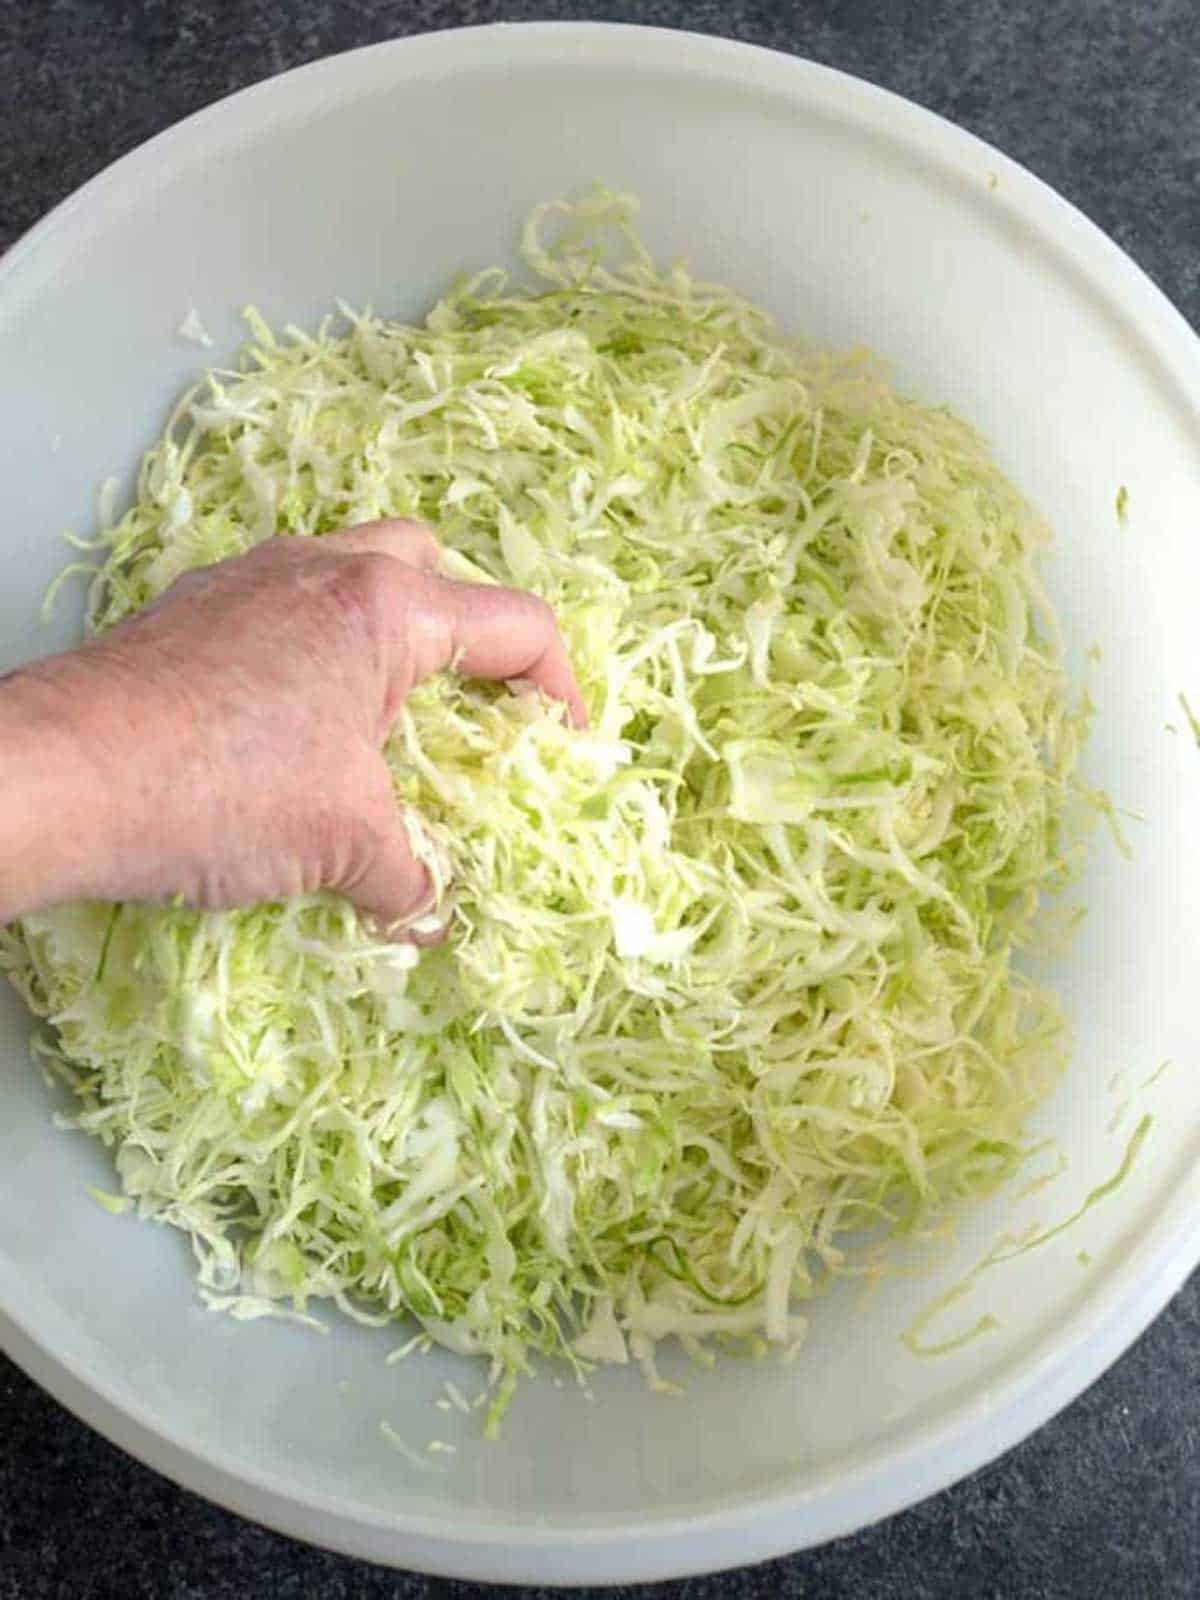
- Massage with Salt: Place the shredded cabbage in a large bowl and sprinkle with salt. Use clean hands to massage for about 5 minutes until the cabbage begins to release liquid. Let it rest for 1 hour, then massage and pound again with a potato masher for 3-4 minutes.
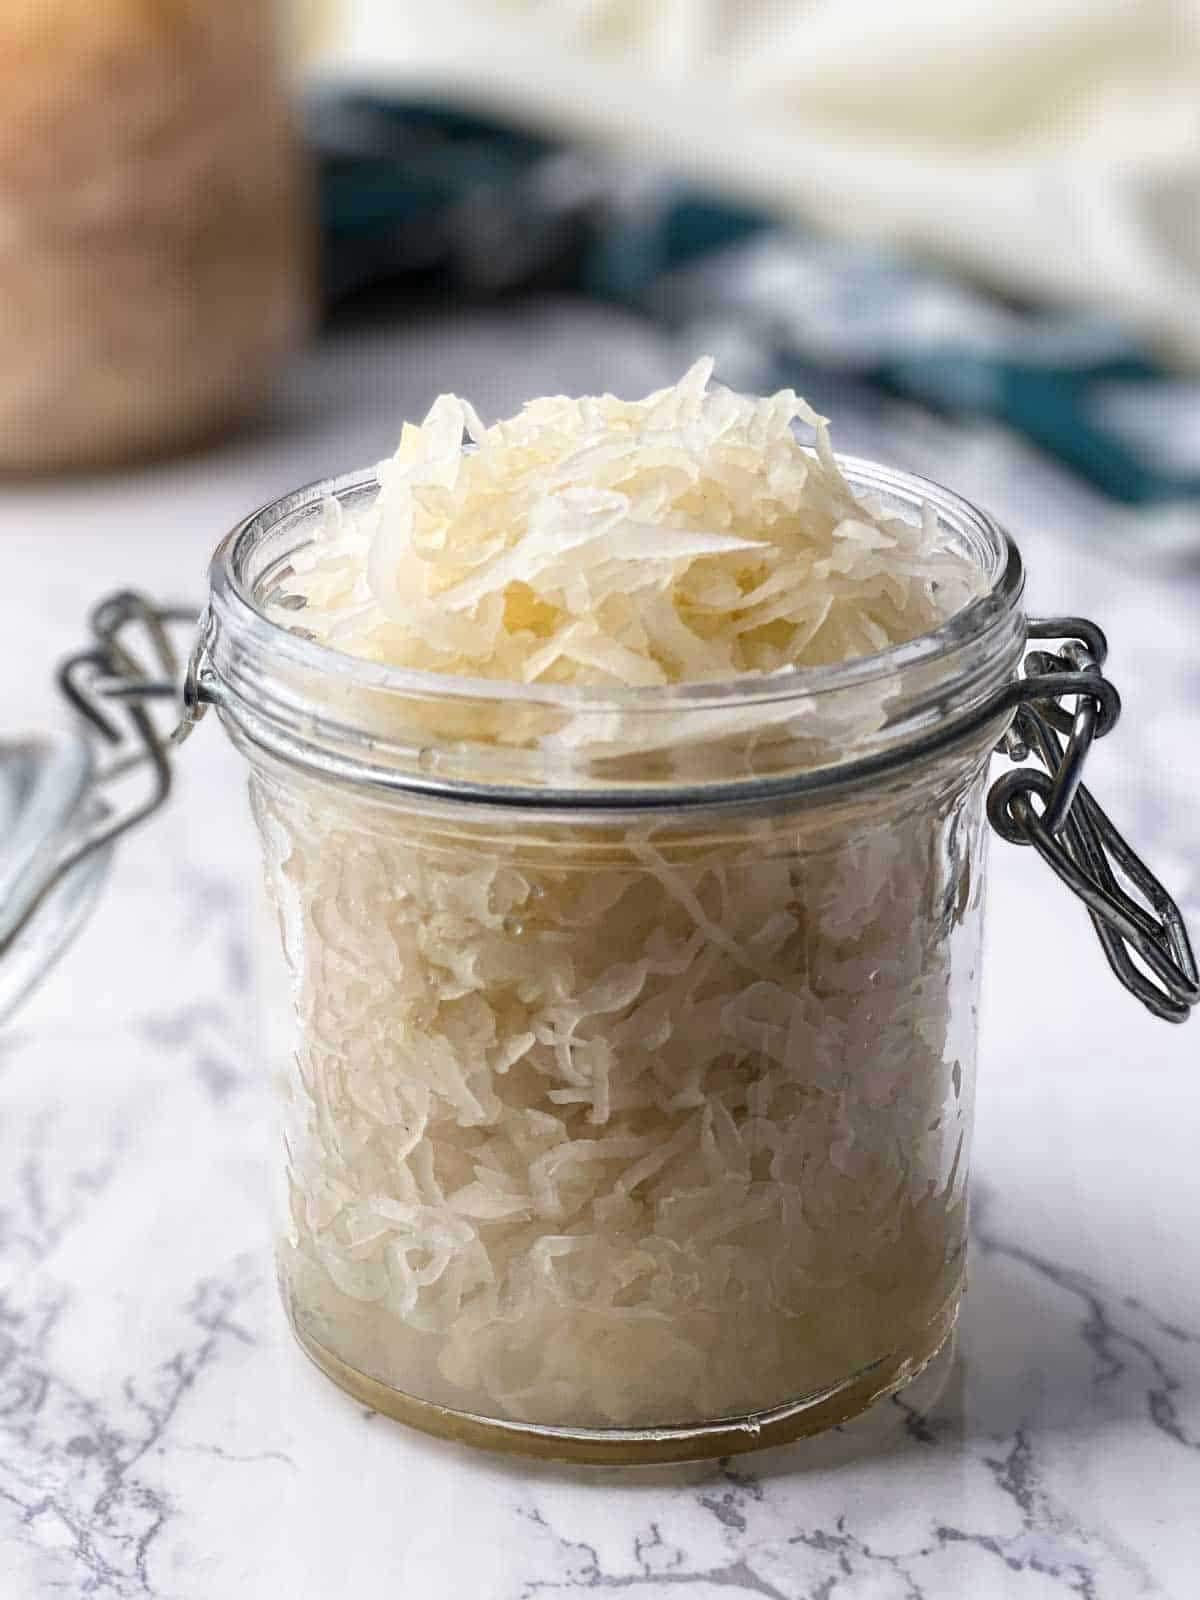
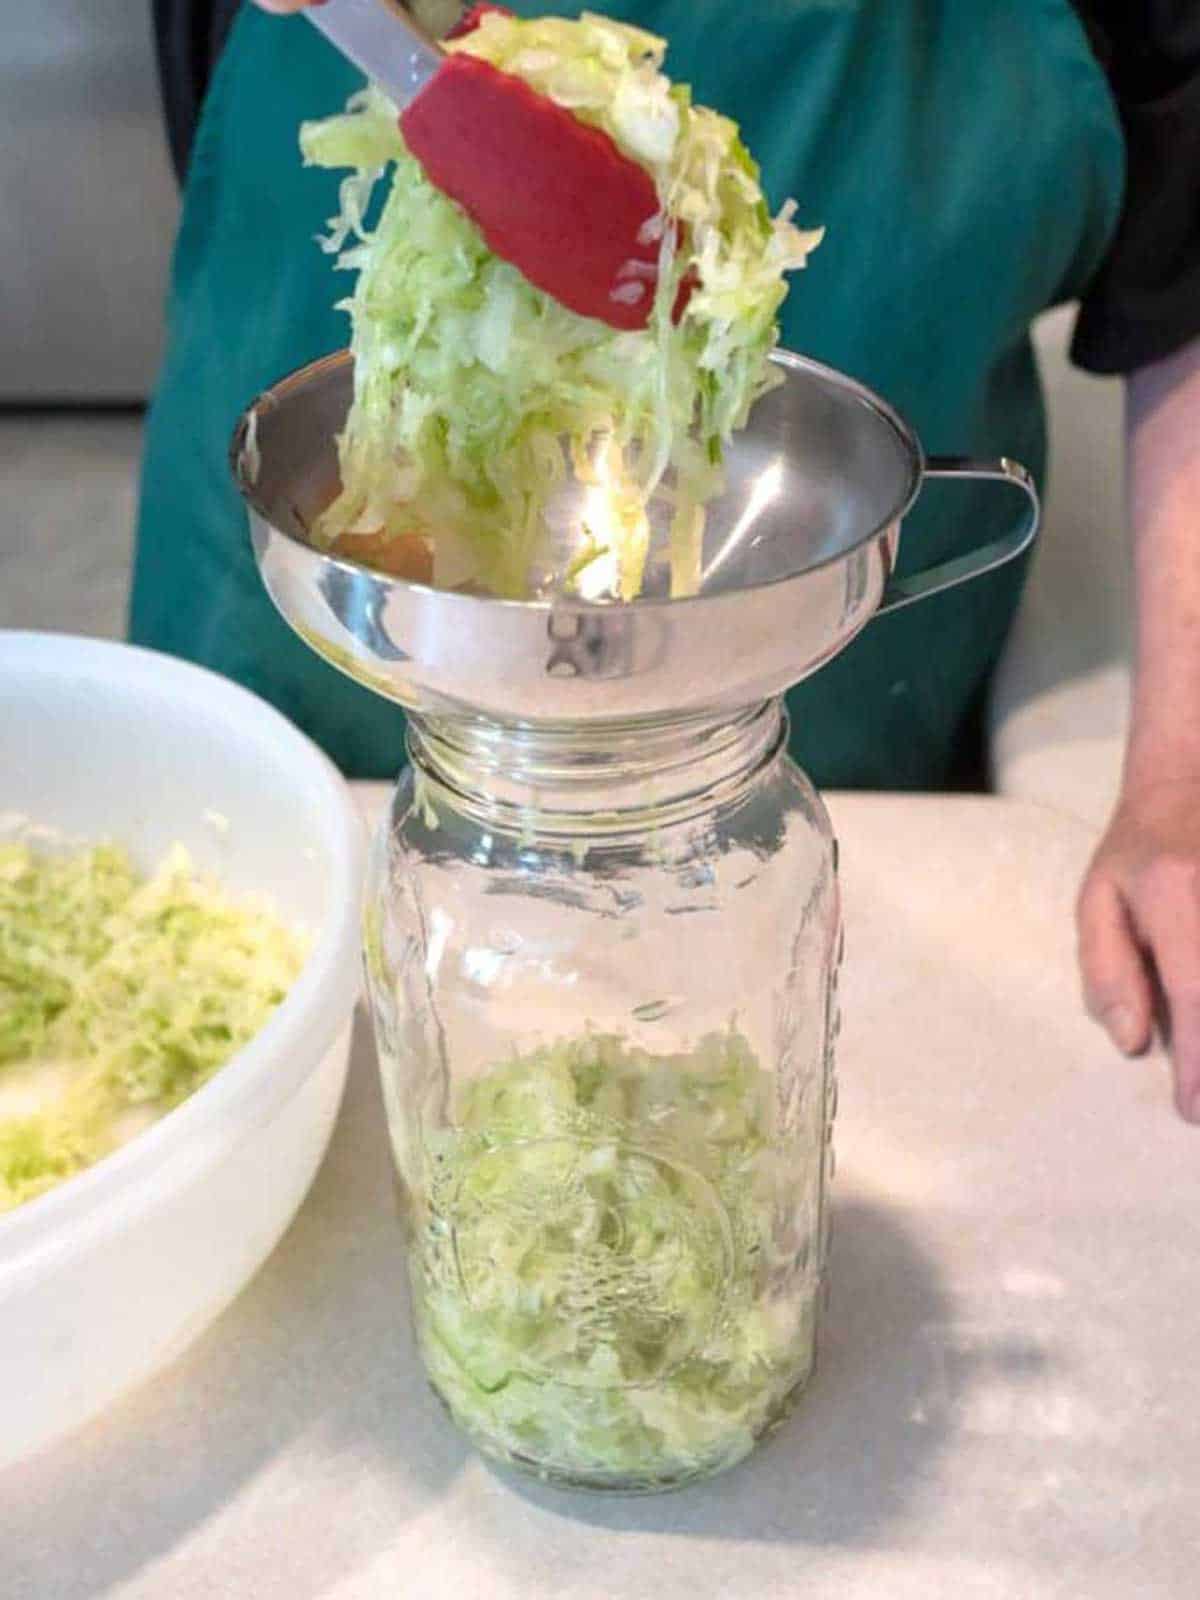
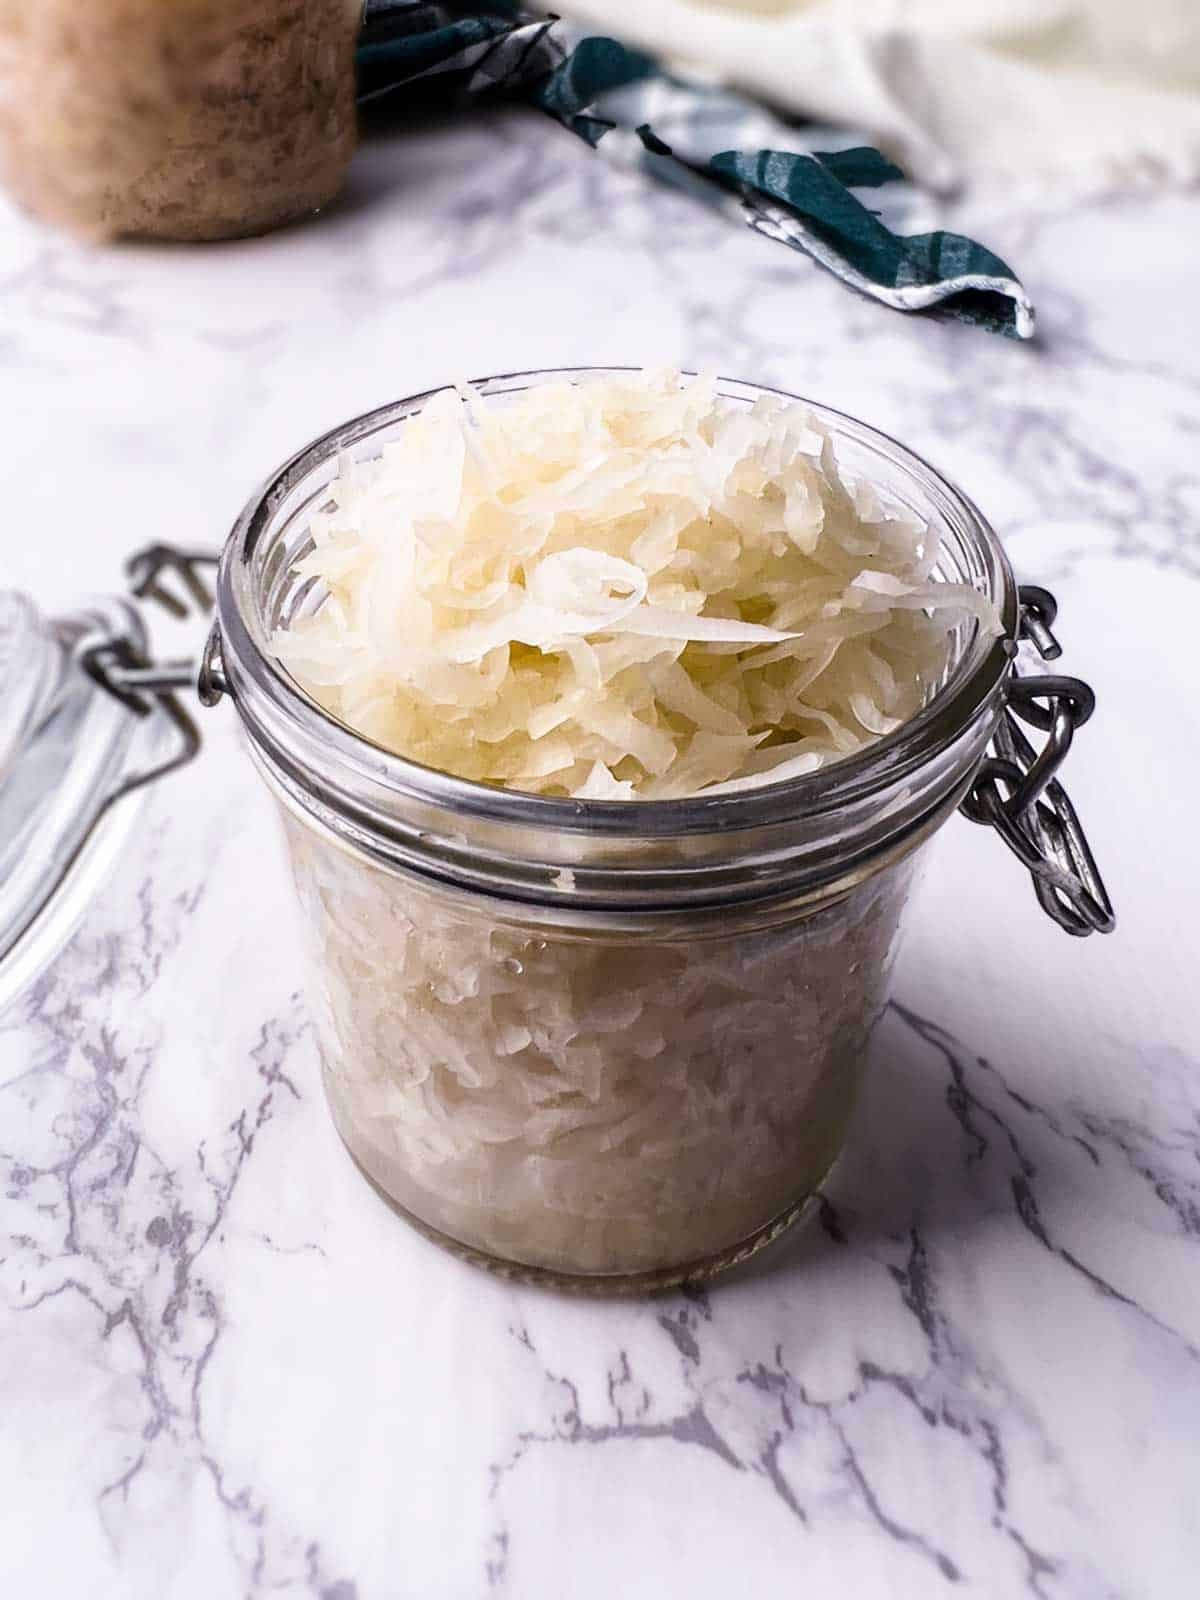
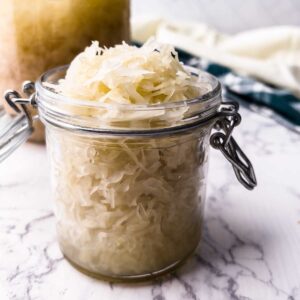
- Pack into Sterilized Jars: Using a canning funnel, transfer cabbage into sterilized half-gallon mason jars. Press down with a tamper and top with a reserved cabbage leaf and a weight (glass disc or small jar). Add filtered water until the cabbage is fully submerged.
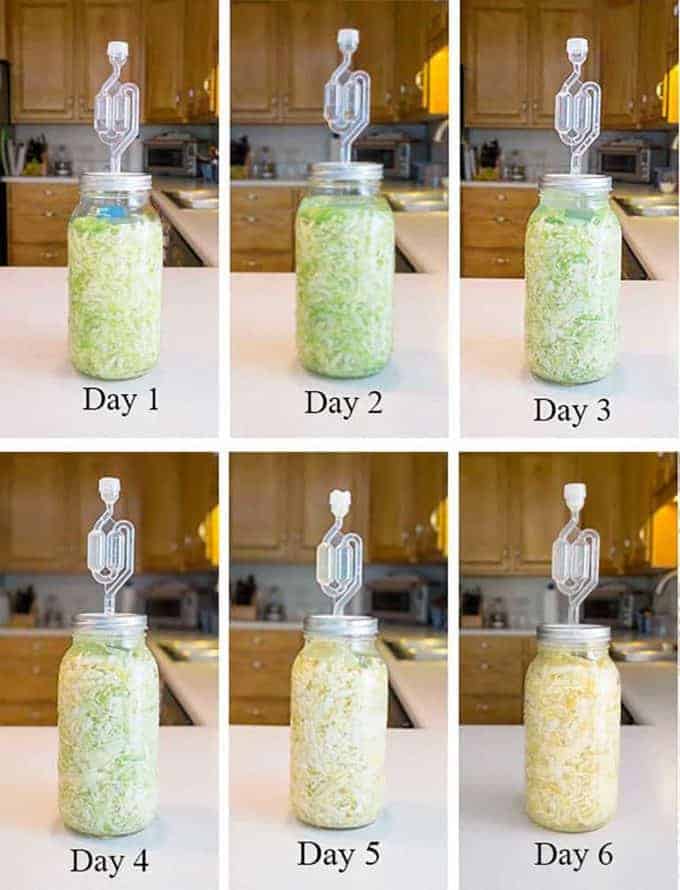
- Ferment: Seal the jar with a lid and an air-lock device. Place in a cool, dark spot for 3-4 weeks. During the first week, you'll notice bubbling and a color change from green to beige. Once bubbling subsides, allow 2-3 more weeks for full fermentation.
Is the wait worth it? Absolutely! The Reubens made with the homemade sauerkraut are incredible. In addition, the Master Taste Tester eats the sauerkraut like he would a salad. Yum!
Frequently Asked Questions
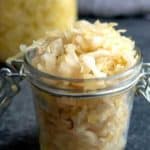
Properly fermented sauerkraut will last up to 6 months in the refrigerator.
Bubbling is a natural sign that fermentation is working. In the early stage, beneficial bacteria feed on the cabbage's natural sugars, releasing carbon dioxide (CO₂). The bubbles are simply the gas escaping from the brine as the sauerkraut becomes tangy and probiotic-rich.
While traditional cloth covers work, an airlock device makes fermentation more consistent by keeping out oxygen and maintaining an anaerobic environment.
I purchased the airlock devices and glass weights from Amazon.com.
Absolutely! Once you master the basics, try experimenting with spices like caraway seeds or garlic for a different flavor. However, this sauerkraut is so good that I never bothered with flavoring it.
Chula's Test Kitchen - Lessons Learned
- Freshness Matters: The fresher the cabbage, the better the flavor and brine release. Older cabbage may require adding up to 2 cups of filtered water.
- Perfect Jar Fit: About 32 ounces of shredded cabbage fills a half-gallon mason jar perfectly.
- Salt Ratio: 2 tablespoons (1.75 ounces) of coarse, unprocessed sea salt works best. Avoid table, iodized, or Kosher salts since additives can interfere with fermentation.
- Salt Alternatives: If you're concerned about salt intake, use potassium chloride instead. Start with 1½ tablespoons.
- Texture Tweaks: Less salt produces softer sauerkraut (a Master Taste Tester favorite), while the full 2 tablespoons per 2 pounds keeps it crisp.
Did you make this recipe? We'd love to know how it turned out! Leave a review below. Then, share a picture on Instagram and tag @pudgefactor so we can see it.
Don't forget to follow us on Pinterest, Facebook, YouTube, Flipboard, and Instagram.
Thank you so much for visiting PudgeFactor. We hope you'll come back!
Recipe
Want to Save This Recipe?
Enter your email & I'll send it to your inbox. Plus, enjoy weekly doses of culinary inspiration as a bonus!
By submitting this form, you consent to receive emails from Pudge Factor.
Homemade Sauerkraut
Equipment
- Half gallon mason jars
- Airlock devices
- Fermentation weights
Ingredients
- 4 pounds of Cabbage (2 heads) or enough to make 32 ounces shredded
- 2 Tablespoons light grey Celtic sea salt or other unprocessed sea salt, divided (Tip 1)
- 1 ½ to 2 cups filtered water (See Tip 2)
Instructions
- Remove outer leaves from cabbage, retaining 1 leaf.
- Quarter cabbage and remove core. Cut into fine shreds with a sharp knife or food processor (See Tip 3). Add salt to the shredded cabbage. Massage cabbage with hands for several minutes to to begin the process of breaking down the cabbage and the release of brine. Let sit for an hour. Massage cabbage for another 3 to 4 minutes. Then, using potato masher, pound cabbage for 4 minutes.
- Add cabbage to sterilized half-gallon mason jar (See Tip 4). Top cabbage with retained cabbage leaf and weight (See Tip 5). Add enough filtered water to ensure that the liquid level is above the cabbage.
- Place lid with air-lock device on jar. Sauerkraut takes between 3 and 4 weeks to properly ferment. Yield: 2 pounds.
Tips/Notes
- Never use salt with additives like iodide, sugar, or anti-caking agents such as calcium silicate. The reason is that they can interfere with the fermentation process. Therefore, stay away from table salt, iodized salt, and Kosher salt. The best salts to use are those that are unprocessed, i.e., salts that still have their complete natural profile of minerals.
- Always use filtered water. The reason is that tap water tends to contain chlorine that can retard the fermentation process.
- My food processor has a variable shredding blade that allows me to cut the cabbage into 1 mm shreds. I've found that 1 mm is the ideal size at least for us.
- I use a canning funnel set on top of the mason jar to more easily add the cabbage to the mason jar.
- I've used different weights through the years such as glass discs, 4 ounce mason jars, and ziploc bags filled with water. The glass discs and mason jars tend to work the best.