
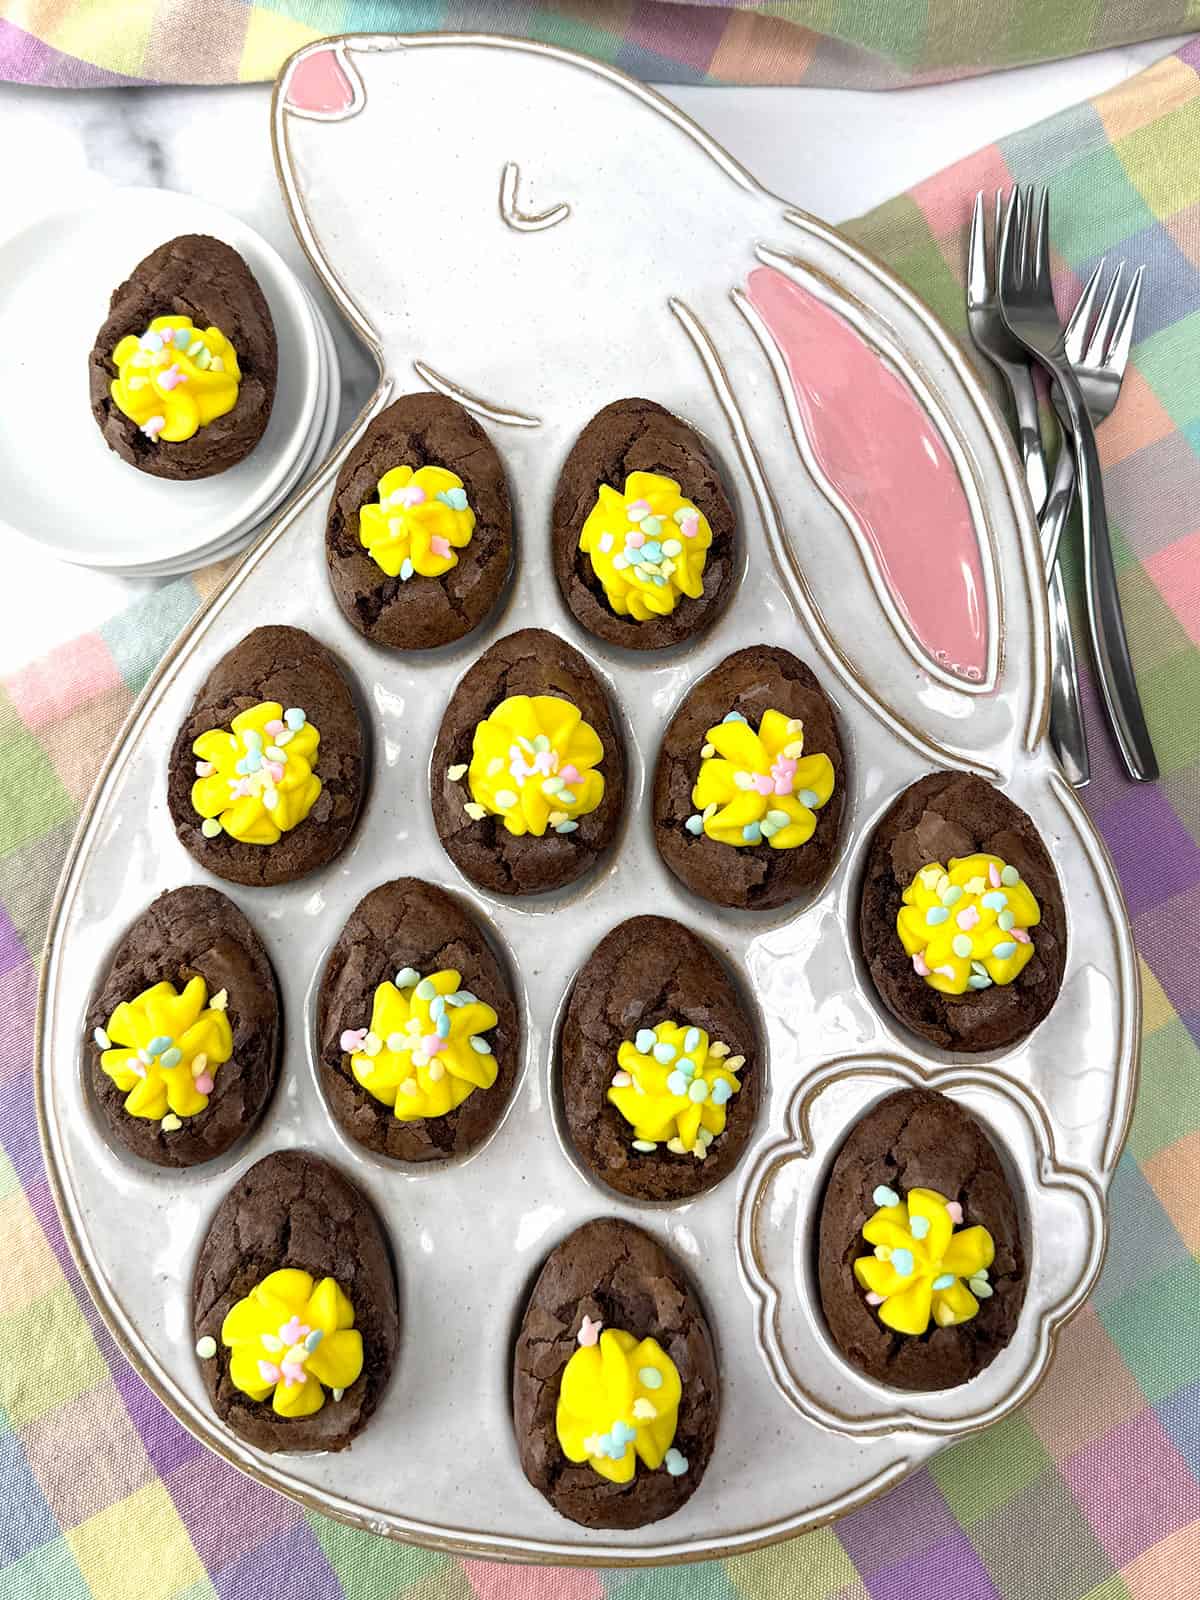
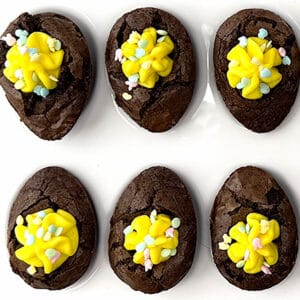
Brownie Deviled Eggs are the ultimate dessert illusion, transforming a classic savory appetizer into a rich, chocolatey treat. Made with fudgy brownie eggs and a bright yellow buttercream filling, these sweet treats are a fun alternative to traditional cupcakes. Perfect for Easter brunch these dessert deviled eggs are as visually striking as they are easy to assemble.
Jump to:
Why You'll Want to Make Brownie Deviled Eggs
- Perfect Portion Control: Because they are made in a silicone egg pan, they serve as ideal bite-sized finger foods for parties where guests prefer small treats over a heavy slice of cake.
- Customizable Bases: You can use any brownie style-from a dark, fudgy espresso brownie to a lighter milk chocolate version-depending on the flavor profile you want.
- Holiday Versatility: While they are a natural fit for April Fools' Day or Easter, they can be adapted for any season. Use green frosting "yolks" for St. Patrick's Day or orange for Halloween "pumpkin" eggs.
- Texture Contrast: The pairing of a chewy, dense brownie base with a light, airy buttercream "yolk" creates a more interesting mouthfeel than a plain brownie.
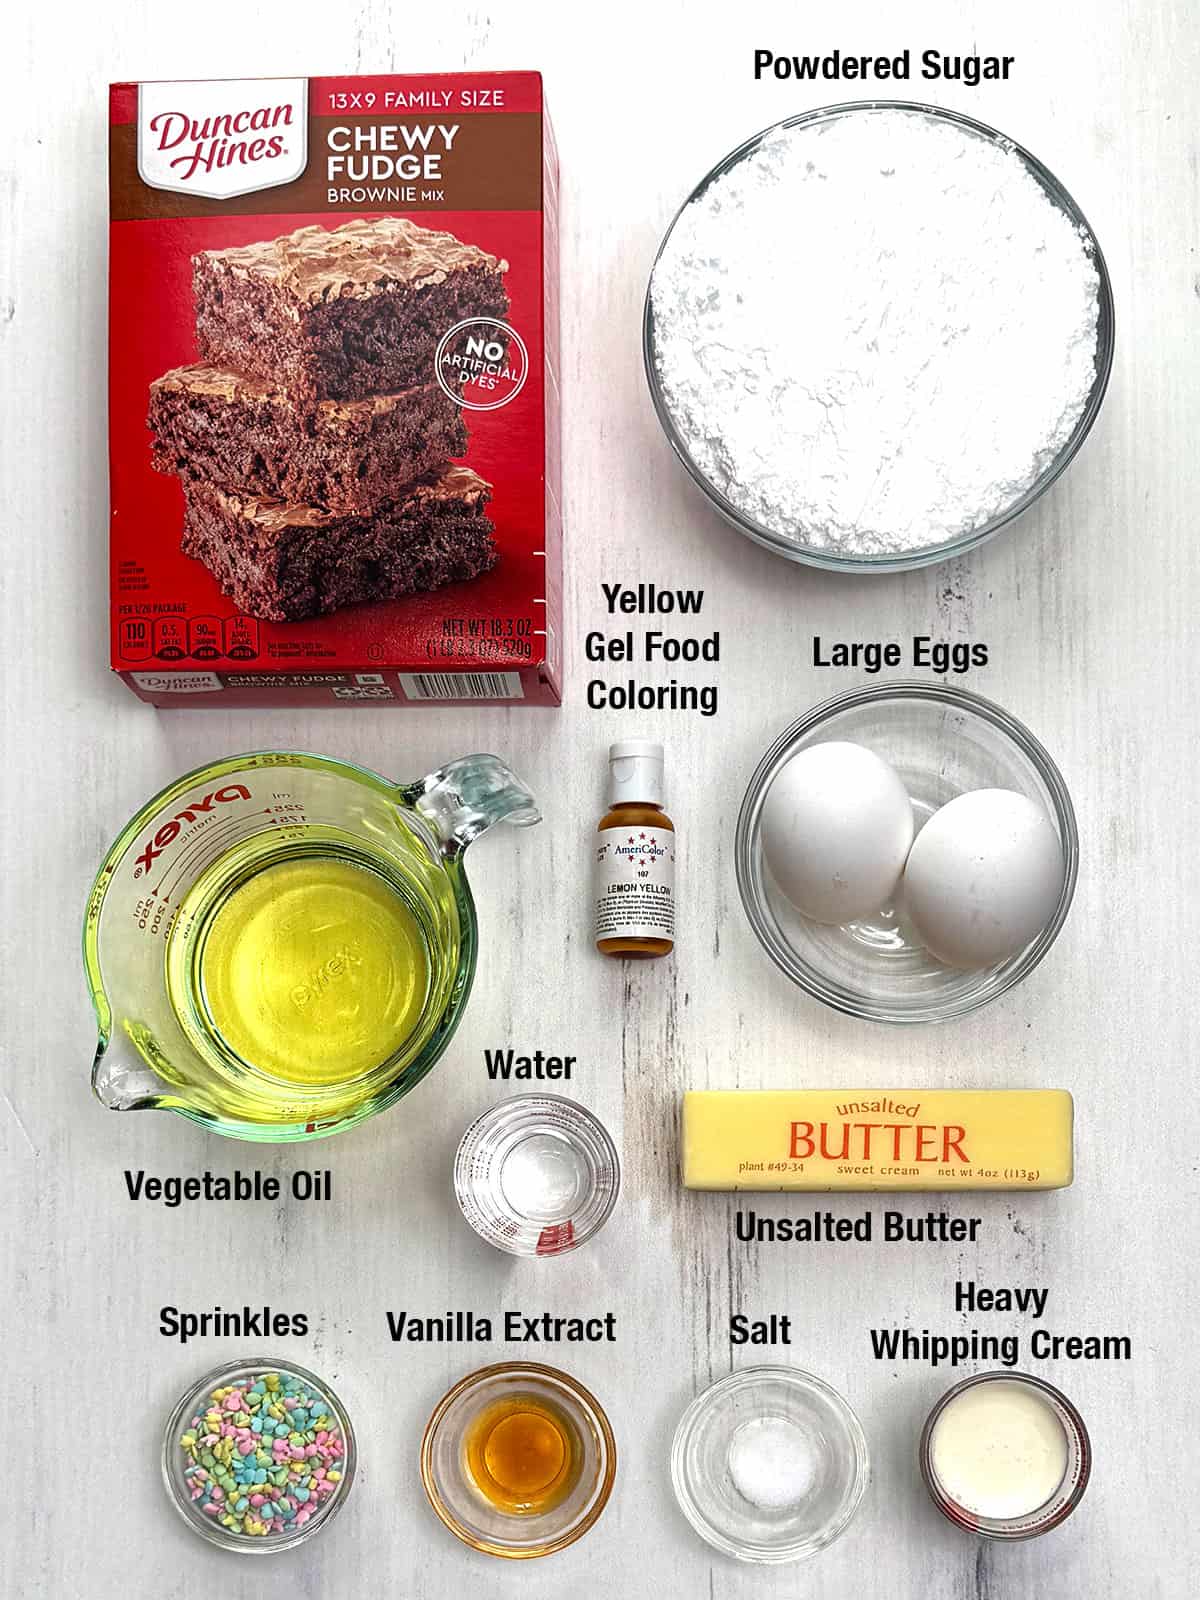
Ingredients - Here's What You'll Need
Steps to Make Brownie Deviled Eggs
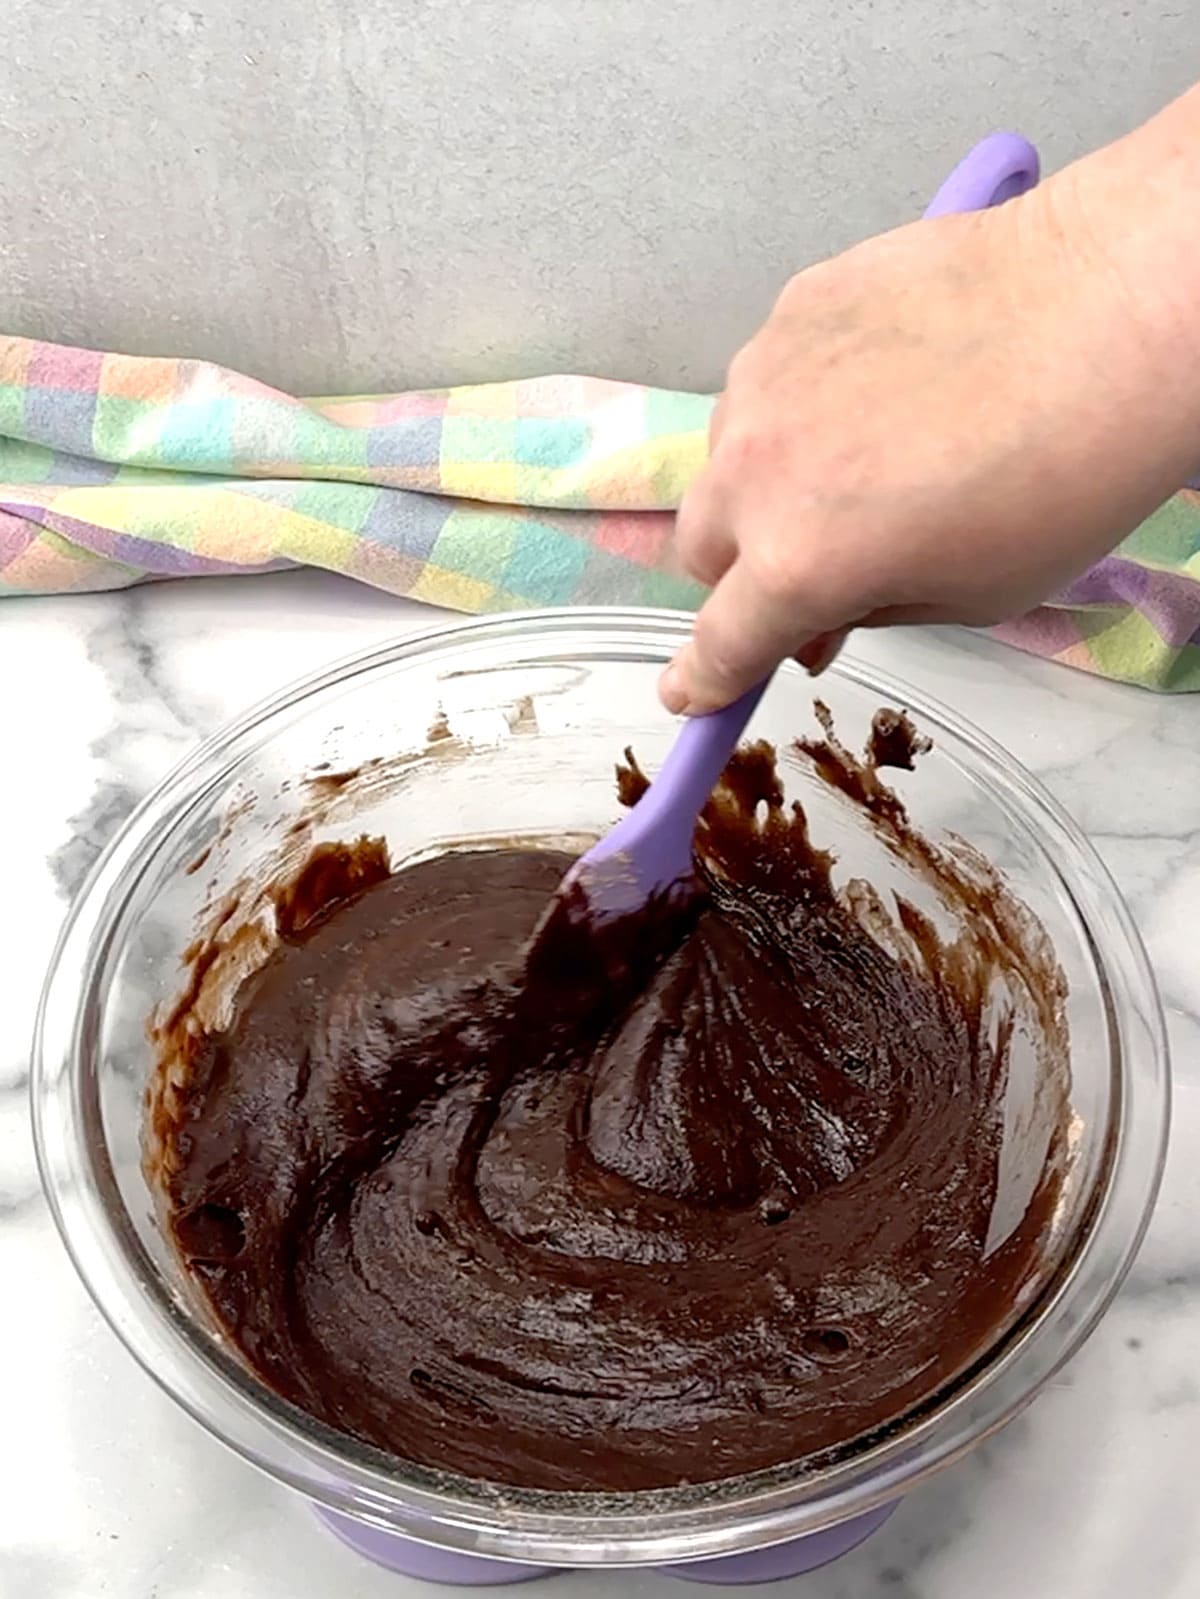
- Preheat oven to 350°F. Prepare brownies according to package directions. Start by pouring the brownie mix into a large bowl. Then, add vegetable oil, water, and two slightly beaten eggs. Use a silicone spatula to stir the mixture for about 50 strokes until everything is incorporated.
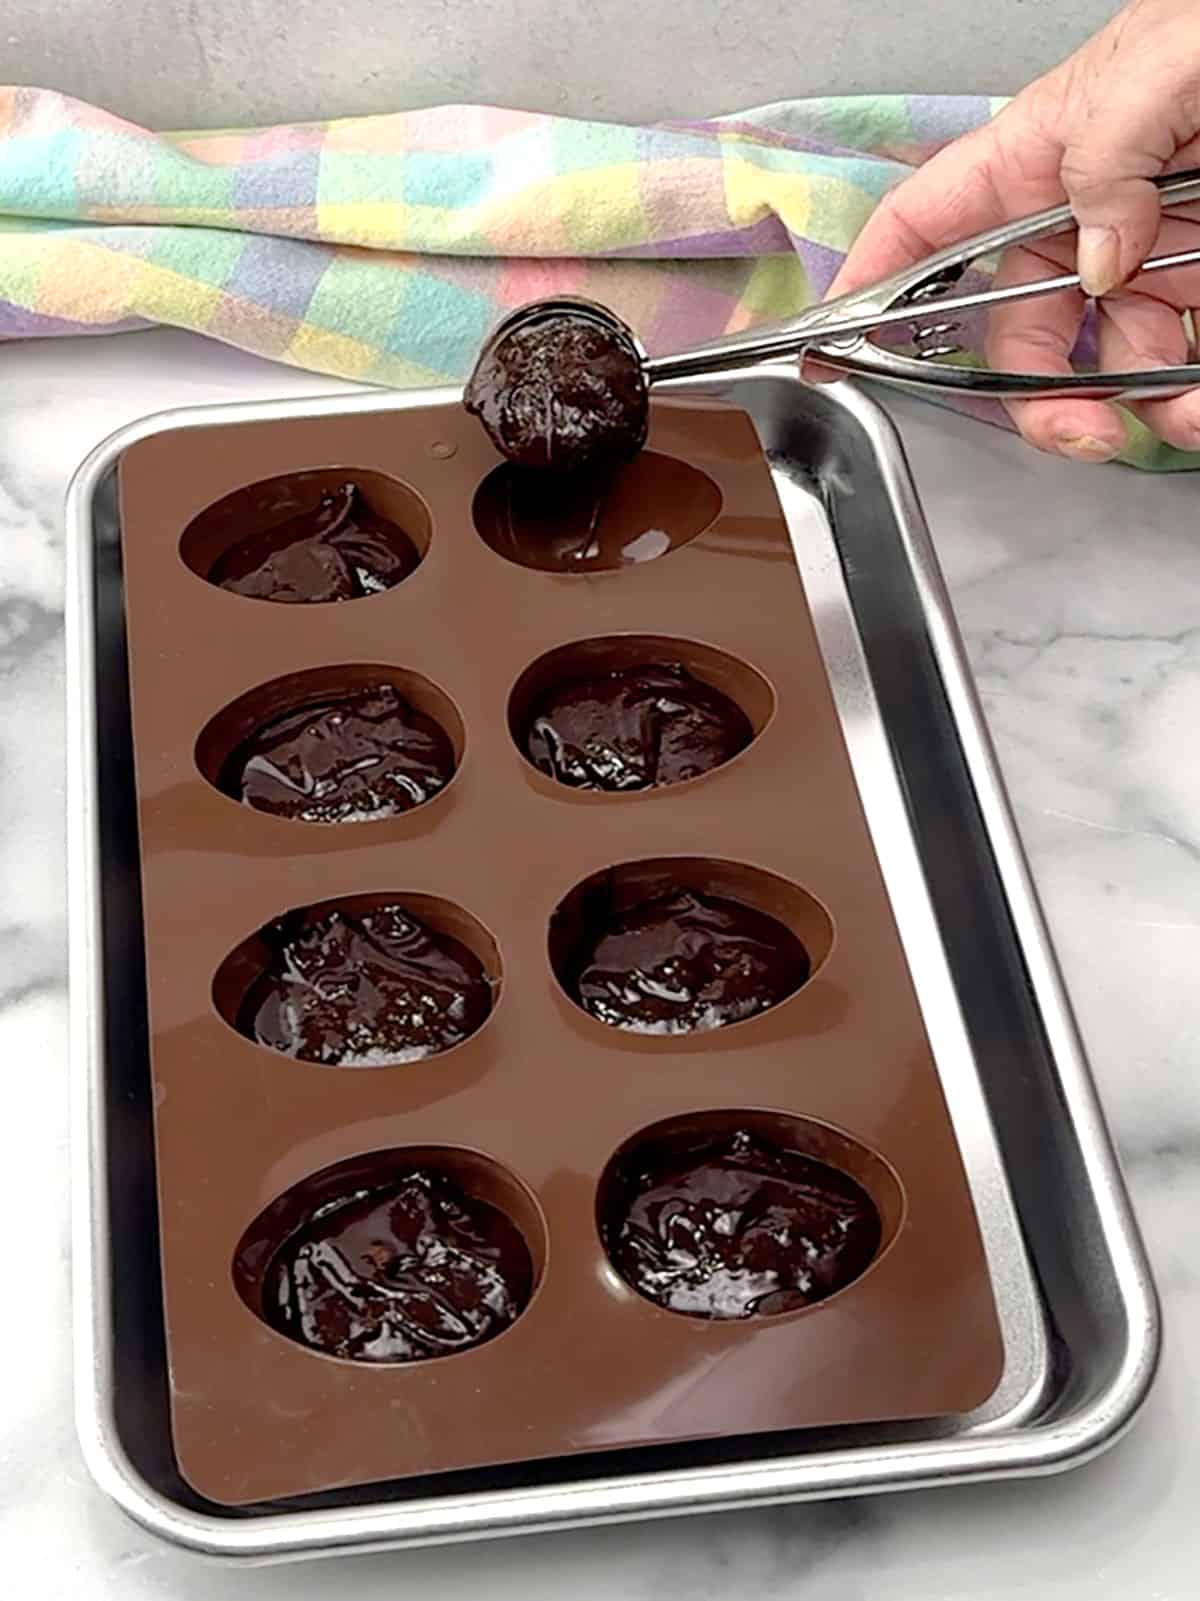
- Then, place one 8-cavity silicone egg-shaped pan on a quarter sheet pan. Use a two-tablespoon ice cream scoop to fill each well about ⅔ full. Then, bake the pan in the 350°F oven for 22 minutes.
- Remove the pan from the oven and immediately press an indentation into each egg with the back of a round teaspoon. Return the pan to the oven and bake for an additional three minutes.
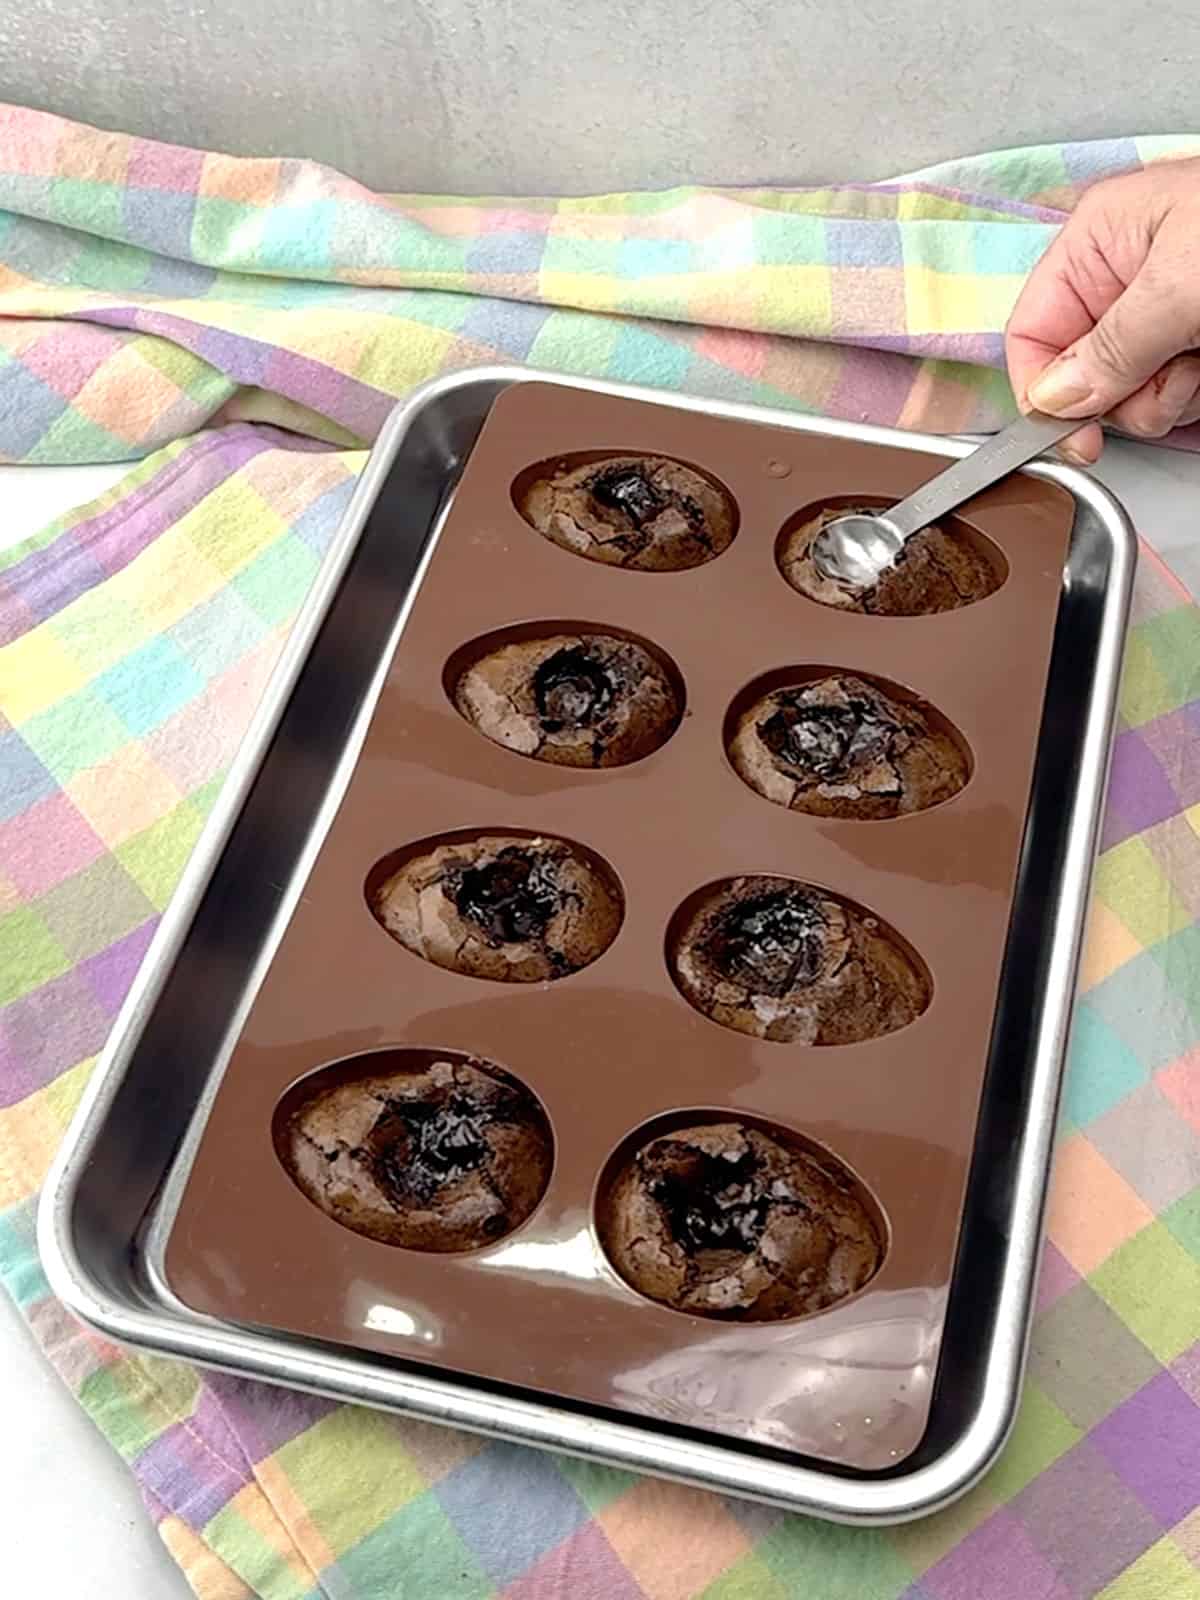
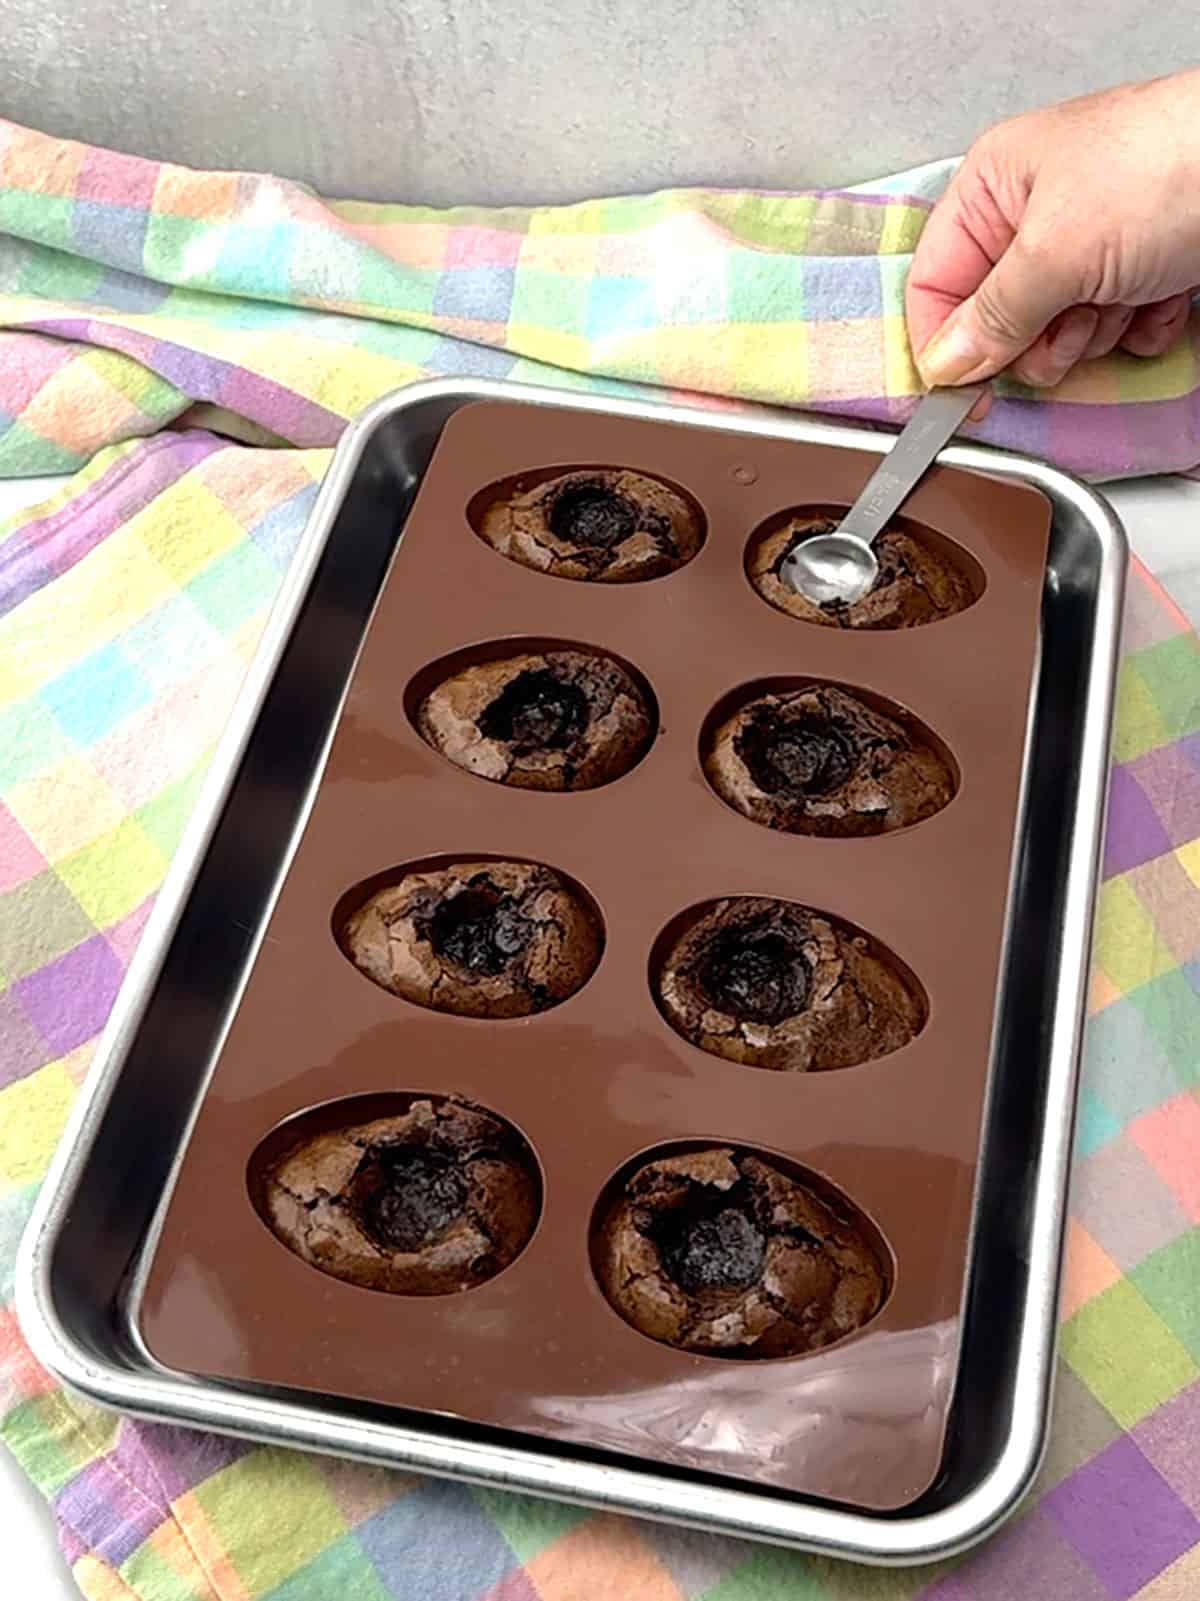
- Remove the pan from the oven and re-press the indentation with the teaspoon. Allow the pan and the eggs to come to room temperature before removing the eggs from the pan. Repeat filling, baking, and creating the indentation in the eggs for the other two pans, making sure to bake them one at a time.
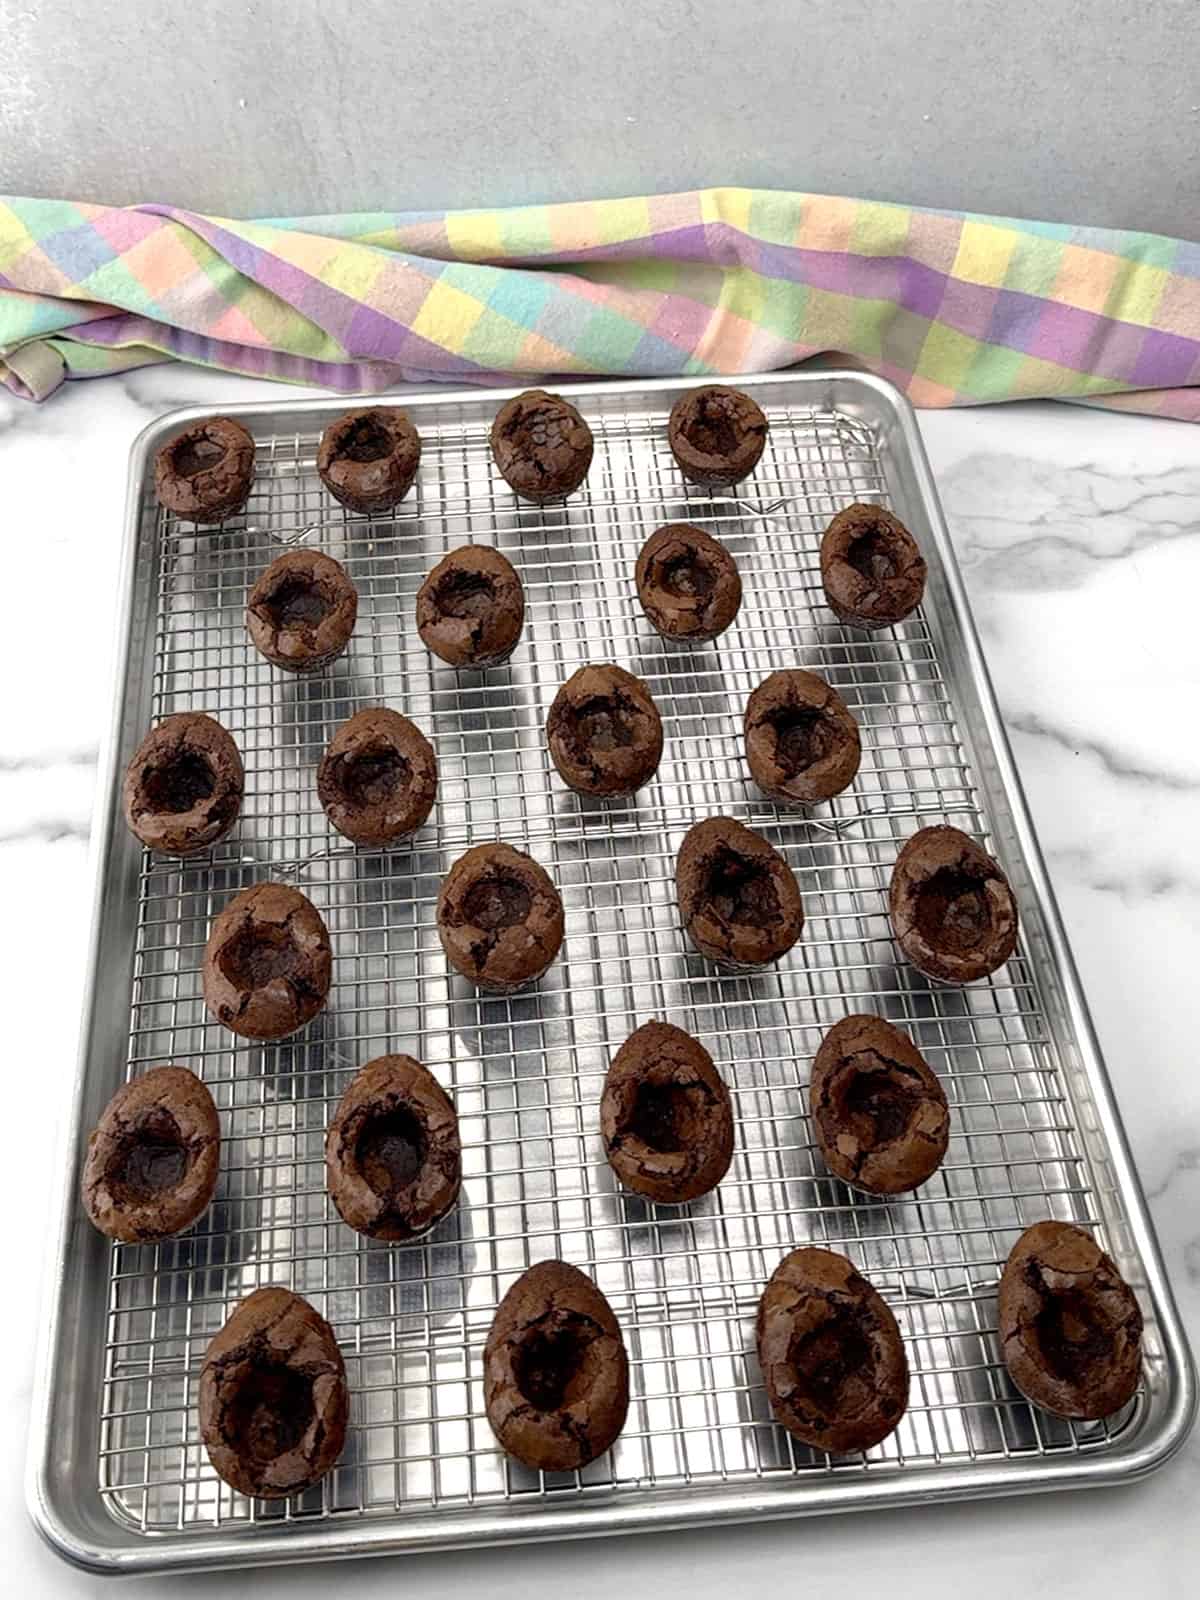
- Once the eggs have cooled to room temperature, carefully remove them from the silicone molds and place them on a wire rack set over a half sheet pan.
- To make the frosting, start by beating one stick of room temperature unsalted butter with an electric hand mixer for about three minutes. Then, add the salt and about half of the powdered sugar, and beat until the mixture is smooth.
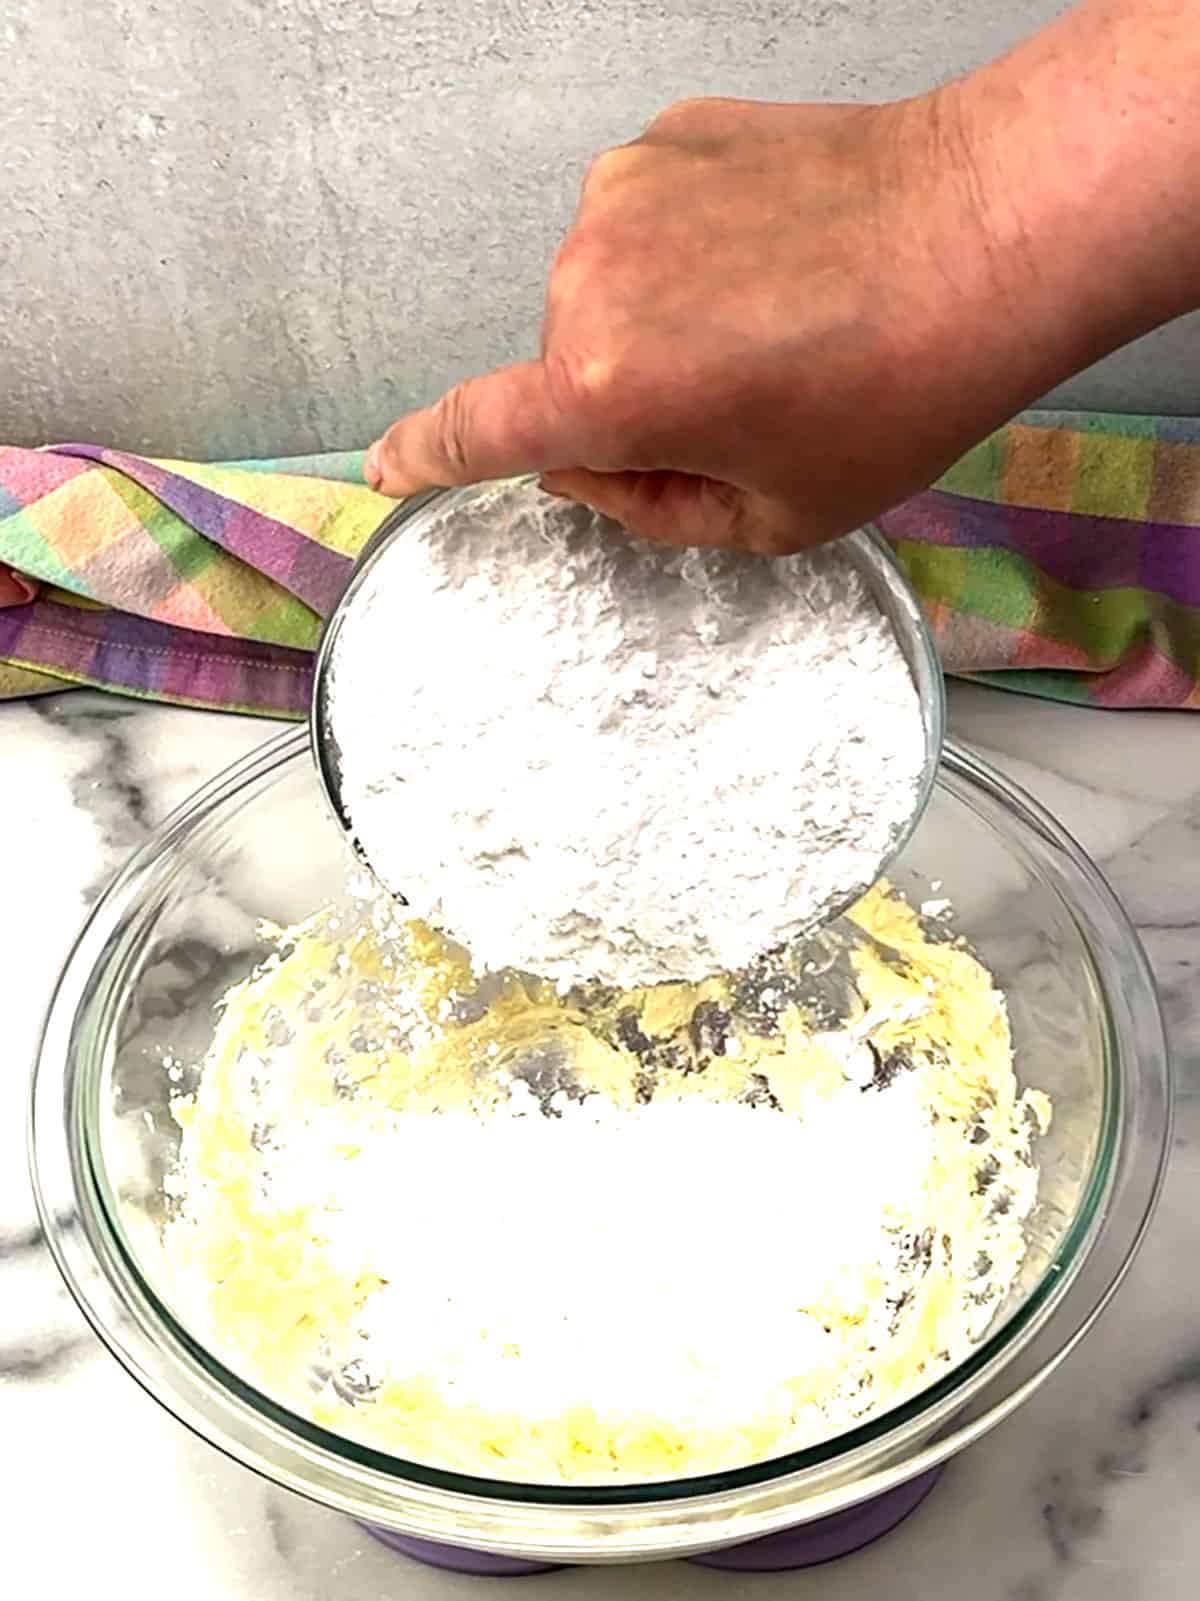
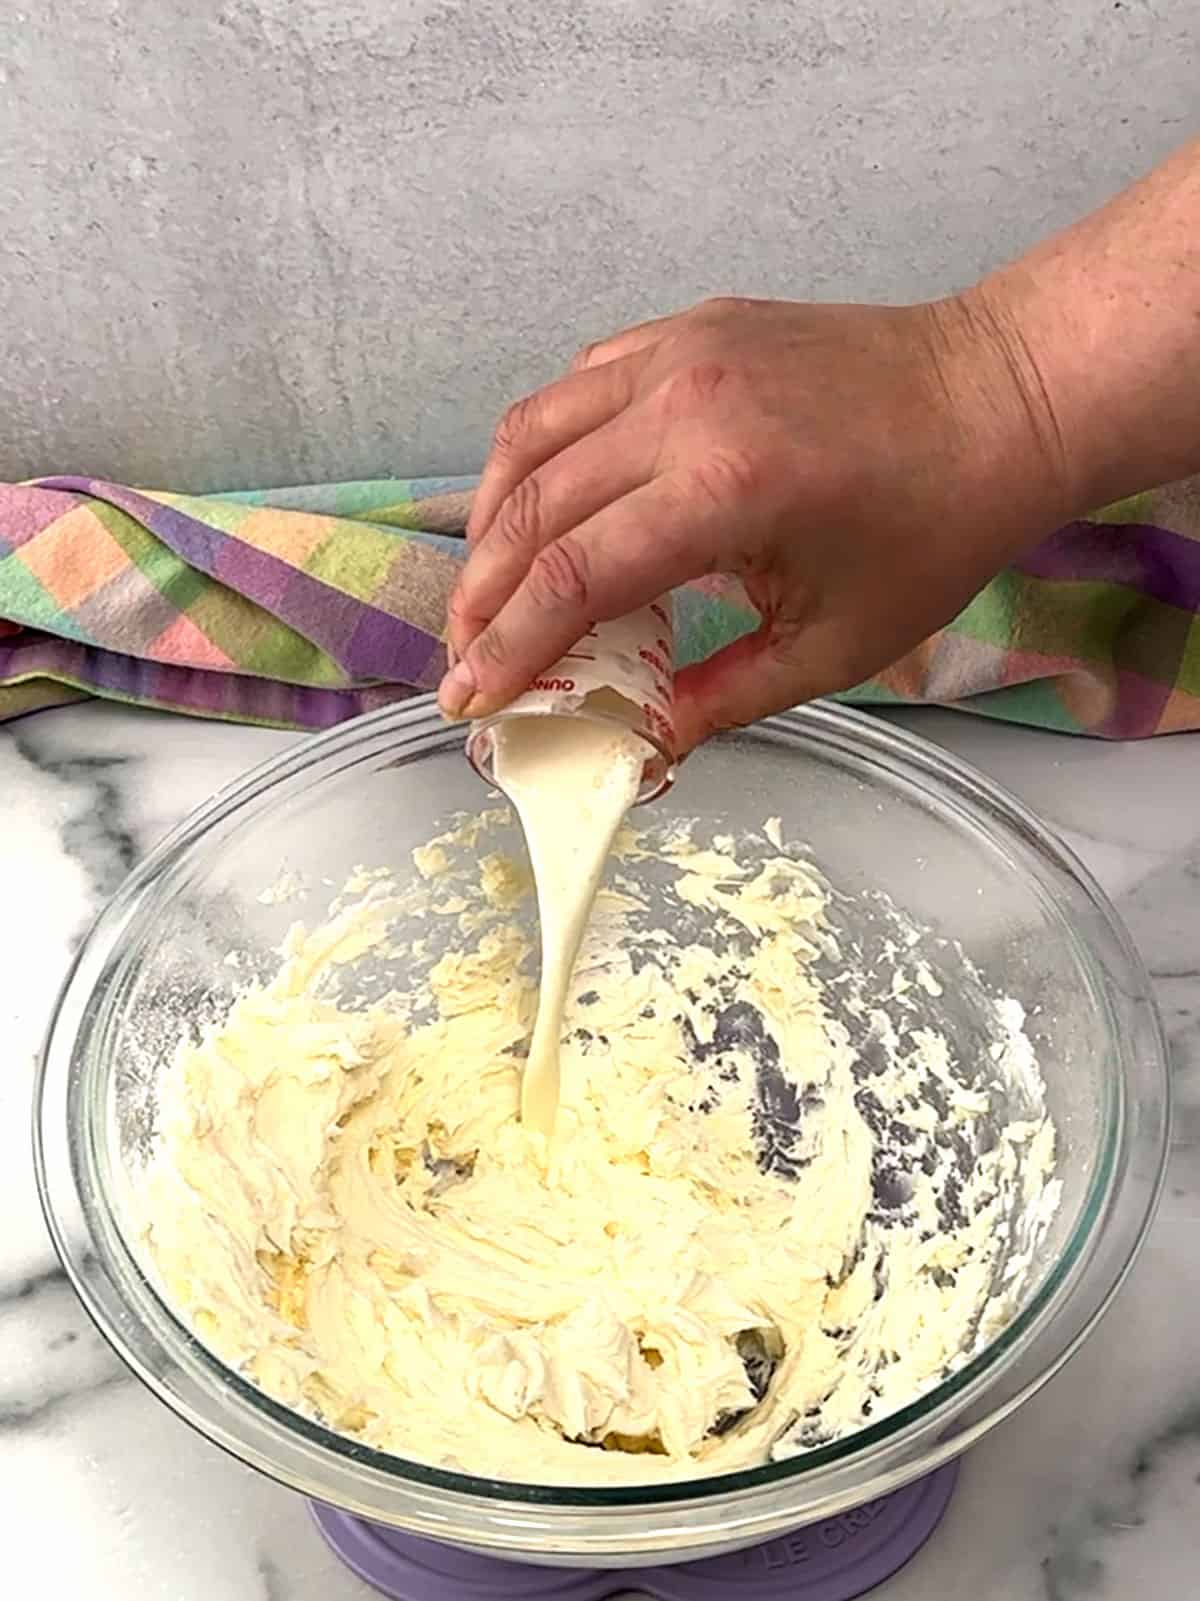
- Beat in the remaining powdered sugar; the mixture will likely be crumbly. Then, add vanilla extract and heavy whipping cream, and beat until the mixture is smooth and creamy.
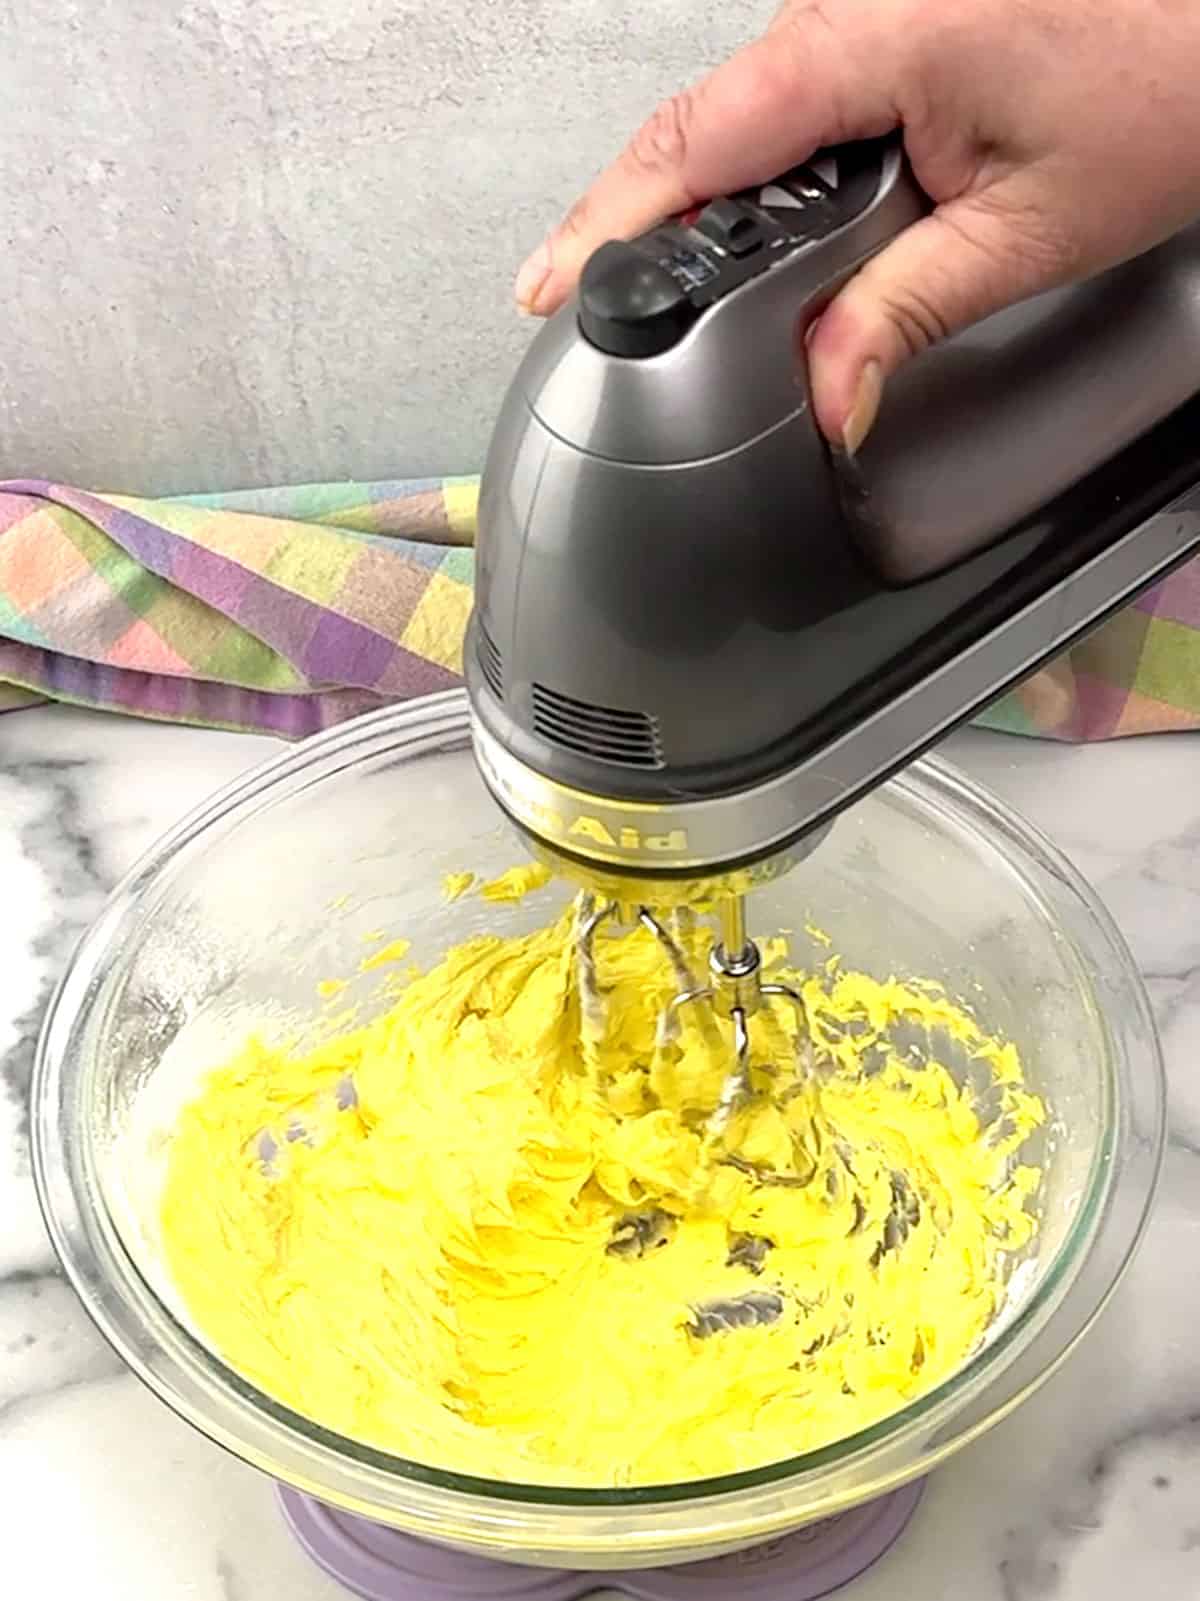
- Add four or five drops of yellow gel food coloring to start, then beat it into the frosting.
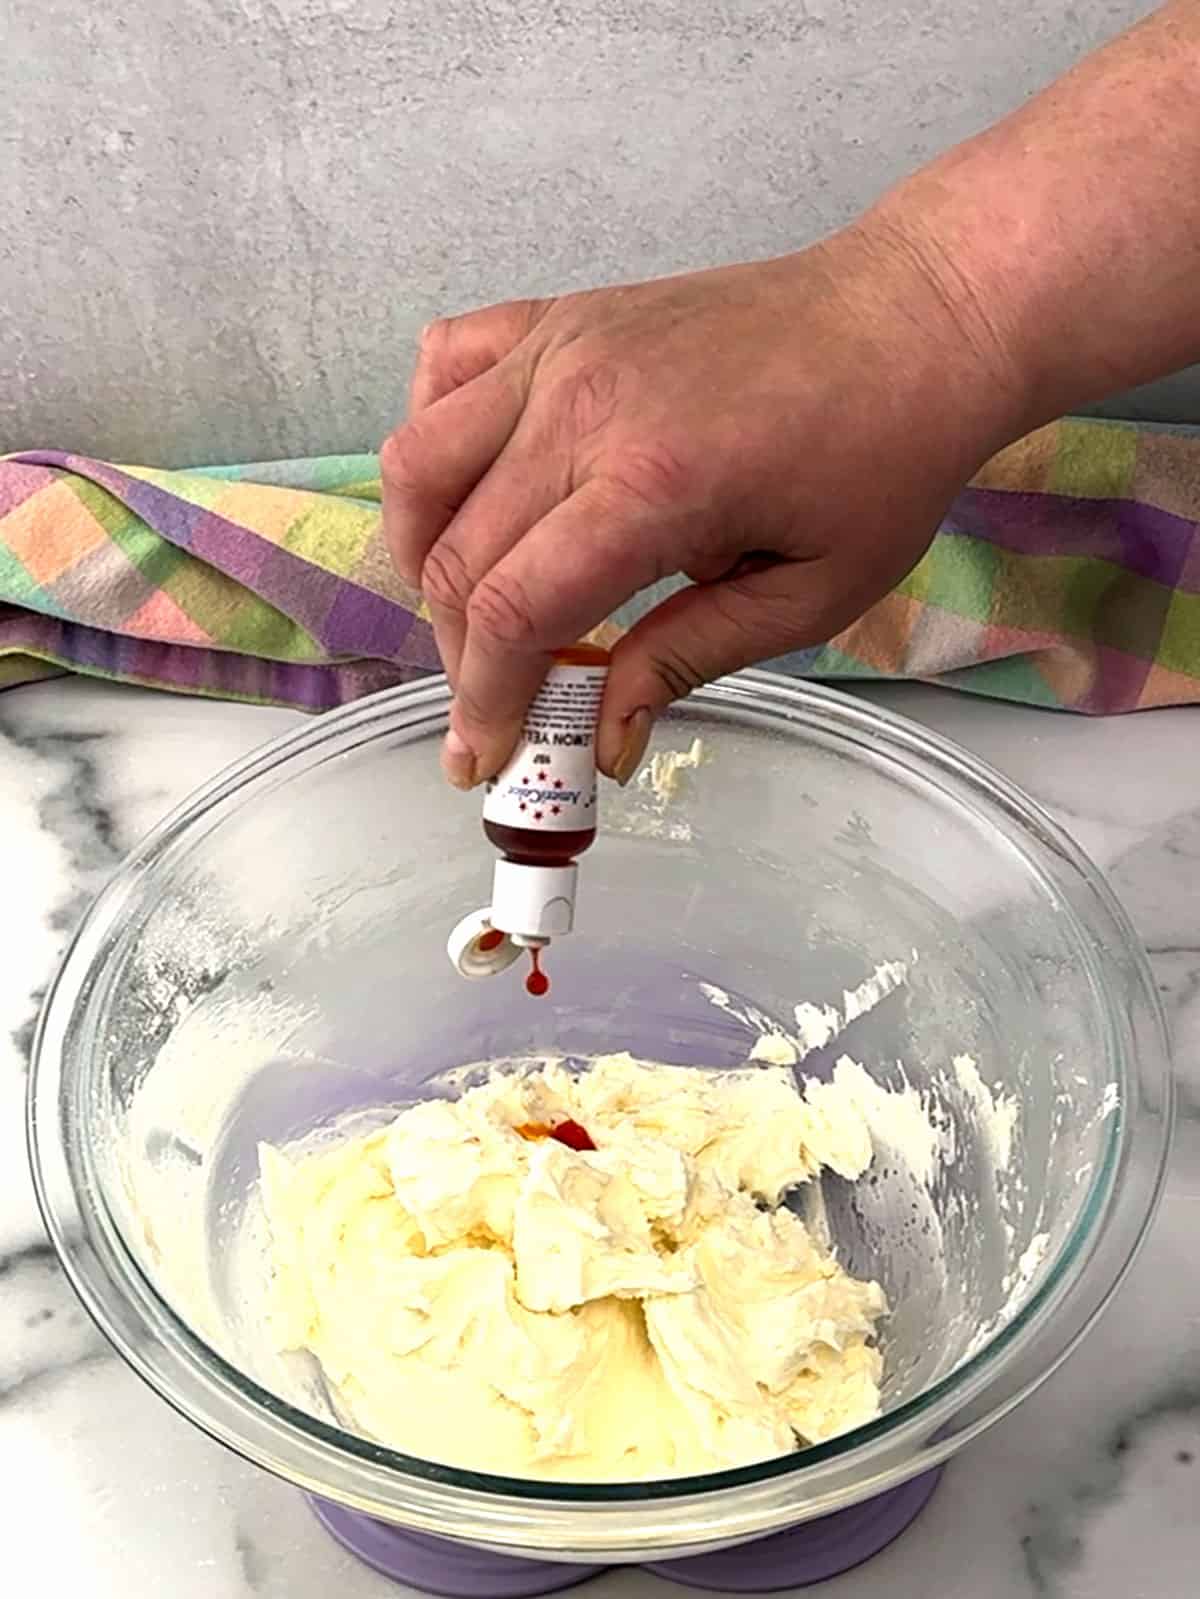
- Adjust the color of the frosting if necessary by adding a few more drops until the desired color is reached.
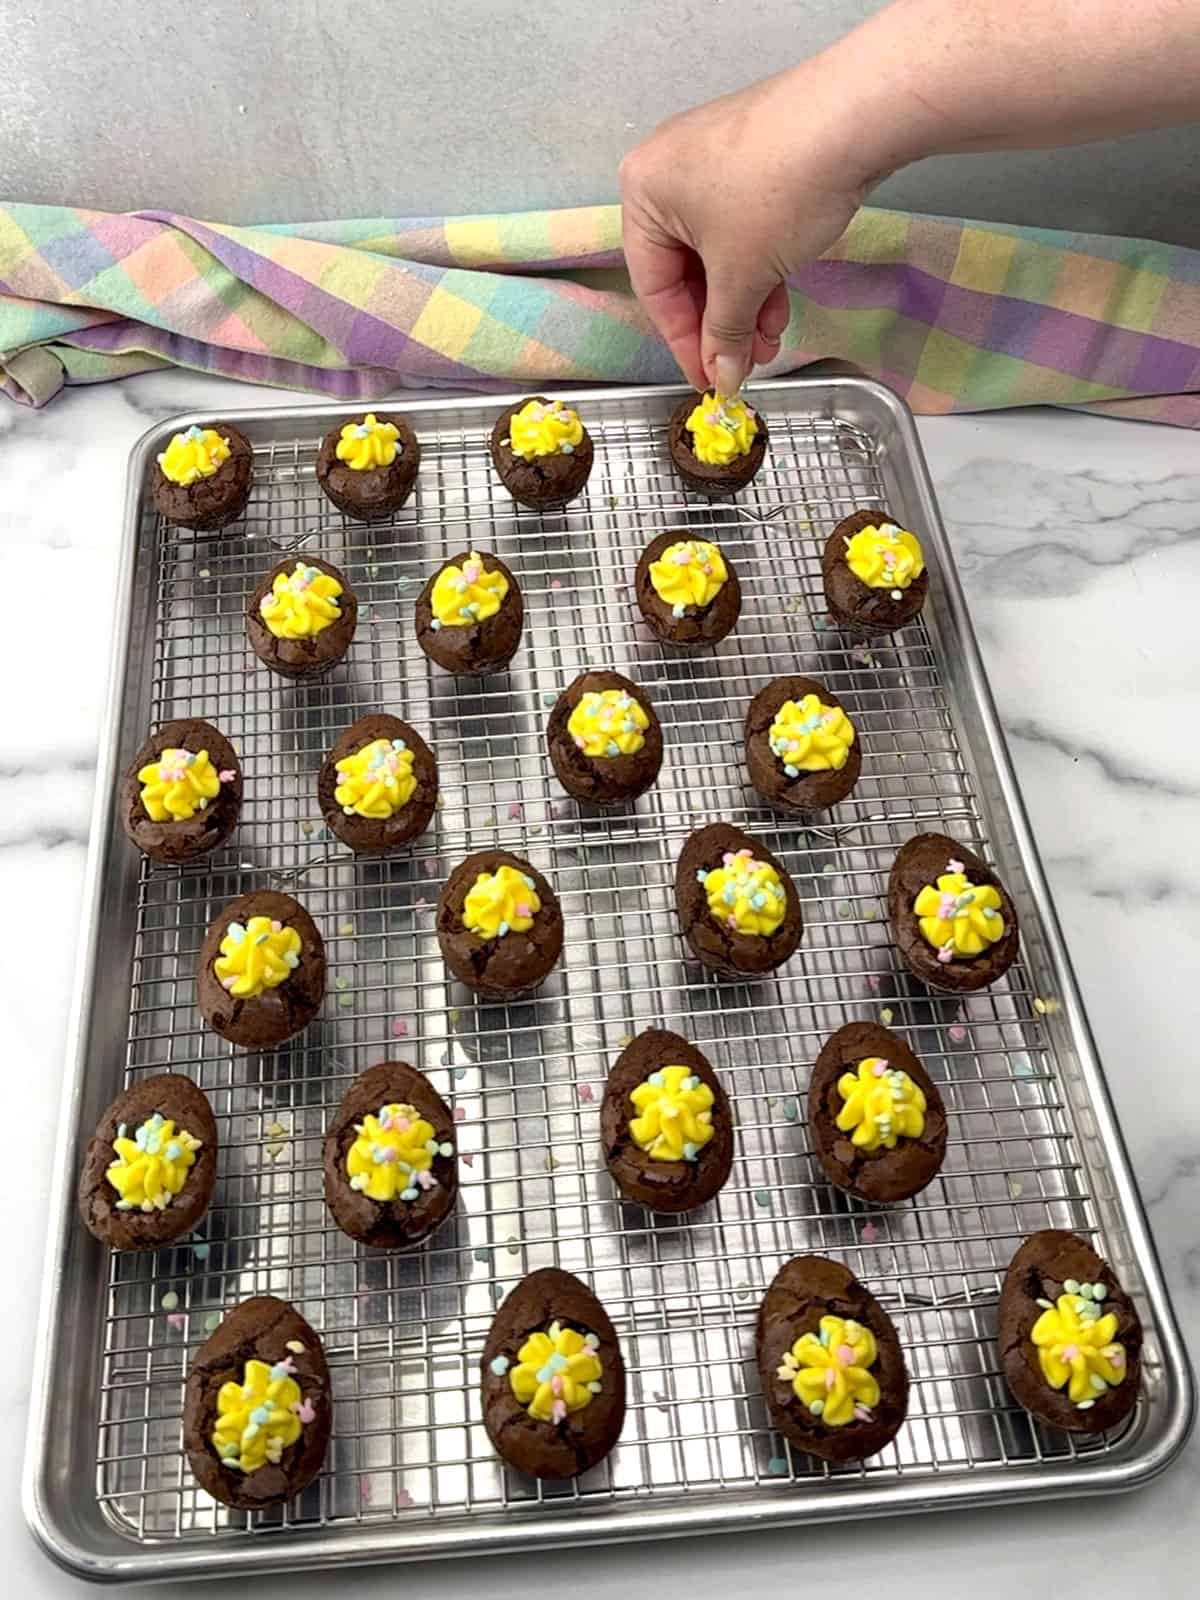
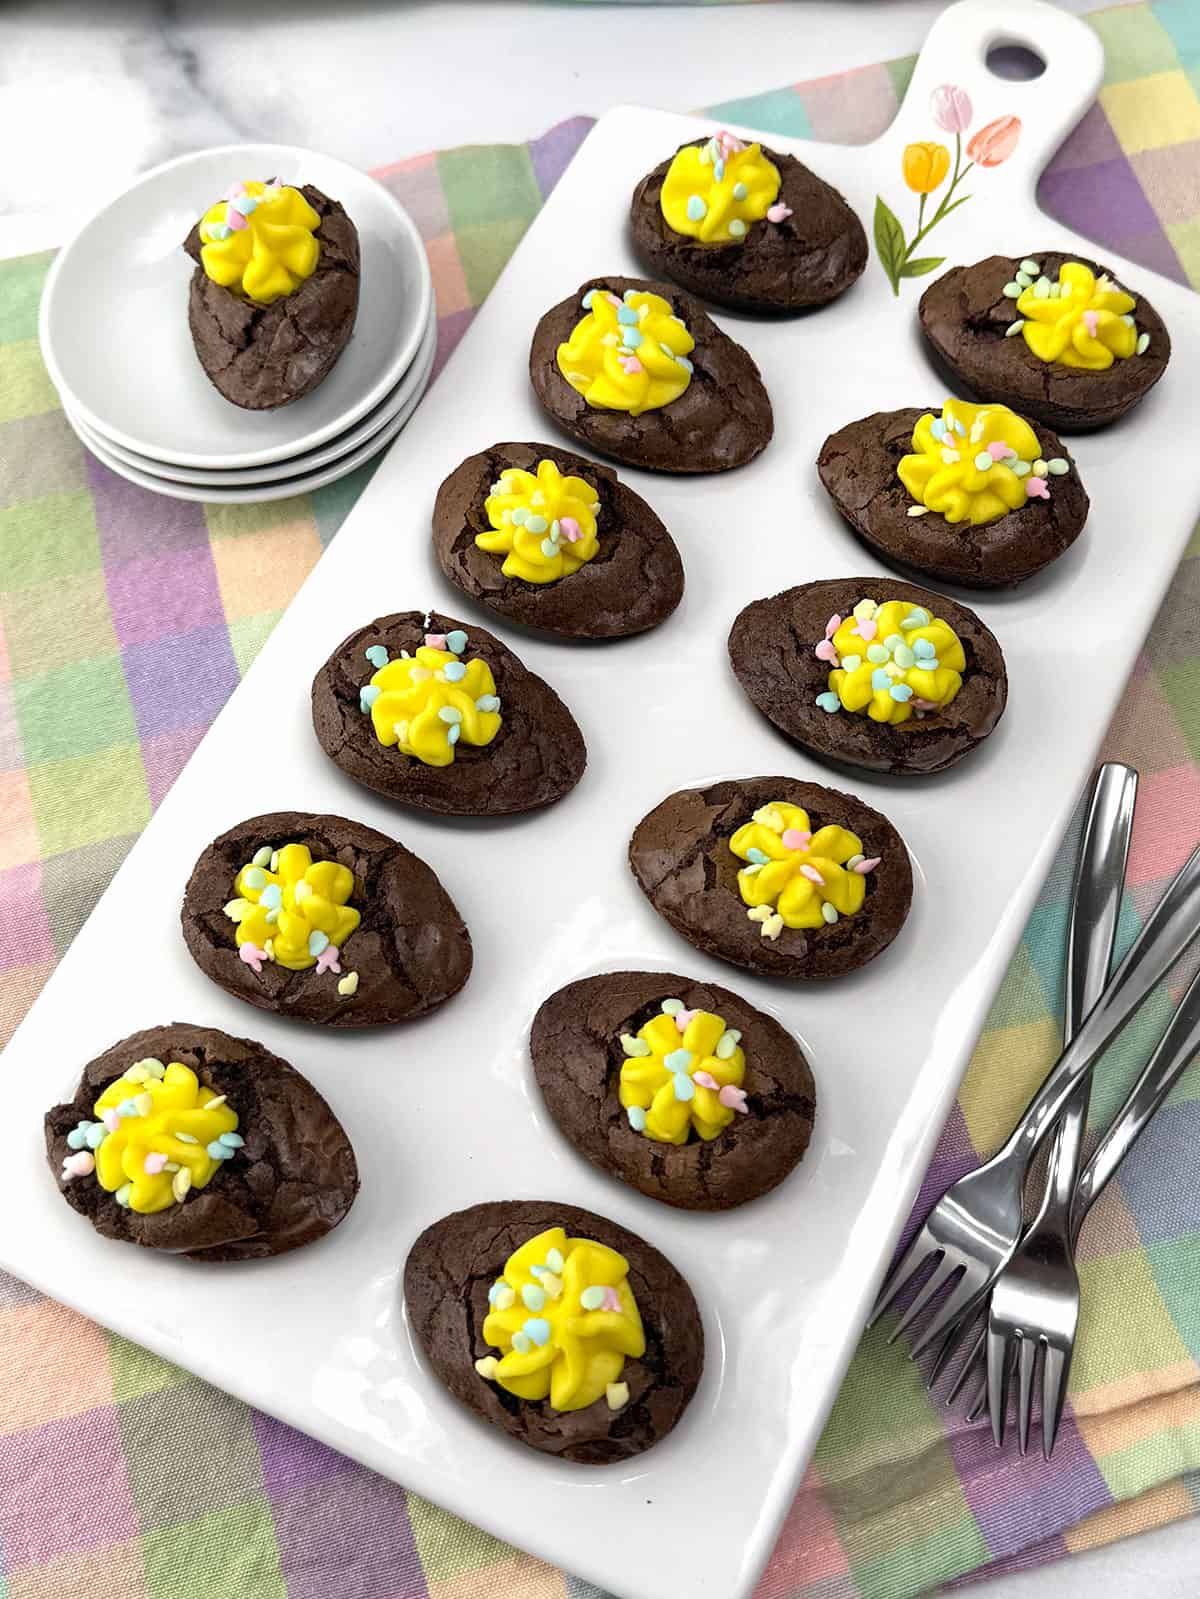
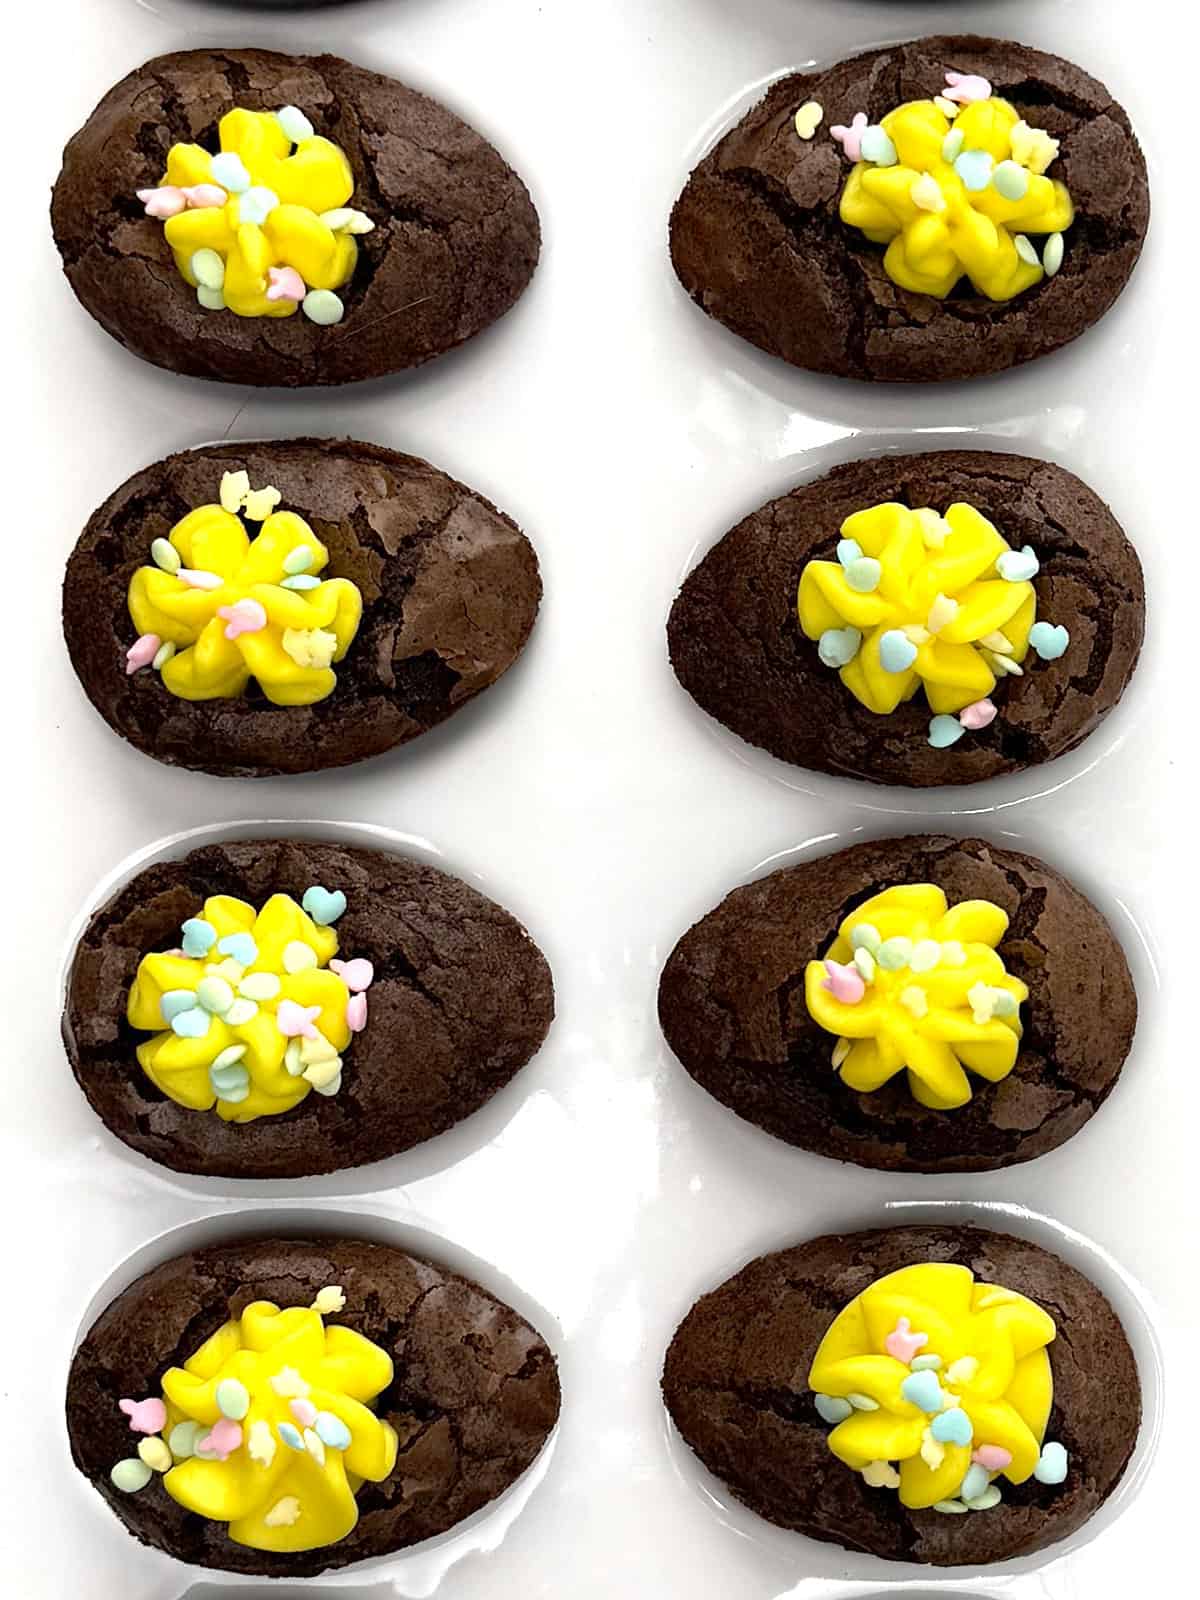
- Place the frosting in a piping bag fitted with a large 1M tip. Then, pipe a small amount of frosting into the indentations in each egg.
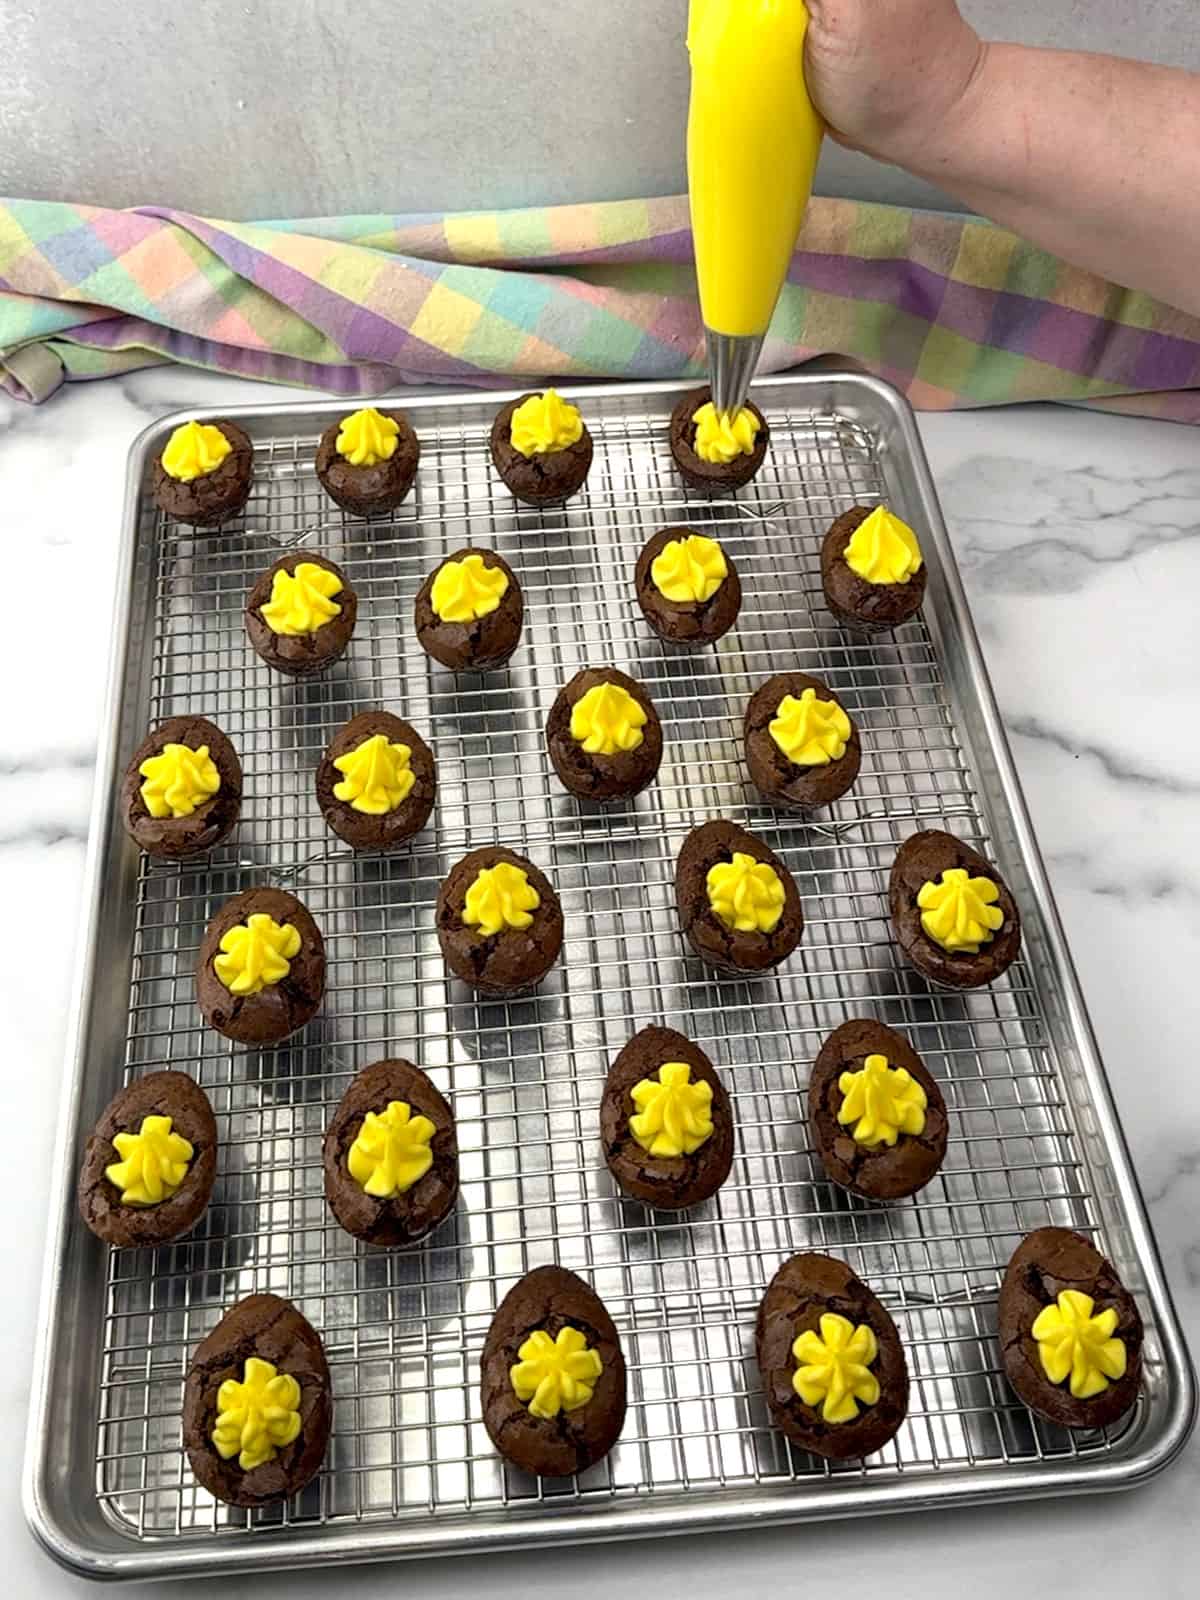
- Then, top each bit of frosting with a few festive sprinkles. Store in an airtight container for up to five days.
Ready to surprise your friends and family with these Brownie Deviled Eggs? This recipe proves that you don't need to be a professional pastry chef to create a show-stopping treat. These chocolate delights are a reliable, stress-free addition to any Easter brunch or party menu. They are as fun to look at as they are delicious to eat!
Frequently Asked Questions
Store your brownie eggs in an airtight container in the refrigerator for up to 5 days. If you haven't topped them with sprinkles yet, you can keep the brownie bases at room temperature for 2-3 days, but once frosted, they should be chilled to keep the buttercream firm.
Yes! You can bake the brownie bases up to two days in advance. For the best presentation, pipe the frosting "yolks" and add your holiday sprinkles on the day you plan to serve them to ensure the sprinkles stay crisp and don't bleed into the frosting.
You can freeze the unfrosted brownie bases for up to 3 months. Wrap them tightly in plastic wrap and place them in a freezer bag. We do not recommend freezing them once they are frosted, as the texture of the buttercream and the color of the holiday sprinkles can change during the thawing process.
The key is to let the brownies cool completely in the pan. Brownies are very fragile while warm. Once cool, gently press the bottom of each mold to pop the brownie out. If they still seem stuck, place the pan in the fridge for 20 minutes to firm them up further.
Recipe Tips and Tricks
- The "Pop" Technique: When removing the brownies, apply gentle pressure to the bottom of each silicone mold. If you feel any resistance, stop and chill them longer. This ensures the rounded "egg" surface stays perfectly smooth.
- Timing the Sprinkles: Add your festive holiday sprinkles immediately after piping each "yolk." Once the frosting crusts over (even slightly), the sprinkles won't stick as well.
- Egg Pans: You need three 8-Cavity Silicone Egg Molds for this recipe. You will also need to place the silicone pans onto metal sheet pans before baking.
- Color Matching the Yolk: For the most realistic look, use a gel food coloring (like Lemon Yellow) rather than liquid drops. Gel gives you a vibrant, saturated "yolk" color without thinning out the frosting, which helps it hold those sharp piped ridges.
Other Great Easter Desserts
- Easy Easter Chocolate Chip Cookie Cake
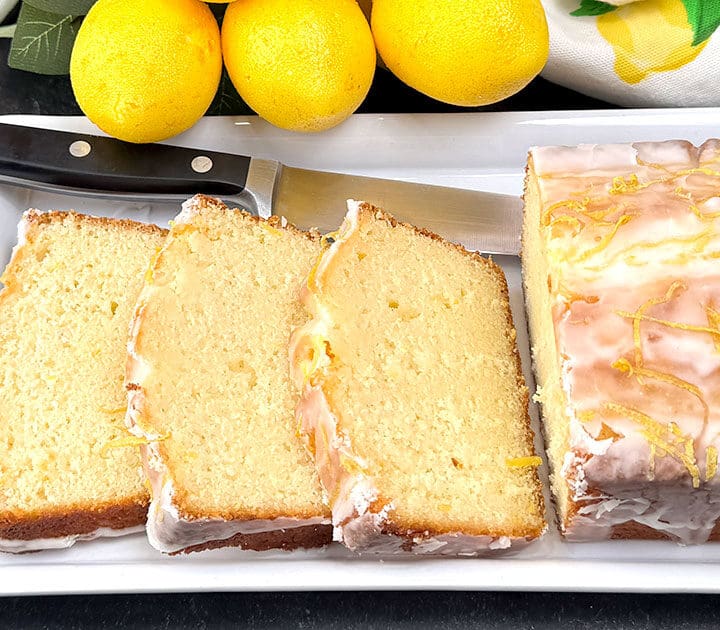
- Lemon-Curd-Filled Hawaiian Rolls with Glossy Lemon Glaze
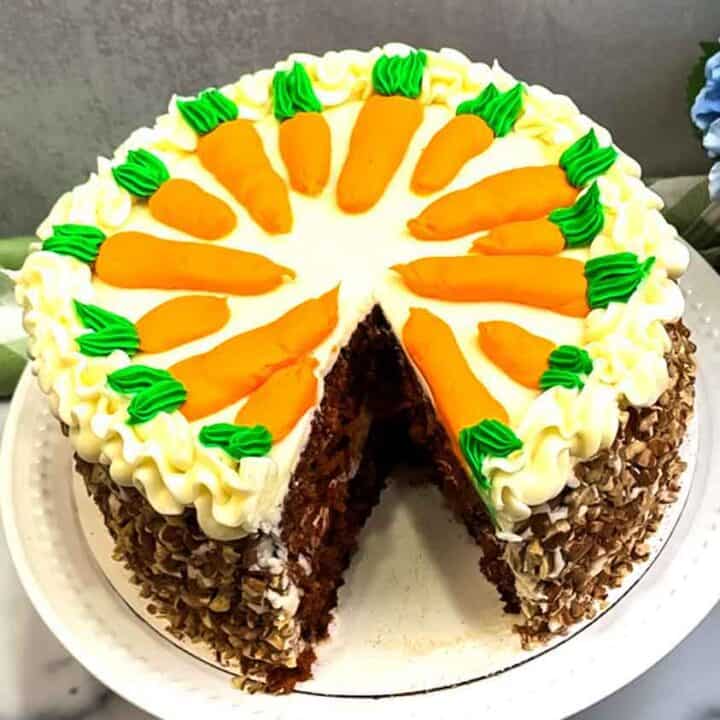
- Mini Carrot Bundt Cakes with Cream Cheese Frosting
- Easter Bunny Parfait Cups
- Easter Bunny Bark
- Easy Easter Crockpot Candy
- Easter Basket Cookies (With Vintage Bakery Frosting)
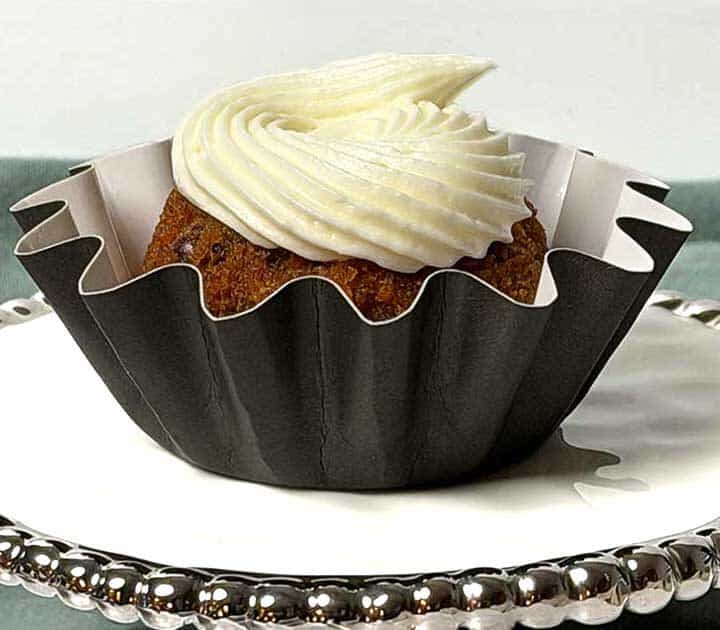
- Carrot Cake with Cream Cheese Frosting


Did you make this recipe? We'd love to know how it turned out! Leave a review below. Then, share a picture on Instagram and tag @pudgefactor so we can see it.
Don't forget to follow us on Pinterest, Facebook, YouTube, Flipboard, and Instagram.
Thank you so much for visiting PudgeFactor. We hope you'll come back!
Recipe
Want to Save This Recipe?
Enter your email & I'll send it to your inbox. Plus, enjoy weekly doses of culinary inspiration as a bonus!
By submitting this form, you consent to receive emails from Pudge Factor.
Brownie Deviled Eggs
Equipment
- Large mixing bowl
- Silicone Spatula
- two tablespoon ice cream scoop
- 3 8-Cavity Silicone Egg Molds
- 3 quarter sheet pans
- round teaspoon
- wire cooling rack
- half-sheet pan
- medium mixing bowl
- Electric hand mixer
- piping bag
- 1M piping tip
Ingredients
- 18.3 oz Box Brownie Mix
- 2 lg Eggs
- ⅔ c Vegetable Oil
- 3 tbs Water
For the Frosting
- ½ c Unsalted Butter room temperature
- 2 c Powdered Sugar
- ⅛ teaspoon Salt
- 1 teaspoon Vanilla Extract
- 3 tbs Heavy Whipping Cream
- 1 tbs Festive Easter Sprinkles
Instructions
- Preheat oven to 350°F. Prepare brownies according to package directions. Pour the brownie mix into a large bowl. Then, add vegetable oil, water, and two slightly beaten eggs. Use a silicone spatula to stir the mixture for about 50 strokes until everything is incorporated.
- Then, place one1 eight-cavity silicone egg-shaped pan on a quarter sheet pan. Use a two-tablespoon ice cream scoop to fill each well2. Then, bake the pan in the 350°F oven for 22 minutes. Remove the pan from the oven and immediately press an indentation into each egg with the back of a round teaspoon. Return the pan to the oven and bake for an additional three minutes. Remove the pan from the oven and re-press the indentation with the teaspoon. Allow the pan and the eggs to reach room temperature before removing the eggs from the pan.
- Repeat filling, baking, and creating the indentation in the eggs for the other two pans, making sure to bake them one at a time. Once the eggs have cooled to room temperature, carefully remove them from the silicone molds and place them on a wire rack set over a half sheet pan.
To Make the Frosting
- Start by beating one stick of room temperature unsalted butter with an electric hand mixer for about three minutes. Then, add the salt and about half of the powdered sugar, and beat until the mixture is smooth. Beat in the remaining powdered sugar; the mixture will likely be crumbly. Then, add vanilla extract and heavy whipping cream, and beat until the mixture is smooth and creamy.
- Add four or five drops of yellow gel food coloring to start, then beat into the frosting. Adjust the color of the frosting if necessary by adding a few more drops until the desired color is reached.
- Place the frosting in a piping bag fitted with a large 1M tip. Then, pipe a small amount of frosting into the indentations in each egg. Then, top each bit of frosting with a few festive sprinkles. Store in an airtight container for up to five days.
- Yield 24 Brownie Deviled Eggs
Tips/Notes
- You should only bake one pan at a time.
- If you don't have a two-tablespoon ice cream scoop, fill each cavity with two tablespoons of brownie mixture, or about ⅔ full. I recommend filling all three pans, or 24 cavities, before baking the first pan.

Brandy says
Can I ask where you found the bunny tray? It’s adorable! I want to make this dessert for Easter!
Susan Ensley says
Brandy:
I bought the bunny tray at Buc-ee's and the rectangular plate from Michaels, both several years ago. I did however find the same bunny plate online for you. https://shopcarversboutique.com/products/mud-pie-bunny-deviled-egg-tray
I hope this helps! Please come back and leave a comment to let us know how your Brownie Deviled Eggs turn out after you've made them.
Susan