
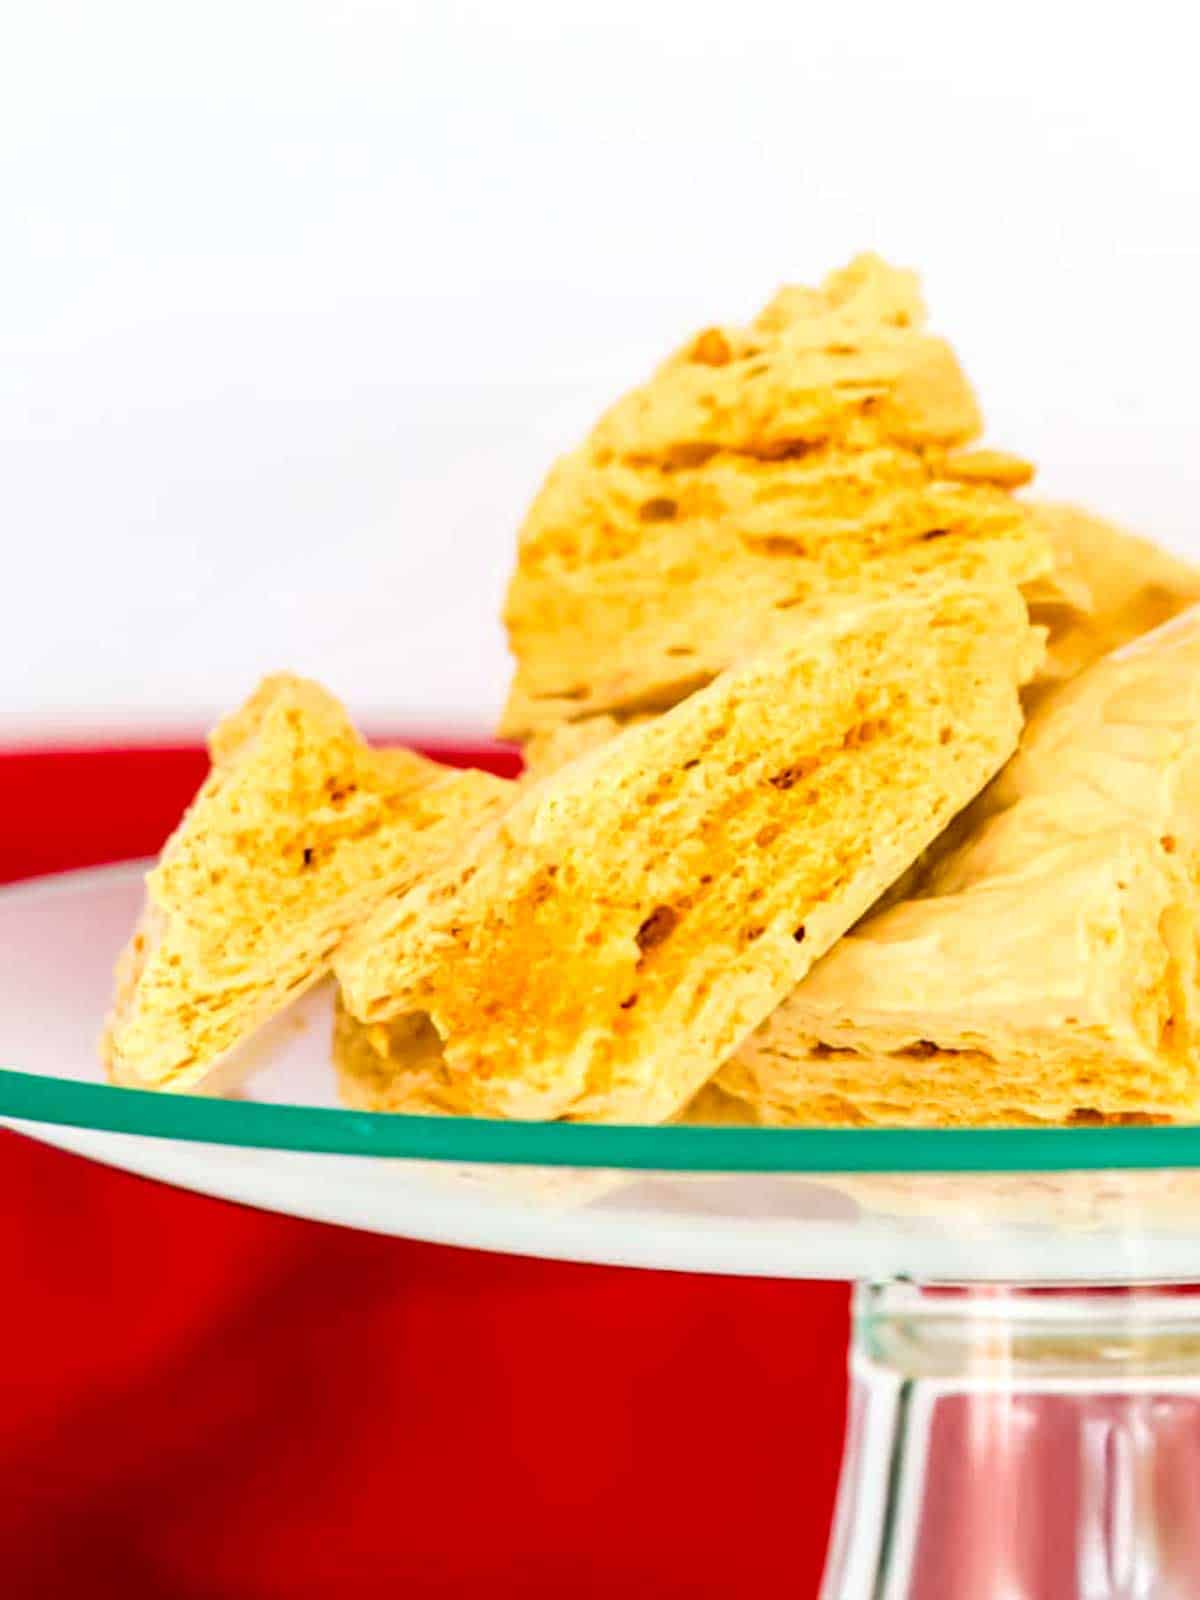
Sponge Candy is a very light and crunchy confection that has a melt-in-your-mouth texture with a taste of molasses. Depending on where you live, it has lots of different names. For example, it's also called honeycomb candy, sponge toffee, seafoam candy, hokey pokey, and fairy food candy.

Sometimes, sponge candy is served covered in chocolate, and other times, it's served plain. However it's served, Sponge Candy is a simple-to-make treat that will definitely satisfy your sweet tooth!
Ingredients - Here's What You'll Need
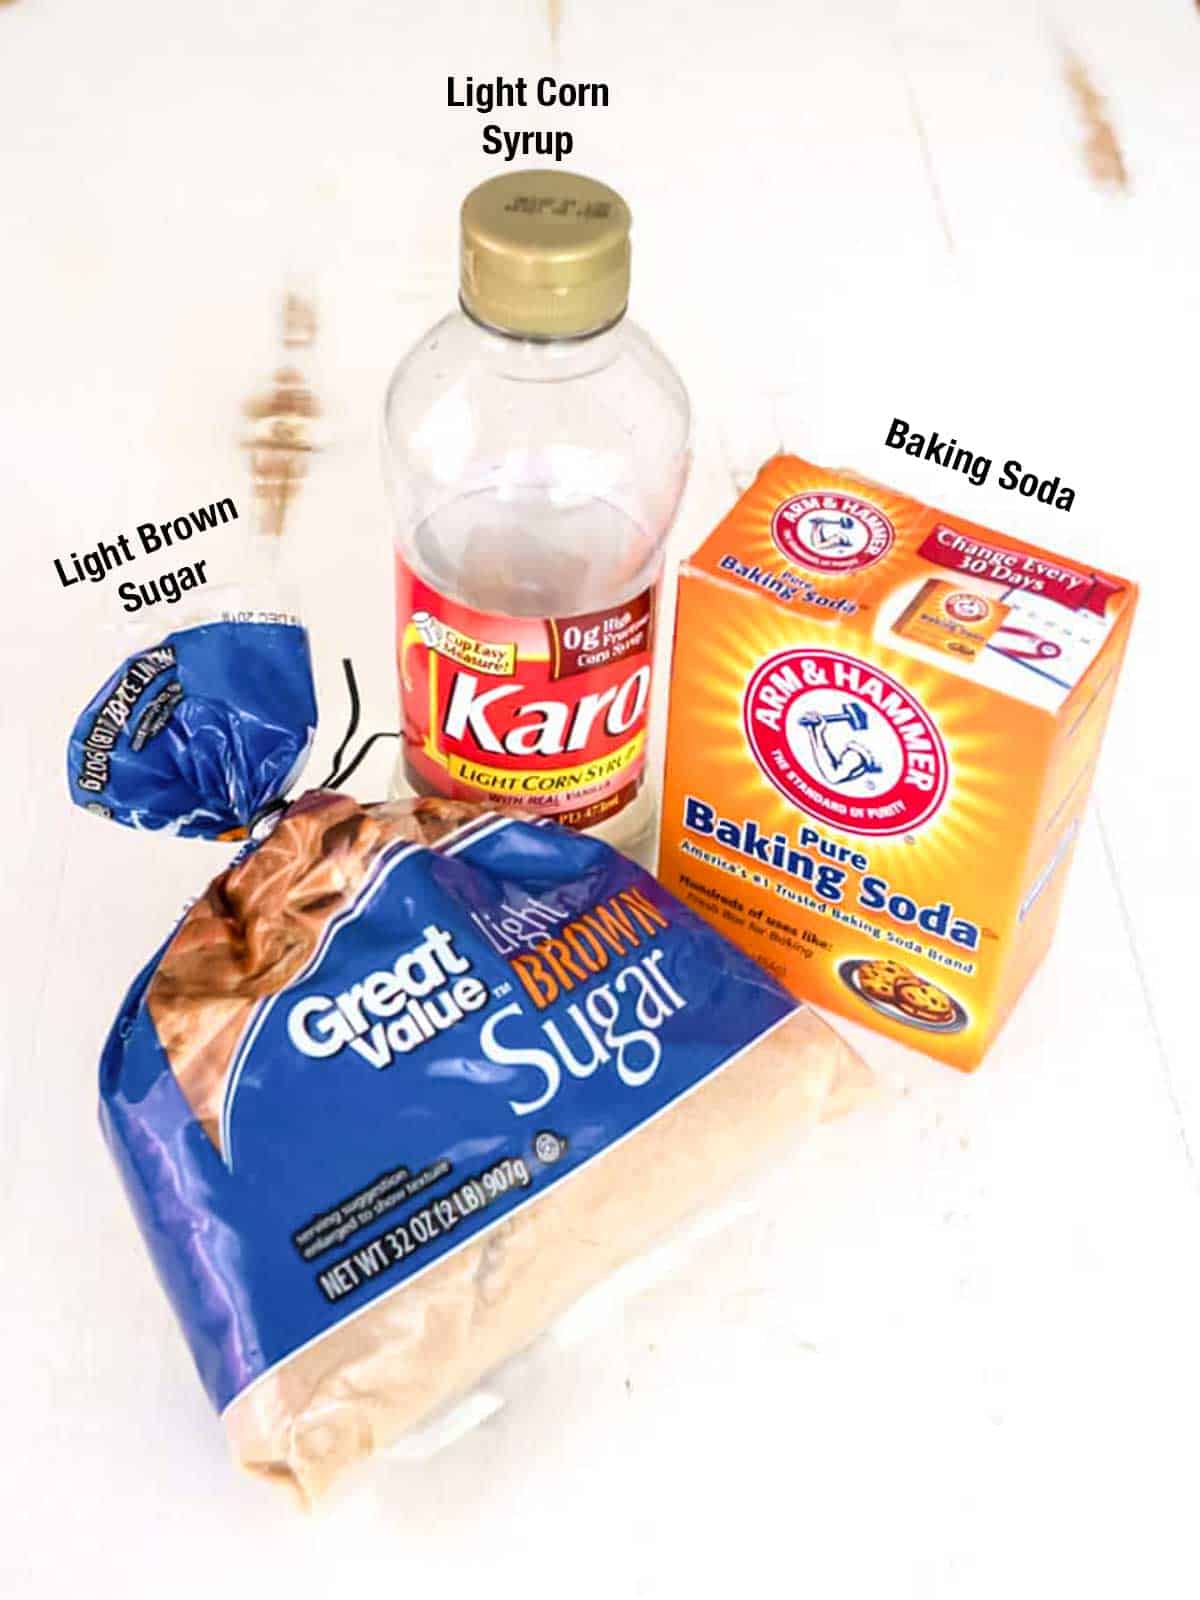
Sponge Candy is named because of its sponge-like interior. I used the following simple ingredients: corn syrup, light brown sugar, and baking soda (a.k.a. bicarbonate soda).
In England, Sponge Candy is made with golden syrup, caster or superfine sugar, and baking soda. The brown sugar or golden syrup is what produces the molasses taste.
Making the Sponge Candy:
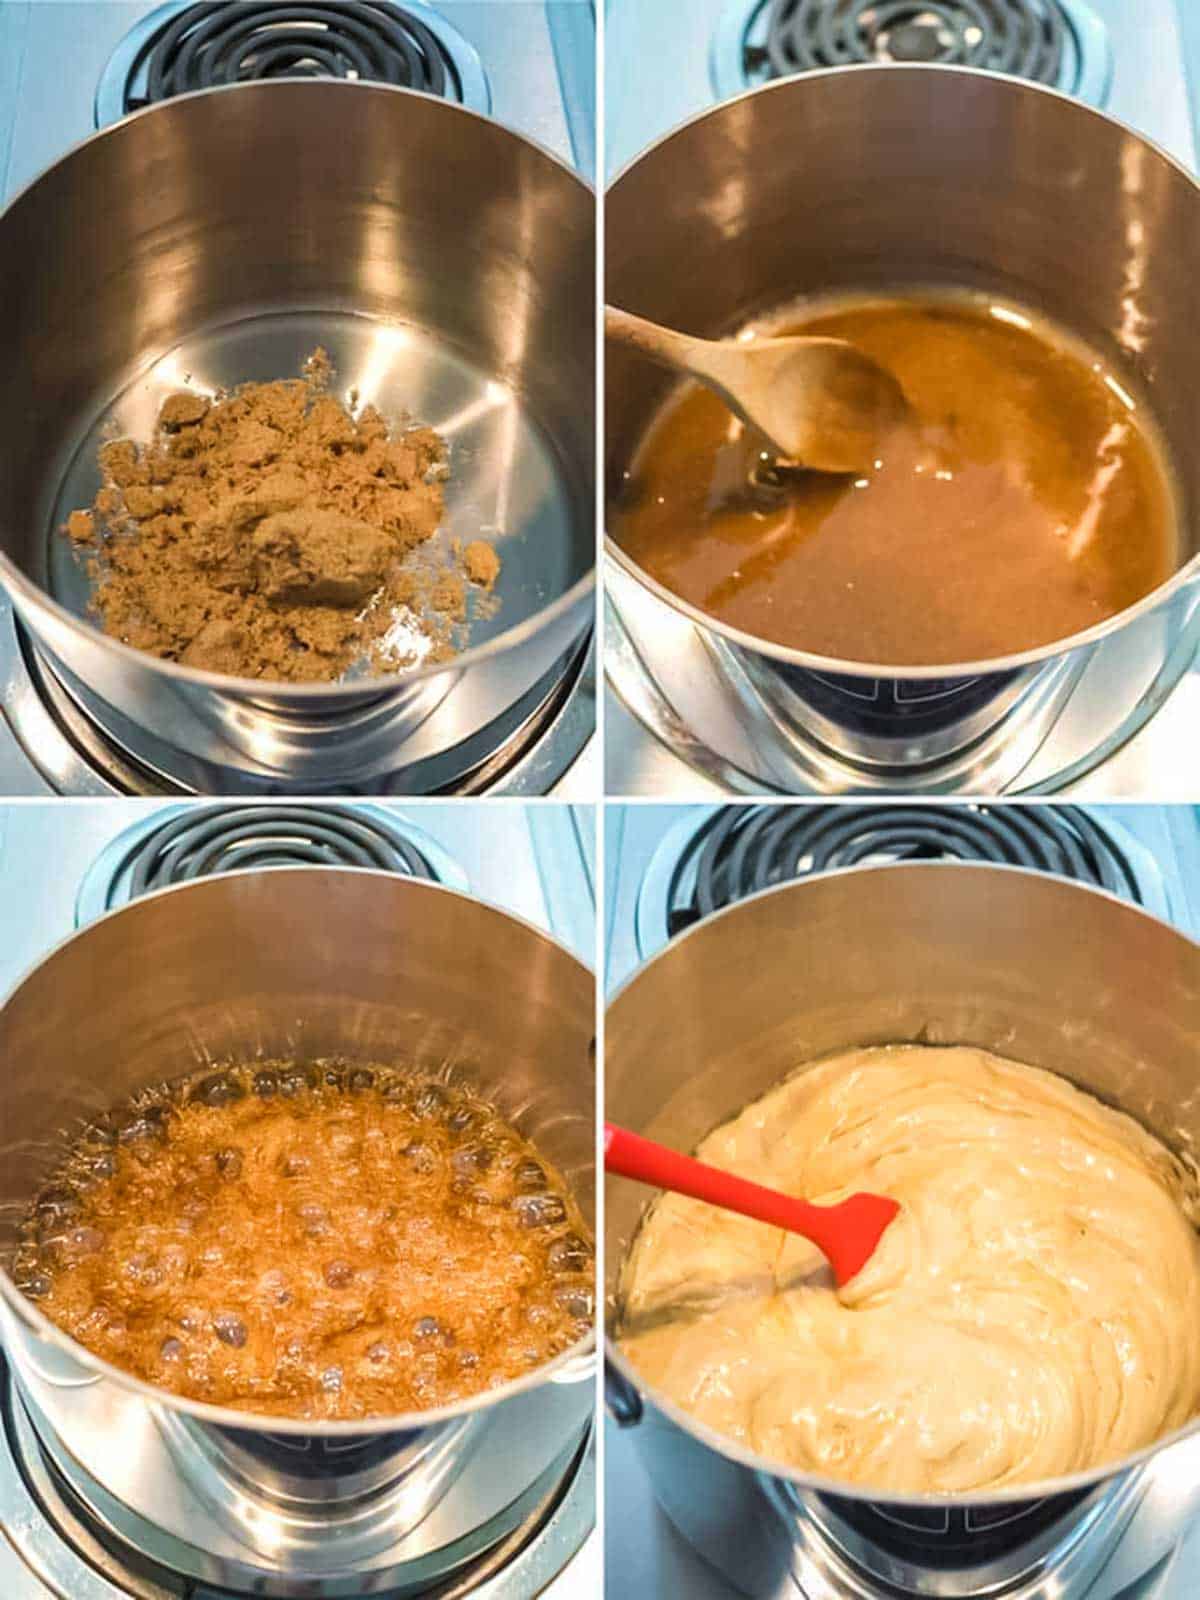
I started by stirring together the corn syrup and brown sugar in a large saucepan. Once the syrup and sugar were combined, I set the saucepan over medium heat. I let the mixture come to a boil without stirring it. I let it continue boiling undisturbed for about 10 minutes until it reached 300° F on my instant-read thermometer.
At this point, I removed the saucepan from the heat and added the baking soda. I quickly stirred the mixture with a silicon spatula until the baking soda was fully incorporated, about 5 seconds.
The addition of baking soda to the molten liquid causes it to thermally decompose, releasing carbon dioxide. This process produces the sponge-like texture of the candy. Some recipes also call for the addition of vinegar, arguing that the reaction of the acid and the baking soda enhances the release of carbon dioxide. From my perspective, this isn't necessary!
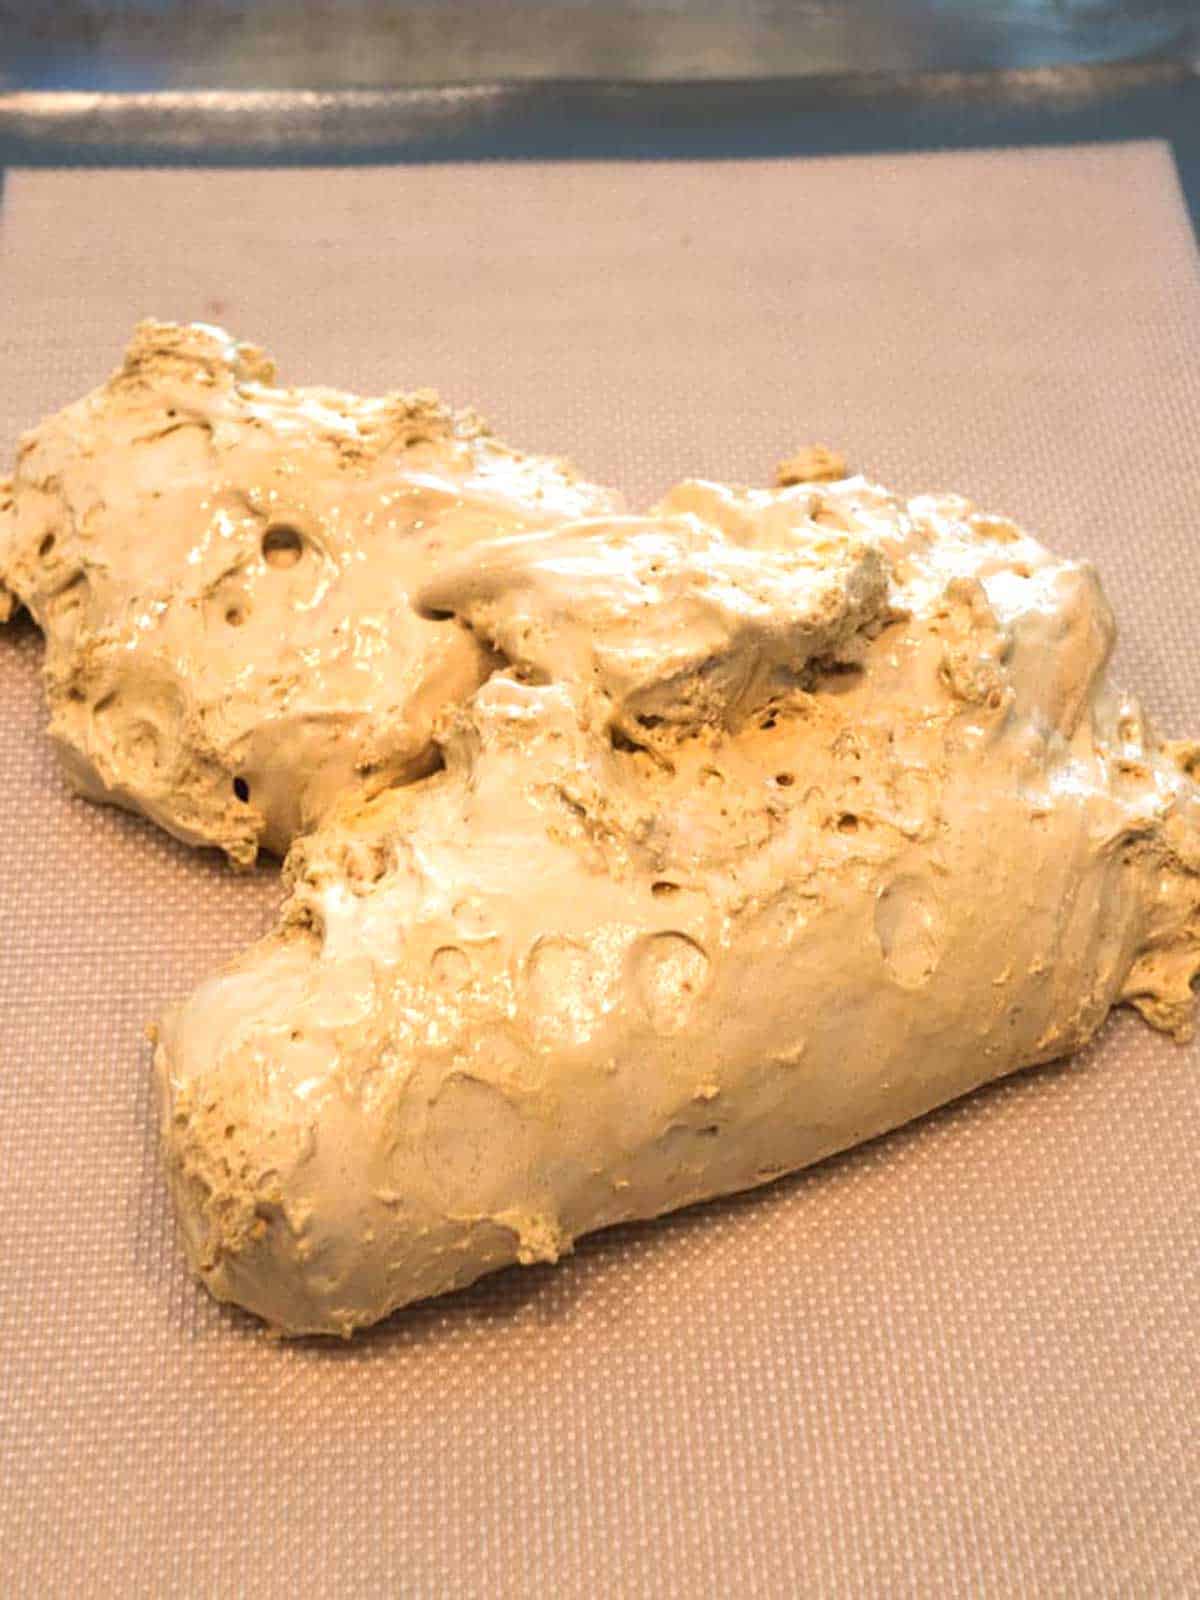
Once the baking soda was fully incorporated, I quickly dumped the candy onto a silicone-lined baking sheet. It was about this time that the Master Taste Tester came into the kitchen. He took one look at the mass and suggested that it looked like a cowpat in a field (British humor)!
I let the candy cool completely for about an hour before breaking it into pieces using a meat mallet.
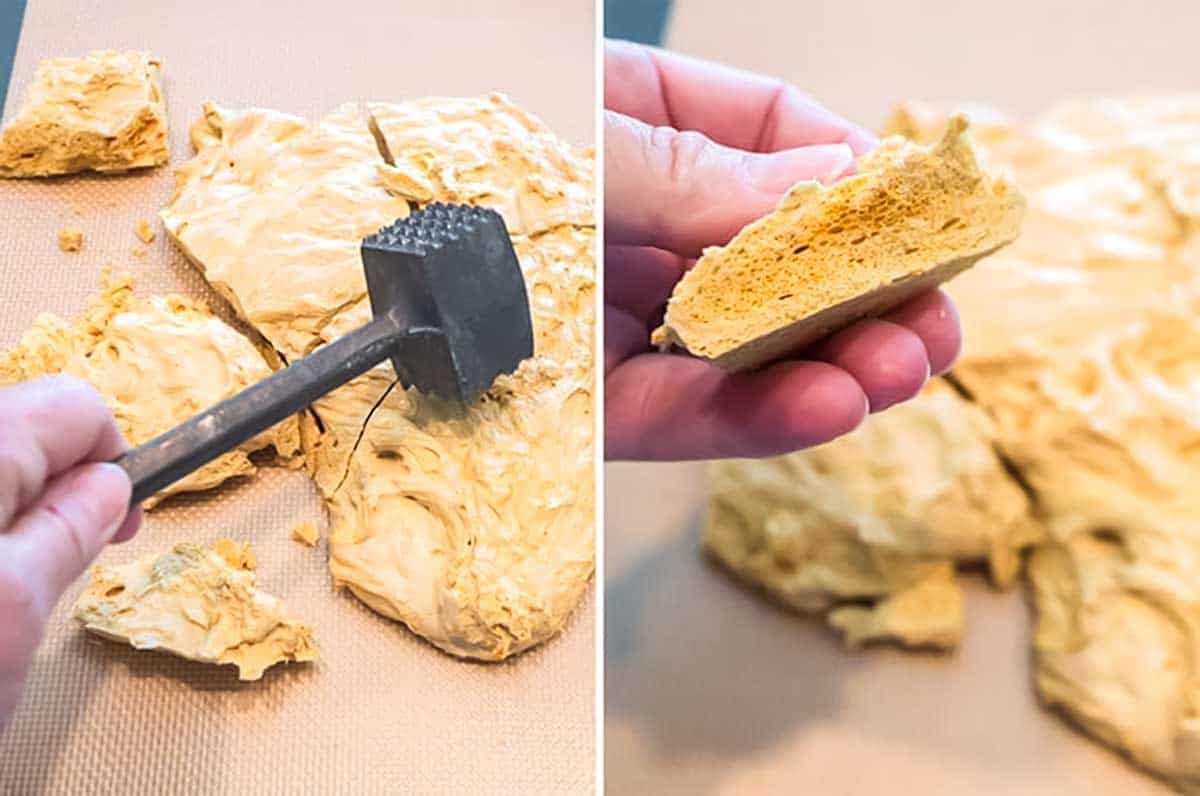
I ended up with the perfect Sponge Candy: light, crunchy, and melted in your mouth. Yum!
Did you make this recipe? We'd love to know how it turned out! Leave a review below. Then, share a picture on Instagram and tag @pudgefactor so we can see it.
Don't forget to follow us on Pinterest, Facebook, YouTube, Flipboard, and Instagram.
Thank you so much for visiting PudgeFactor. We hope you'll come back!
Recipe
Want to Save This Recipe?
Enter your email & I'll send it to your inbox. Plus, enjoy weekly doses of culinary inspiration as a bonus!
By submitting this form, you consent to receive emails from Pudge Factor.

Sponge Candy
Ingredients
- ½ cup (5.5 ounces) light corn syrup
- ½ cup (3.75 ounces) light brown sugar
- 1-½ teaspoons baking soda sifted
Instructions
- Line large baking sheet with silicon mat or parchment paper. Set aside.
- Combine corn syrup and brown sugar in a large saucepan. Bring to a boil over medium, without stirring.
- Continue boiling over medium heat until mixture reaches 300° F, about 10 minutes.
- Remove from heat. Add baking soda. Quickly stir with silicon spatula until well incorporated, no more than 5 seconds.
- Quickly pour ingredients on prepared baking sheet.
- Let cool completely. Break into pieces.
- Store in air tight container.
- Yield: 4 to 6 servings.


Dana Johnson says
I went to Wikipedia after seeing your comment about heat alone being needed to release the co2 from the baking soda. That is spot on, but it turns out that in this circumstance only half the available co2 is liberated. Leaving sodium carbonate. The article didn’t go into the products when using an acid like vinegar or cream of tartar, but I expect it would be something like sodium acetate or tartrate releasing the second co2 molecule. Regardless, it is good to know you can get by without and still get great results. Can’t wait to try this. Loved it as a young man in the 60’s. Also brilliant to pour out on a silicone mat. Saves all the fuss with parchment or buttering a pan.
PudgeFactor says
Dana, I love the science part of why things work the way that they do in the kitchen. It was definitely fun watching the transformation! Hope it works out well for you. Chula