
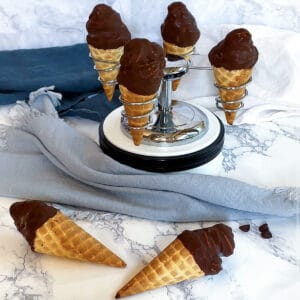
Easy to make Chocolate Dipped No-Churn Ice Cream Cones are a definite winner with both children and adults. The no-churn ice cream initially has the consistency of soft-serve making it perfect for piping into chocolate coated cones. The winning touch is the crispy magic shell coating the ice cream.

Why You'll Love This Recipe
- Simple: It may not look simple but putting this recipe together is easy with just a handful of ingredients.
- Perfect for when you want a treat: Once these chocolate dipped cones are made, they can be stored in the freezer for when you're craving an awesome treat.
- Everyone will love them: This treat is amazingly delicious. Everyone from young to old will thank you!
These Are The Ingredients That You'll Need
This recipe has three categories of ingredients: the magic shell ingredients, the waffle cones and the no-churn ice cream ingredients.

- Magic Shell: The magic shell is made with chocolate chips and coconut oil.
- Waffle Cones: The waffle cones are store-bought and are, well, waffle cones. There's no need to make your own here.
- No-Churn Ice Cream: My ice cream of choice for these amazing chocolate dipped cones is vanilla. Only three ingredients are required - heavy cream, vanilla extract and sweetened condensed milk.
Steps To Making This Amazing Treat
- First, you'll need something to stand the cones in. I like to use an empty Styrofoam egg carton.
I turned the egg carton upside down. Then, I made cuts in the bottom of the egg cups using an x-acto knife.
I didn't worry about being exact here because the cone would enlarge the hole to the right size.

- Next, I made the magic shell.
The magic shell is so named because it "magically" hardens into a solid shell when poured over ice cream.
With all of the magic, it only has two ingredients - chocolate chips and coconut oil.
The magic shell is amazingly easy to make - just melt the chocolate chips and coconut oil in 30 second intervals on 50% power in the microwave, stirring between intervals. That's it!

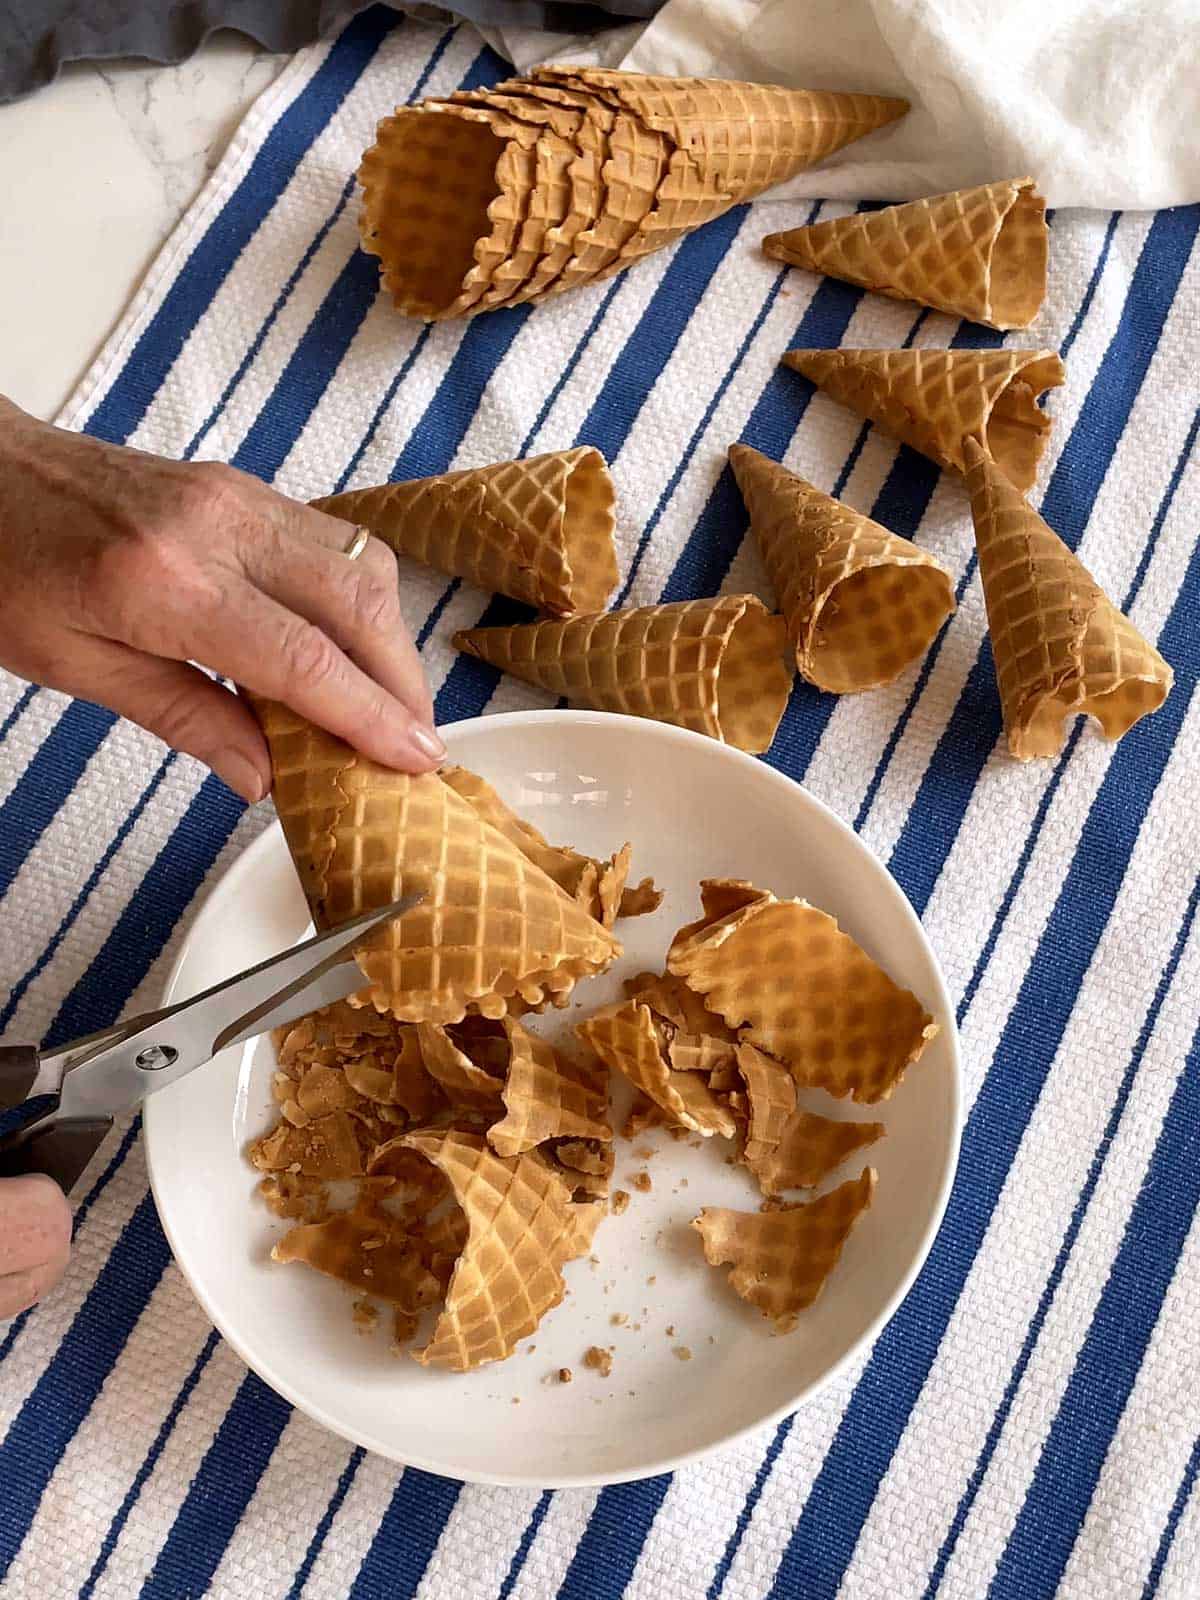
- I know that it seems like a waste, but the next thing that I did was to cut down the waffle cones to between 3 ½ and 4 inches.
When I first started making these amazing treats, I used a serrated knife. Then, I learned that kitchen shears worked great.
Because the waffle cones are brittle, I was very careful in cutting them down. I started at the low wrapped point and carefully snipped away.
I didn't worry about the edges being somewhat ragged. The reason was that the magic shell coating would cover the edges.
- Next, I used a spoon to coat the inside of the cones with the magic shell mixture.
Once I had spooned some of the magic shell mixture into the cone, I held the cone horizontally and twirled it to ensure that the entire surface was coated. Then, I poured out the excess mixture.
I placed the cones which were held upright in the egg carton in the freezer for the magic shell to harden. This took about 10 minutes.

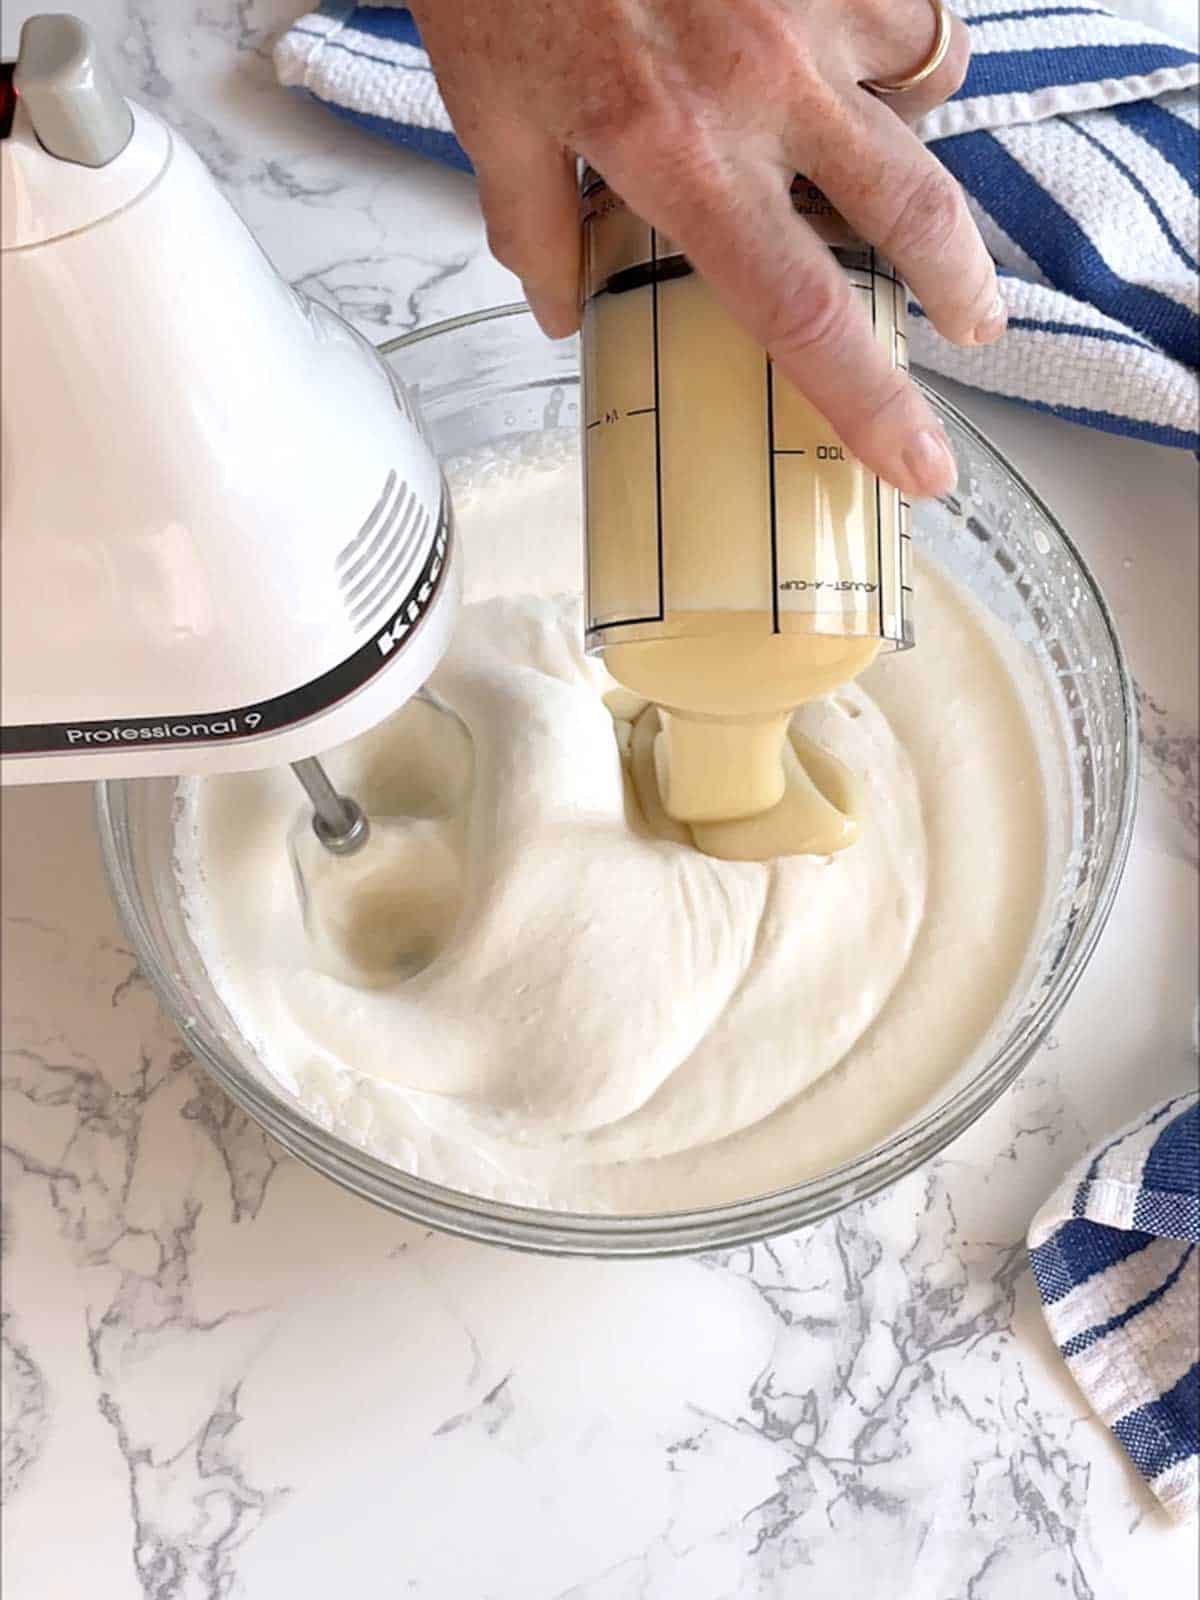
- While the magic shell was hardening in the cones, I made the no-churn vanilla ice cream.
I started by beating the cream on high with my electric mixer until soft peaks formed. This took several minutes.
Then, I added the vanilla extract and sweetened condensed milk. I continued beating on high until stiff peaks formed. This took another several minutes.
Because the Master Taste Tester doesn't like his ice cream too sweet, I tend to use a little more than half of the can of sweetened condensed milk.
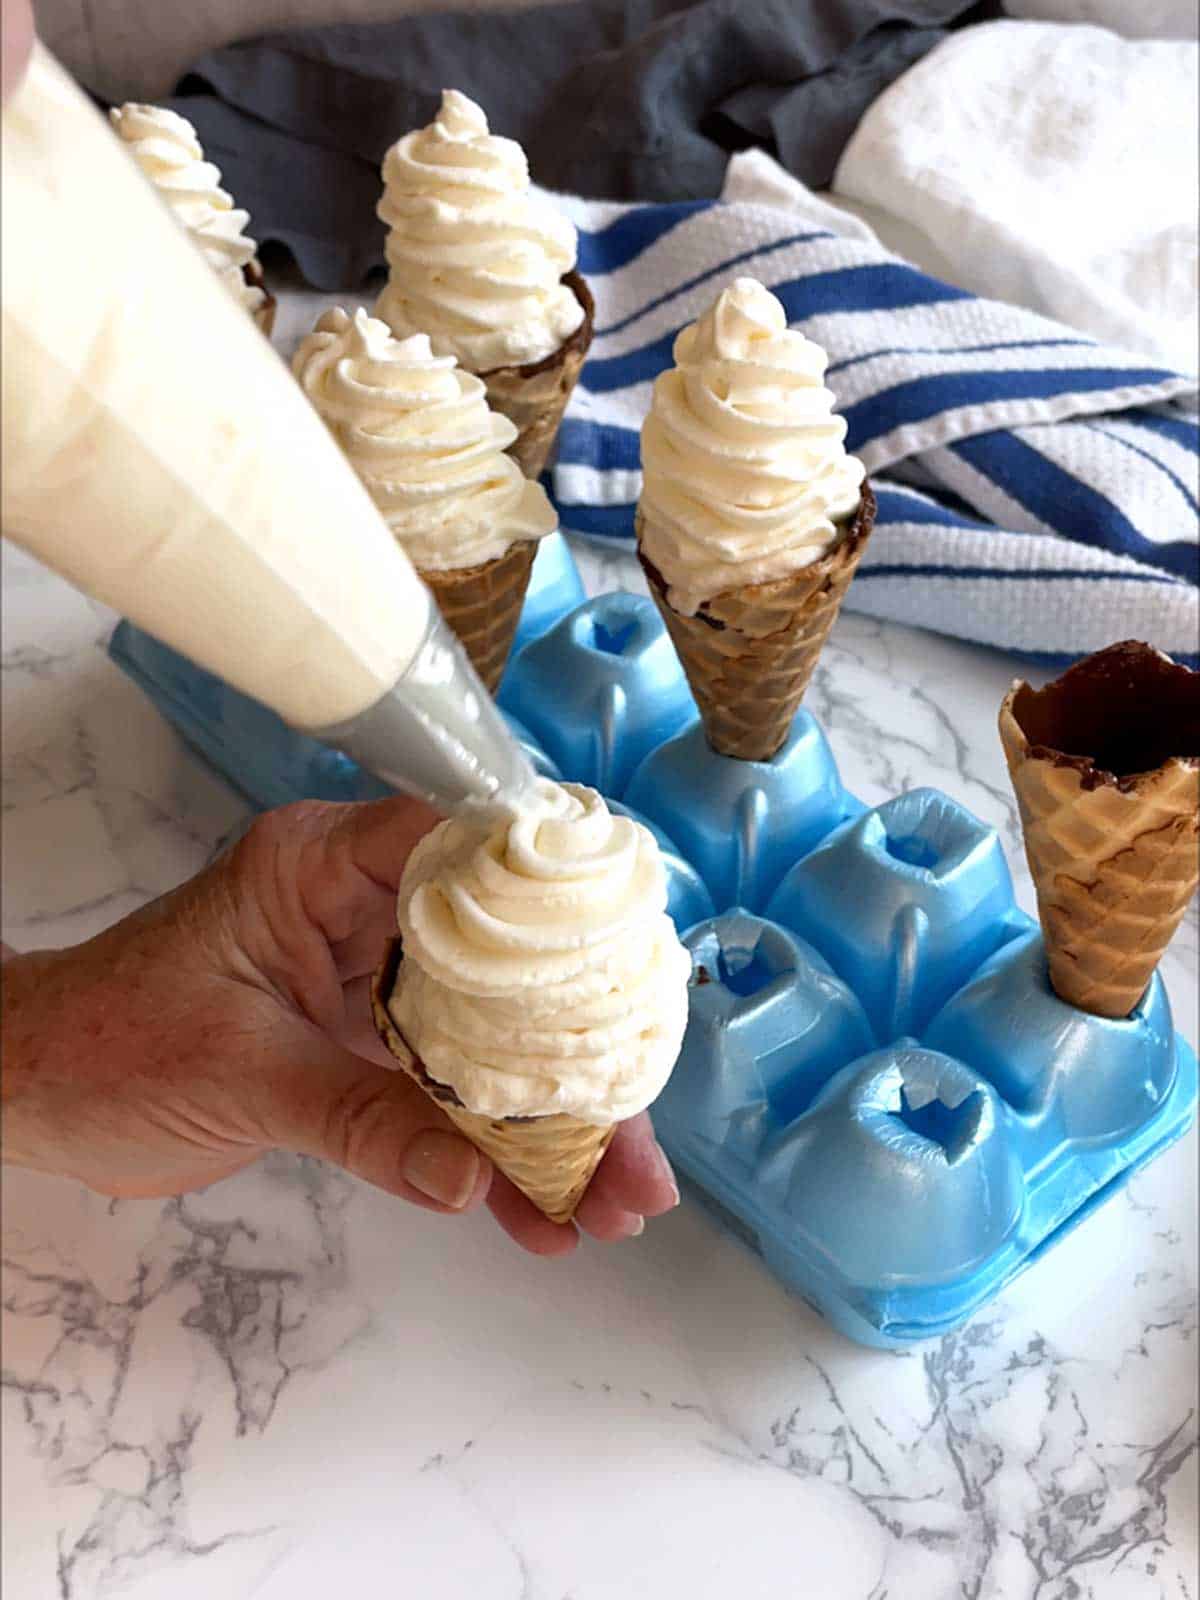
- Once the ice cream mixture had reached the stiff peak stage, it had the consistency of soft-serve ice cream. Therefore, it was perfect for piping into the coated ice cream cones.
I used a pastry bag fitted with a 1M star tip to pipe the ice cream into each of the cones.
Then, I placed the filled cones in the freezer for the ice cream to harden. This took about an hour.
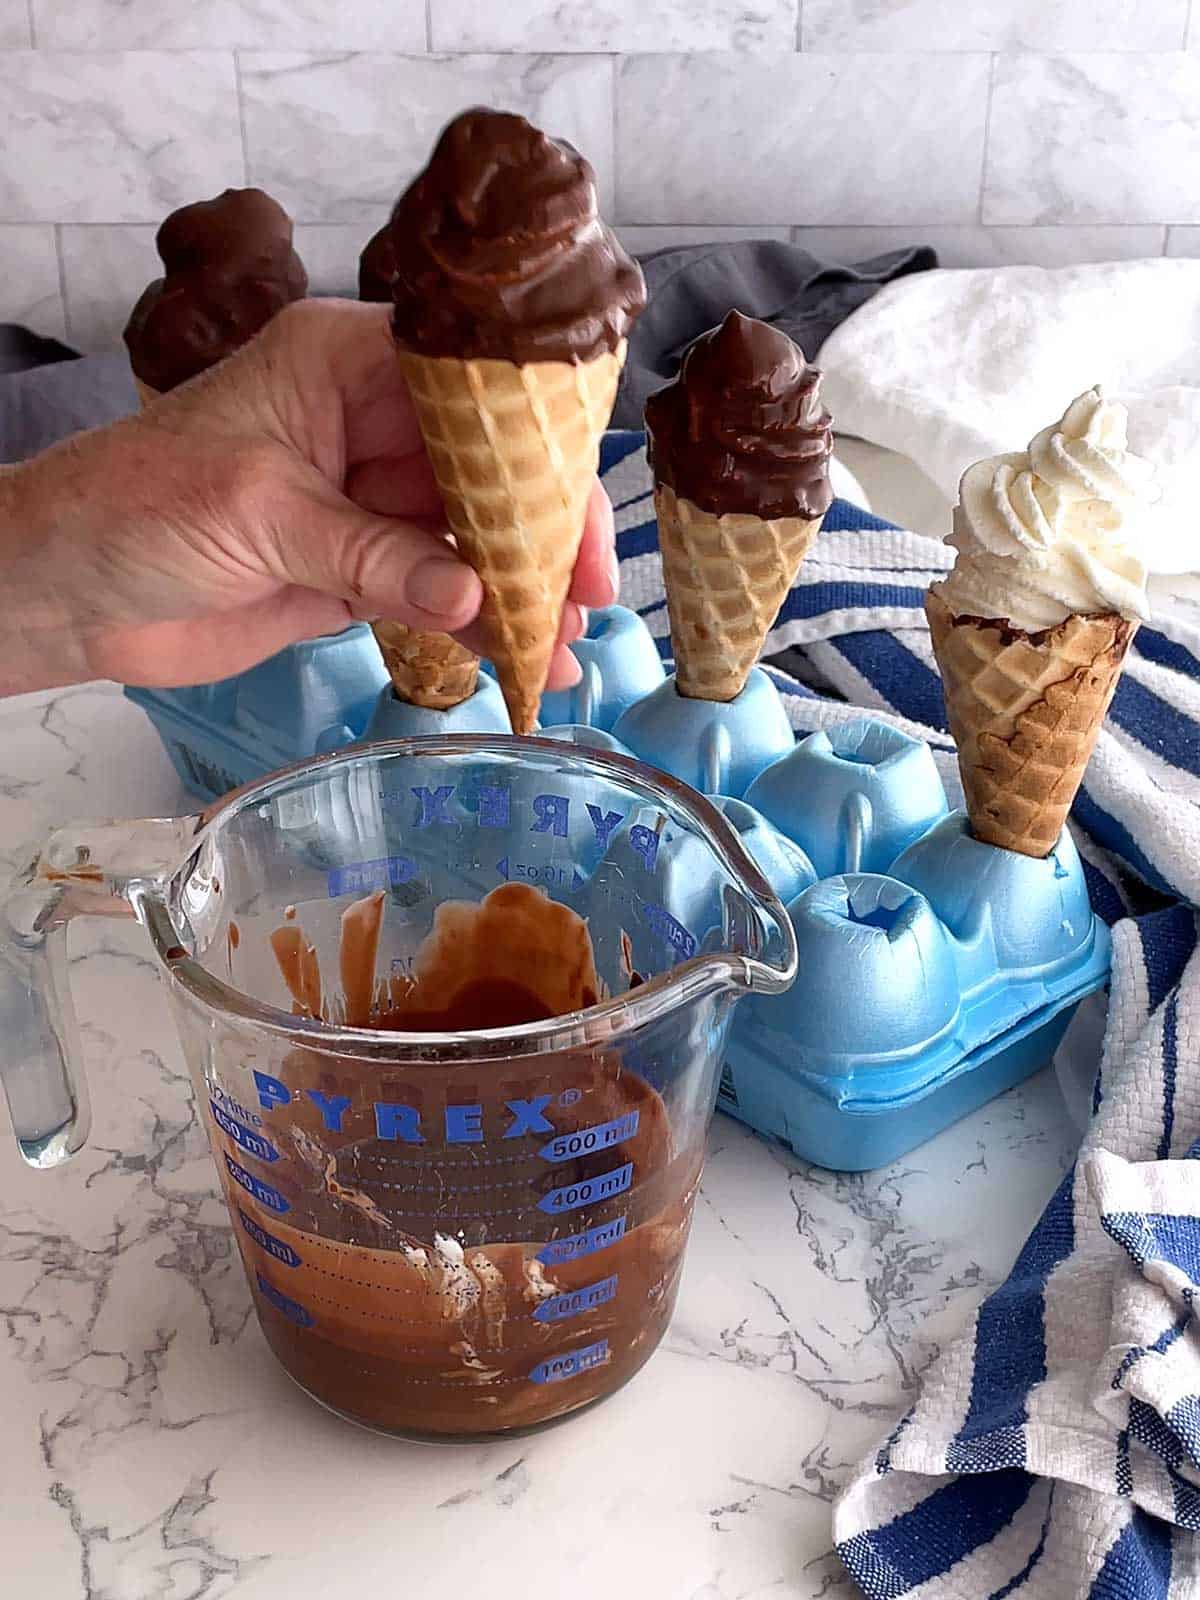
- For the final step, I dipped each of the ice cream cones in the magic shell.
I ensured that both the ice cream and the rough edges of the cone were completely covered. I let the excess magic shell mixture drip off before returning the cones to the egg carton.
It was fun to watch the magic shell harden so quickly after I had dipped the cones!
I placed the chocolate dipped no-churn ice cream cones in the freezer until ready to serve.
I ended up with 12 amazingly delicious chocolate dipped no-churn ice cream cones.
The waffle cones were crispy with the chocolate surprise in their coating. The no-churn ice cream was velvety smooth with just the right amount of sweetness. The crowning glory was the crispy magic shell covering the ice cream. Yum!

Recipe Tips
- You can use either refined or unrefined coconut oil. However, unrefined coconut oil will have a strong coconut taste whereas refined coconut oil has hardly any taste.
- The sweetness of the ice cream can be controlled by the amount of sweetened condensed milk you add. I prefer a less sweet ice cream, so I only use part of the can. However, the ice cream works just as well if you add the entire can of the sweetened condensed milk.
- Before whipping the cream, I like to put the bowl and beaters in the freezer for about 5 minutes. This helps to maintain a proper structure.
- Because the consistency of the ice cream is like soft serve, it's easy to fill the cones. If you don't have a pastry bag and/or piping tip, you can pipe the ice cream using a Ziploc bag with the corner snipped off. You could also scoop the ice cream into the cones.
Frequently Asked Questions
When I first started making these awesome cones, I used unrefined coconut oil. I had no clue as to what the difference was between refined and unrefined.
While the cones were delicious, the unrefined coconut oil had a strong coconut flavor that tended to dominate the taste of the magic shell.
I've since switched to the refined coconut oil. It works just as well but doesn't have the strong coconut taste.
Bottom line, both refined and unrefined coconut oil will work. However, the refined coconut oil will not mask the chocolate flavor.
I've read that one can use butter in place of coconut oil for the magic shell.
You can definitely use store-bought ice cream. In fact, when I first started making these chocolate dipped cones, I used store-bought ice cream. I would let the ice cream soften to the point where it could be piped into the cones. This was somewhat tricky. If it didn't soften enough, it was difficult to pipe and if it softened too much, it made a mess.
That's why I really like using the no-churn ice cream - it's perfect for piping.
If you would prefer not to pipe the ice cream, you can definitely just scoop it into the cones. It may be a bit difficult this way to make sure that the entire cone is filled with ice cream. Also, you likely won't get the pretty swirls at the top.
If you don't have the piping bags and/or the tip, you can definitely pipe the ice cream using a Ziploc bag with the corner snipped off.
As I previously indicated, I prefer to use less than the full can of sweetened condensed milk to cut down on the sweetness of the ice cream. My experience suggests that the consistency of the ice cream is just as perfect with the reduced amount of sweetened condensed milk.
I first started making chocolate dipped cones after purchasing some Hold the Cones from Trader Joes. My Hold the Cone Copycat was such a success that I continued to experiment until I reached perfection.
I hope you liked this recipe for Chocolate Dipped No-Churn Ice Cream Cones as much as I do. If so, please consider rating it and leaving a comment. Also, if you'd like to receive notifications of new posts by email, enter your email address in the Subscribe box.
Thank you so much for visiting Pudge Factor. I hope you'll come back!
Recipe
Want to Save This Recipe?
Enter your email & I'll send it to your inbox. Plus, enjoy weekly doses of culinary inspiration as a bonus!
By submitting this form, you consent to receive emails from Pudge Factor.
Chocolate Dipped No-Churn Ice Cream Cones
Equipment
- Empty egg carton
Ingredients
- 1 cup (6-ounces) semi-sweet chocolate chips
- ¼ cup (2-ounces) coconut oil (See Tip 1)
- 12 store-bought waffle cones
- 2 cups (16-ounces) heavy cream, chilled
- ¾ cup (8-ounces) sweetened condensed milk (See Tip 2)
- 2 teaspoons vanilla extract
Instructions
- Use an empty Styrofoam egg carton to hold the cones upright. Turn the egg carton upside down and cut holds in the bottom of the egg cups using an x-acto knife or small paring knife.
- To make the magic shell, microwave chocolate chips on 50% power in 30 second increments, stirring between increments until the chocolate chips are melted. Set aside. (See Tip 3)
- Using kitchen shears, carefully cut the waffle cones to about 3 ½ to 4 inches. place upright in egg carton. Discard the scraps or use for another purpose.
- Coat the inside of the cones with the magic shell mixture, allow excess to drip back into magic shell mixture. Freeze until firm, about 10 minutes.
- Beat heavy cream on high in a chilled bowl until soft peaks form, a little over a minute. While beating and add vanilla extract and sweetened condensed milk. Continue beating until stiff peaks form, another minute or so (See Tip 4).
- Transfer no-churn ice cream to pastry bag fitted with 1M star tip. Pipe ice cream into prepared cones. Place in freezer until ice cream is firm, about an hour. (See Tip 5)
- Microwave remaining magic shell mixture on 50% power for 15 seconds. Dip ice cream into magic shell mixture being sure to thoroughly coat ice cream and top of cone. Allow excess chocolate to drip off. Place in freezer.
- Yield: 12 Chocolate Dipped No-Churn Ice Cream Cones
Tips/Notes
- You can use either refined or unrefined coconut oil. However, unrefined coconut oil will have a strong coconut taste whereas refined coconut oil has hardly any taste.
- For a sweeter ice cream, use up the whole can of sweetened condensed milk.
- It takes about 2 minutes in my microwave for the chocolate chips to melt on 50% power.
- I like to put the bowl and beaters in the freezer for about 5 minutes before whipping the cream. This helps to maintain a proper structure.
- If you don't have a pastry bag and/or piping tip, you can pipe the ice cream using a Ziploc bag with the corner snipped off. You could also scoop the ice cream into the cones.
Nancy lewis says
Terry wants to know why you didn’t invite him over to taste. Am going to make these in the next couple of days and will post my comment. Although, I have never made any of your recipes that weren’t delicious!!
Chula King says
These are one of Chris' favorite after dinner snacks. It's amazing how easy the no-churn ice cream is to make. It's just like soft-serve ice cream making the piping into the cones super easy! Hope they turn out for you.
Chula
Susan Marie Cunningham says
Thanks Chula. I love the no-churn approach. Is the ice cream recipe similar to Haagendaazs Vanilla, which is my favorite. I can hardly wait to get the ingredients and jump on it! It looks like you have some other recipes on this site. I love ive cream. Suzie
Chula King says
Hi Suzie,
The no-churn approach is almost magic - the ice cream is velvety smooth and delicious!
Chula