Lately, Dot Cakes have taken social media by storm. However, after making two batches, I quickly discovered that the viral videos that are everywhere leave out some important details.
Here are the lessons I learned, the mistakes I made, and the final recipe for these beautiful, giftable Red, White, and Blue Dot Cakes, which were a huge hit with family and friends.
Jump to:
The Viral Dot Cake Trend
When I first saw Dot Cakes on social media, I wasn't sure they were worth the effort. The finished cakes looked acorable, but the videos made the process seem almost too easy. As it turned out, several details made the difference for me between frustration and success.
The first batch taught me a lot, and I almost decided to abandon the whole thing. However, I persevered and made a second batch, which burned out beautifully thanks to the lessons learned.
If you're thinking about making Dot Cakes, here's everything I wish I had known before I started.
What Are Dot Cakes?
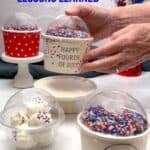
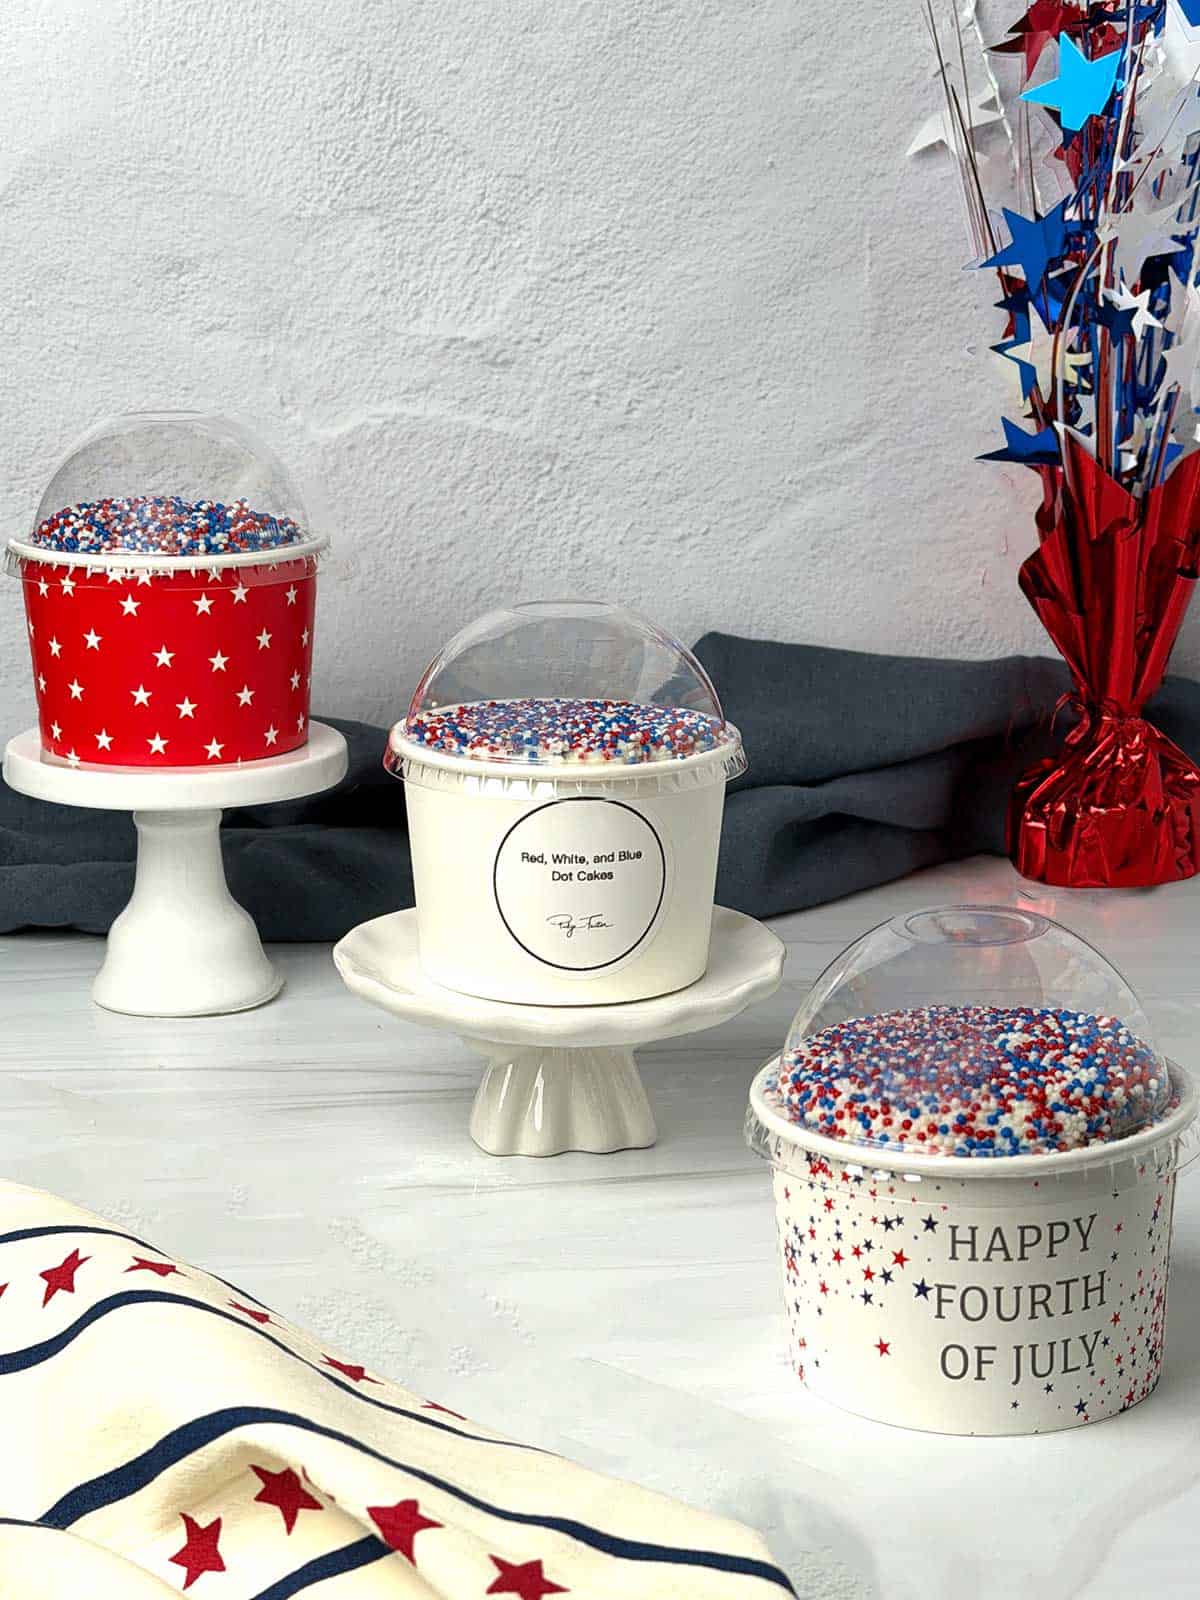
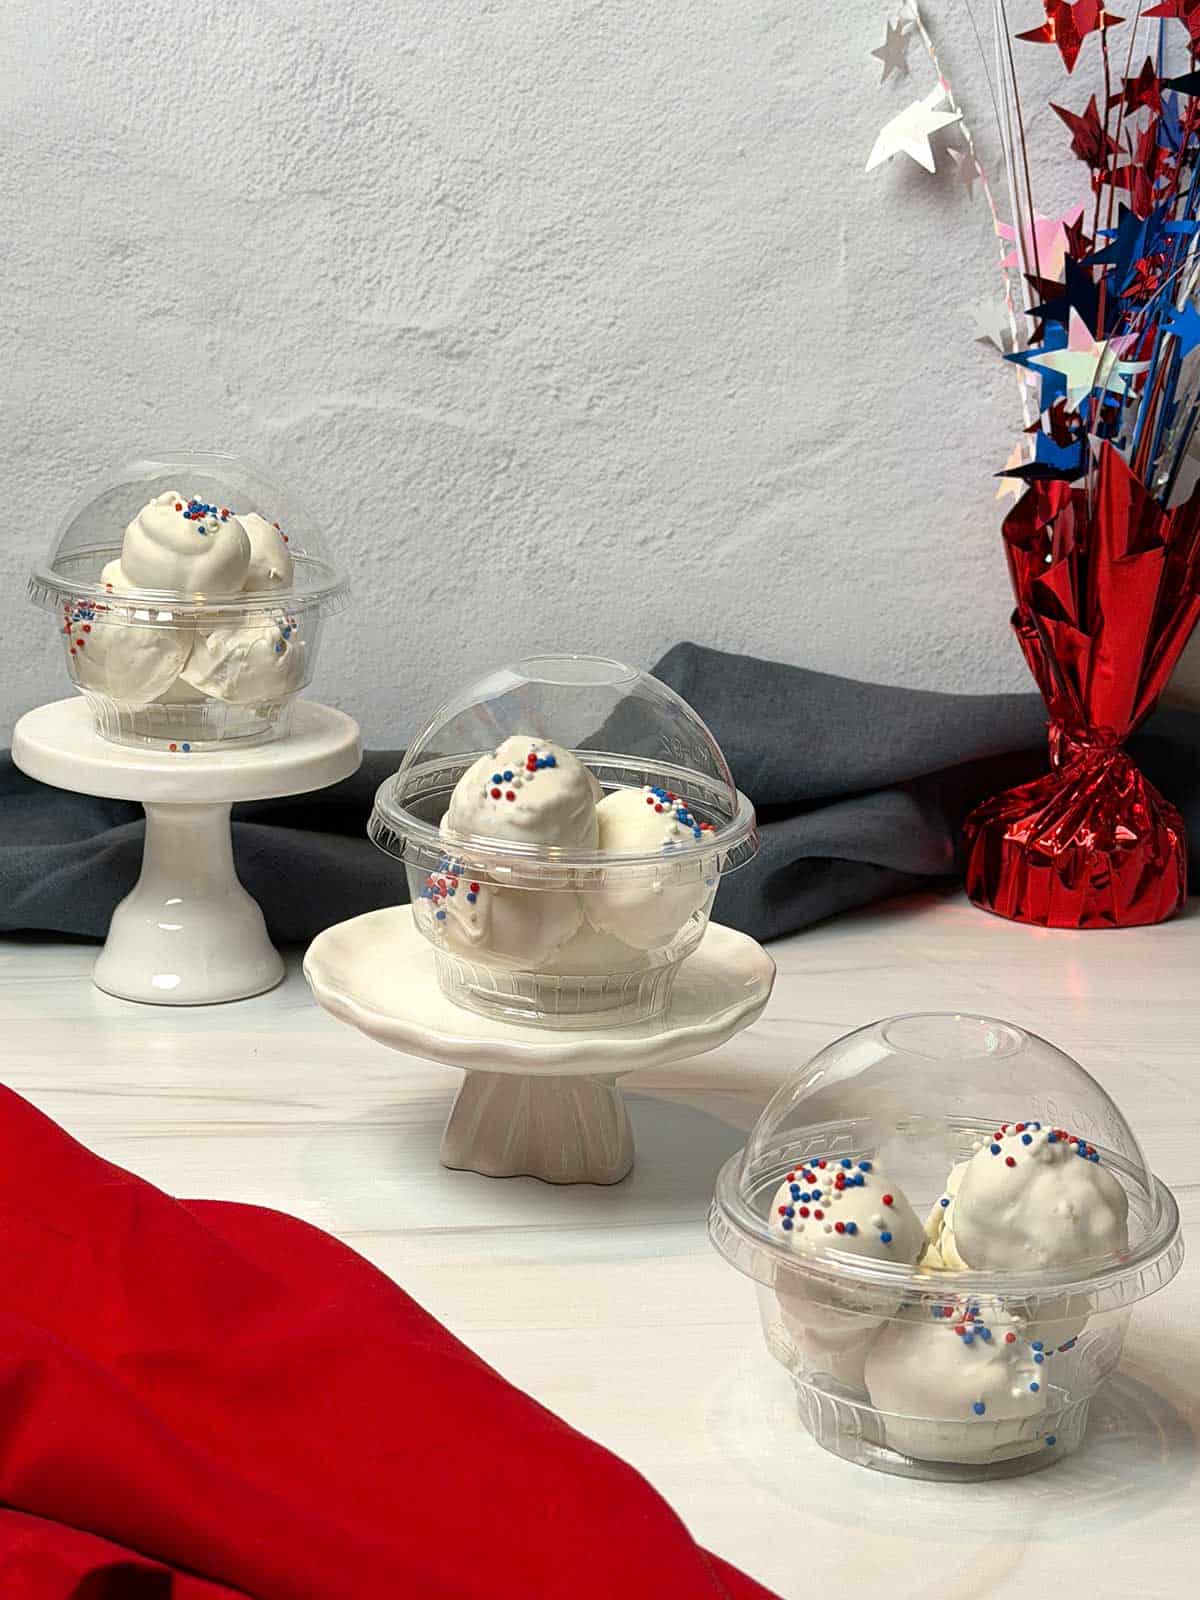
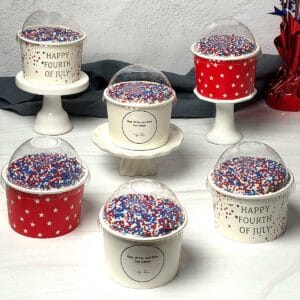
Dot Cakes are individual dessert cups made by layering cake rounds and buttercream frosting inside small containers. The tips are dipped into colorful nonpareils. This creates the signature "dot" appearance that has become incredibly popular on Facebook, TikTok, and Instagram.
What made Dot Cakes appealing to me are (1) properly packaged, they're easy to transport, and giftable; (2) they're perfect for parties, cookouts, and game day celebrations; (3) they're fun to customize for holidays and other celebrations.
What I Wish I knew Before Making Dot Cakes
Lesson 1: Use Two 9-inch Square Pans
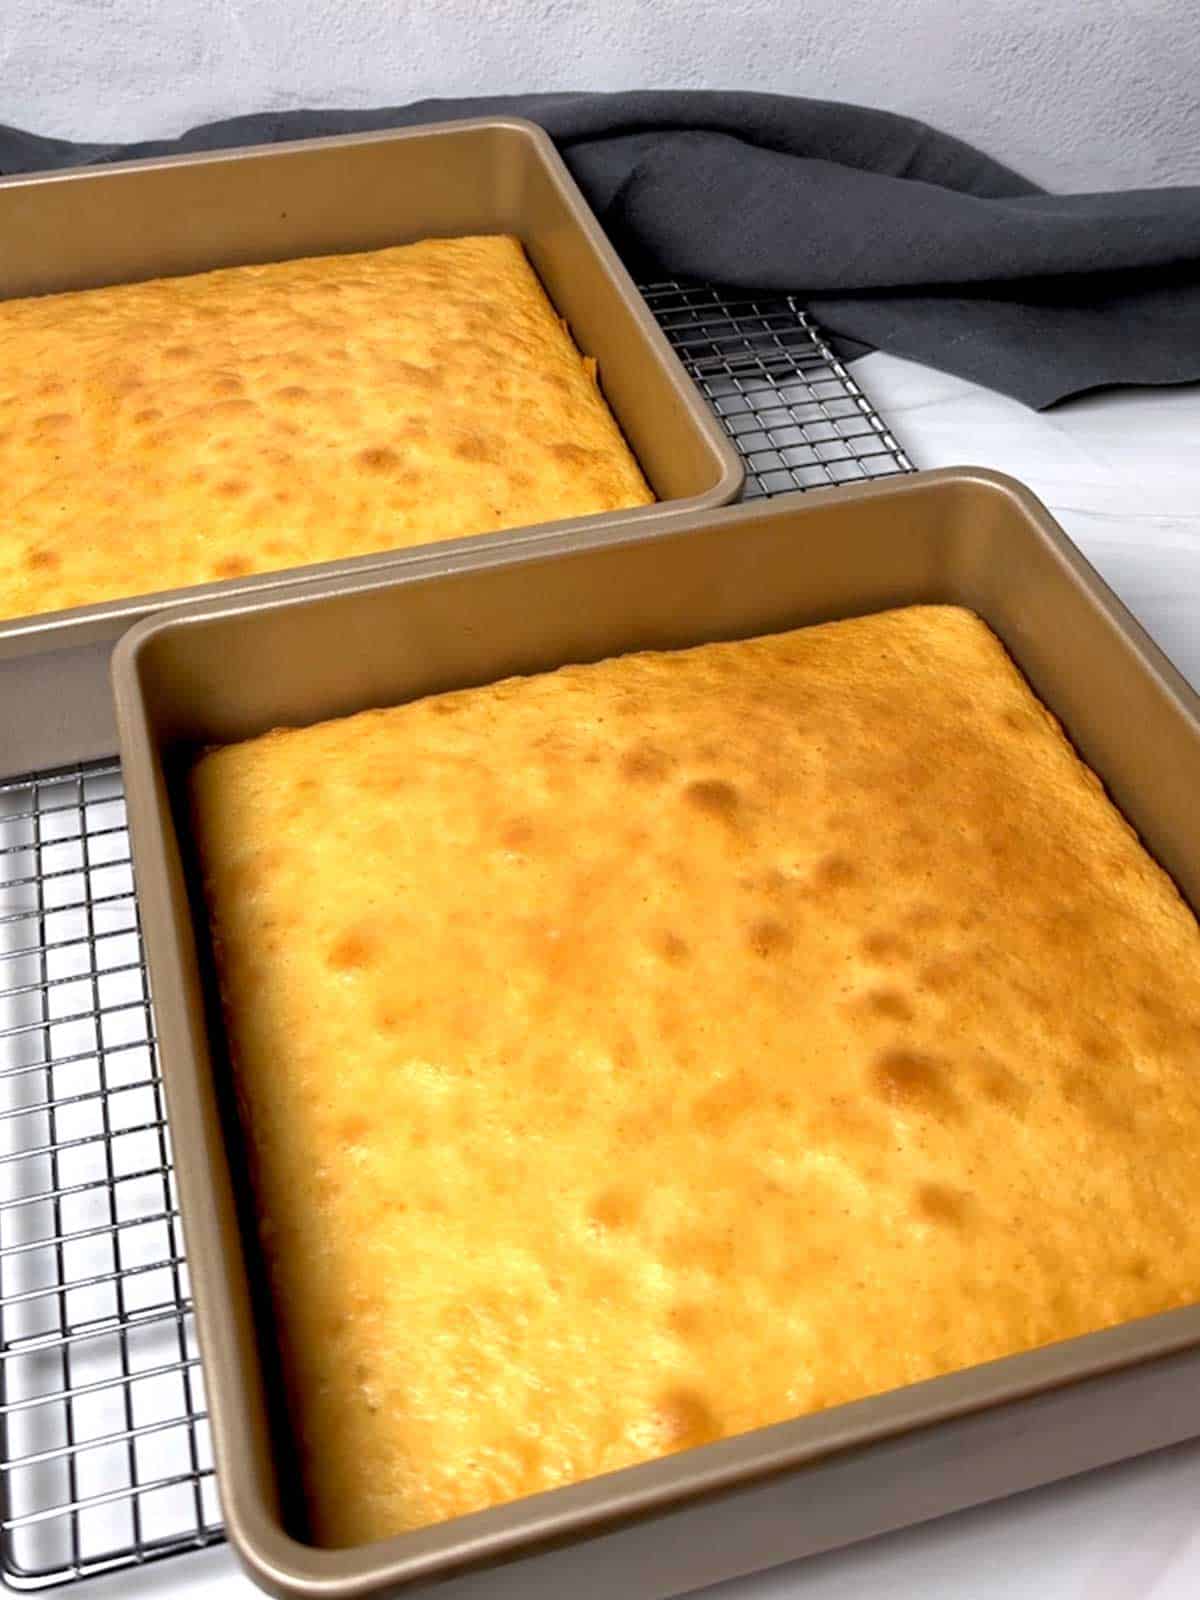
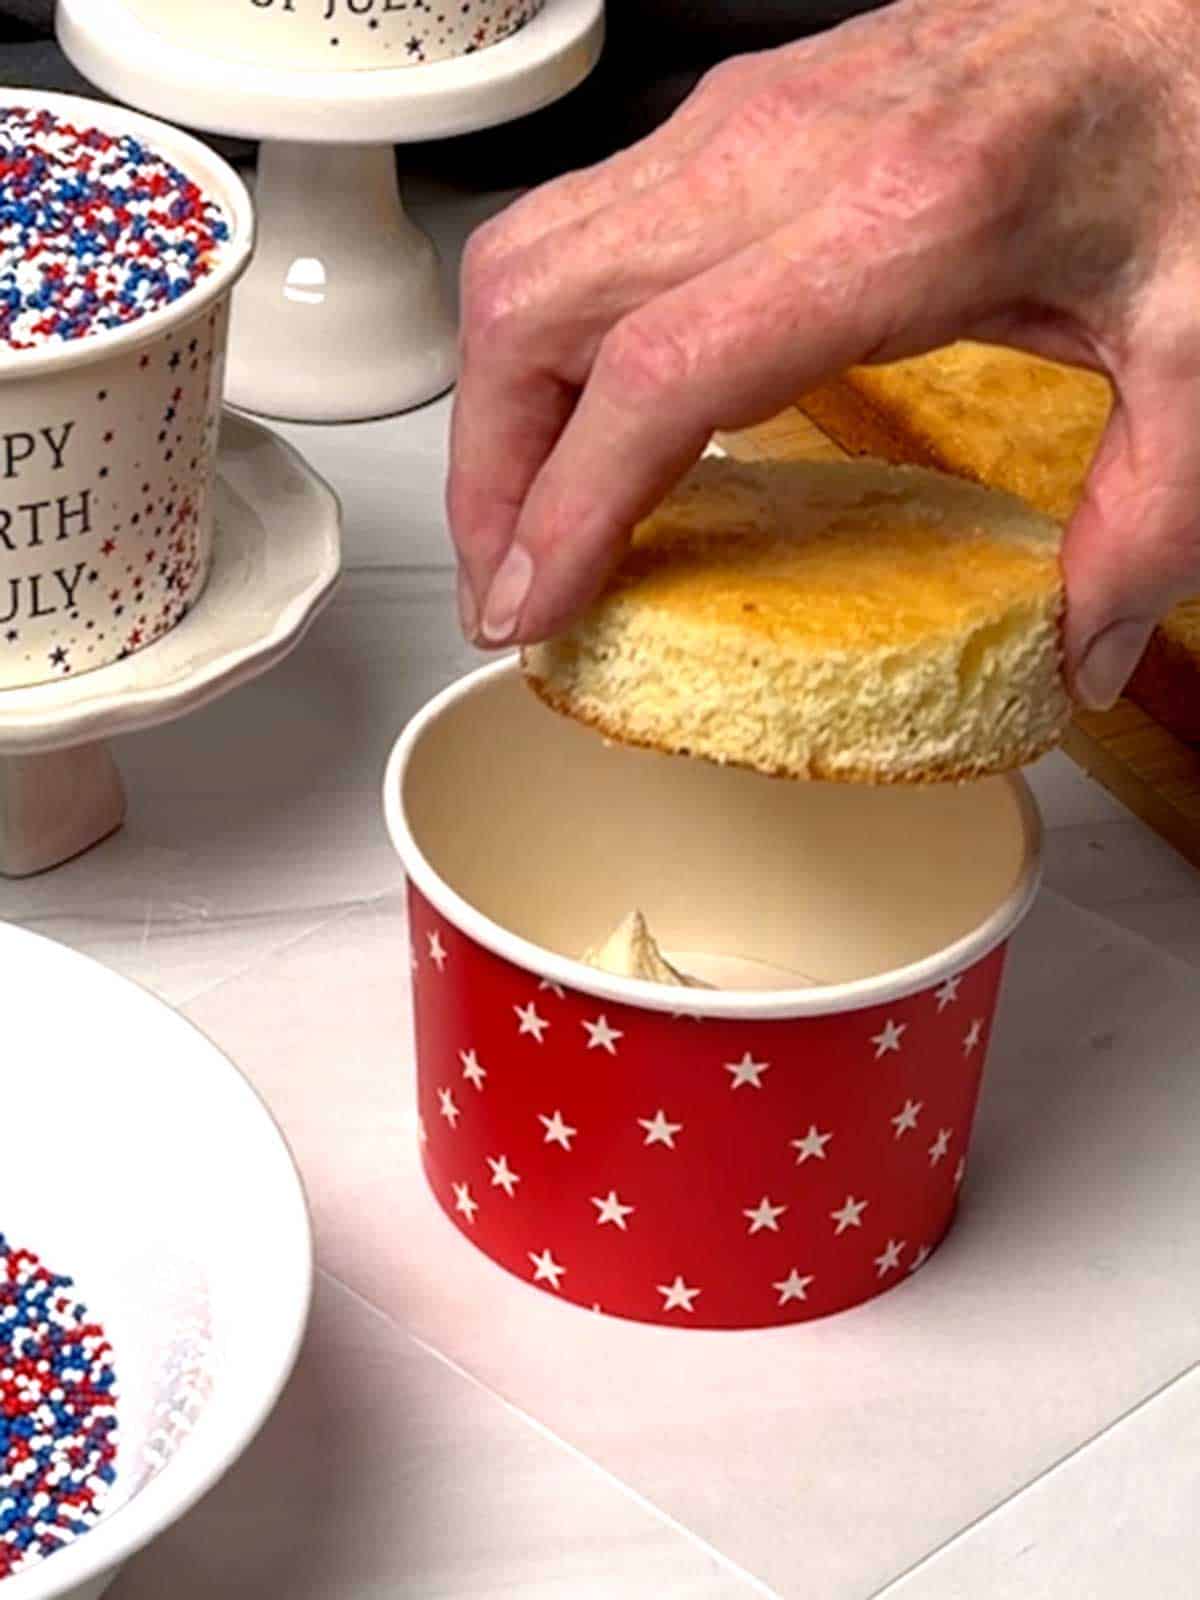
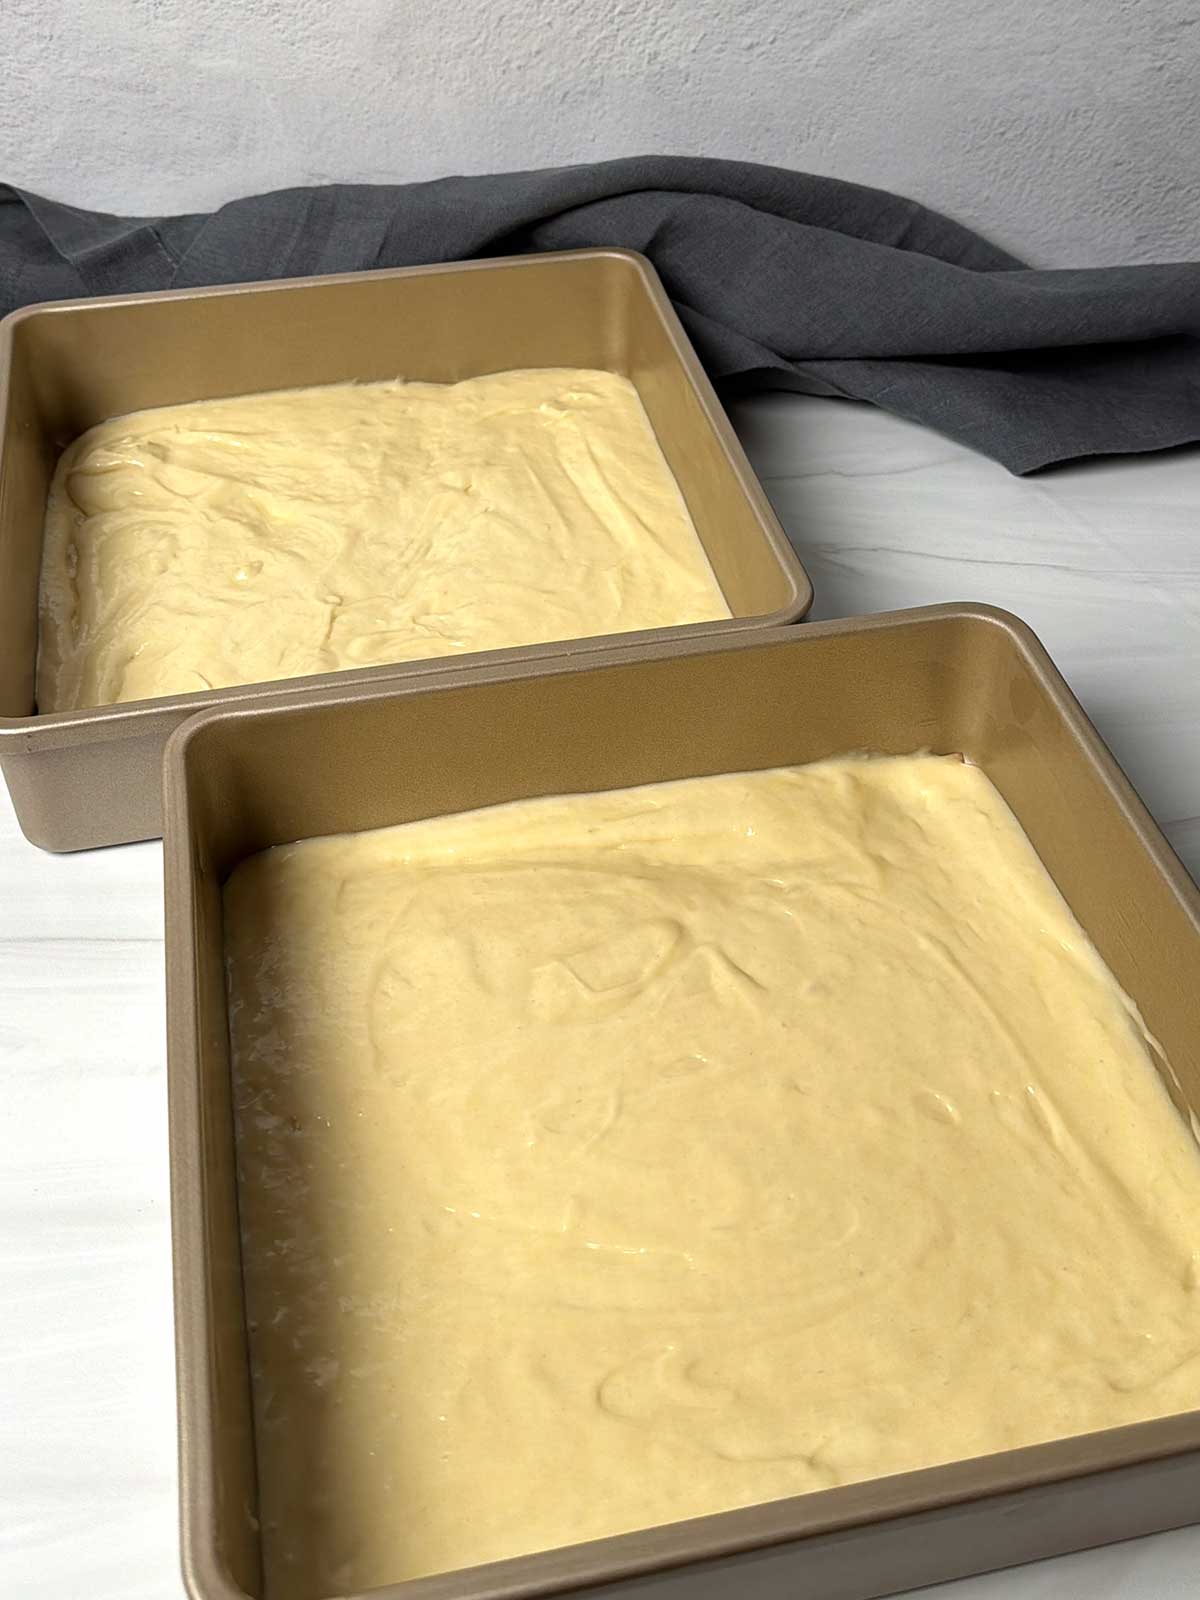
For my first batch, I baked the cake in a 9 x 13-inch pan, which seemed consistent with the videos on my social media feeds. However, the thickness of the cake meant that either one cake round was too short, or two cake rounds stacked together were too tall.
For the second batch, I baked the cake in two 9-inch cake pans. The layers were approximately 1-inch thick and stacked perfectly inside my cups!
Winner: Two 9-inch square cake pans.
Lesson 2: Skip the Nonpareils in the Cake Batter
Since I was focused on a red, white, and blue theme for the 4th of July, I decided to add red, white, and blue nonpareils to the cake batter. This was a huge mistake for two reasons.
First, a lot of the nonpareils sank to the bottom during baking. Second, and more importantly, when I later tried to turn the scraps into cake balls, the mixture became an unappetizing blue-gray color.
Winner: Plain white or yellow cake.
Lesson 3: Double the Buttercream
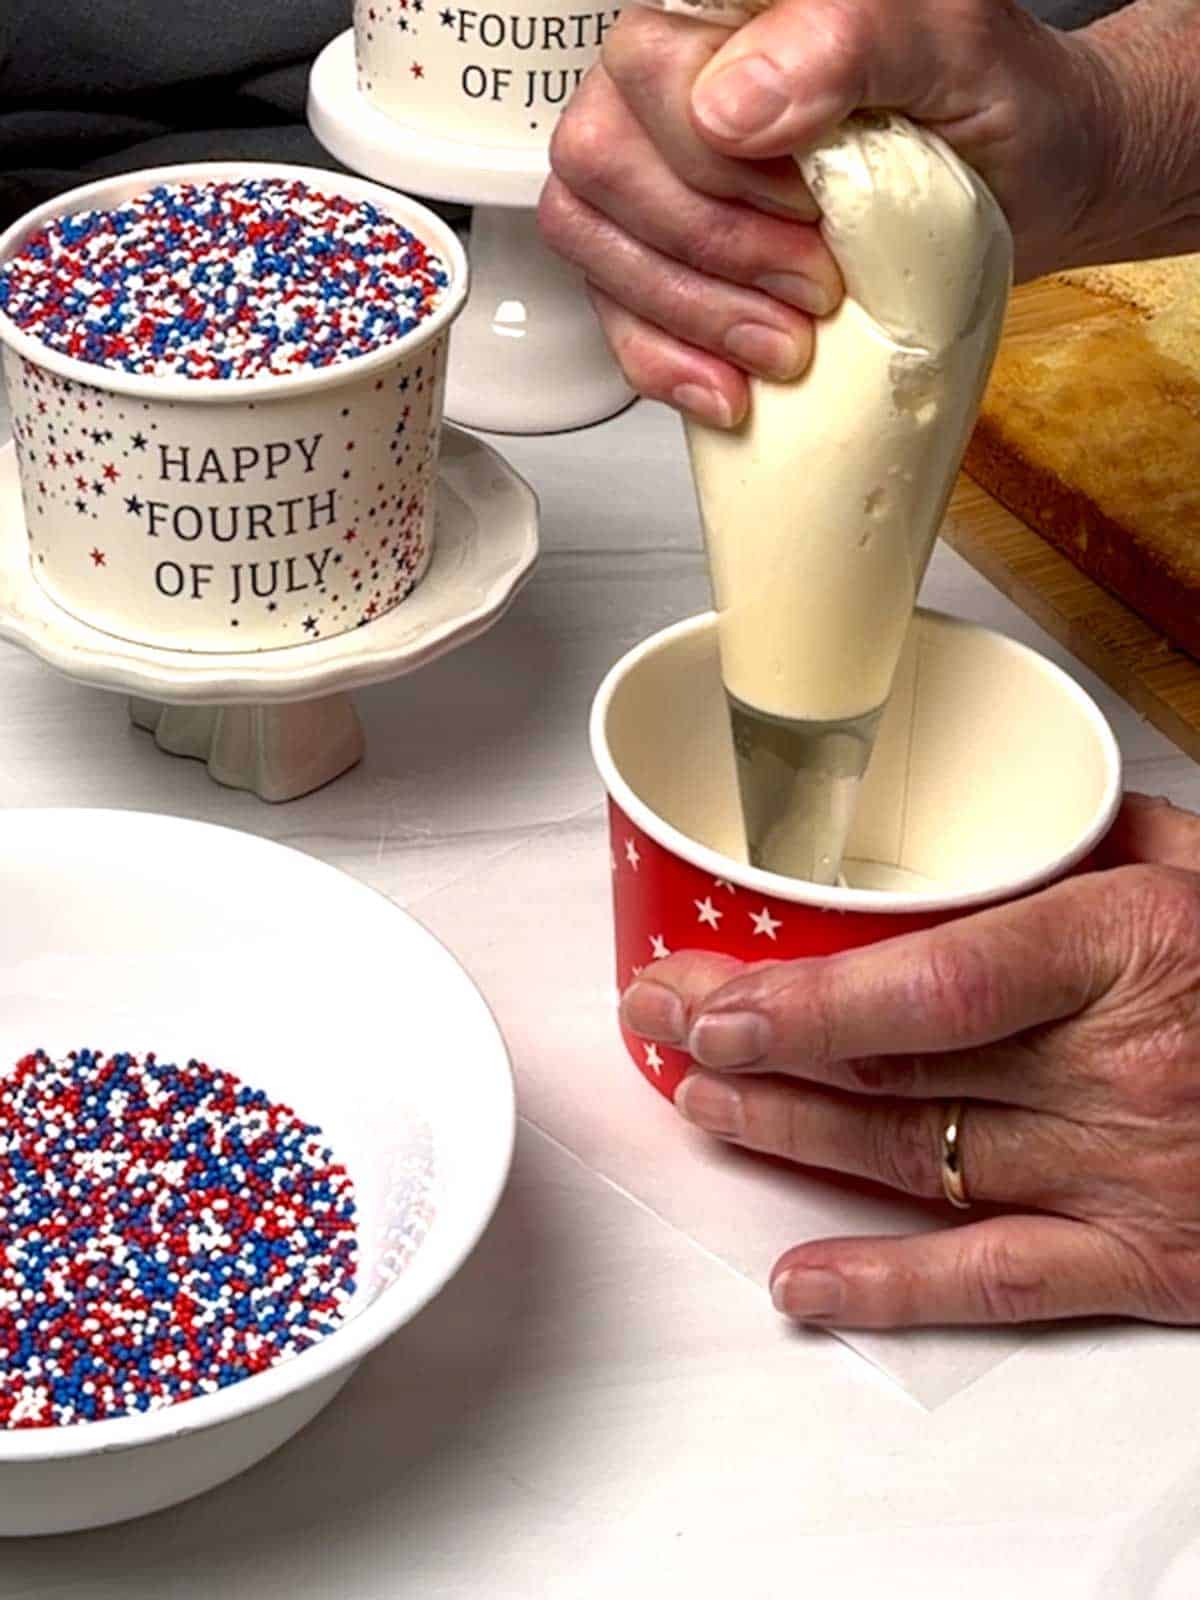
This was my biggest surprise. Dot Cakes require far more frosting than they appear to in the viral videos. You need frosting to anchor the cakes, fill the layers, and cover the tops. During my first batch, I actually ran out.
Winner: Double the frosting recipe.
Lesson 4: Add Heavy Cream and Use a Large Round Piping Tip
My first batch of buttercream was good, but when I tried to pipe it, I discovered that it was a bit too thick. For the second batch, I added 1 ½ tablespoons of heavy cream to the frosting, and the difference was dramatic. The frosting became easier to pipe, spread, smooth, and dip.
In addition, I used a #12 Wilton round tip for the first batch, which proved too small. For the second batch, I used an Ateco 806 round tip (½-inch opening). This meant less spreading, less mess, and much cleaner layers.
Winners: 1 ½ tablespoons of heavy cream to the frosting and a large round piping tip.
Lesson 5: Anchor the Cake Layers
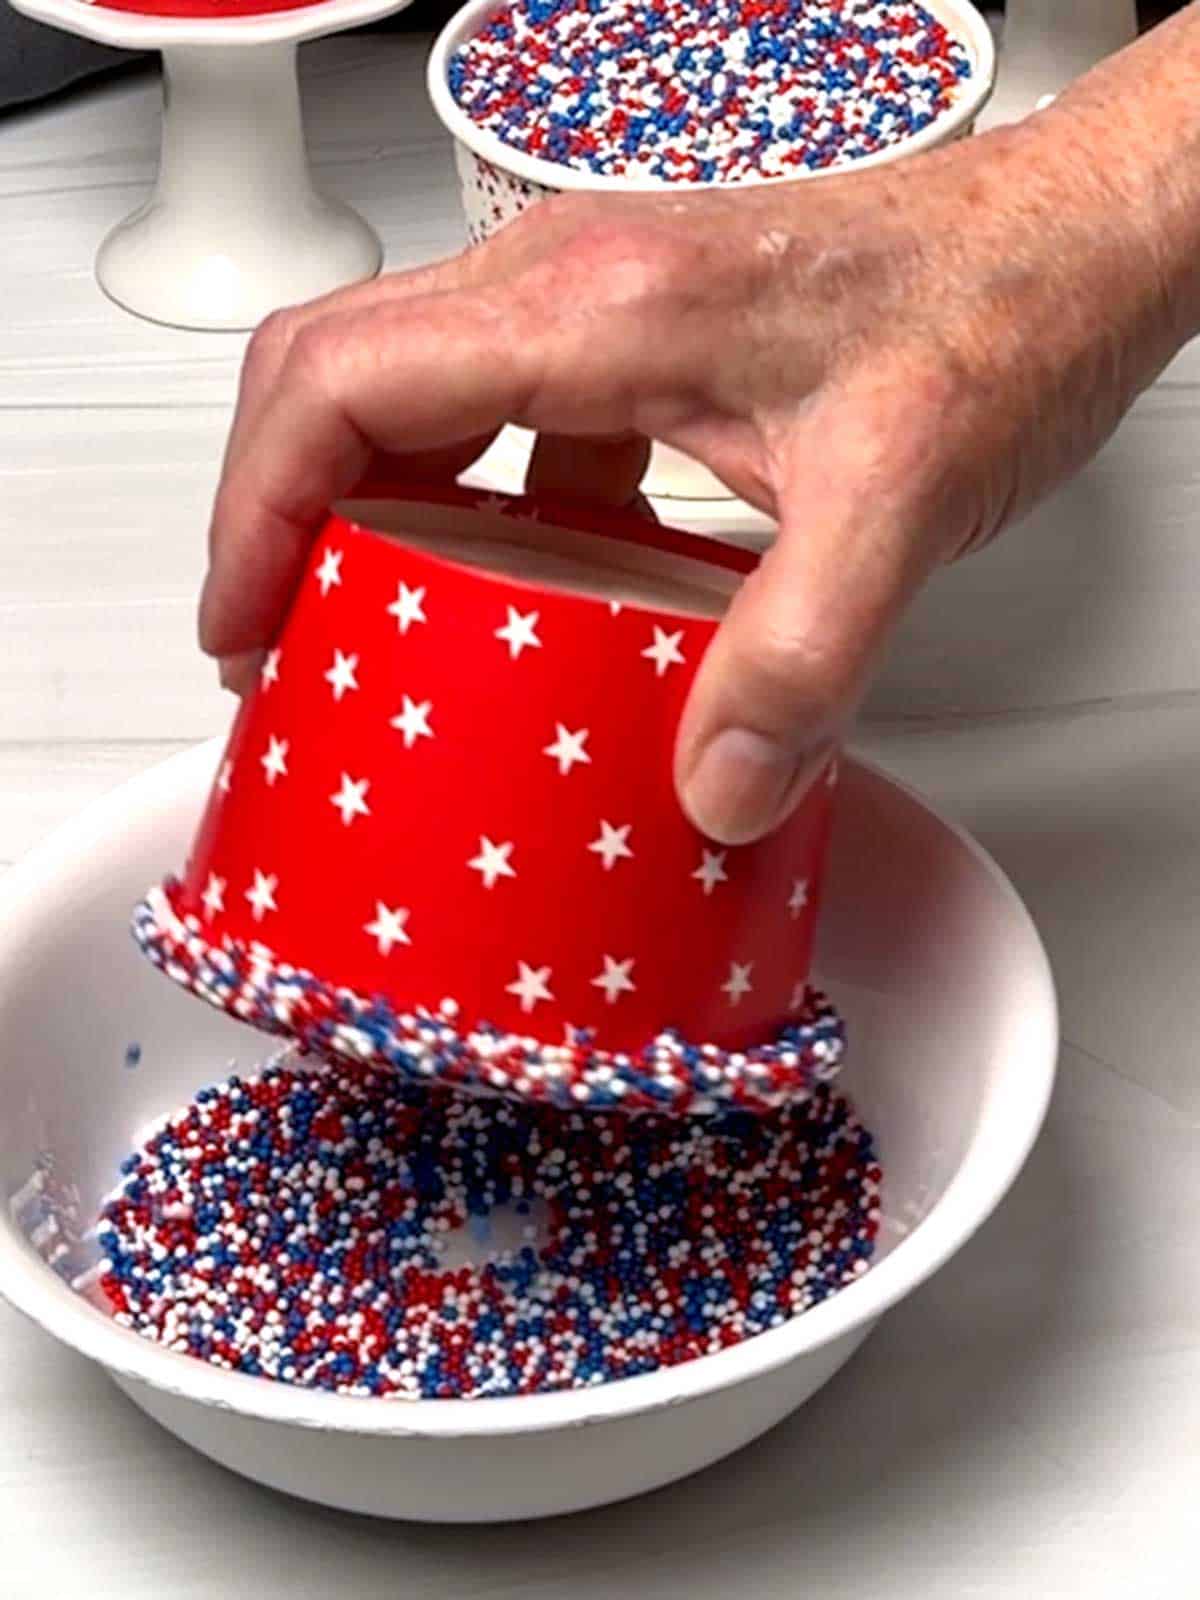
Before adding the first cake round, pipe a fair amount of frosting into the bottom of the container. This creates an anchor that prevents the cakes from slipping out when you invert them into the nonpareils. I learned this the hard way!
Winner: Always anchor the cake in the container.
Lesson 6: Refrigerate the Cake Before Cutting
Cold cake cuts cleaner, results in fewer crumbs, and holds its shape better than room temperature cake.
I wrapped the cakes in plastic wrap, and refrigerated them overnight before cutting the rounds.
Winner: Chill first.
Lesson 7: Use a Proper Cutter
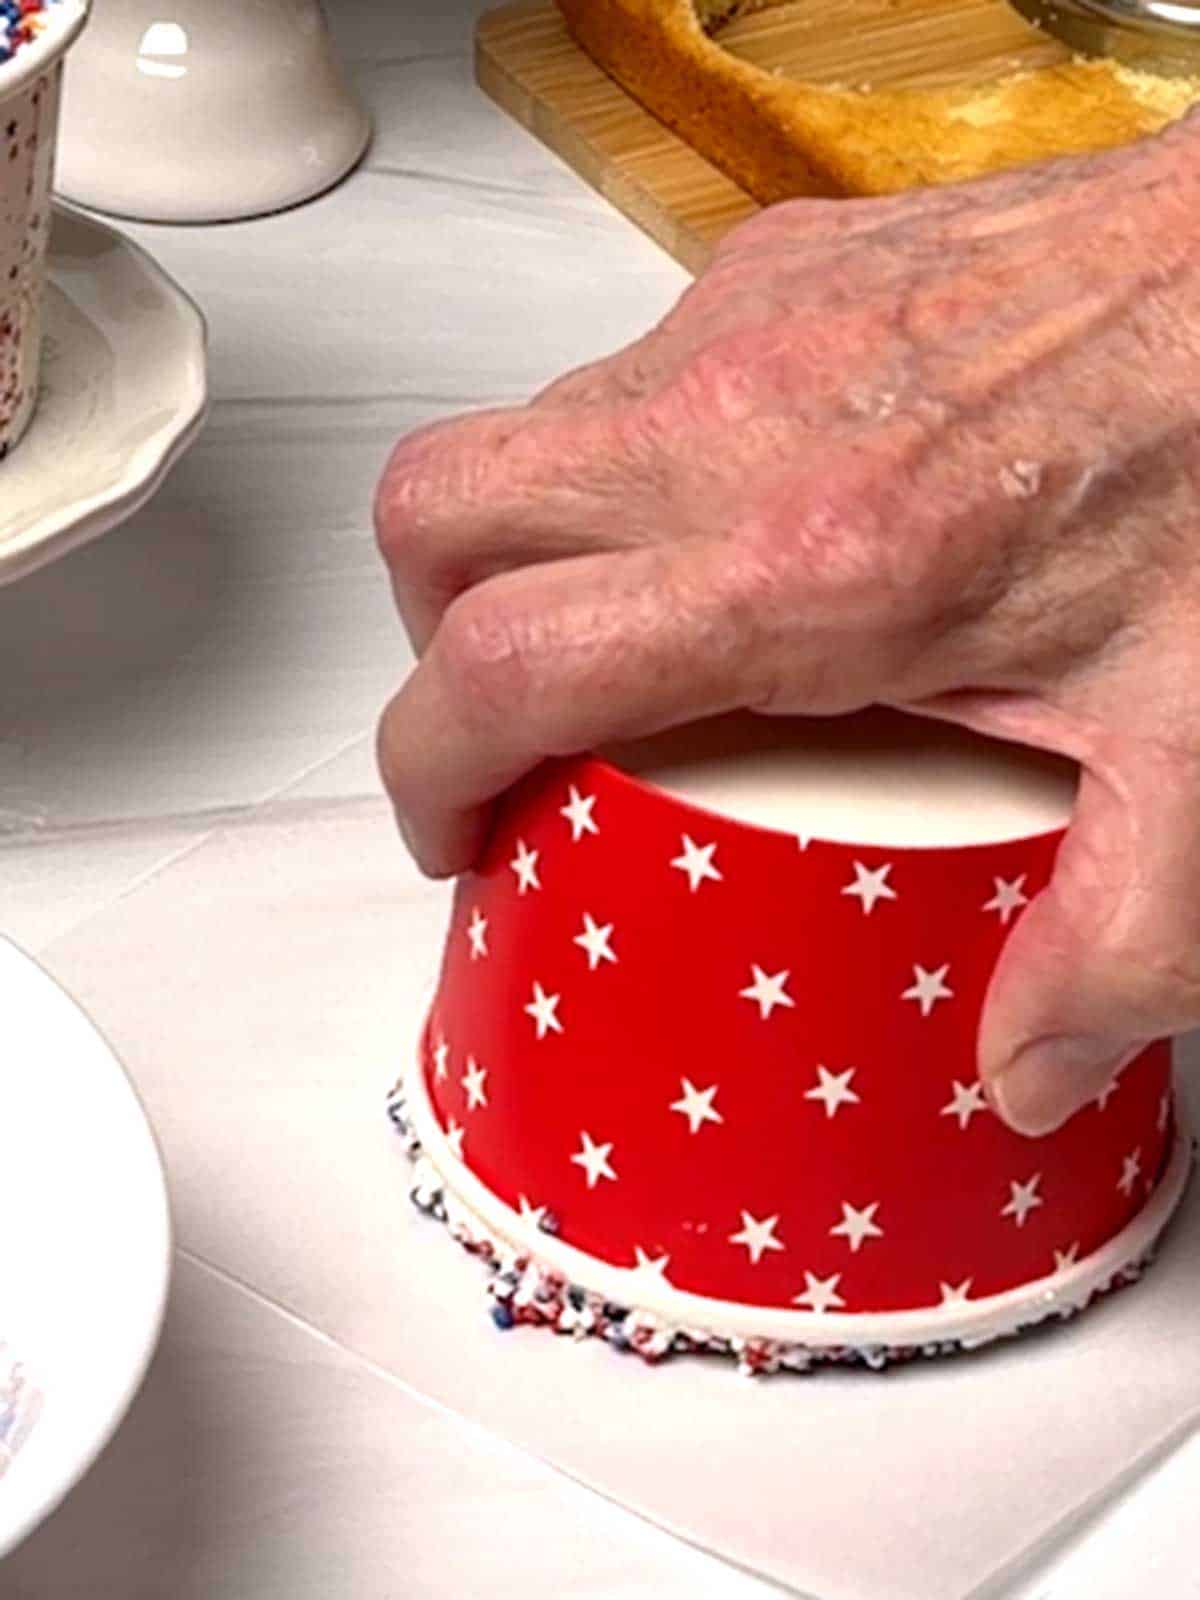
In many of the videos I watched on social media, the individual used what appeared to be an 8-ounce mason jar to cut the cake rounds. While this worked, the cake rounds were ragged and full of crumbs.
Therefore, don't use the cup itself as a cutter. A proper biscuit or cookie cutter creates much cleaner edges. For my cups, a 2 ¾-inch cutter fit perfectly in the white cups and a 3-inch cutter fit the decorated cups perfectly.
Winner: Use a proper biscuit or cookie cutter that fits inside your container.
Lesson 8: Nonpareils Go Everywhere
Accept this now! If you're like I am, you'll find them on the counter, on the floor, on your sleeves, in places that defy explanation, etc.
The Winner: The messy nonpareils are worth it.
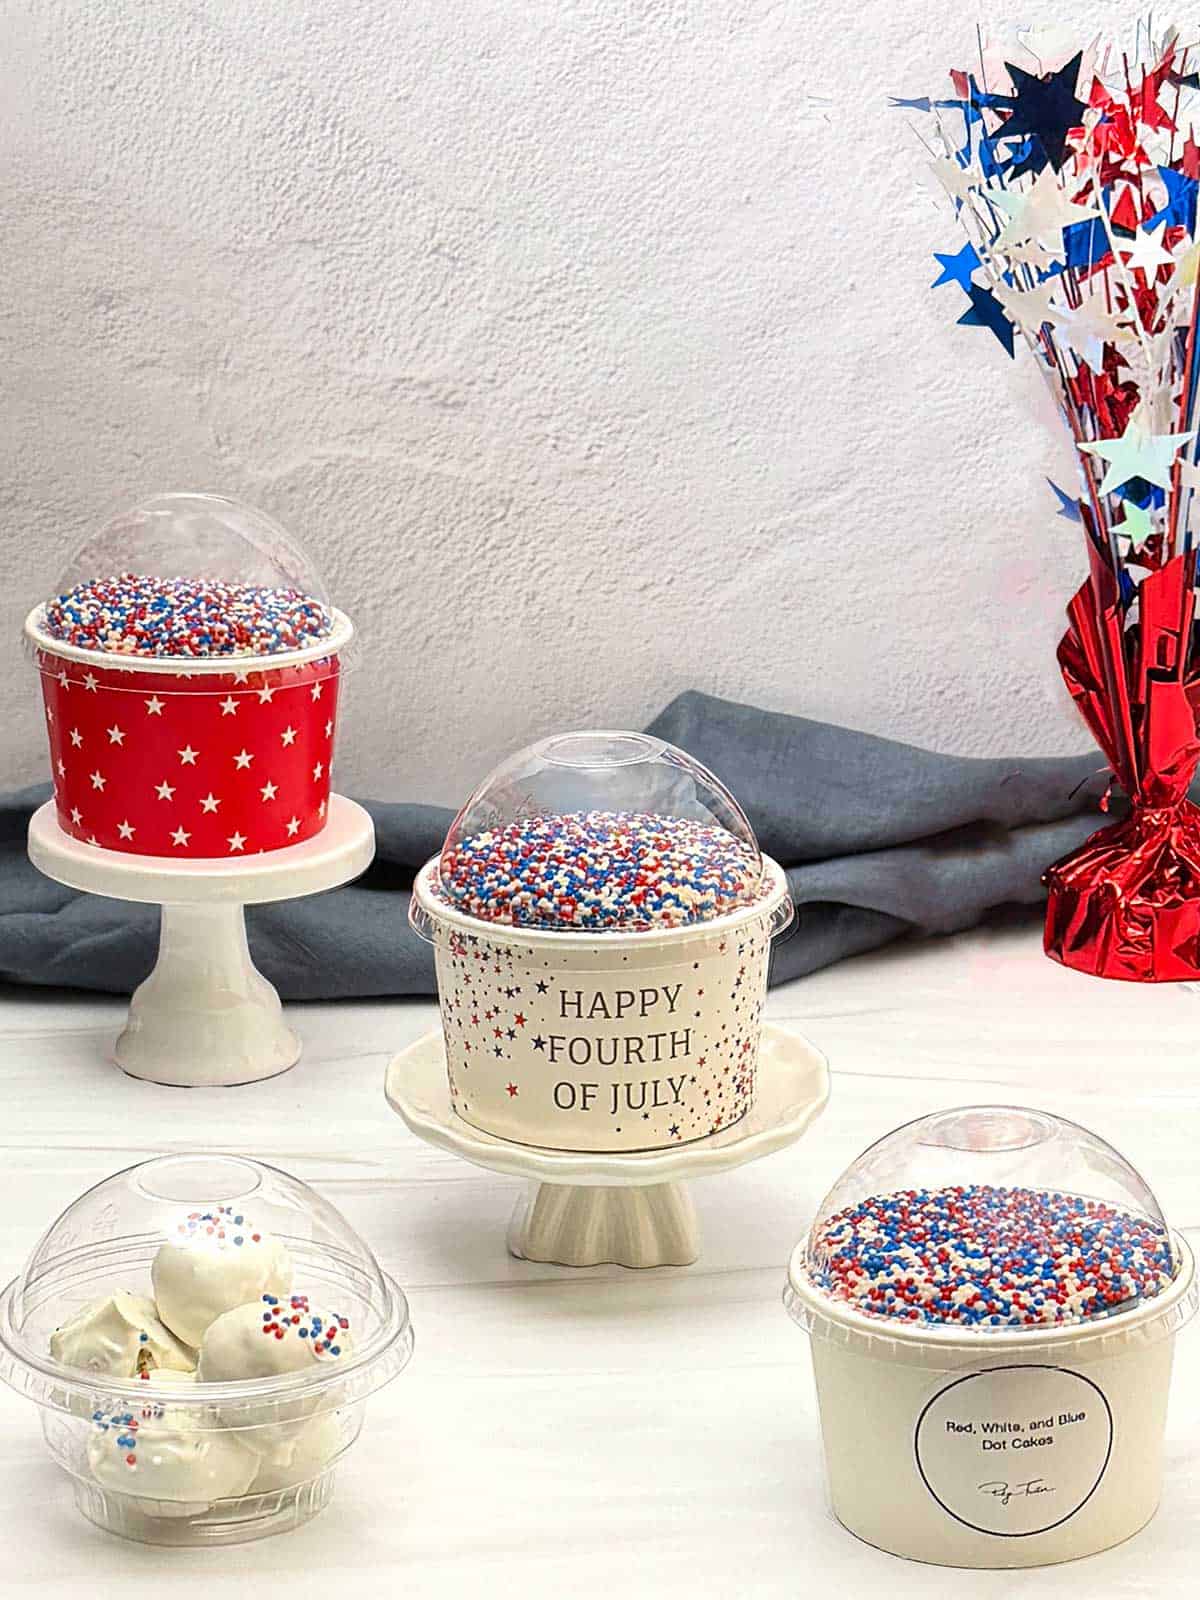
Lesson 9: Think About Packaging
For me, this may be the most important lesson. The viral videos stop when the Dot Cakes are assembled, and a spoon is drawn across the top. but what happens next?
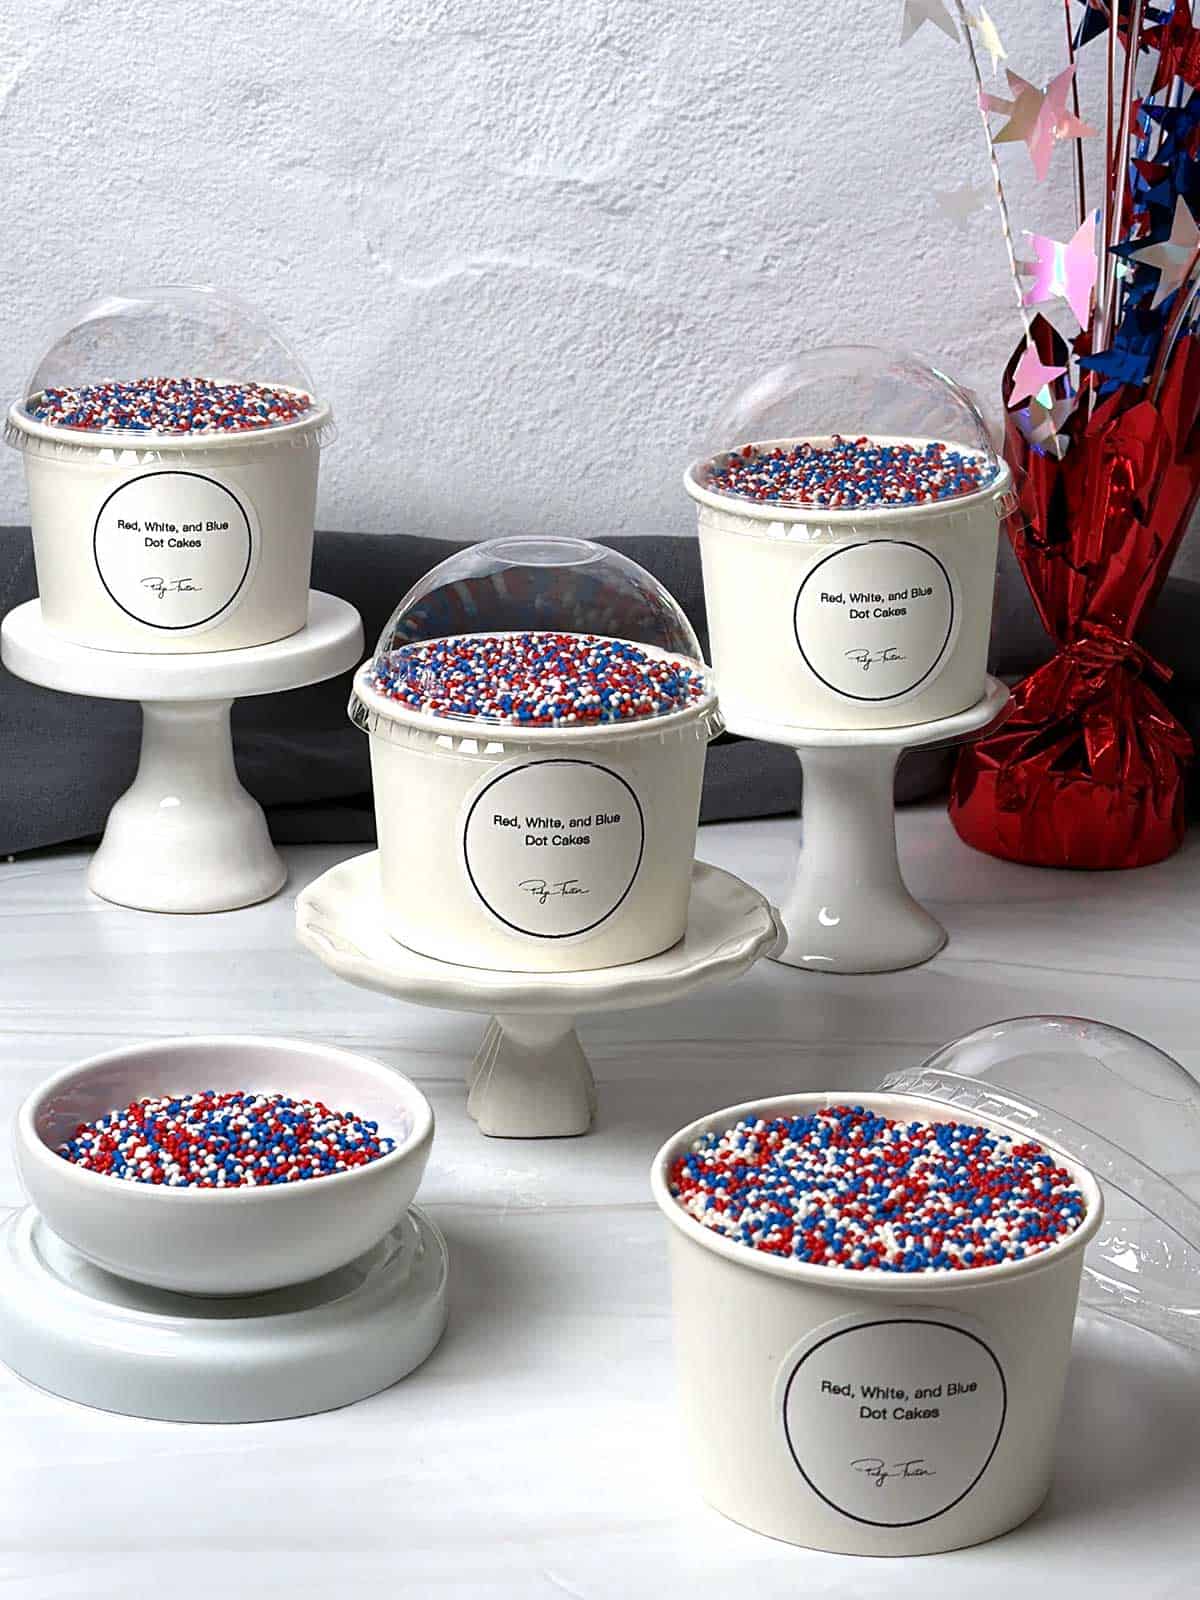
How will you store, transport, and gift them? For me, the answer was dome lids fit on decorative cups, and custom labels on the plain cups.
The packaging elevated the finished product from a viral dessert to a bakery-quality gift.
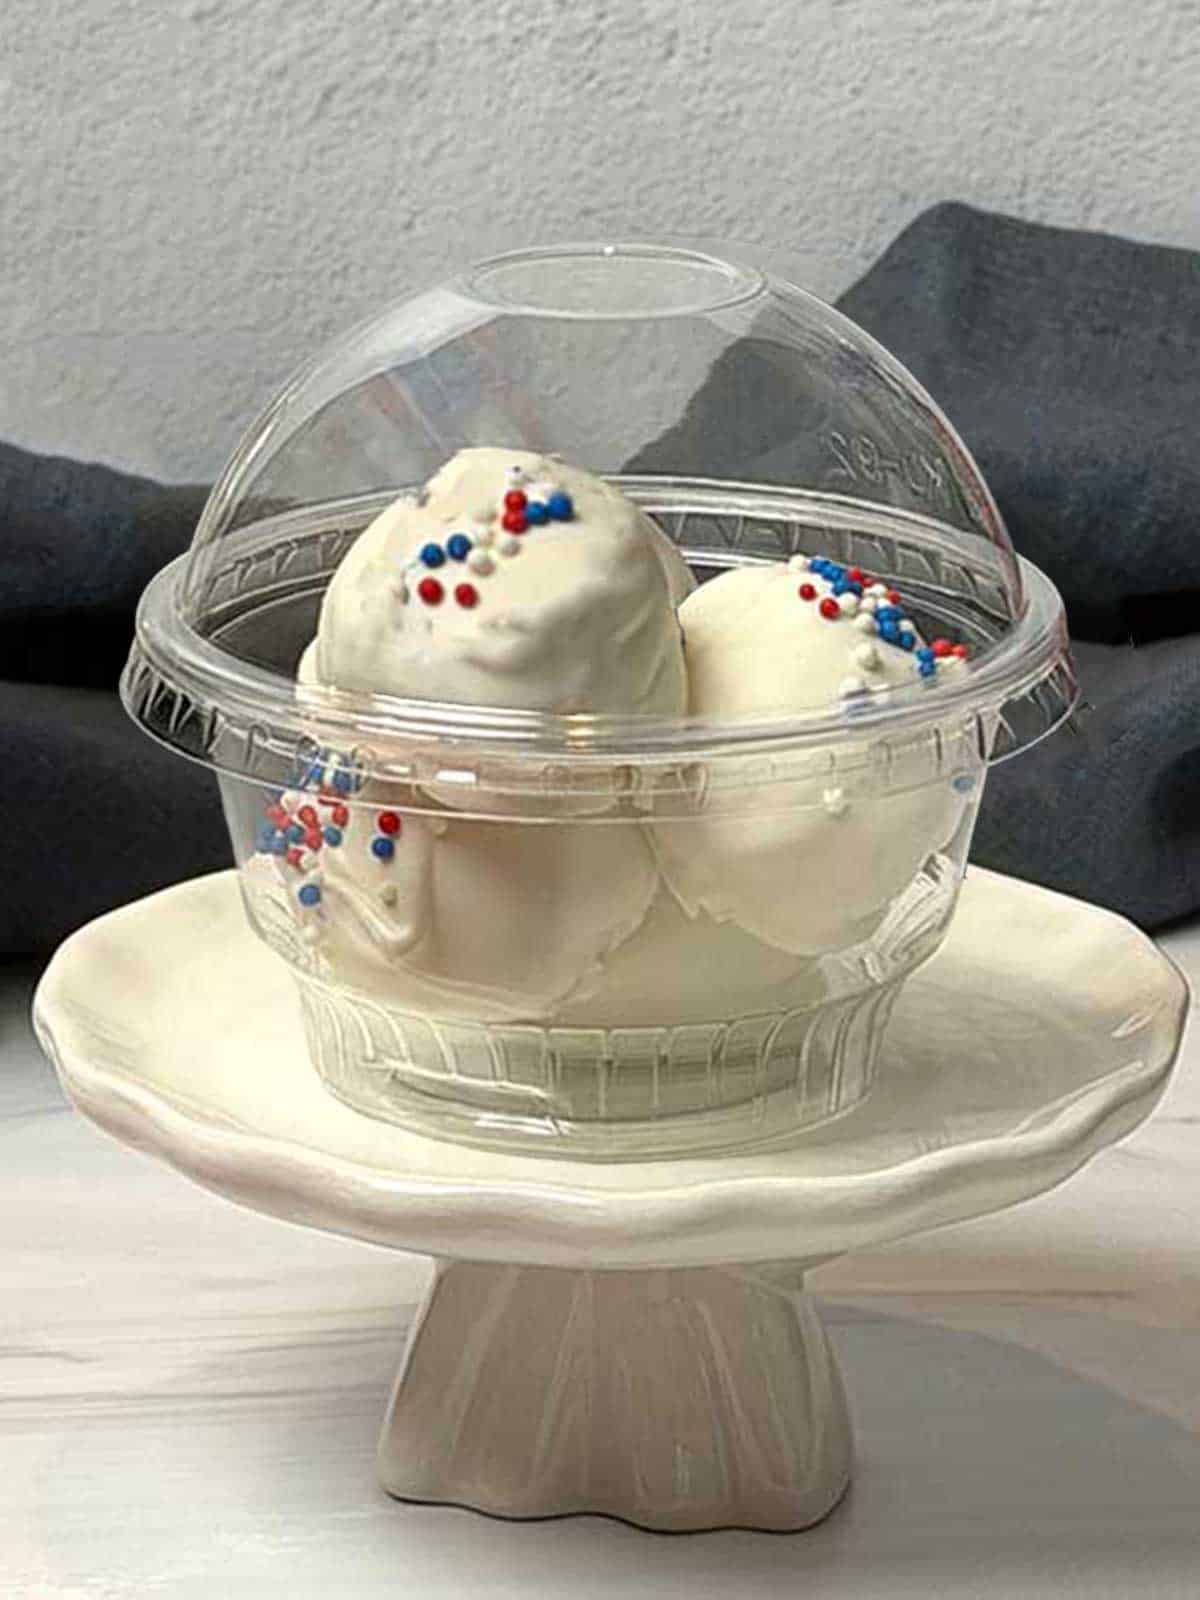
Lesson 10: What About Scraps?
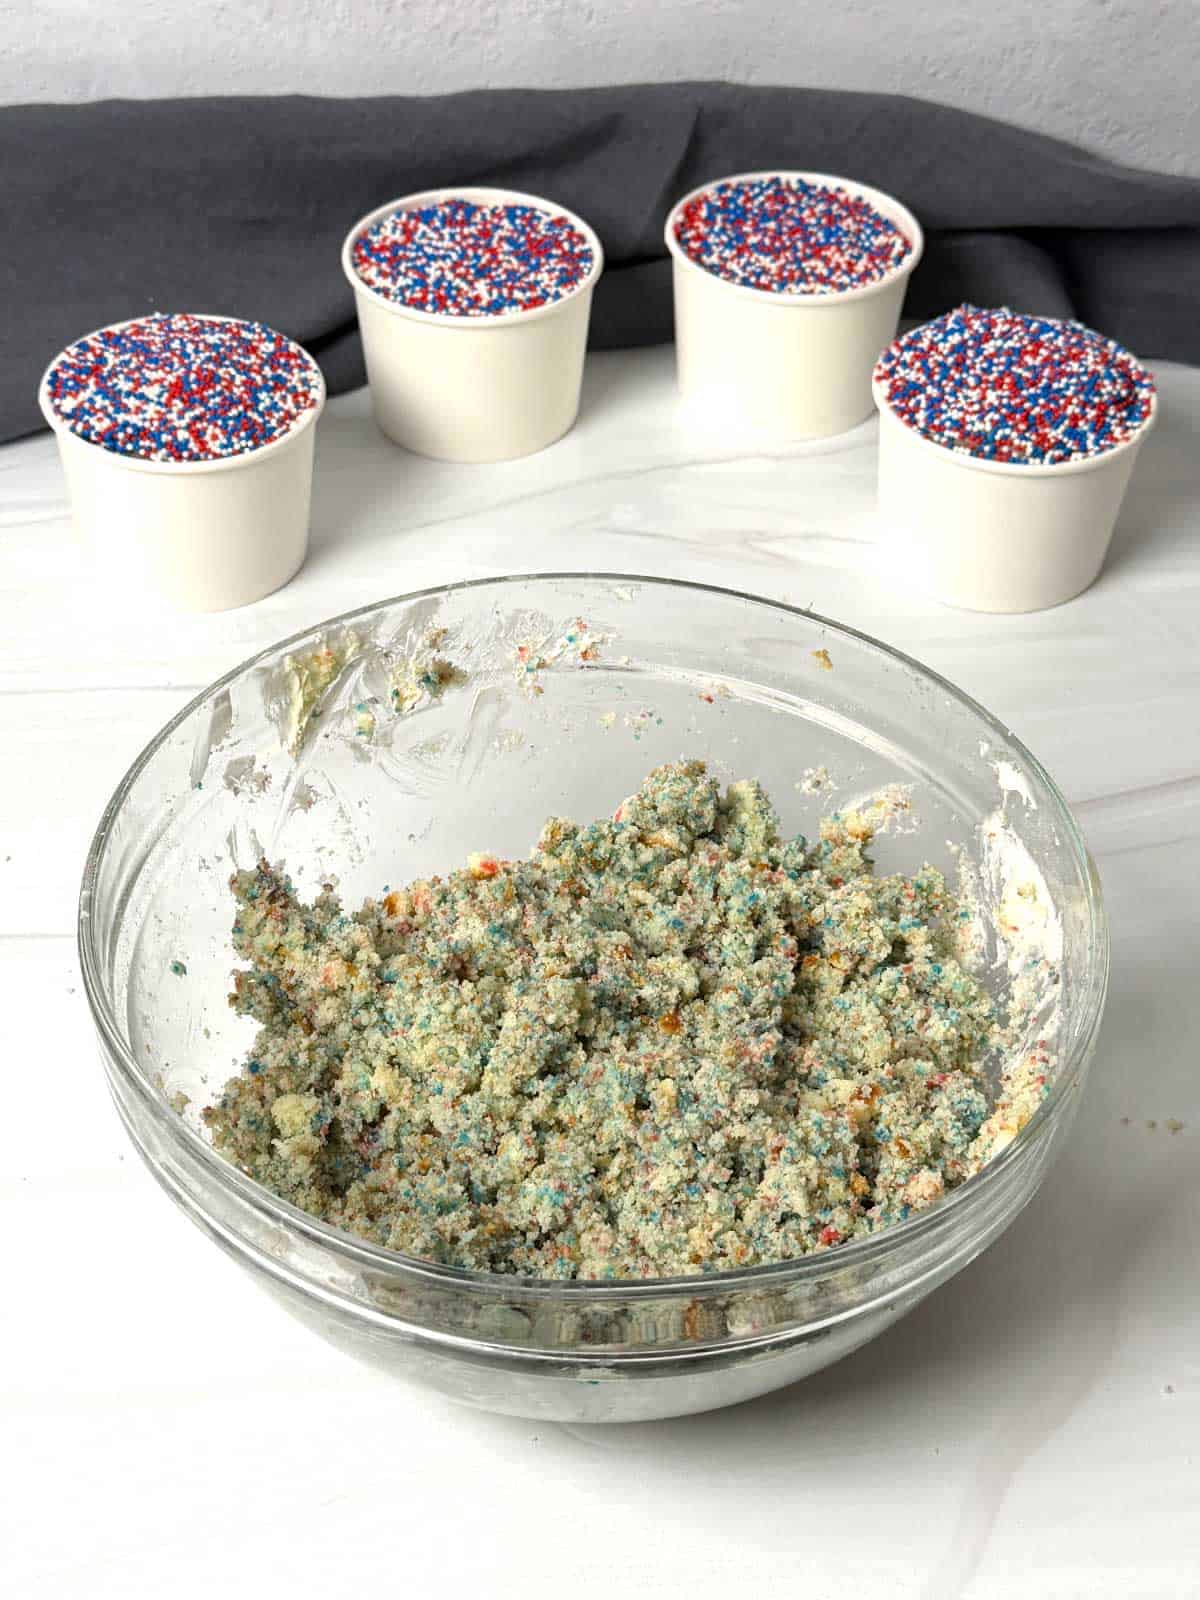
Be prepared for a fair amount of cake scraps. You can toss the scraps or turn them into attractive cake balls or cake pops.
I mixed the scraps with the leftover frosting, rolled them into 1-inch balls, dipped them in melted white candy melts, and sprinkled them with matching nonpareils.
Because I'm all about packaging, I stored them in small clear dome cups - another giftable item!
Lesson 11: Start With a Prototype
Before assembling the entire batch, make one complete Dot Cake. This single step will tell you whether the
- cake thickness is correct,
- frosting consistency is right,
- packaging works, and
- proportions look balanced.
My first batch was essentially a prototype and I learned what worked and more importantly what didn't work from that first batch.
The second batch benefited from every lesson learned.
Final Dot Cakes From Lessons Learned
The Cakes
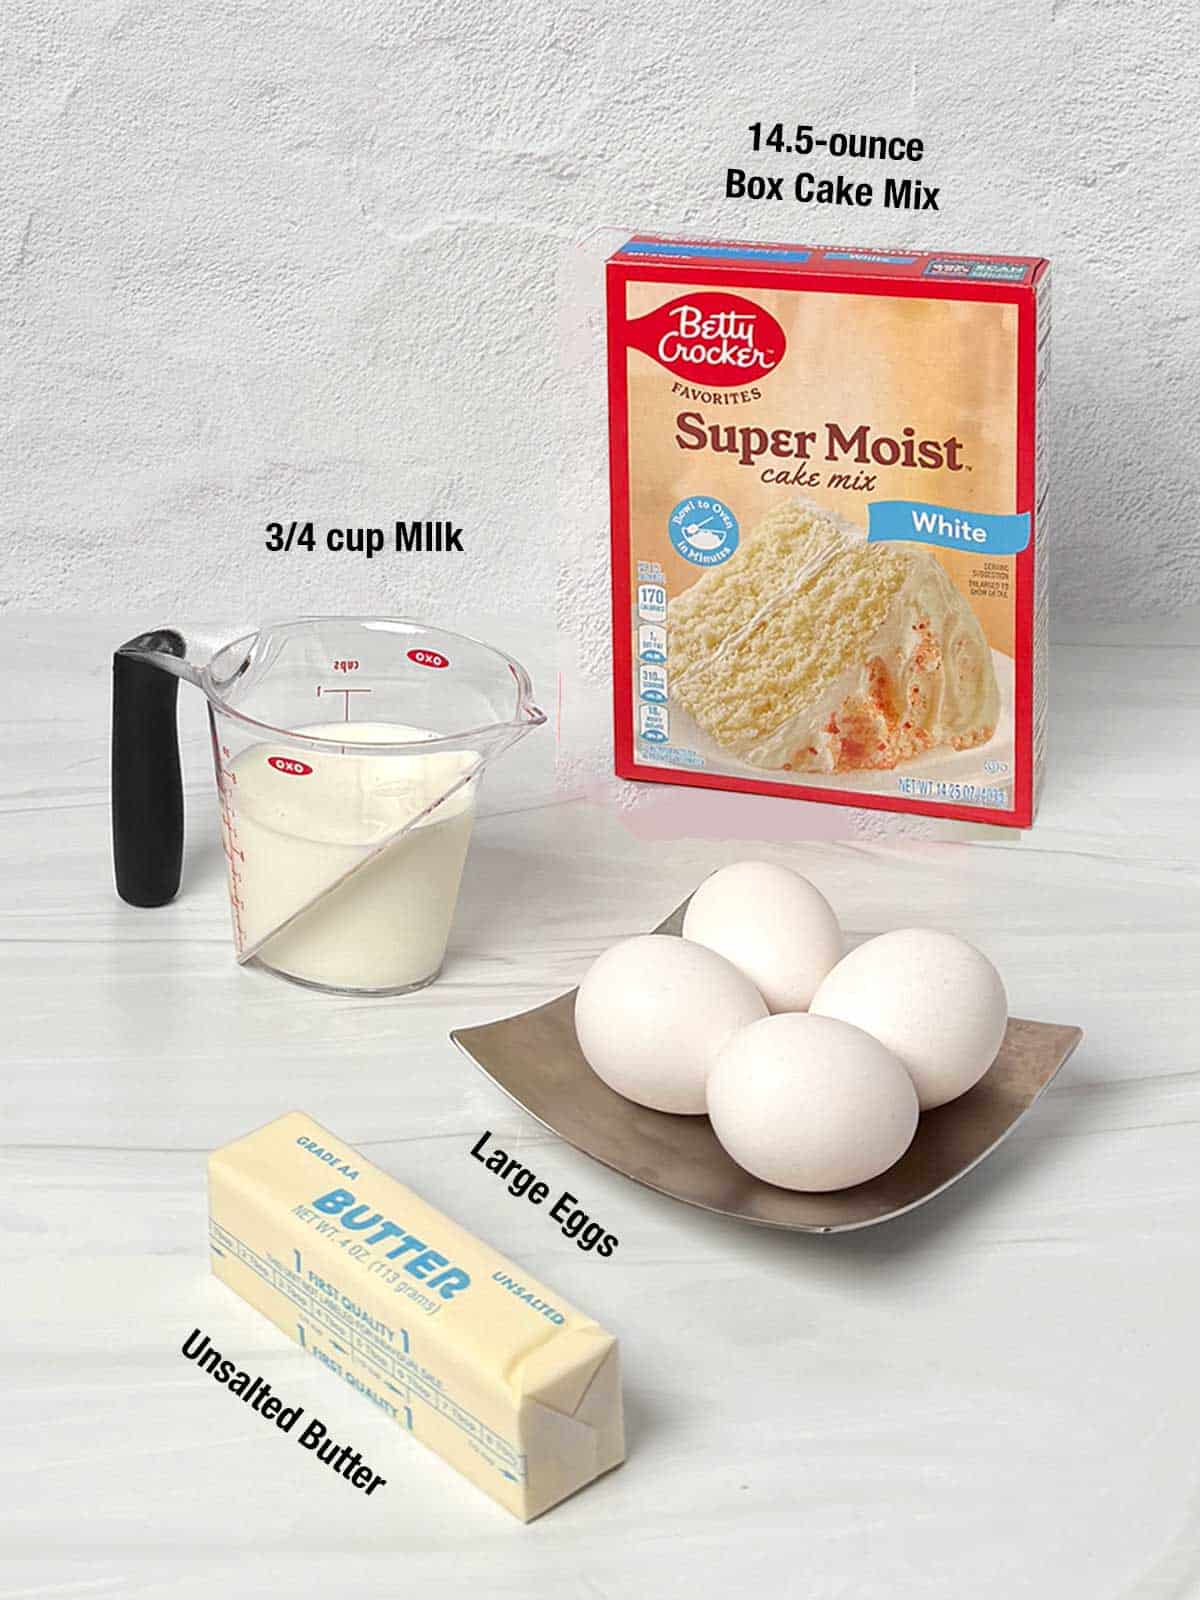
- Here's what I used: To elevate the cake's quality, I substituted milk for water, melted butter for oil, and added an extra egg. This made all the difference in the world.
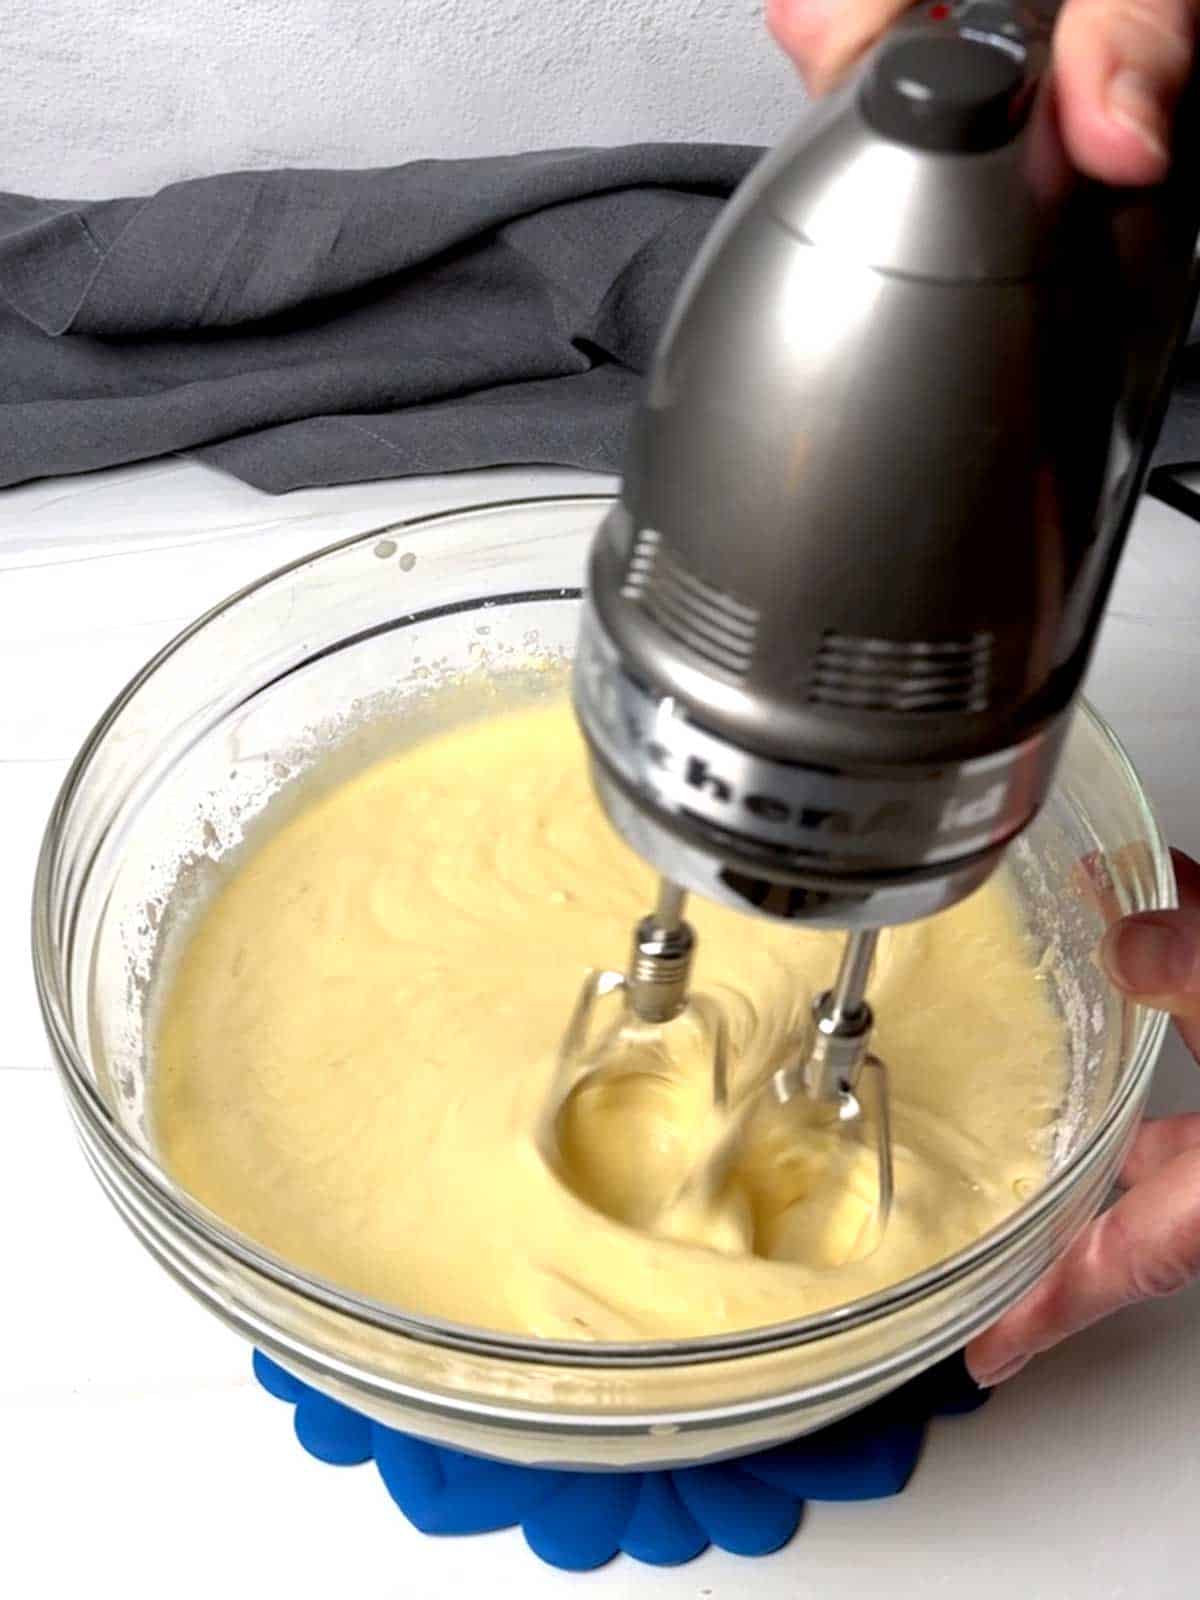
- Prepare the Batter: Beat together the cake mix, milk, melted butter, and eggs in a large bowl just until combined.
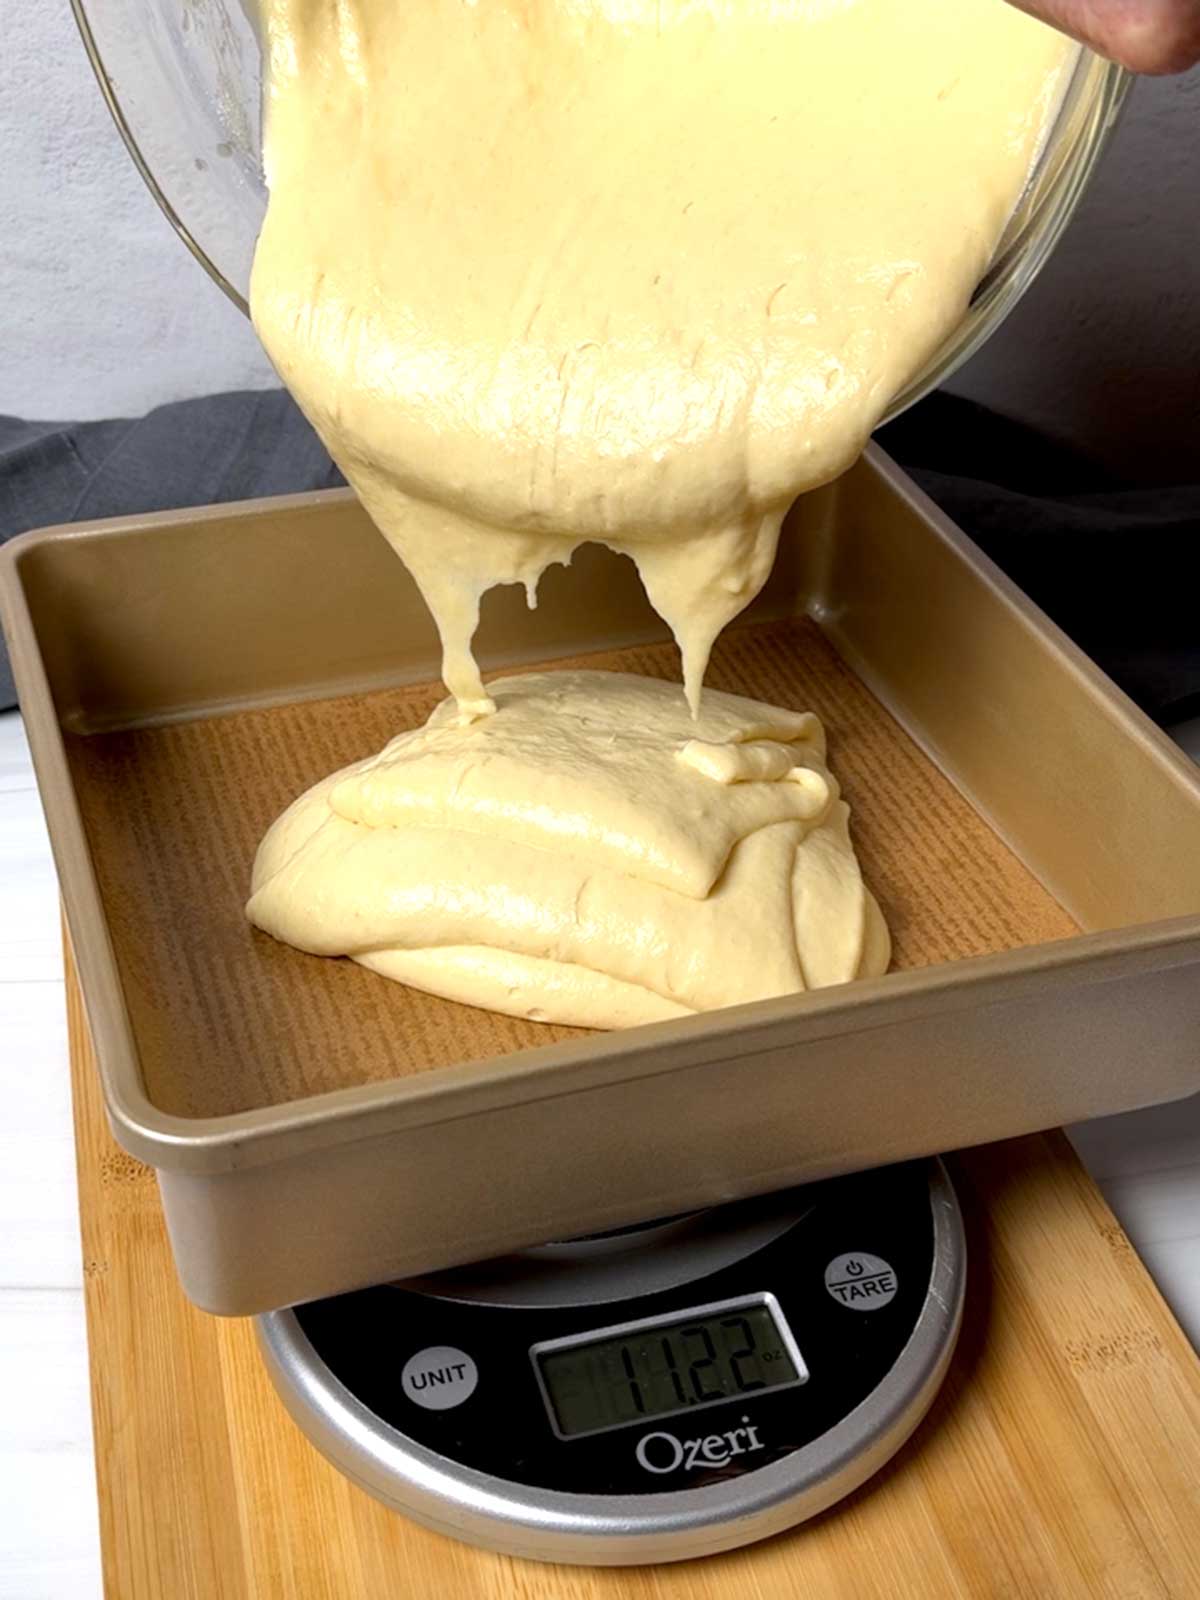
- Divide the Batter: Spray the two 9-inch square pans with nonstick spray, then line the bottoms with parchment paper. Divide the batter evenly between the two pans. (I actually used a scale to portion the batter - yes I know that I'm a total foodie nerd!) Spread the batter into even layers and tap the pans several times on the counter to remove any air bubbles.
- Bake: Bake the cakes at 325°F for 28 to 30 minutes or until a toothpick inserted into the center comes out clean. The lower temperature helps keep the cakes level.
- Cool Completely: Remove the cakes from the oven and let them cool for 10 minutes in the pans. Then transfer the cakes to a wire rack to cool completely.
The Buttercream
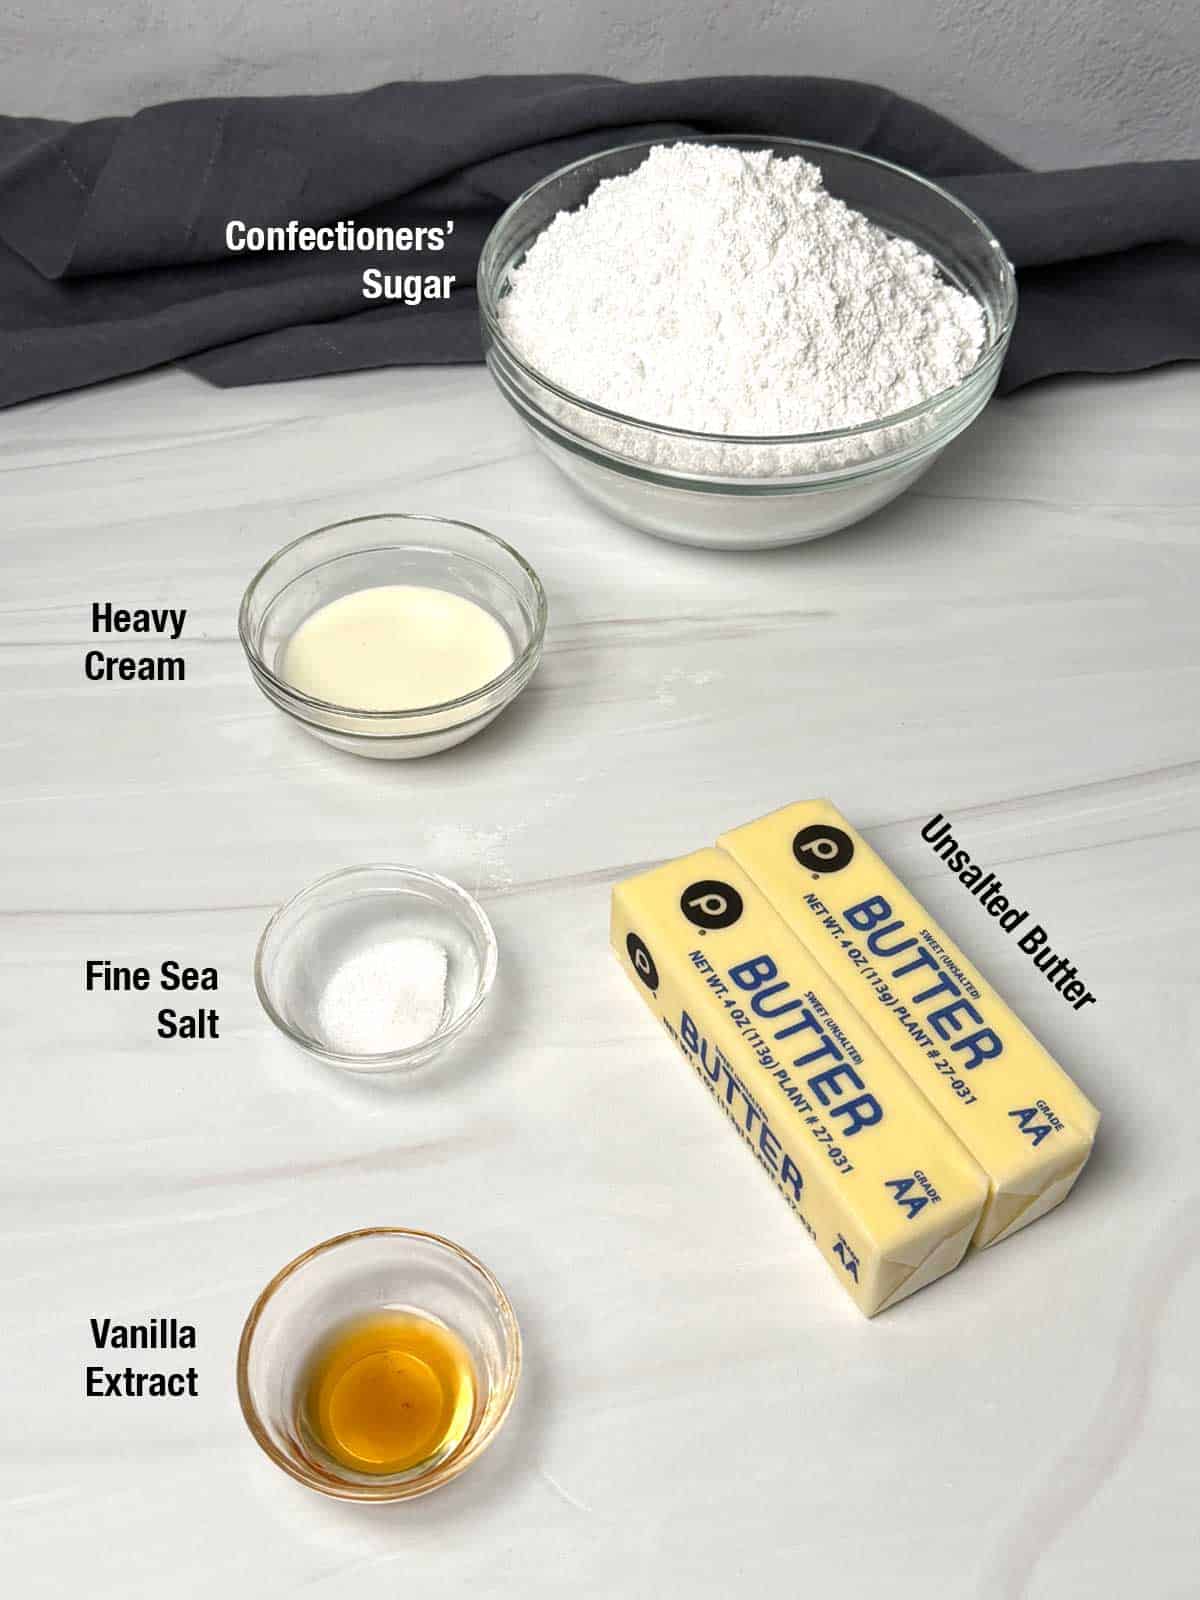
- Here's What I Used: Unsalted butter, vanilla extract, fine sea salt, heavy cream, and confectioners' sugar.
- The Butter: Beat butter until creamy and lightened in color, around 2 minutes. Then beat in the vanilla extract, and salt.
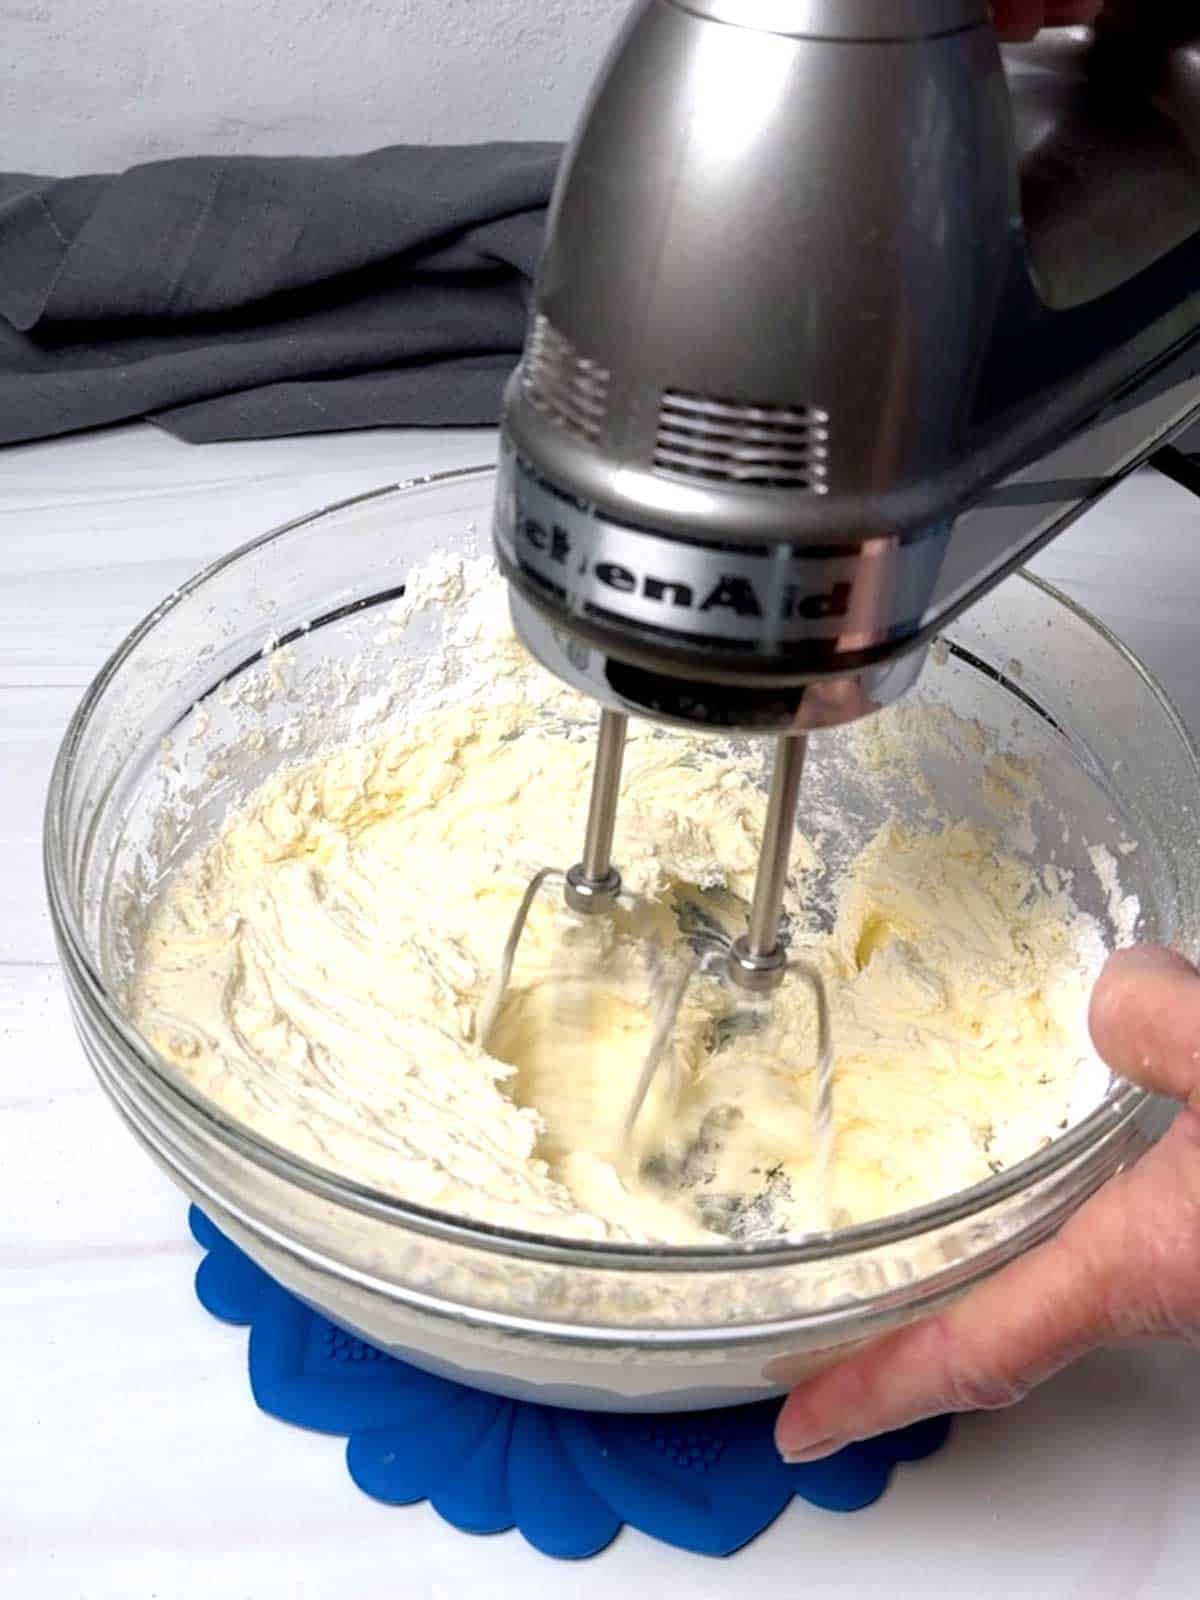
- The Confectioners' Sugar and Cream: Add the confectioners' sugar in stages, beating well after each addition. If necessary, thin the frosting with about 1 ½ tablespoons of heavy cream. Beat until the frosting is smooth and spreadable.
Assembly
Cut the cake rounds using a cutter that fits inside the container to be used. Pipe frosting into the bottom of each cup. Add the first cake round and top with frosting. Add the second cake round; cover the top with frosting. Invert and dip into nonpareils. Press gently onto parchment paper and carefully wipe away any excess frosting and nonpareils. Finish by adding the dome lids.
Bonus: Turn Scraps into Cake Balls
Don't throw away the leftover cake. Crumble the scraps and mix with leftover frosting until the mixture holds together. Roll into balls and chill thoroughly.
Dip in melted white candy melts and sprinkle on red, white, and blue nonpareils. If desired, packcage in clear dome cups.
It's an easy way to transform leftovers into a second festive treat!
Frequently Asked Questions
Can Dot Cakes Be Made Ahead?
Yes. Assemble them up to two days in advance and store covered in the refrigerator.
What Size Cutter Should I Use?
Use a cutter approximately ¼ inch smaller than the top diameter of your container.
Can I Use Different Sprinkle Colors?
Absolutely. Customize them for birthdays, holidays, baby showers, and celebrations.
Do Dot Cakes Need Refrigeration?
Yes. Store refrigerated until ready to serve.
What Should I Do With Leftover Cake?
Turn it into cake balls or cake pops.
Final Thoughts
When I first started this project, I wasn't convinced Dot Cakes were worth the effort.
My first batch was frustrating.
My second batch completely changed my mind.
Once I understood the proper cake thickness, frosting consistency, assembly method, and packaging, the process became much easier and the results were dramatically better.
The biggest surprise?
The reaction from friends and family-especially some very enthusiastic teenage taste testers who immediately requested another batch.
If you're thinking about trying the viral Dot Cake trend, I hope these lessons help you skip the mistakes and head straight to success.
Happy baking!
Other 4th of July Treats

Did you make this recipe? We'd love to know how it turned out! Leave a review below. Then, share a picture on Instagram and tag @pudgefactor so we can see it.
Don't forget to follow us on Pinterest, Facebook, YouTube, Flipboard, and Instagram.
Thank you so much for visiting PudgeFactor. We hope you'll come back!
Recipe
Want to Save This Recipe?
Enter your email & I'll send it to your inbox. Plus, enjoy weekly doses of culinary inspiration as a bonus!
By submitting this form, you consent to receive emails from Pudge Factor.
Red, White & Blue Dot Cakes
Equipment
- 2 (9-inch) square cake pans
- Parchment paper
- Electric Mixer
- piping bag
- large round piping tip
- 3-inch round cutter (or cutter sized approximately ¼-inch smaller than the top diameter of your cups)
- Dessert cups with dome lids
Ingredients
Cake
- 1 14.5-ounce white cake mix (such as Betty Crocker Super Moist White)
- 1 cup whole milk (instead of water_
- ½ cup unsalted butter, melted (instead of oil)
- 4 large eggs
Buttercream Frosting
- 8 ounces (2 sticks) unsalted butter, softened
- 16 ounces (4 cups) confectioners' sugar
- ½ teaspoon fine sea salt
- 1 teaspoon vanilla extract
- 1½ tablespoons heavy cream
- ½ cup red, white, and blue nonpareils
Instructions
Cake
- Preheat oven to 325°F. Spray two 9-inch square cake pans with nonstick spray and line the bottom with parchment paper. Set aside.
- Combine the cake mix, milk, melted butter, and eggs according to package directions.
- Divide the batter evenly between the prepared pans.
- Bake in a preheated 325°F oven until the cakes spring back lightly when touched and a toothpick inserted in the center comes out clean, approximately 28 to 35 minutes.
- Allow the cakes to cool in the pans for 10 minutes. Then transfer to a wire rack to cool completely.
- Wrap the cakes tightly in plastic wrap and refrigerate for several hours or overnight.
Buttercream
- Beat the softened butter until smooth and creamy. Add the vanilla and salt; beat until combined.
- Gradually add the confectioners' sugar, beating well after each addition.
- Add the heavy cream and beat until light, fluffy, and easily spreadable.
Assemble the Dot Cakes
- Use a round cutter to cut cake rounds from the chilled cake.
- Pipe a small amount of buttercream into the bottom of each cup to anchor the cake. Place one cake round into the cup. Pipe a generous layer of buttercream over the cake. Add the second cake round. Pipe buttercream over the top and spread lightly to cover the cake.
Decorate
- Place the nonpareils in a small bowl.
- Invert each cake and gently press the frosting into the nonpareils. Lift straight up and inspect for coverage.
- Gently press the decorated top onto a piece of parchment paper to help secure the nonpareils. Wipe the edges of the container.
- Place the dome lids on the cups.
- Refrigerate until ready to serve.
- Yield: 6 Dot Cakes
Video
Tips/Notes
- Two 9-inch square pans produce cake layers approximately 1 inch thick, which are ideal for Dot Cakes.
- Do not add nonpareils to the cake batter; they tend to sink and can discolor leftover scraps.
- A large round piping tip makes assembly much easier.
- Expect to use more frosting than you think.
- Leftover cake scraps and frosting can be combined to make cake balls or cake pops.
Leave a Reply