
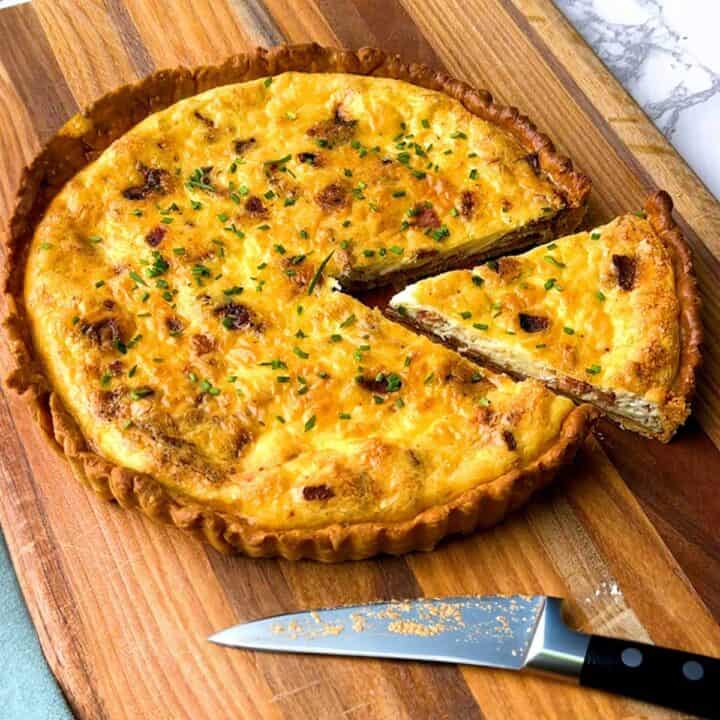
Savory French pastry dough for mini quiches with little shrinkage is a real breakthrough for me. Freeze ahead and bake bakery-quality tart shells anytime.
For years, I wanted to make individual quiches that were as satisfying as a slice from a full-sized quiche. The problem wasn't the filling. It was the crust.
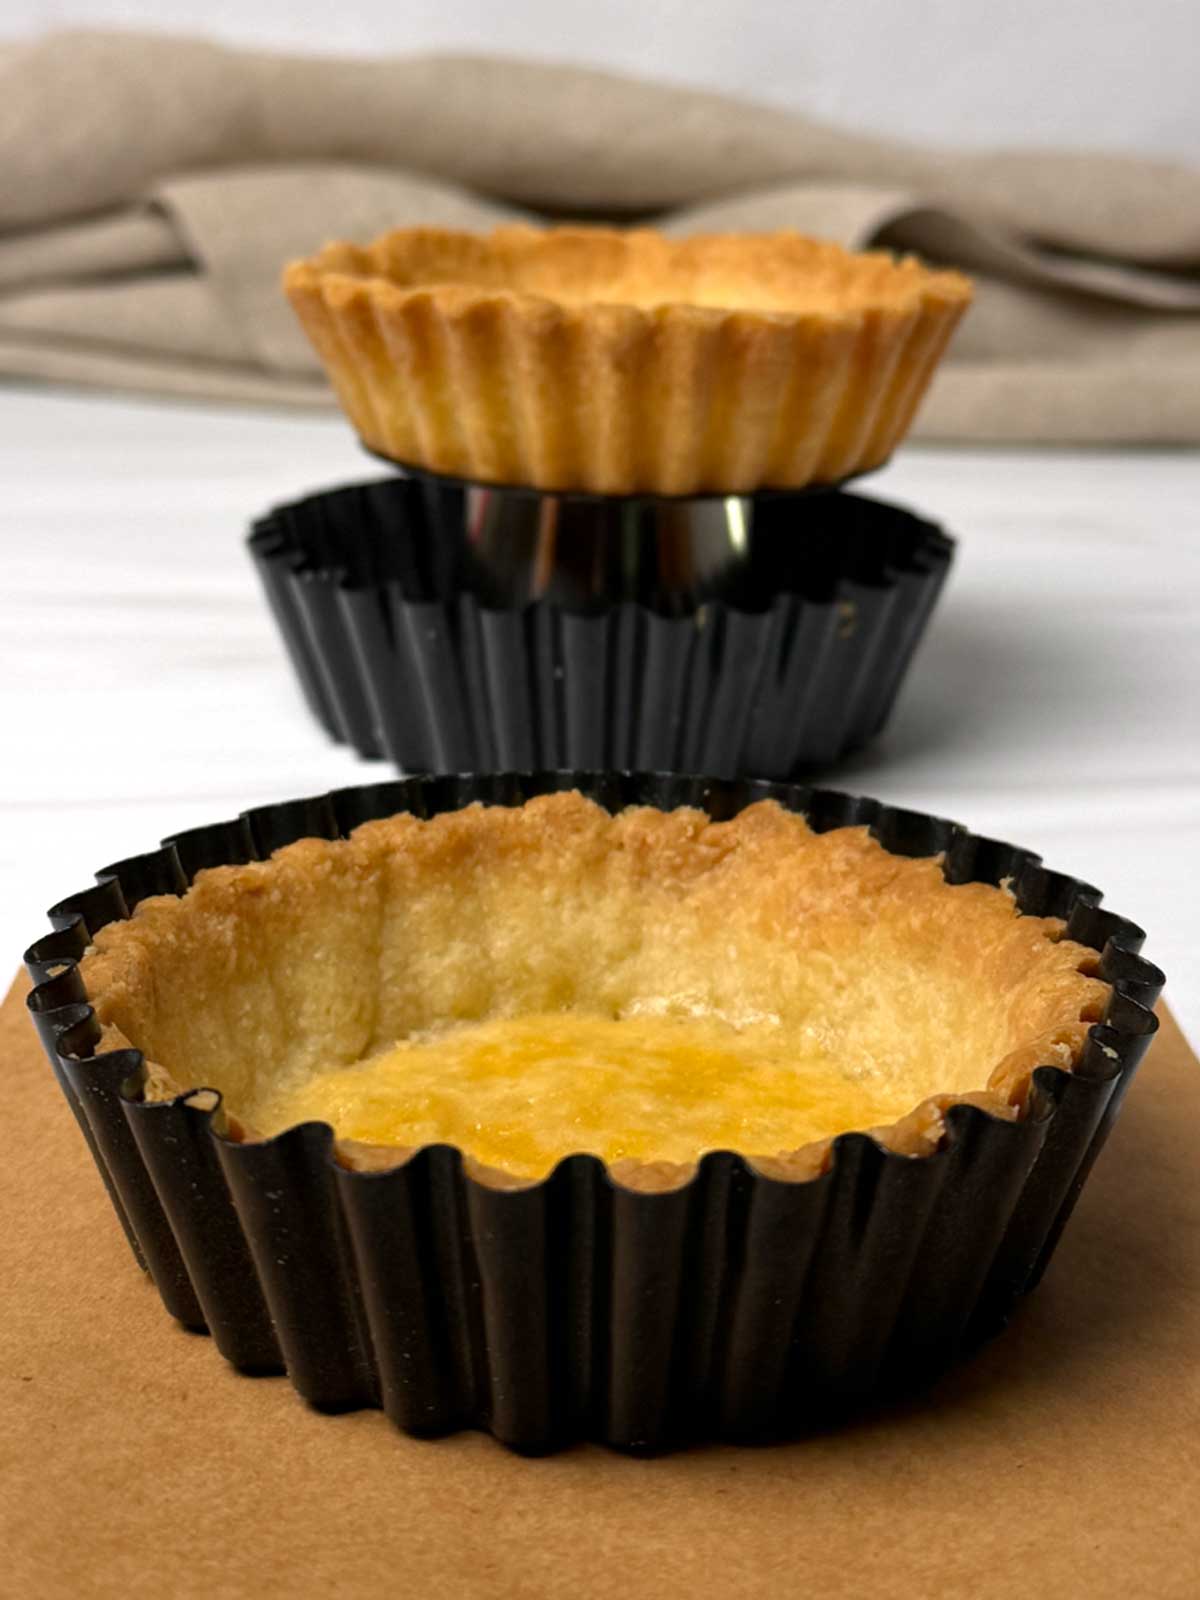
Traditional pie crusts often shrink during blind baking, and the mini tart pans I was familiar with were simply too shallow. The combination of shrinking pie crusts and shallow tart pans spelled disaster in my mind.
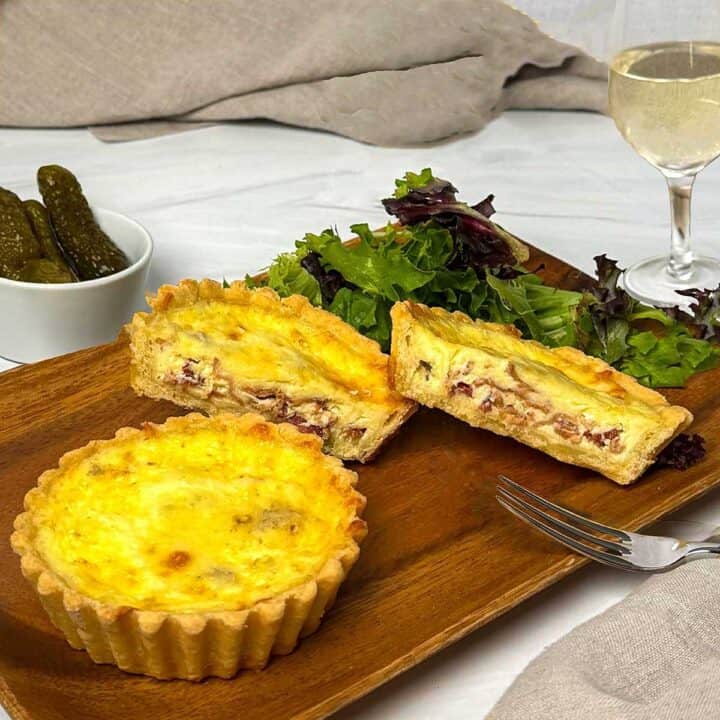
The first success was finding 4-inch deep mini tart pans with sloping sides. The second success was developing a savory pastry dough inspired by the Pâte Sucrée recipe I learned in Paris. By removing the sugar and making a few simple adjustments, I ended up with a buttery, flaky dough that is easy to make and handle, bakes beautifully with little or no shrinkage, and freezes exceptionally well.
Now I keep tart shells ready in the freezer so homemade mini quiches are never more than an hour away.
Quick Look at the Recipe
- Hands-On Time: Around 15 minutes
- Baking the Shells: 25 minutes
- Makes: 6 mini tart shells
- Difficulty: Easy
- Make-ahead Friendly: Yes
- Freezer Friendly: Yes
Jump to:
Why You'll Love This Dough
- Quick and easy using the food processor
- Easy to roll
- Dough scraps reroll beautifully
- Bake right away or freeze for weeks before baking
- Little to no shrinkage during baking
- Perfect for savory tarts and mini quiches
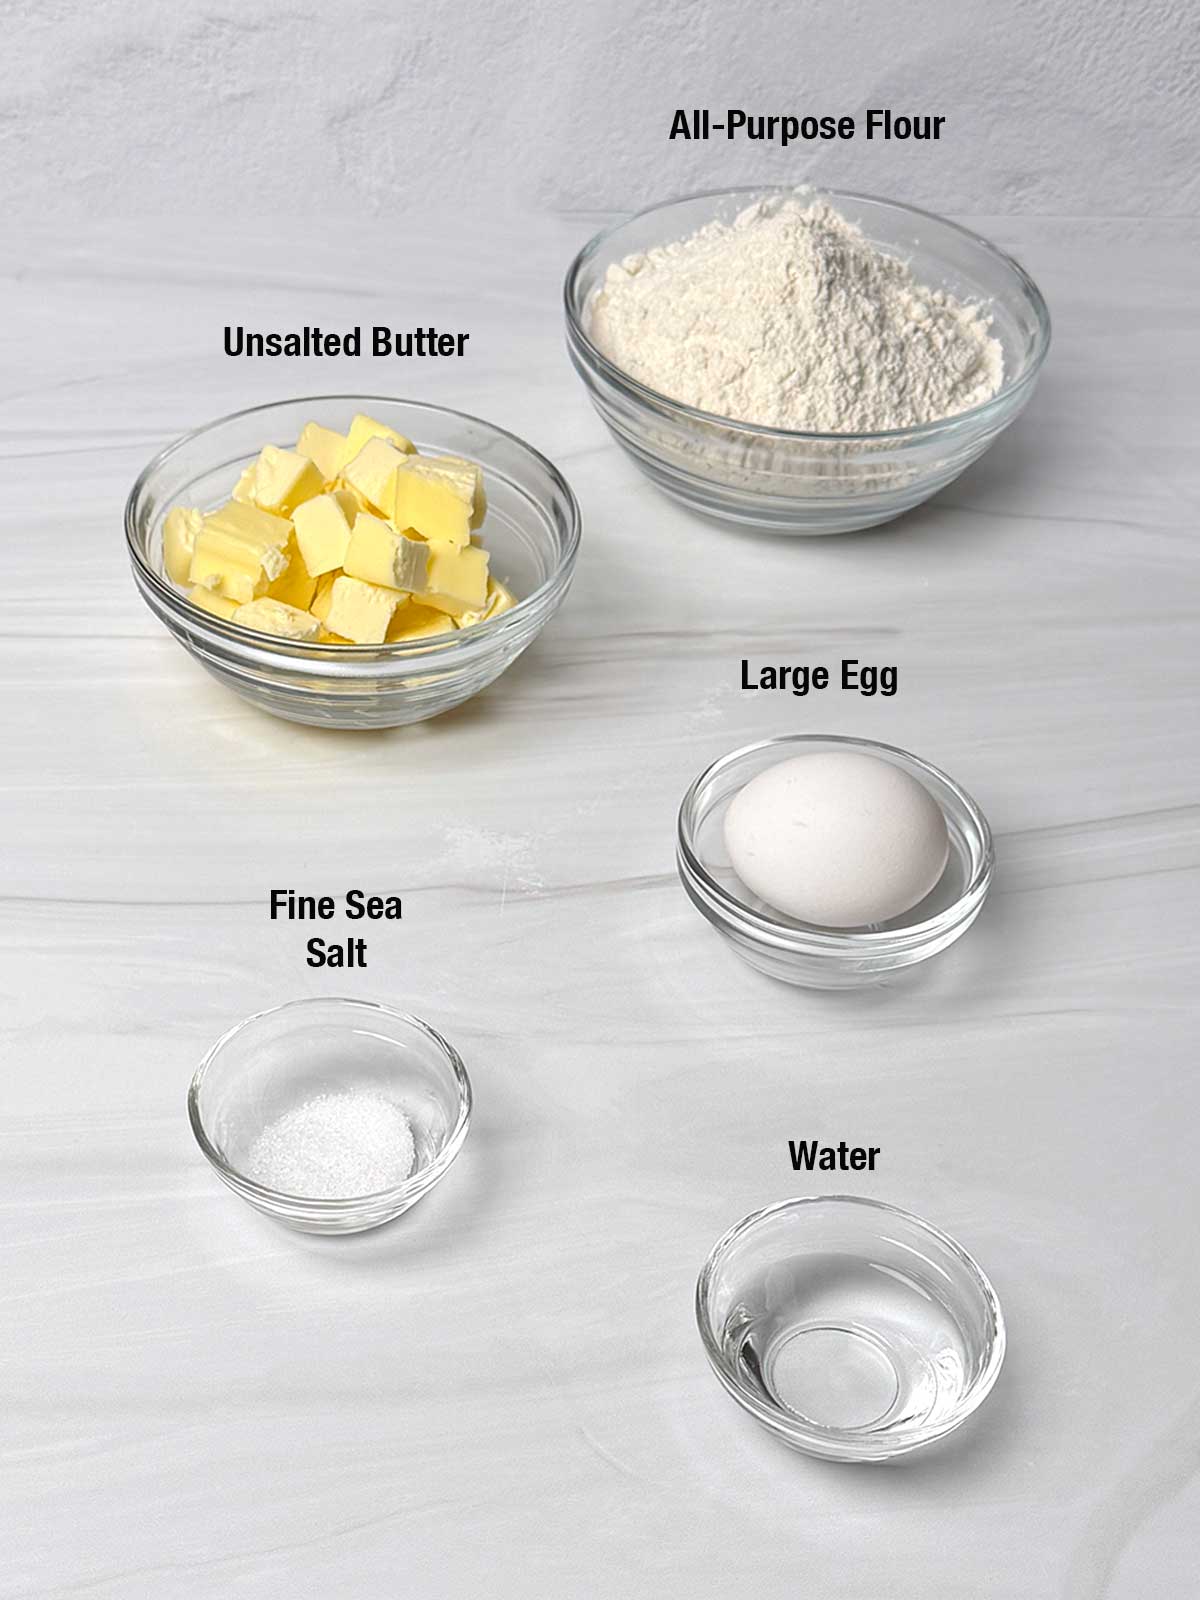
Ingredients - Here's What You'll Need
Simple ingredients for an amazing crust.
Here's How to Make the Savory Pastry Dough
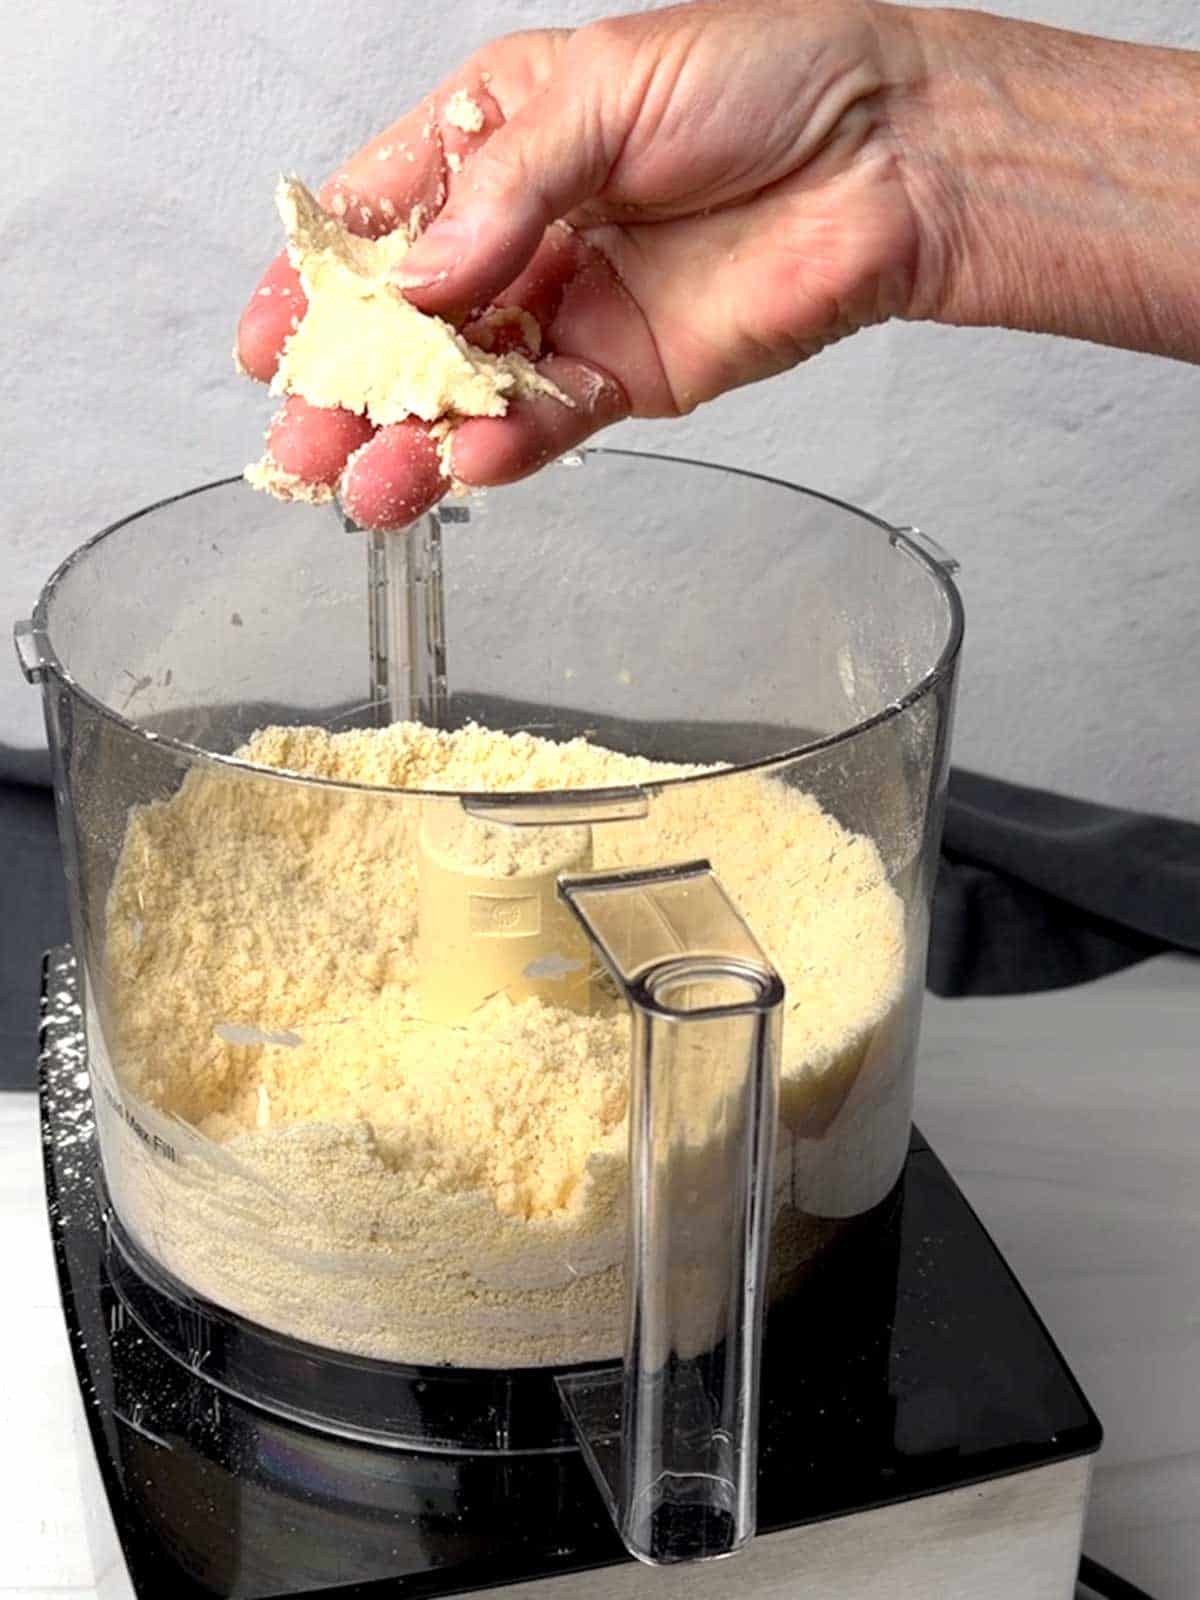
- The Food Processor: Pulse the flour and salt in the food processor with a steel blade 5 times. Add cold, cubed butter, and pulse 9 to 10 times until the mixture resembles coarse cornmeal. Add the egg, and pulse 9 to 10 times, or until crumbly. Gather a handful of the dough and pinch it together to test its consistency. If necessary, add 1 to 2 teaspoons of water and pulse 7 to 8 times. (I always add 1 teaspoon of water.)
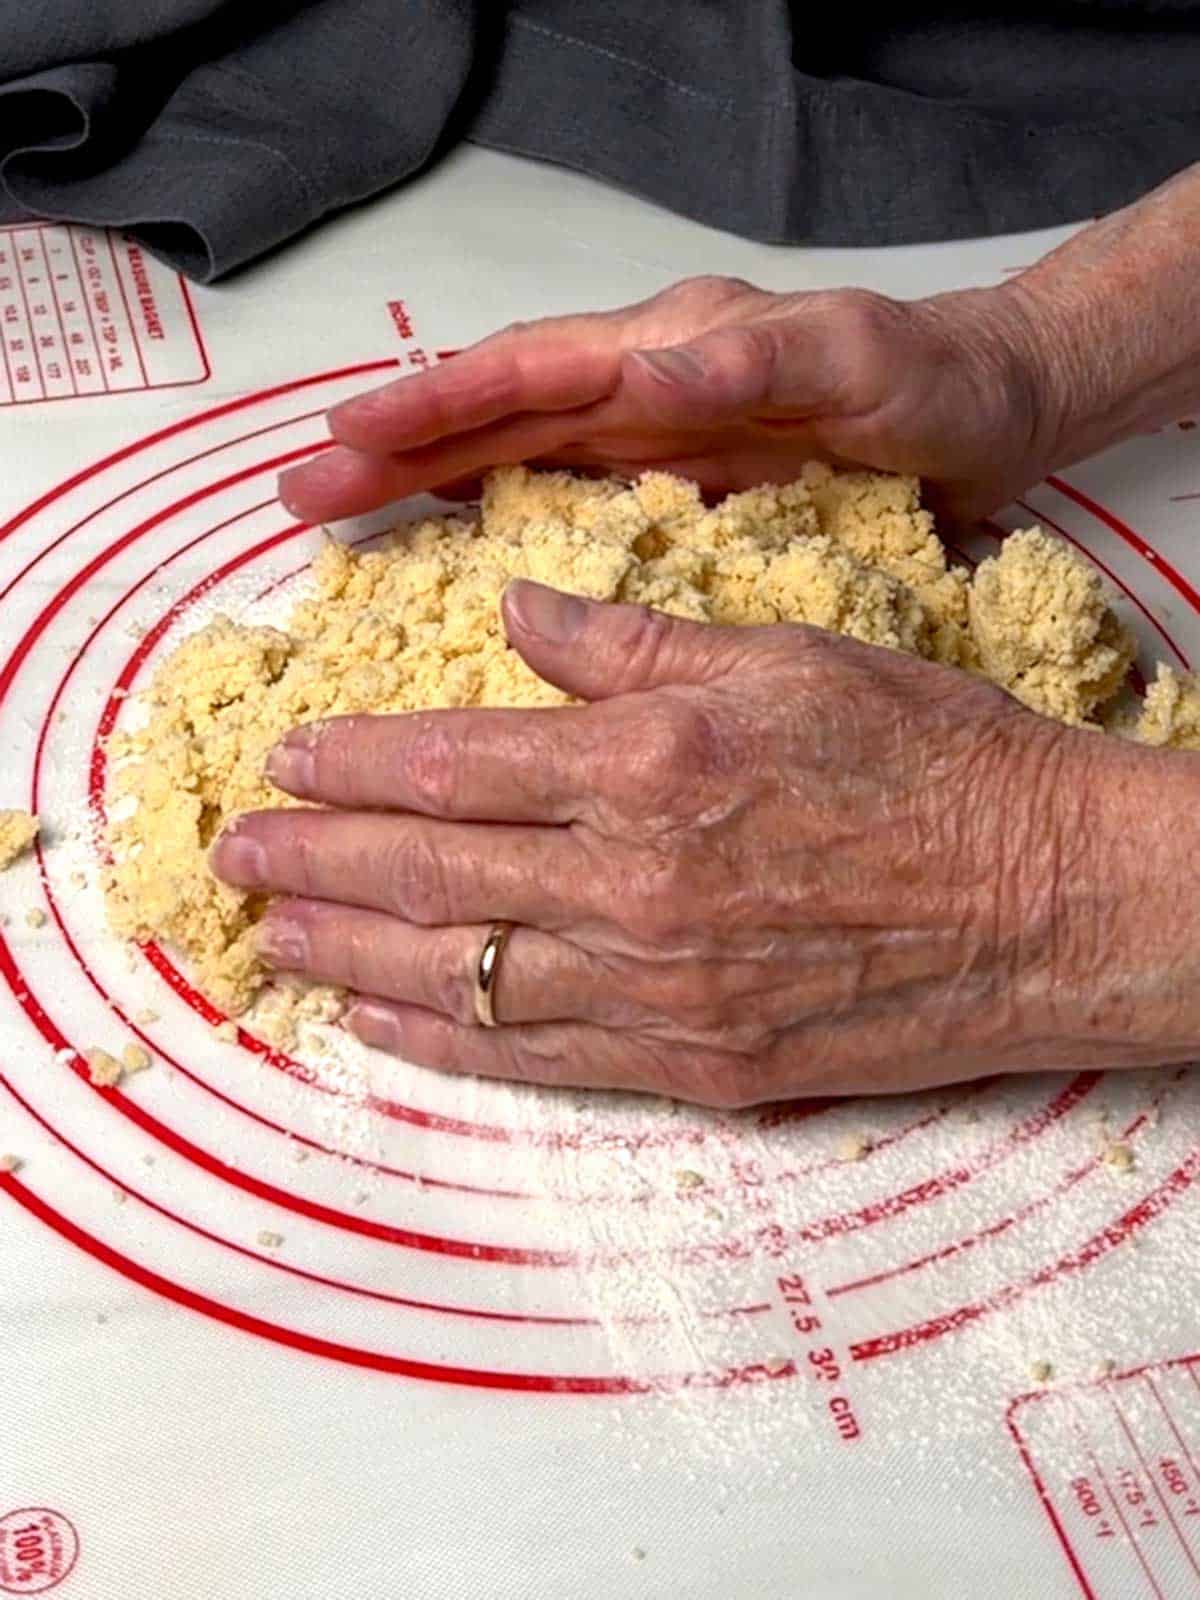
- Form the Dough: Transfer the dough to a floured surface and gently gather the crumbly pieces until they come together.
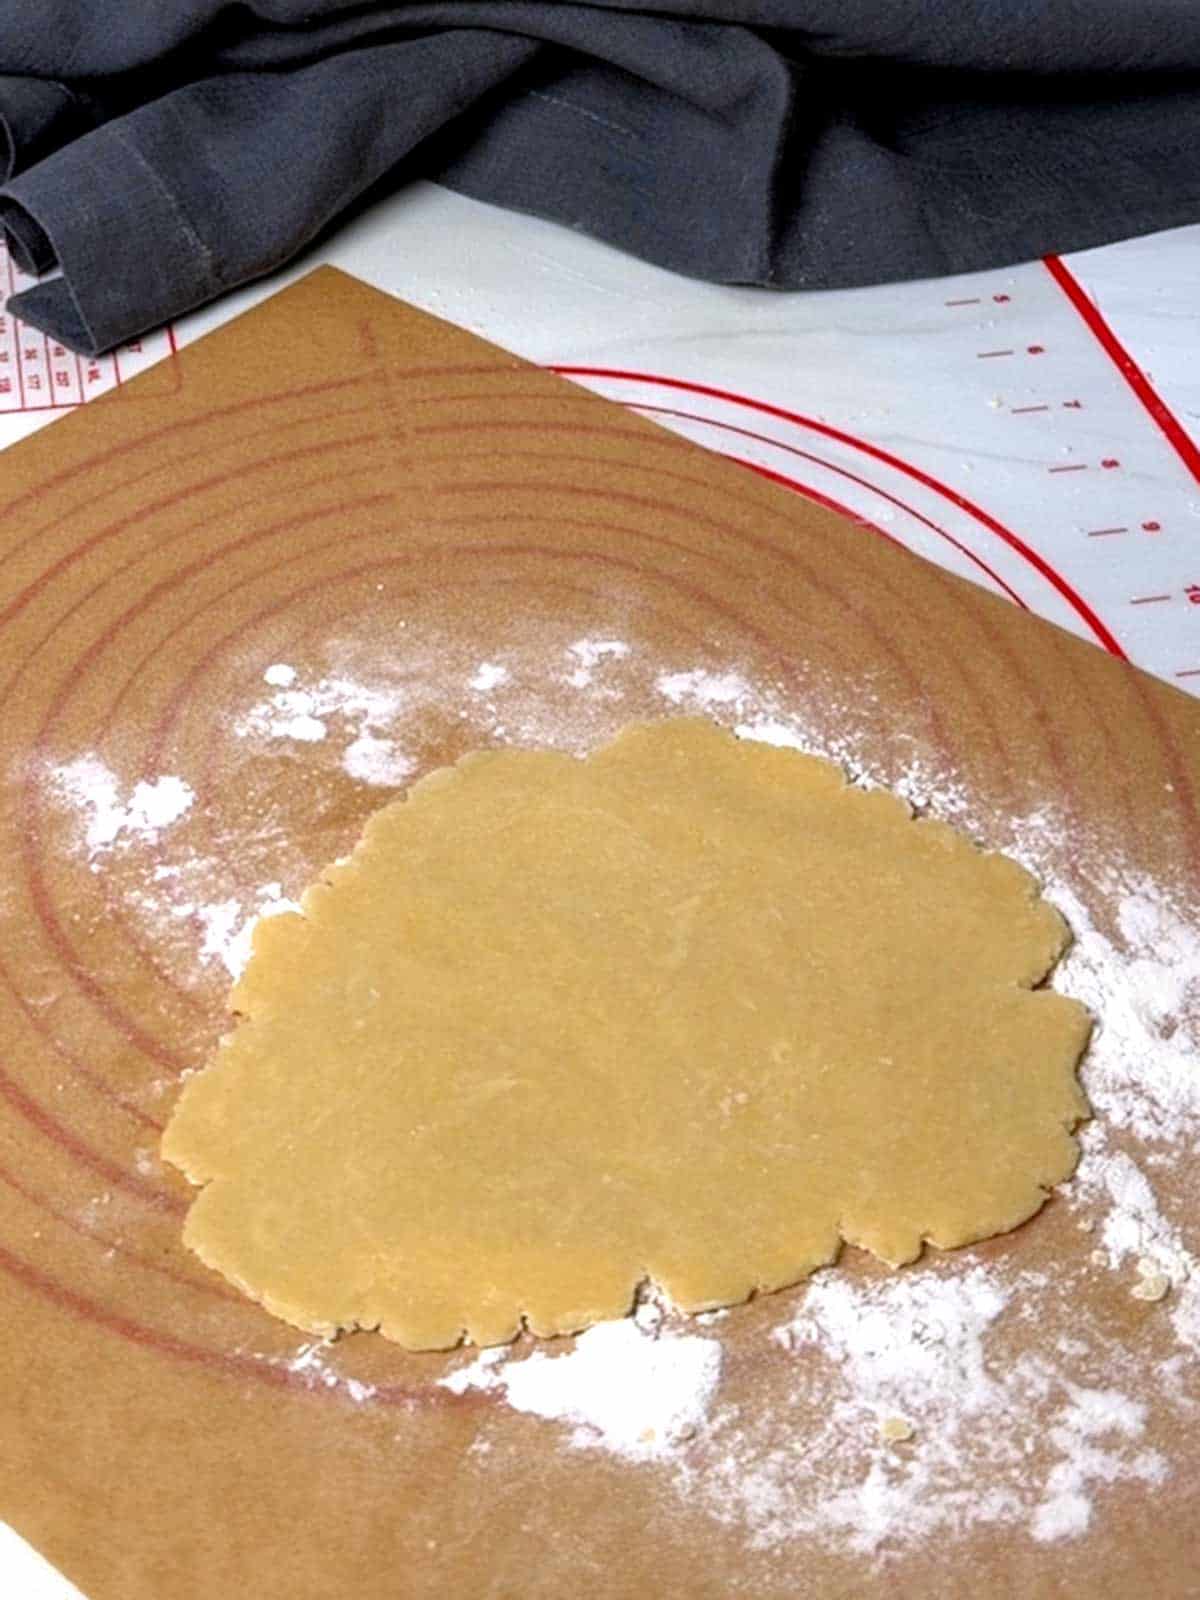
- Portion and Roll the Dough: Pinch off a piece of dough, between 65 and 70 grams. Form the dough into a ball and flatten it into a rough circle. Place the dough on a piece of floured parchment paper and top with another piece of parchment paper. Roll the dough into a rough circle 6 ½ to 7 inches in diameter, and ⅛ inch thick. (I always use ⅛-inch rolling pin rings on either end of my rolling pin to ensure an even thickness.)
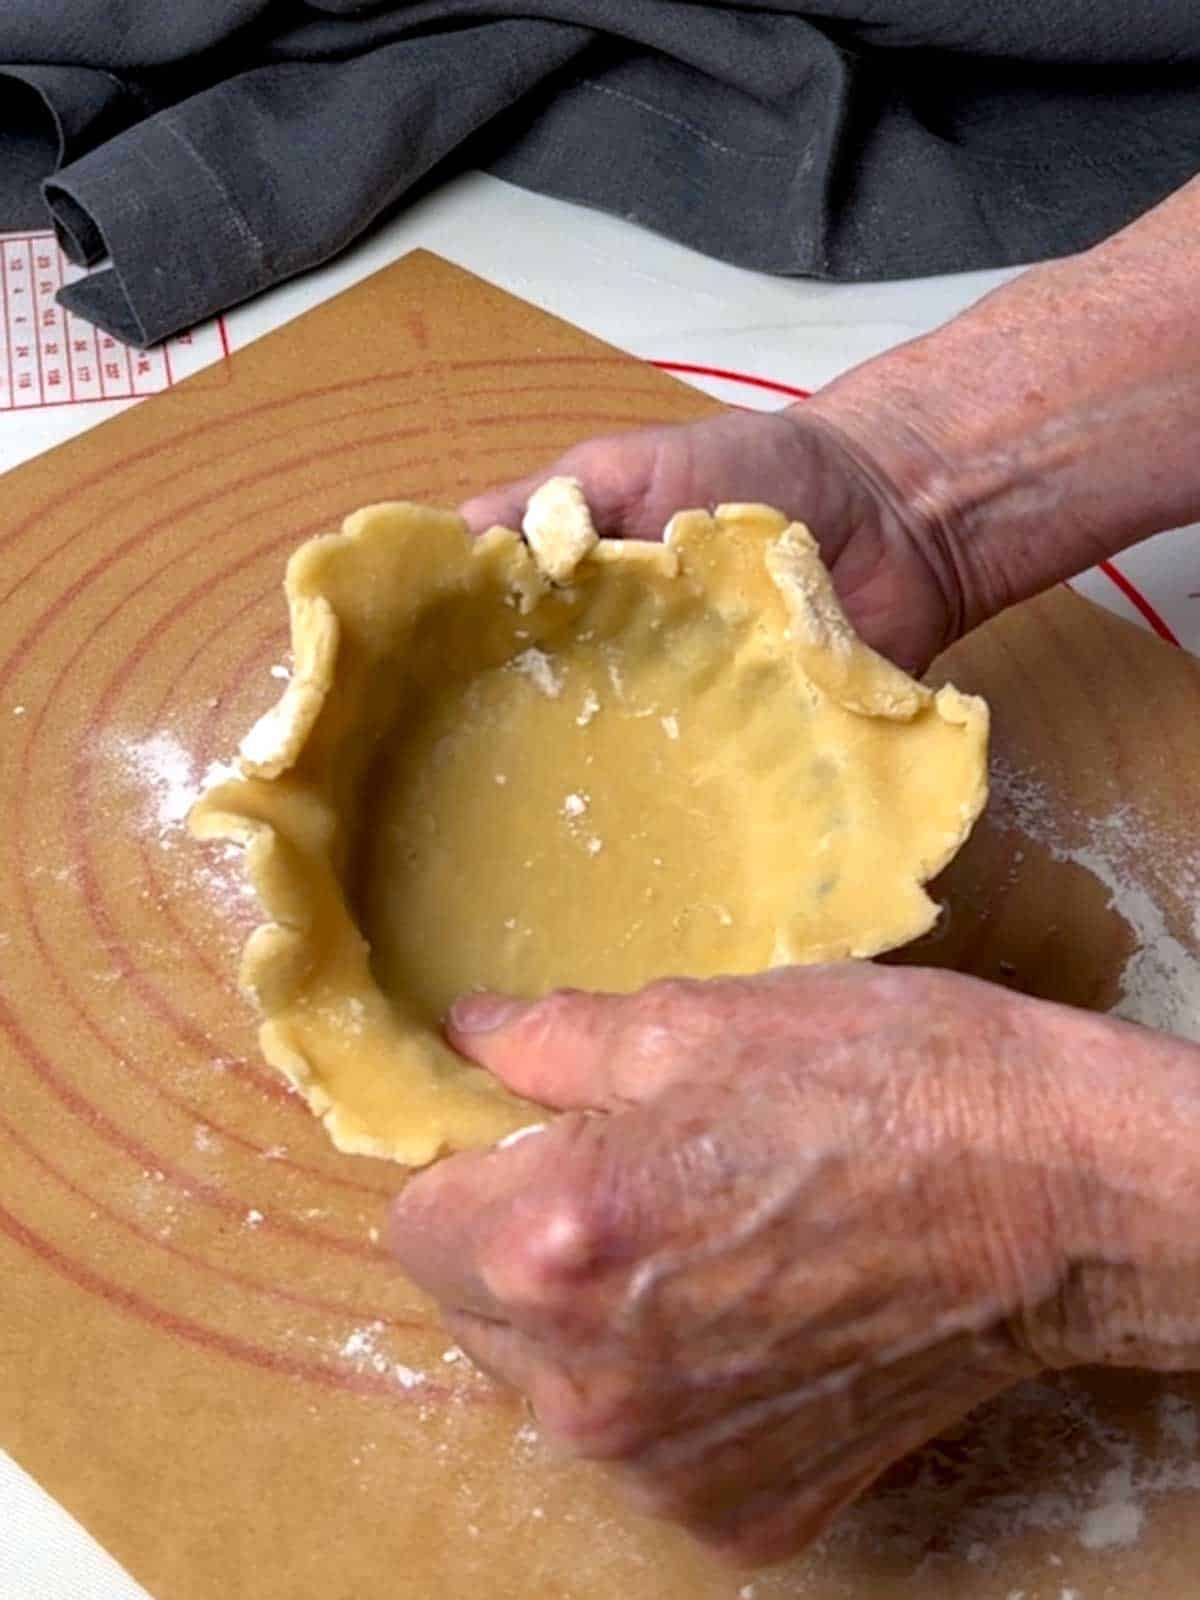
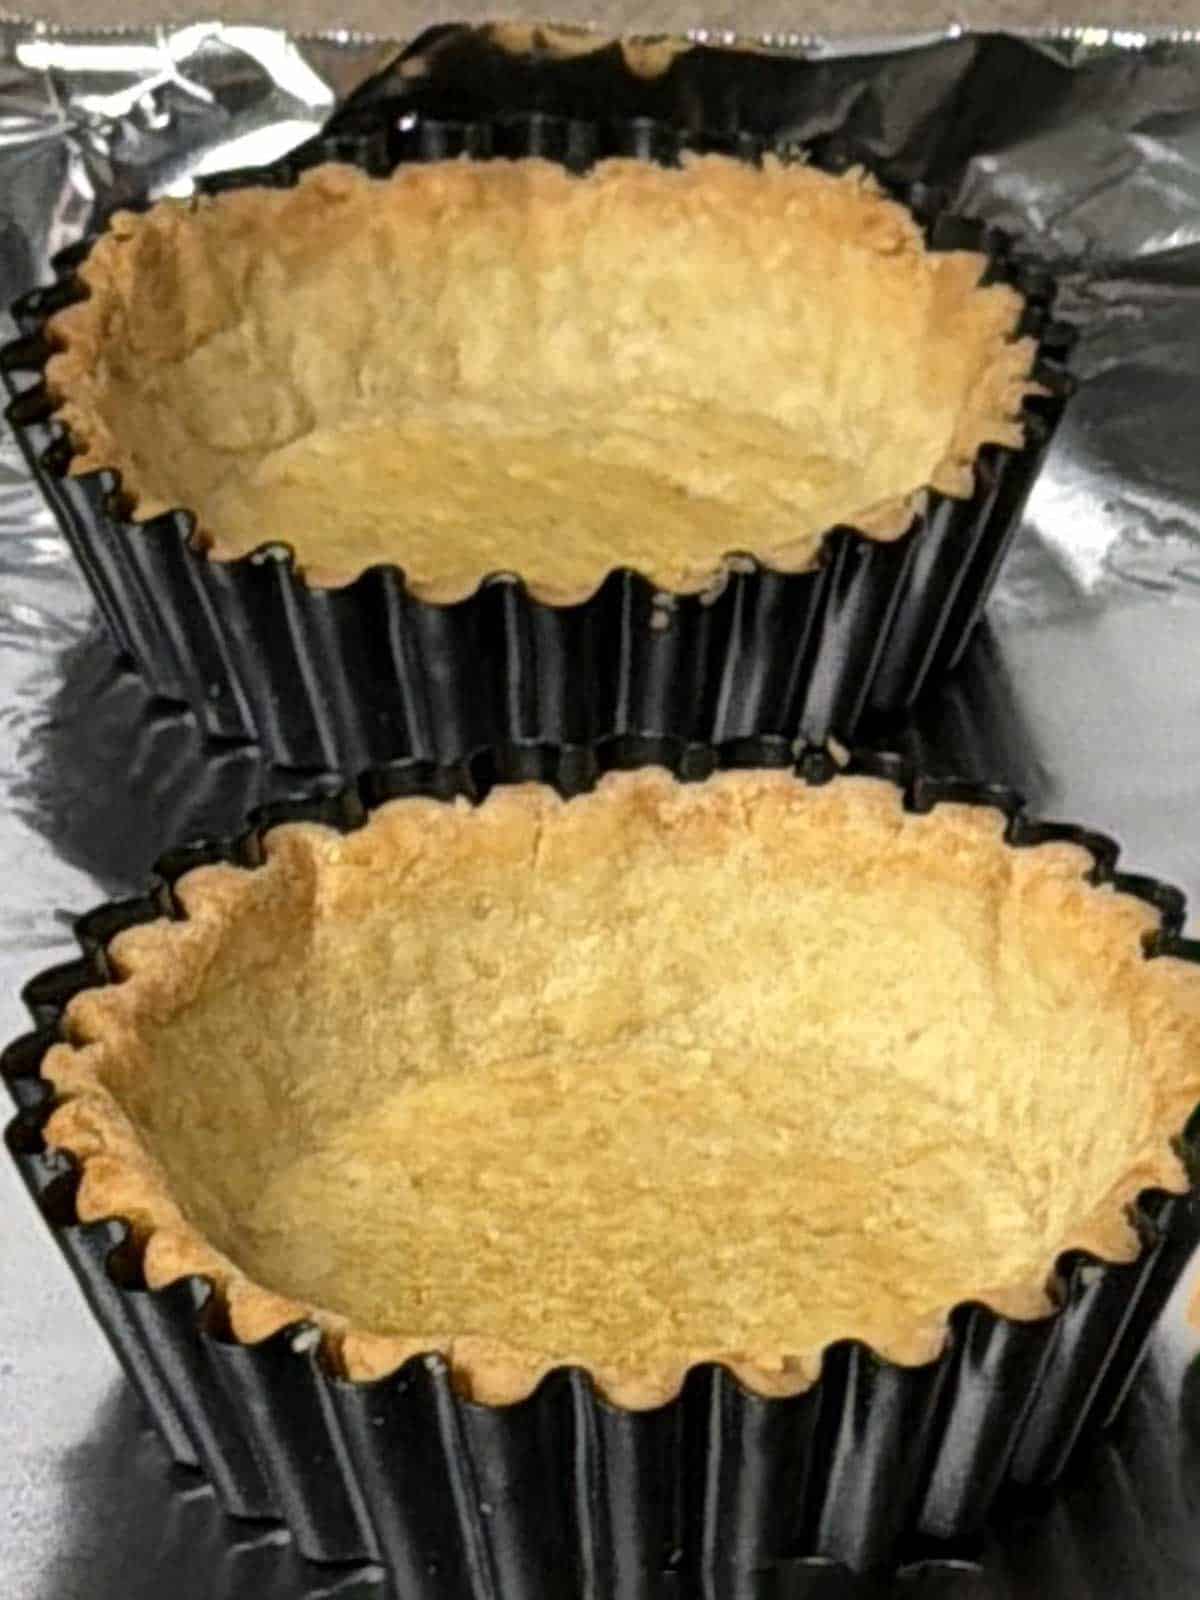
- Fit Dough into Mini Tart Pan: Gently fit the dough into the mini tart pan, pressing it down and then against the sides. Trim the top.
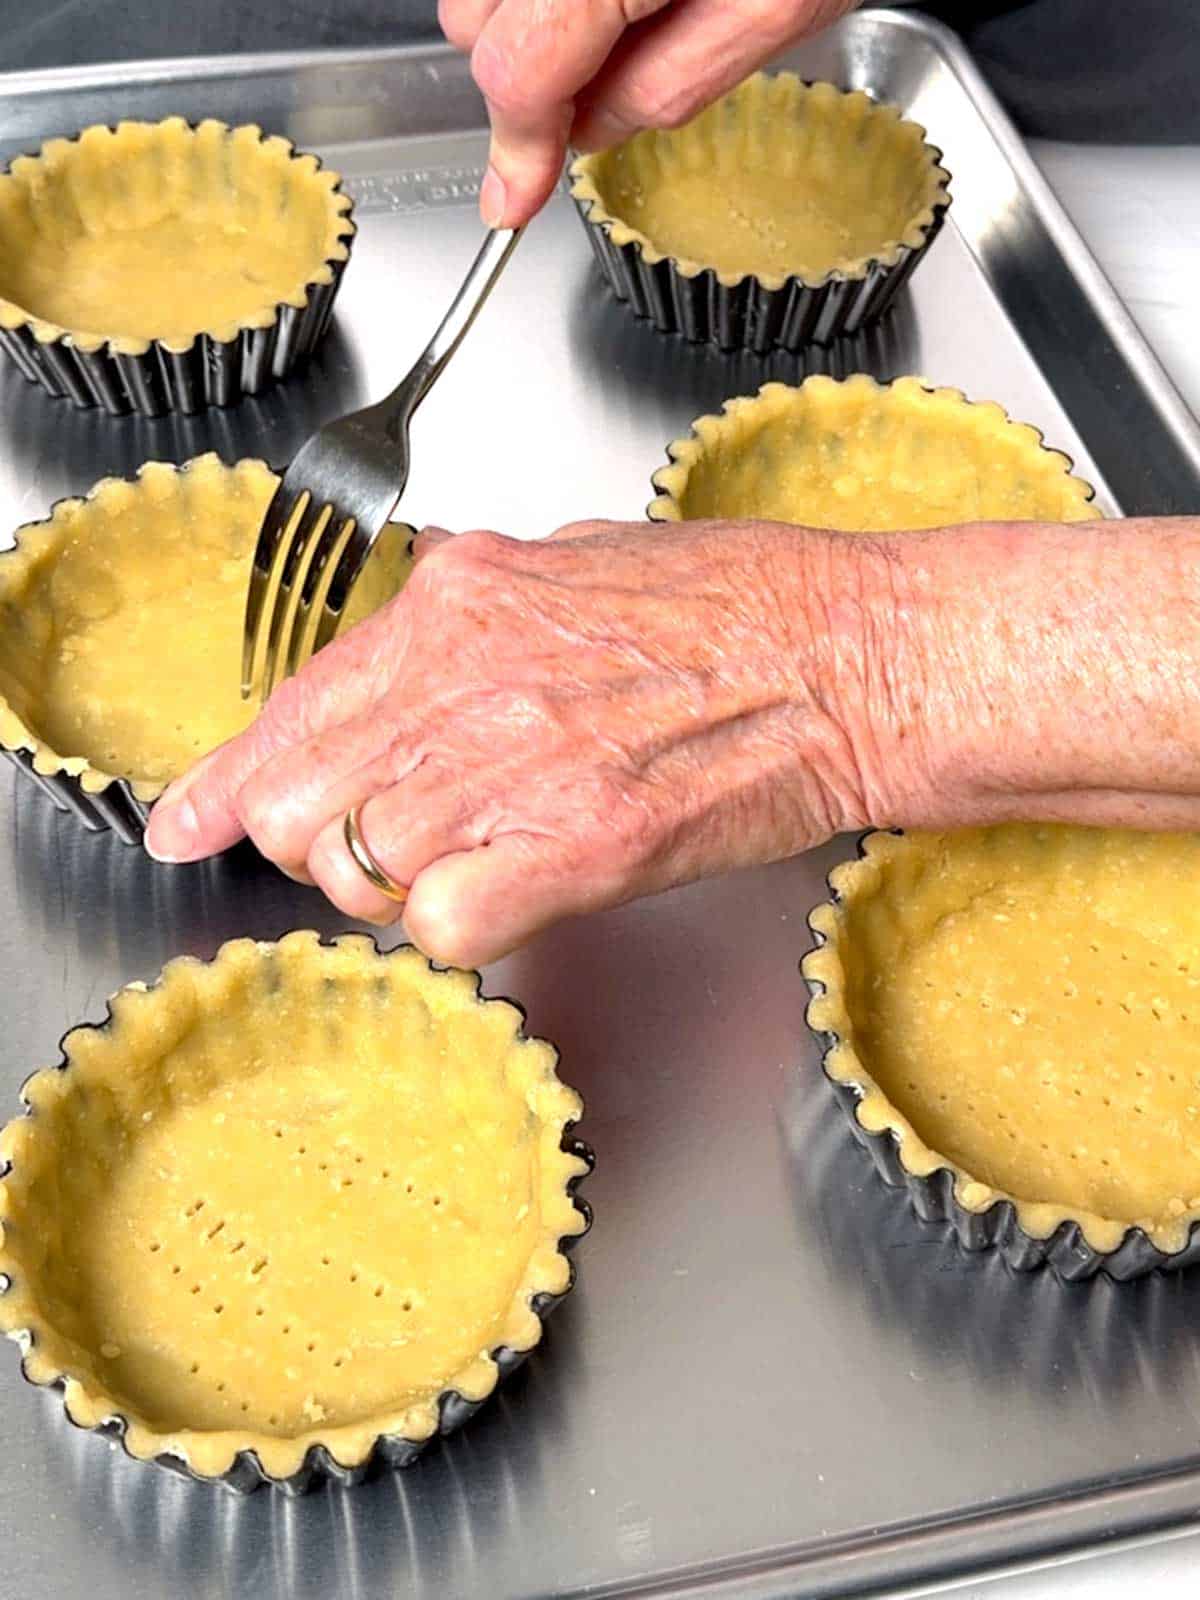
- Dock and Freeze: Use a fork to prick the bottom all over. Repeat with the remaining dough, using scraps as needed. Freeze the shells for at least 30 minutes.
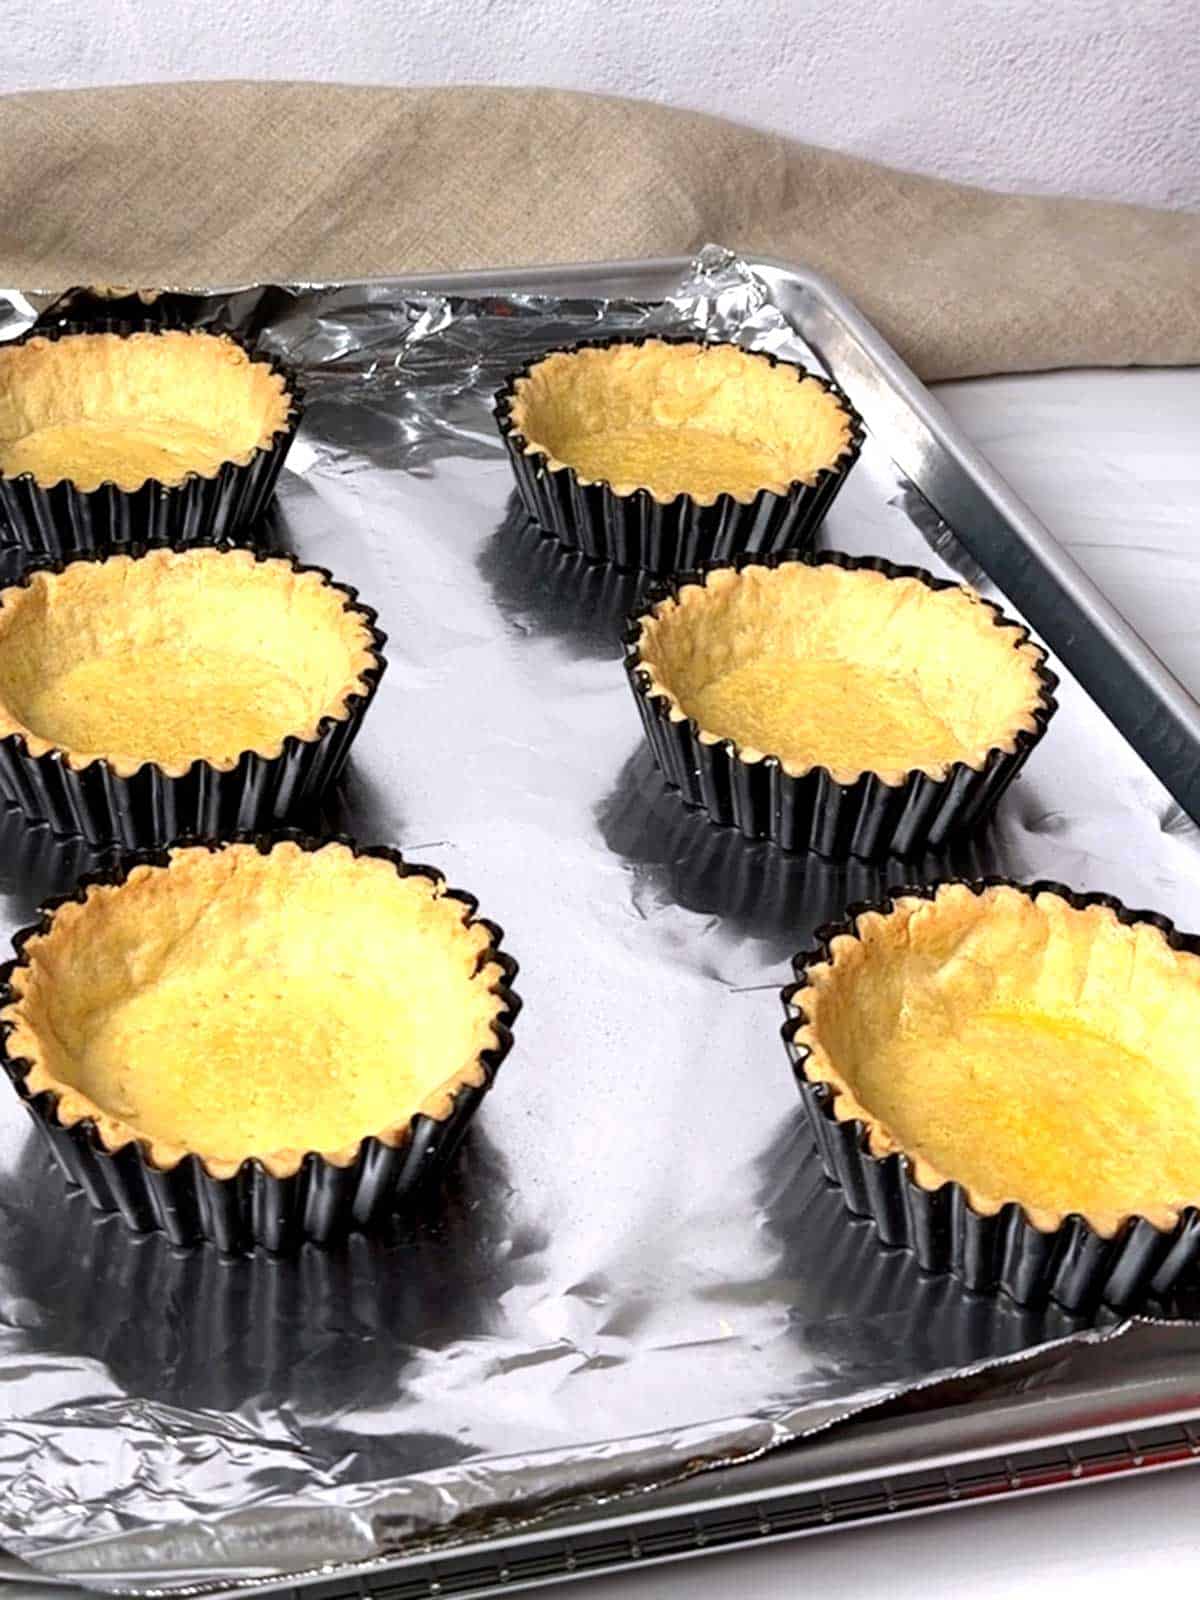
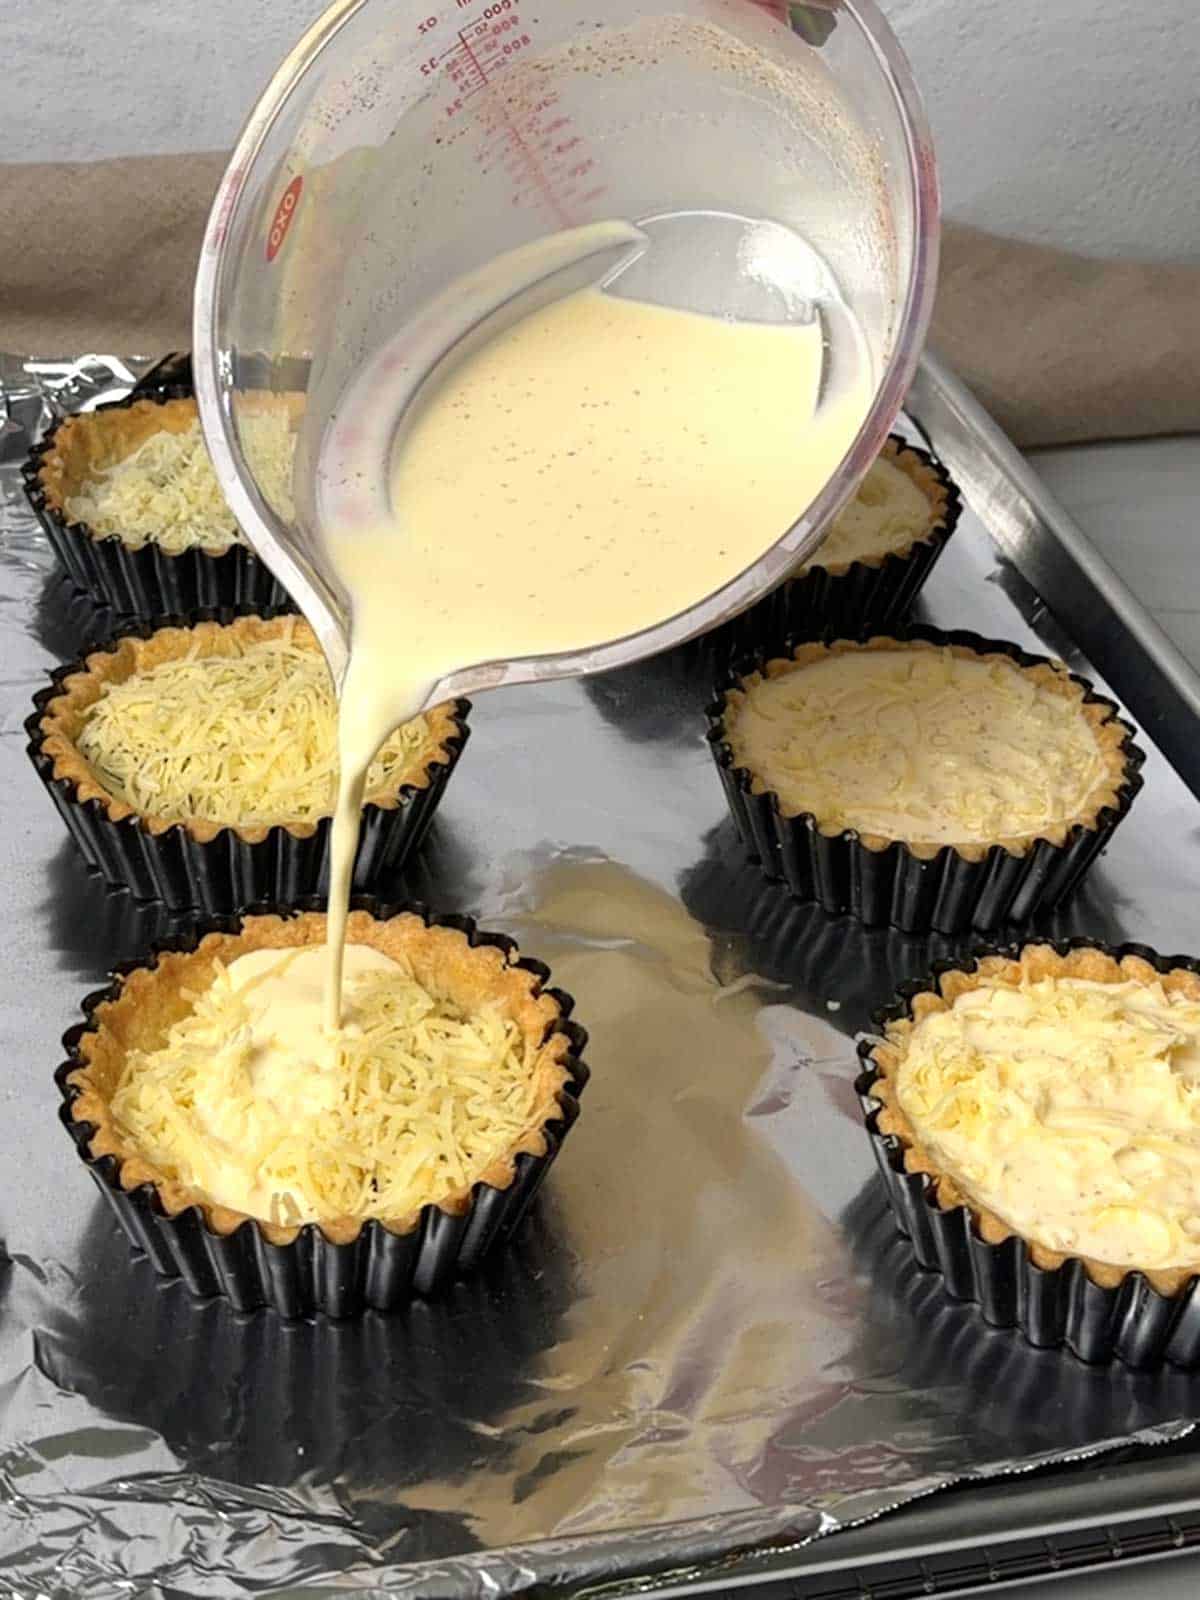
- Blind Bake: Line the tart shells with a 5-inch piece of parchment paper, and fill with dried beans or weights of your choice. Bake in a preheated 400°F oven for 20 minutes. Remove the parchment paper and weights, and seal the bottom by brushing it with a beaten egg. Return to the oven for another five minutes.
- Use or Freeze: Fill the mini tart shells with your favorite filling, or freeze for up to three months.
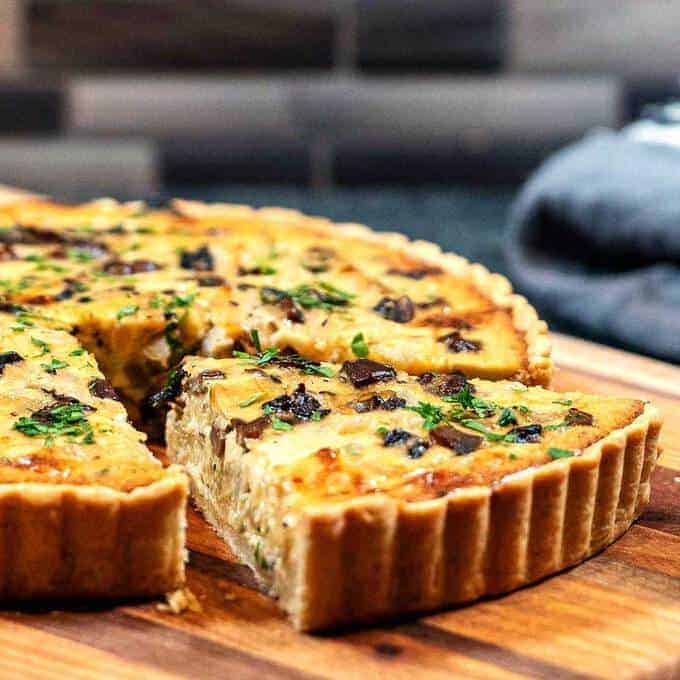
This savory tart dough is about as perfect a dough as I can imagine. It's easy to make, easy to form into tart shells, and most importantly, it bakes with little or no shrinkage. In addition, its buttery taste and flaky texture pair beautifully with your choice of filling. Yum!
PudgeFactor Test Kitchen
At long last, I have found the perfect savory pastry dough. Throughout the test phase, I learned the following:
- The mini tart pans with deeper, sloped sides that I used are perfect - so much so that I ordered another set after my first test use.
- A 2.5-ounce portion of the dough provided a generous fit in the 4-inch tart pans.
- It didn't matter whether I chilled the dough before use or used it right away - same amazing results.
- Rolling the dough between two pieces of parchment paper virtually eliminated a sticky mess.
- Using ⅛-inch guide rings on the rolling pin provided a consistent dough thickness.
- Freezing the shells before baking is non-negotiable. It virtually eliminates slippage.
- Dough made from rerolled scraps baked and tasted identical to shells made from freshly portioned dough, somewhat defying conventional wisdom.
Why This Dough Changed My Kitchen
As I tested this recipe, I realized I wasn't just developing a better tart crust. I was creating a system.
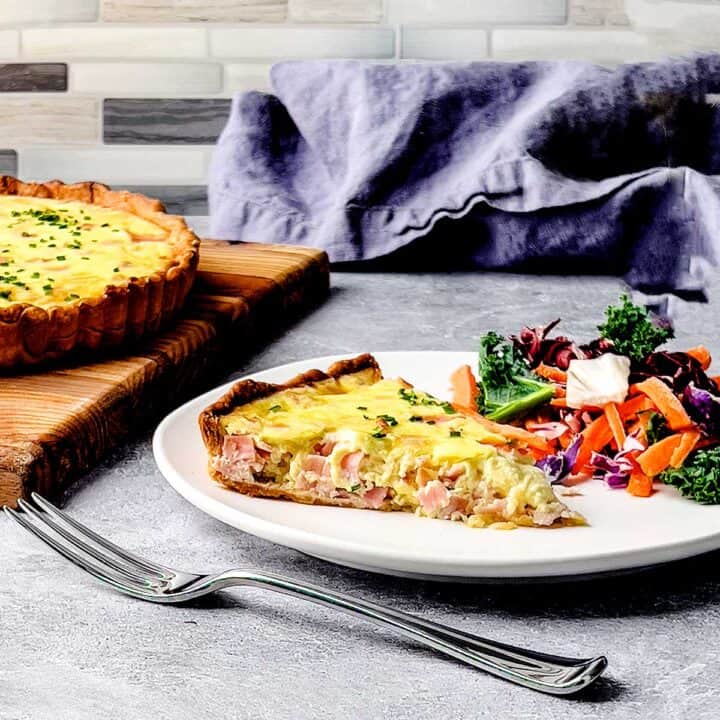
I can make the dough one afternoon, line several tart pans, and freeze them until I'm ready to bake. Later, I can bake one quiche or six. Even better, the finished quiches freeze and reheat beautifully, making homemade quiche one of the easiest make-ahead meals in my kitchen.
Make-Ahead Strategy
One of the beauties of this dough is that the formed tart shells can be frozen for later use, whether you're ready to make one quiche or six. In fact, the Master Taste Tester kept coming back to one idea during testing: "Having these tart shells in the freezer is a huge breakthrough."
I have to agree. Once the shells are lined, frozen, and ready to bake, homemade quiche becomes a surprisingly easy weeknight meal. The reasons are:
- The dough is simple to make, portion, roll, and line the mini tart pans.
- The shells should be frozen before baking, but that doesn't mean that they need to be used right away. Consider the possibilities of a stash of frozen shells that can be baked straight from the freezer and filled with your favorite filling.
- Once filled and baked, the filled shells can be frozen and reheated without any loss of taste or texture.
In Case You're Wondering...
Absolutely! The best quiche pan to use is one that has slightly sloped sides. The combination of the actual dough formulation and the pan used is key to minimizing slippage during baking.
I tested this recipe with Gold Medal Blue because of its lower protein and also used King Arthur all-purpose flour. I couldn't detect any difference between them.
Yes and no. I did a side-by-side test of baking the crust with and without weights. The crust baked without the weights had a very slight slippage compared to the crust baked with the weights. The crust without the weights, however, was darker given the same baking time. My recommendation is to go the extra step of using the weights, but it's a personal preference.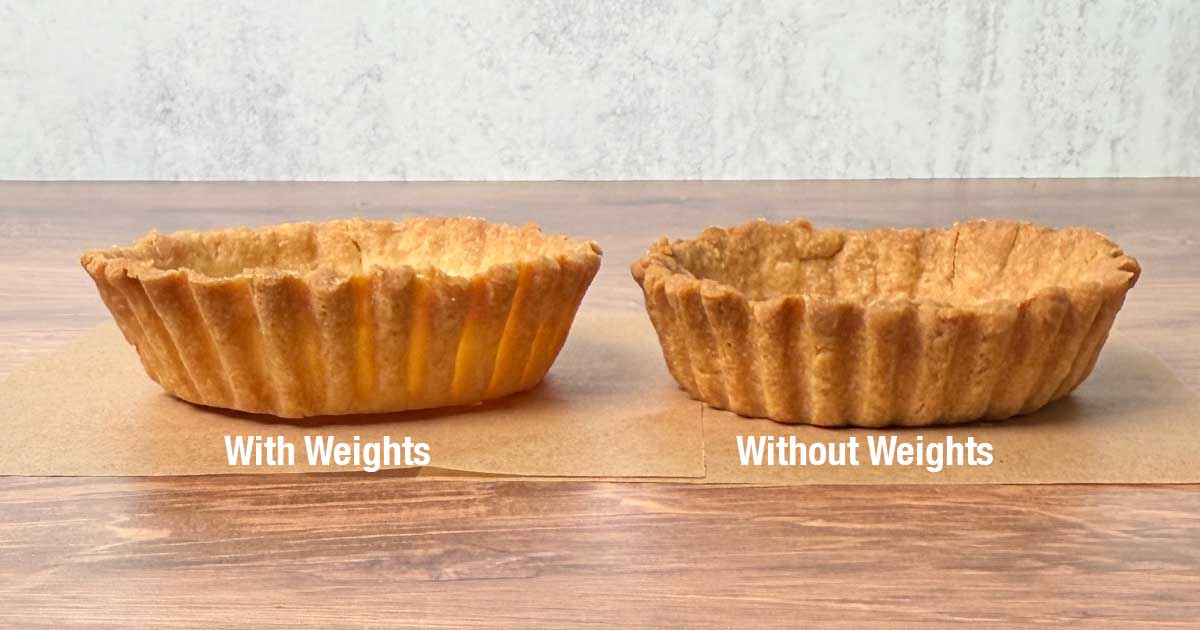
Yes. In fact, I often make the dough, line the tart pans, and freeze the unbaked shells for several days before I need them. They bake beautifully straight from the freezer.
Potential Uses for Mini Savory French Pastry Dough
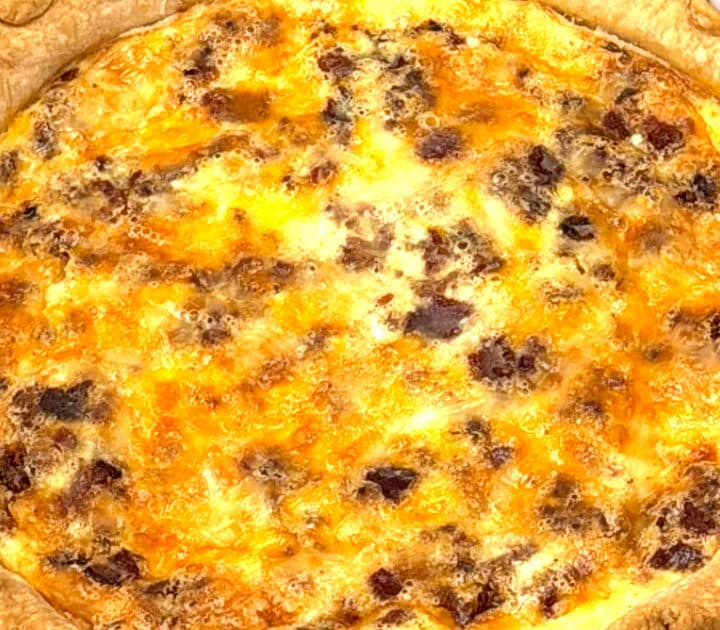
Quiches are the perfect candidate for this Savory French Pastry Dough. Here are some candidates for a mini version of a quiche:
Did you make this recipe? We'd love to know how it turned out! Leave a review below. Then, share a picture on Instagram and tag @pudgefactor so we can see it.
Don't forget to follow us on Pinterest, Facebook, YouTube, Flipboard, and Instagram.
Thank you so much for visiting PudgeFactor. We hope you'll come back!
Recipe
Want to Save This Recipe?
Enter your email & I'll send it to your inbox. Plus, enjoy weekly doses of culinary inspiration as a bonus!
By submitting this form, you consent to receive emails from Pudge Factor.

Savory French Pastry Dough for Mini Quiches
Equipment
- Food Processor with Steel Blade
- Kitchen scale
- Parchment paper
- Rolling pin with ⅛-inch guide rings
- 6 4-inch deep mini tart pans with sloping sides
Ingredients
- 1 ½ cups (7.5 ounces, 213 grams) all-purpose flour (See Tip 1)
- ½ teaspoon fine sea salt
- ½ cup (1 stick, 4 ounces, 113 grams) cold unsalted butter, cut into cubes
- 1 large egg
- 1 to 2 teaspoons water, as needed
Instructions
- Add the flour and salt to a food processor with a steel blade. Pulse five times to combine. Add the butter; pulse until a coarse cornmeal consistency, about 9 times.
- Add the egg and pulse until crumbly, about 10 times. Gather a handful of the dough and pinch it together to test its consistency. If necessary, add 1 to 2 teaspoons of water, and pulse 7 to 8 times. (See Tip 2)
- Transfer the dough to a floured surface (it will be crumbly). Gently gather the dough until it comes together.
- Pinch off a piece of dough, between 65 and 70 grams. Roll into a ball and flatten into a rough circle. Place on a piece of floured parchment paper and top with another piece of parchment paper. Roll into a 6 ½- to 7-inch rough circle, ⅛-inch thick. (See Tip 3)
- Fit the dough into the tart pan, gently pressing the sides down the sides and then pressing the sides against the sides of the tart pan. Trim the top; use a fork to prick the bottom all over. (See Tip 4)
- Repeat with the remaining dough, using scraps as needed. (See Tip 5)
- Freeze the shells for at least 30 minutes.
- Preheat the oven to 400°F. Line the tart shells with 5 or 6-inch squares of parchment paper and fill with weights. (See Tip 6)
- Bake the tart shells for 20 minutes. Remove the parchment paper and weights. Brush the crusts with a beaten egg to seal them and bake for another 5 minutes, or until they just begin to color.
- Allow to cool slightly before filling. (See Tip 7)
- Yield: 6 4-inch mini tart shells ready to fill with your favorite filling.
Video
Tips/Notes
- I first tried Gold Medal Blue, then King Arthur, and couldn't tell any difference.
- I always add 1 teaspoon of water.
- I always use ⅛-inch rolling pin rings on either end of my rolling pin to ensure an even thickness.
- The 4-inch-deep mini tart pans with sloping sides that I used are the perfect pans for this recipe.
- I know that this somewhat defies conventional wisdom, but I can't tell any difference in the tart shells when I use the scraps.
- I always use dried beans for my pie weights.
- I sometimes freeze the baked tart shells for later use.


Leave a Reply