
Cheesy Tomato Onion Galette is perfect for a light dinner when paired with a salad. Tasty tomatoes and onions are layered between two cheeses on a tender and flaky all-butter crust. It's easy to put together and reheats beautifully. Make it earlier in the day for a no-fuss and amazing dinner.

What is a Galette?
What is a galette (pronounced guh-let) you ask? Well, it's a rustic, free-form tart made with a single layer of crust. Once the filling is added, the crust is folded up around the sides of the filling.
Because the galette is free-form, it's quite easy to make and very forgiving. The filling can be either sweet or in the case of this Cheesy Tomato Onion Galette, savory.
Although a galette can be made with bread dough like a pizza, when made with a pâte brisée crust such as I used, it's light and amazingly delicious. In fact, the Master Taste tester was expecting something like pizza and was no end impressed that it was nothing at all like a doughy pizza.
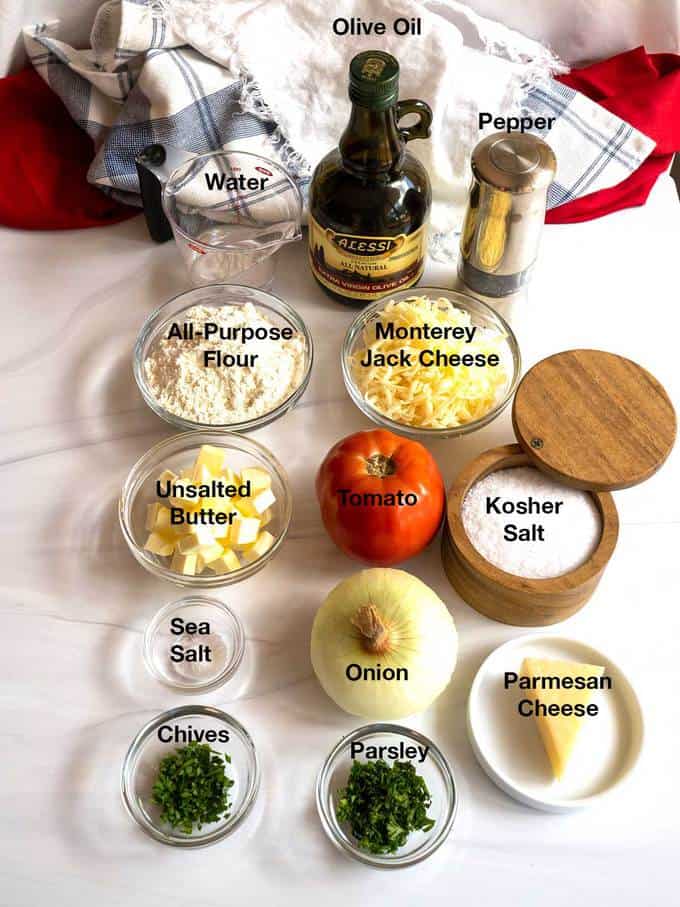
Ingredients for Cheesy Tomato Onion Galette
For this simple crust, I used all-purpose flour, unsalted butter, salt and water. I used a fresh tomato, sweet onion, Parmesan cheese and Monterey Jack cheese for the filling. As a garnish, I used olive oil, fresh parsley and fresh chives.
Making the Cheesy Tomato Onion Galette
1 hour and 15 minutes 1 hour and 15 minutes
Below are the steps I used in making this amazing galette
- Making the Pâte Brisée Dough - Part 1
You might be tempted to use pre-made pie crust that you can purchase at the grocery store for this amazing galette. However, you really should go the extra step and make this simple crust. Part of the reason is that the food processor does most of the work. The other reason is that the crust is delicately flavored and amazingly flaky.
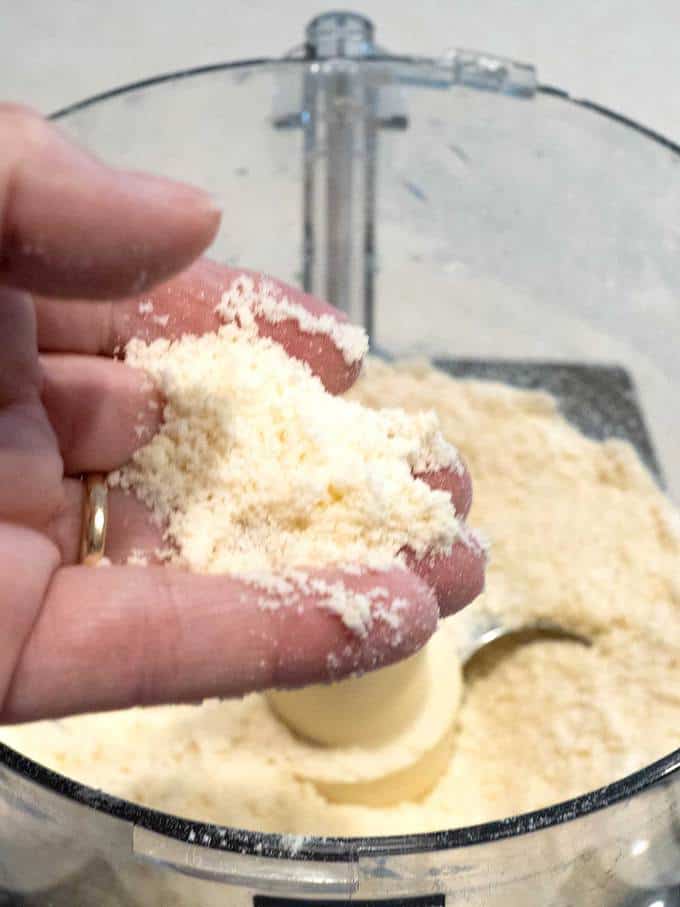
For starters, I added the flour and salt to my food processor, fitted with a steel blade, and pulsed it 5 or 6 times to combine everything. Then I added the cold butter which I had cut into small pieces and pulsed the food processor 7 or 8 times until the mixture resembled coarse meal.
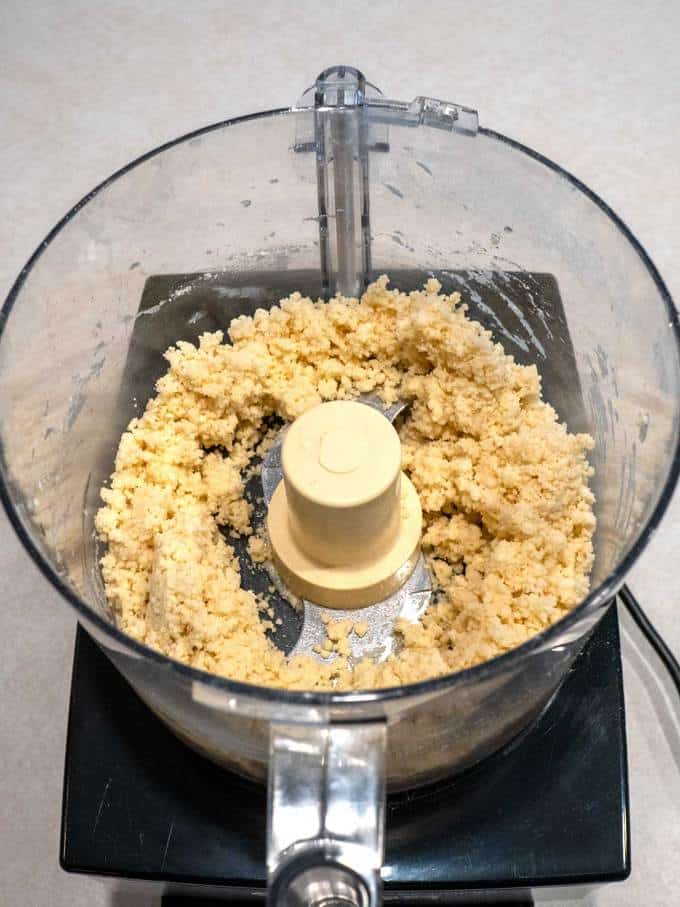
- Making the Pâte Brisée Dough - Part 2
Finally, I added the cold water to the food processor and pulsed it 7 or 8 times, until the dough came together in my hand.
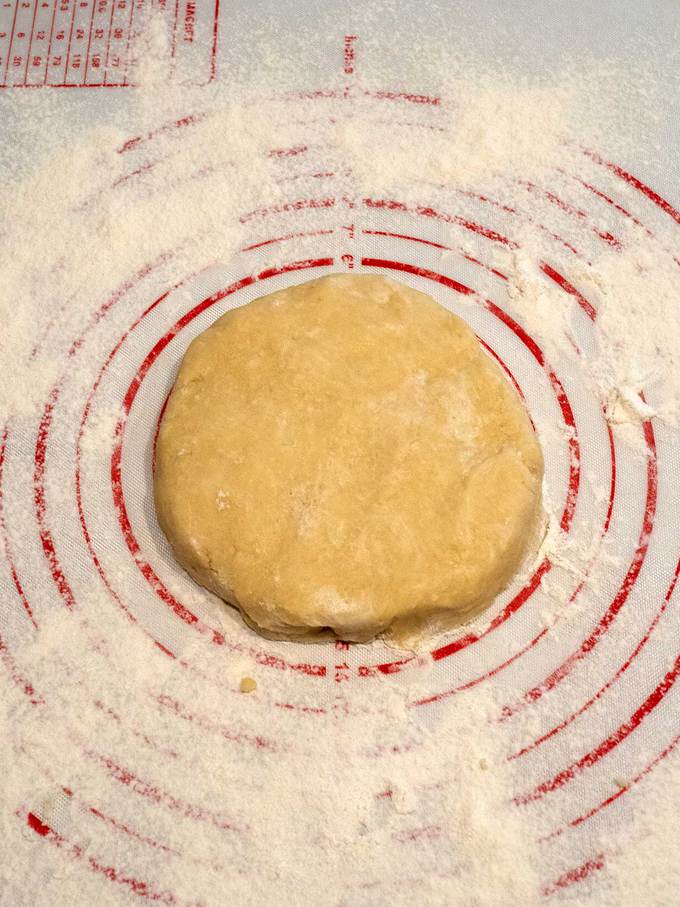
- Forming Dough into a Disk
I turned the dough out onto a floured surface and formed it into a 6-inch disk that was about ½-inch thick. Then, I tightly wrapped the dough in plastic wrap and refrigerated it for about 30 minutes.
- Preparing the Tomatoes and Onions - Part 1
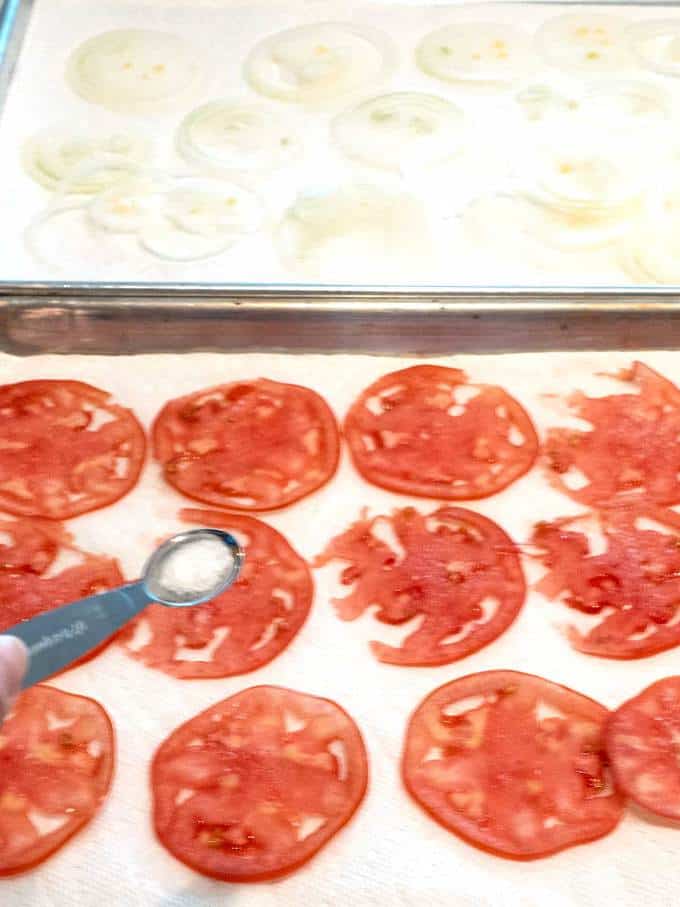
Using my mandoline, I sliced the tomato and onion into very thin slices. For my mandoline, this meant 3.5 mm slices. I could have used a sharp knife, but I wanted the tomato and onion slices to be the same thickness so that they would cook evenly.
A major key to ensuring the galette was not soggy was removing excess moisture from both the tomato and onion slices. To do this, I placed the tomato and onion slices in a single layer on a doubled piece of paper towels. Then, I sprinkled both with some salt to help draw out the moisture. - Preparing the Tomatoes and Onions - Part 2
I let the tomatoes and onions sit for about 30 minutes. After 30 minutes, I blotted both the tomatoes and onions with paper towels to remove the excess moisture.
- Preheating the Oven
Before putting the galette together, I preheated the oven to 400°F. I wanted to make sure that the bottom crust of the galette was nicely browned. I could have used a pizza stone, but instead put an inverted rimmed baking sheet in the oven while it was preheating.
This would produce added heat to the bottom of the galette when I baked it. - Rolling the Pâte Brisée Dough
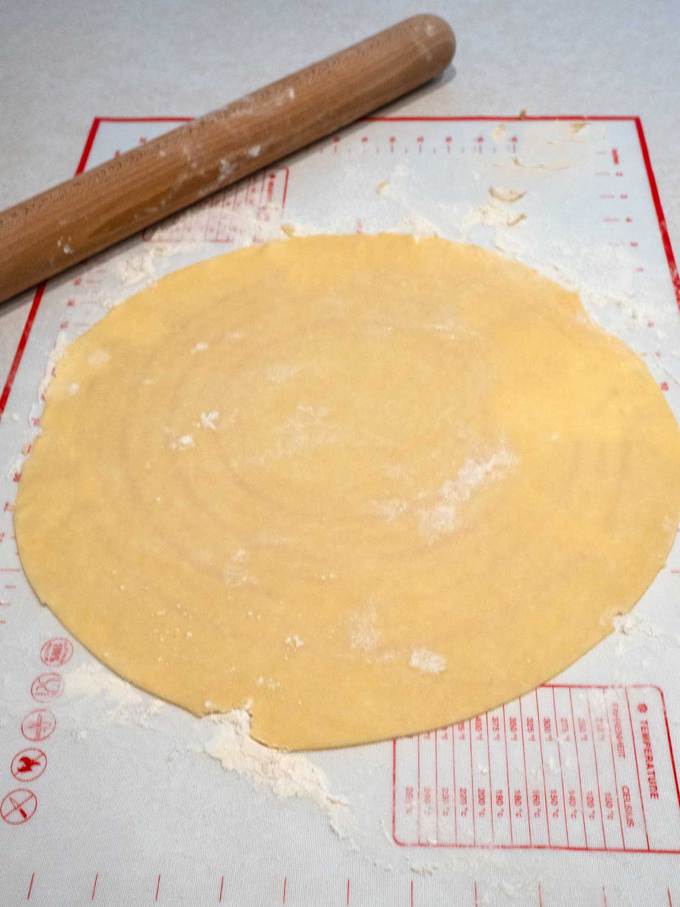
The first step in putting the Cheesy Tomato Onion Galette together was rolling out the dough on a floured surface to a 13 to 14-inch circle.
- Putting the Galette Together
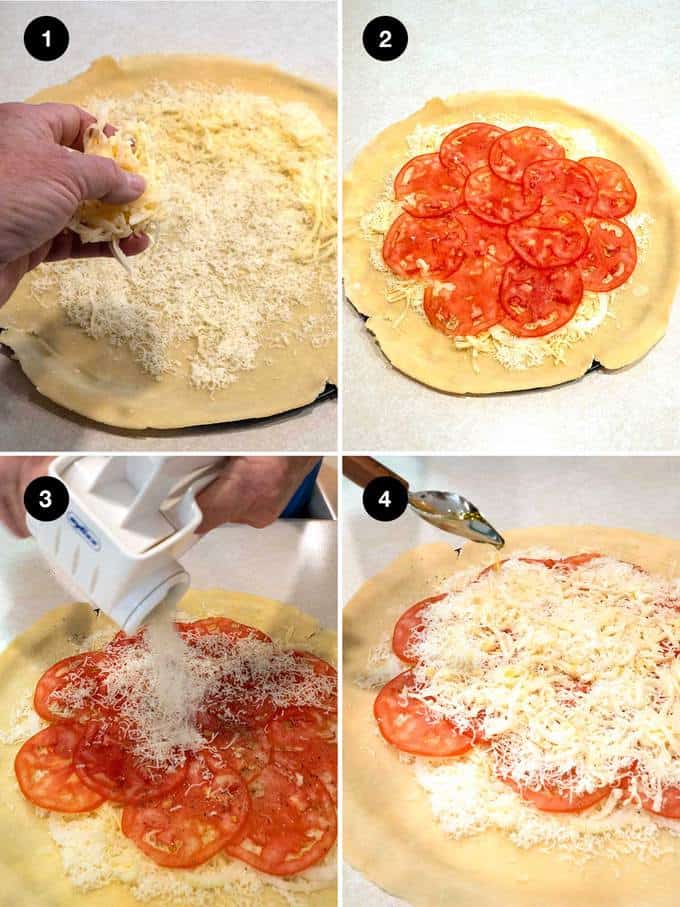
Then, I transferred the dough to a pizza pan. I started by sprinkling part of freshly grated Parmesan and Monterey Jack cheeses on the crust, leaving about a 1 ½-inch border (Photo 1).
The cheese was important for two reasons. First, it produced a barrier between the onions/tomatoes and the crust to prevent the crust from becoming soggy. Second, it added amazing texture and flavor to the galette.
Next, I added a layer of onion slices and tomato slices on top of the cheeses and sprinkled on some freshly ground black pepper (Photo 2) I added another layer of Parmesan cheese and Monterey Jack cheese on top of the tomatoes (Photo 3).
Finally, I sprinkled some olive oil over the top of the galette (Photo 4). - Finishing the Galette
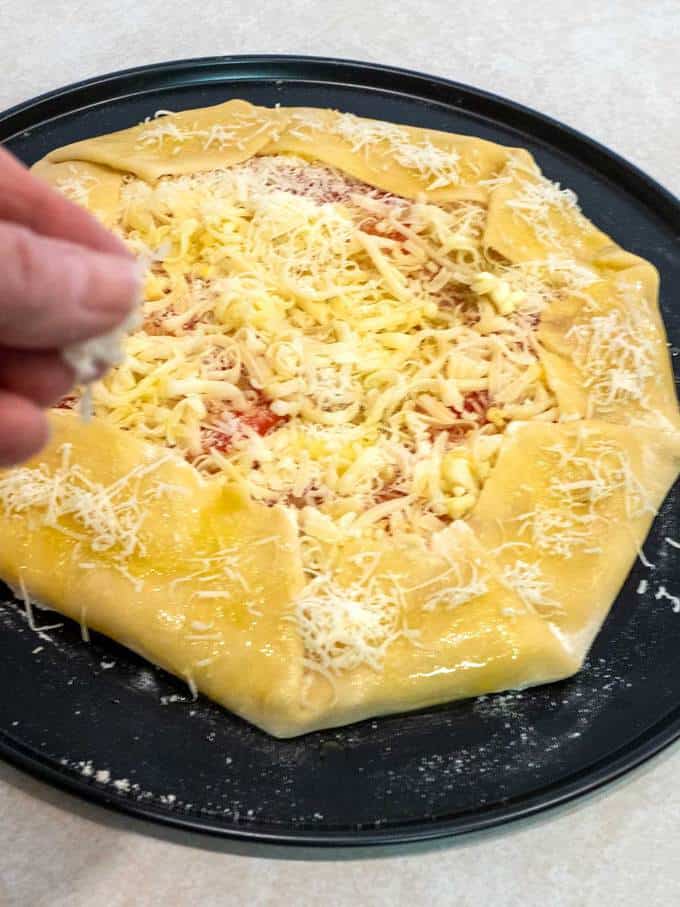
To finish the galette, I brought the uncovered border of the pastry over the filling, pleating it as needed. Then, I lightly brushed the exposed boarder of the pastry with olive oil and sprinkled on some Parmesan cheese.
- Baking the Galette
I popped the Cheesy Tomato Onion Galette into the preheated 400°F oven for between 30 and 35 minutes, until the crust was golden brown.
I removed the galette from the oven and let it cool for about 10 minutes.

The Cheesy Tomato Onion Galette was amazingly delicious. The crust was tender and flaky, and the filling was perfectly balanced with the tomatoes, onions and cheeses. Yum!

If you're interested in another amazing tomato tart, check out my immensely popular Fresh Tomato Ricotta Tart in Puff Pastry.
Frequently Asked Questions
You want both the tomato and online slices to be very thin and of even thickness in this recipe. I used my mandoline to slice the tomato and onion into 3.5 mm slices, but you could also use a very sharp knife. I would not, however use the food processor, especially for the tomato. You would likely end up crushing the tomato too much.
I used Monterey Jack cheese in this recipe because that's what I had on hand. I've also made the galette with Mozzarella cheese and Gruyère cheese. In all cases, the galette was amazing.
I used fresh parsley and chives as a garnish because that's what I had. You could also use fresh thyme and or fresh Rosemary.
While you could use either store-bought pie crust or puff pastry, I would highly recommend that you go the extra step and make the Pâte Brisée. It's easy to make, easy to work with and absolutely delicious.
You can prepare the dough up to 2 days in advance, well wrapped in the refrigerator. It can also be frozen for up to 2 months.
This Cheesy Tomato Onion Galette is just as good reheated as it is freshly baked. Actually, I sometimes will bake the galette earlier in the day and reheat it later for dinner.
I originally posted this amazing recipe on September 15, 2020. Since then, I've made the Cheesy Tomato Onion Galette a number of times with consistently awesome results.
This repost contains the same pictures and recipe with some updated text.
I hope you liked this recipe forTomato Onion Galette as much as I do. If so, please consider rating it and leaving a comment. Also, if you'd like to receive notifications of new posts by email, enter your email address in the Subscribe box.
Recipe
Want to Save This Recipe?
Enter your email & I'll send it to your inbox. Plus, enjoy weekly doses of culinary inspiration as a bonus!
By submitting this form, you consent to receive emails from Pudge Factor.

Cheesy Tomato Onion Galette
Equipment
- Food Processor
Ingredients
Pâte Brisée Crust
- 1 cup (5 ounces) unbleached all-purpose flour
- ¼ teaspoon fine sea salt
- 6 Tablespoons (3 ounces) unsalted butter, chilled and cut into ½-inch cubes
- 3 Tablespoons plus 1 teaspoon (1.67 ounces) ice water
Cheesy Tomato Onion Filling
- 1 large tomato (8 to 9 ounces) or 2 small tomatoes, thinly sliced (See Tip 2)
- 1 medium onion (about 6 ounces) thinly sliced (See Tip 1)
- 1 teaspoon Kosher salt, divided
- ½ cup plus 2 Tablespoons (2.1 ounces) freshly grated Parmesan cheese, divided
- ¾ cup (3 ounces) shredded Monterey Jack cheese, divided (See Tip 2)
- ⅛ teaspoon freshly ground black pepper
- 1 Tablespoon olive oil
- ½ teaspoon freshly minced parsley (See Tip 3)
- ½ teaspoon freshly minced chives (See Tip 3)
Instructions
Pâte Brisée Dough
- Add flour and salt to food processor fitted with steel blade. Pulse process 5 to 6 times to thoroughly combine. Add butter; pulse process 7 to 8 times or until mixture resembles coarse meal. Add water; pulse process 7 to 8 times or until mixture holds together when pressed in hand. (See Tip 4)
- Transfer dough to floured surface. Form into 6-inch disk that is around ½-inch thick. Wrap tightly in plastic wrap. Refrigerate for at least 30 minutes. (See Tip 5)
Filling
- Spread tomatoes and onions in a single layer on doubled paper towels. Sprinkle ½ teaspoon of salt on tomatoes; sprinkle remaining ½ teaspoon of salt on the onions. Let stand for 30 minutes. After 30 minutes, blot dry with paper towels.
Cheesy Tomato Onion Galette
- Preheat oven to 400°F. Position oven rack in bottom third of the oven. If you have one, place a baking stone on the oven rack. Otherwise, place an inverted rimmed baking sheet on oven rack.
- On a lightly floured surface, roll dough to a very thin 13 to 14-inch circle. Transfer dough to large pizza pan or baking sheet.
- Sprinkle ¼ cup of Parmesan cheese on pastry, leaving a 1 ½-inch border. Sprinkle half of the Monterey Jack cheese on Parmesan cheese.
- Scatter onion rings over cheese. Top with tomato slices. Sprinkle pepper on tomato slices.
- Sprinkle ¼ cup of Parmesan cheese and remaining Monterey Jack cheese on tomatoes. Drizzle 1 teaspoon of olive oil on cheeses.
- Bring uncovered pastry border over the filling pleating as necessary. Brush with olive oil and sprinkle on remaining 2 tablespoons of Parmesan cheese.
- Bake in preheated 400°F for 30 to 35 minutes, or until golden brown. (See Tip 6)
- Remove from oven; allow to cool for at least 10 minutes. Serve hot or warm.
- Yield 4 servings. (See tip 7)
Tips/Notes
- I used my mandoline to slice the tomato and onion into 3.5 mm slices. You could also use a knife. However, you want both the tomato and onion slices to be very thin and of even thickness.
- Rather than Monterey Jack cheese, you could use Mozzarella cheese or Gruyère cheese.
- I used fresh parsley and chives as a garnish because that's what I had. You could also use fresh thyme and or fresh Rosemary.
- If the dough doesn't hold together, add more water, 1 teaspoon at a time. You don't want the dough to be too wet.
- This dough can be prepared up to 2 days in advance, well wrapped and refrigerated. It can also be frozen for up to 2 months.
- Watch the galette carefully while it's baking. If the top starts to brown too much, cover loosely with aluminum foil.
- This Cheesy Tomato Onion Galette is just as good reheated. Therefore, sometimes, I'll bake it earlier in the day and reheat it later for dinner.


Leave a Reply