
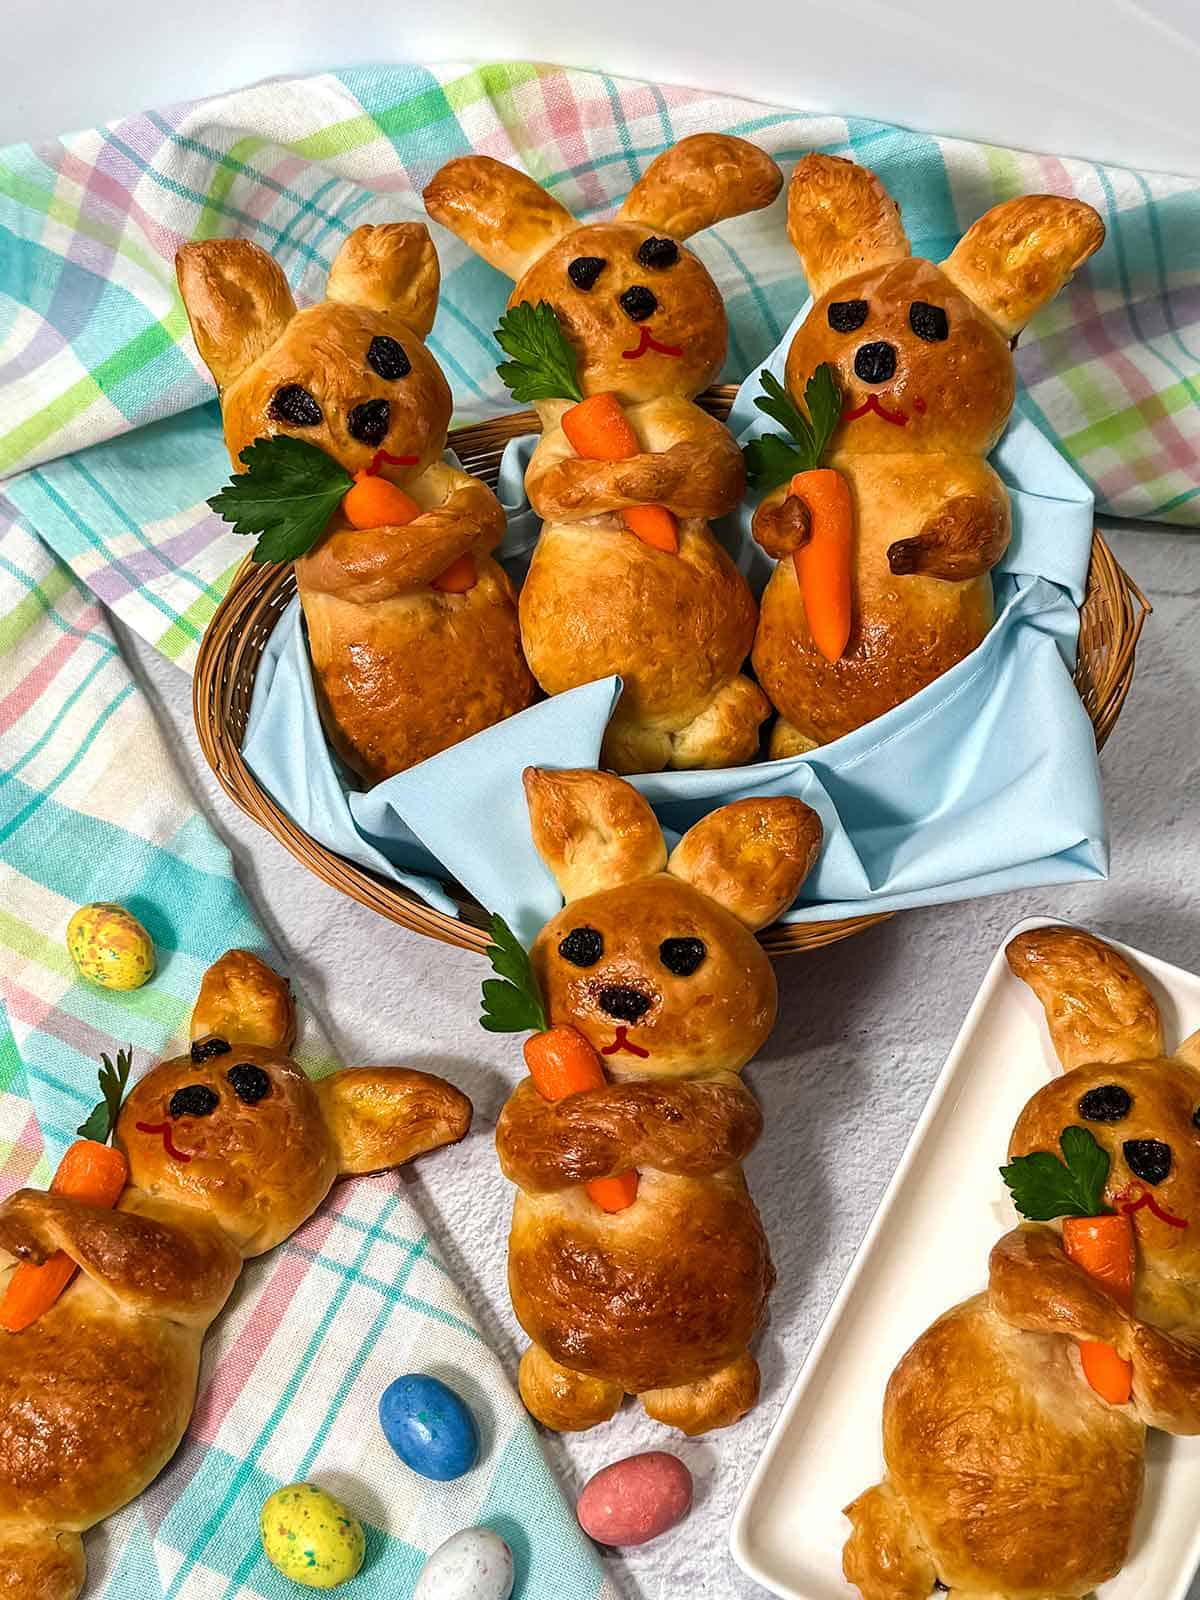
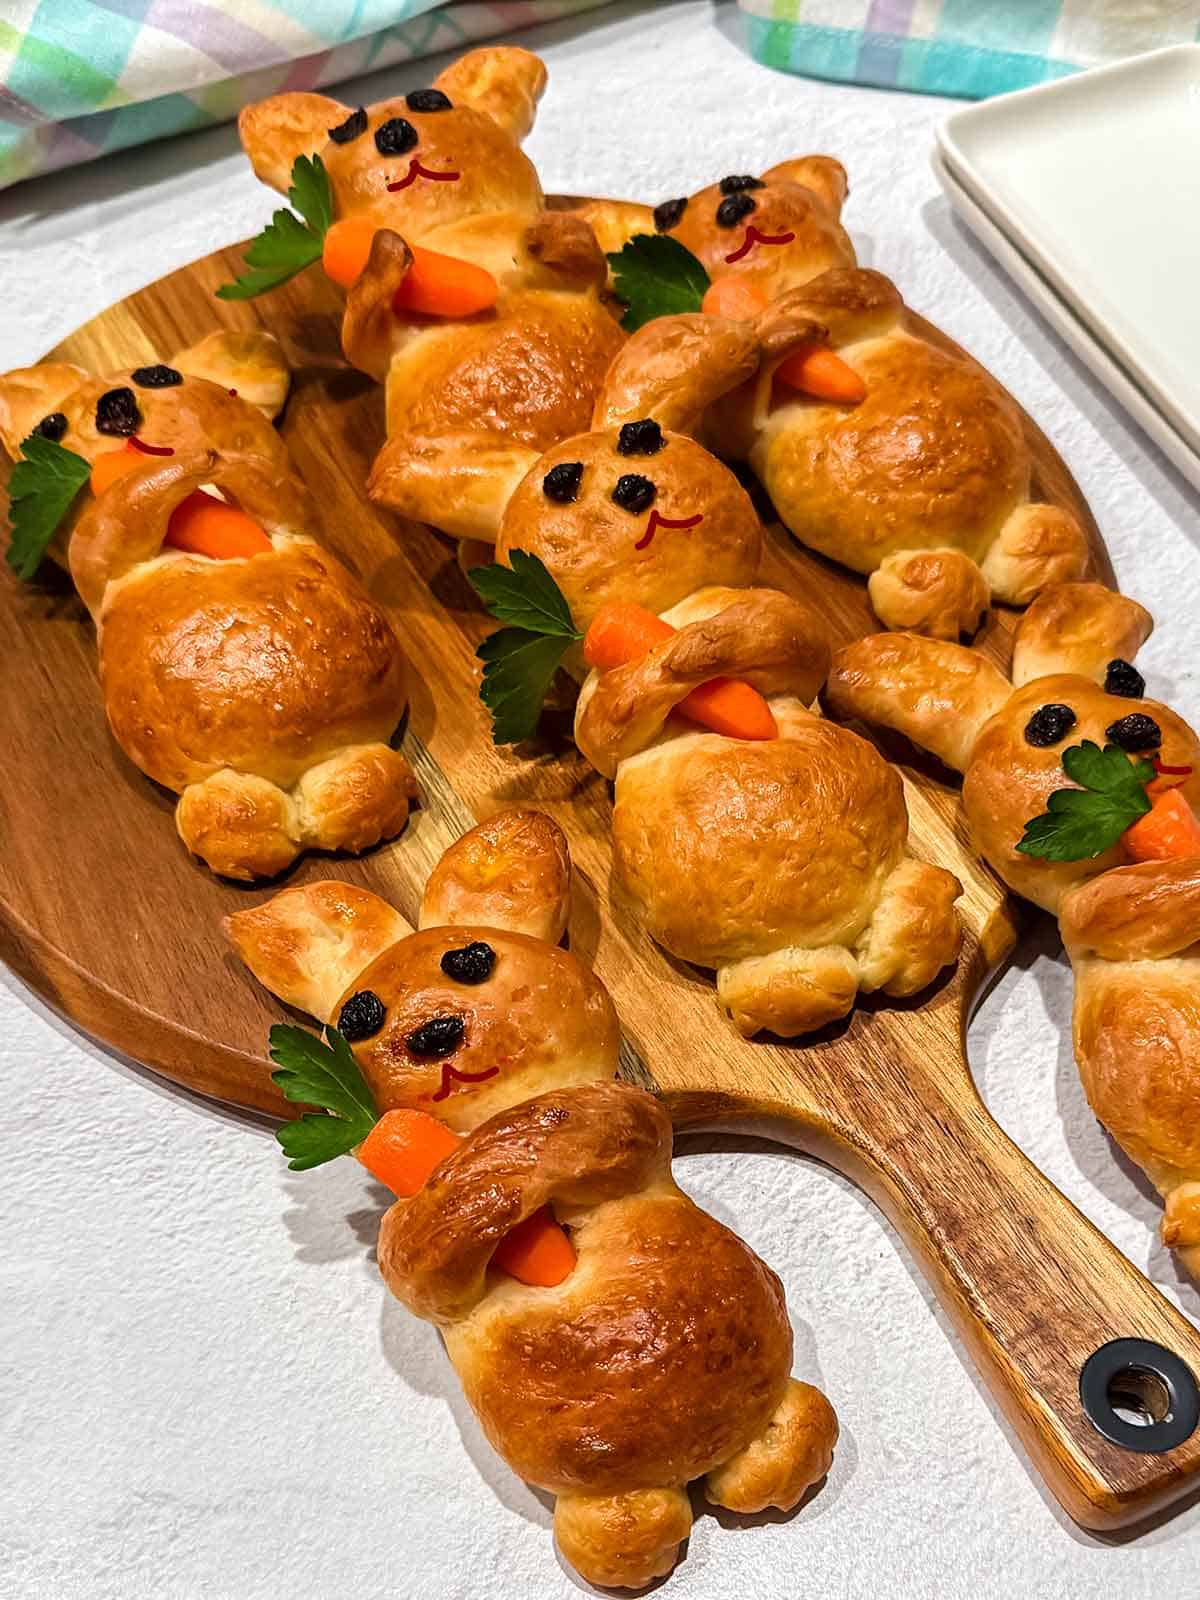
Hop into spring with these irresistibly cute Easter Bunny Rolls! Made from soft dough and shaped entirely by hand, each bunny holds a baby carrot topped with a parsley leaf. These Easter Bunny Rolls will be an instant hit for Easter brunch, kids' parties, or spring-themed gatherings.

The dough comes together easily in the food processor, and the shaping process is fun for all ages. These festive rolls are as tasty as they are adorable!
Quick Look at the Recipe
- Prep Time: 25 minutes
- Rising Time: 1 hour
- Cook Time: 20 minutes
- Total Time: 1 hour and 45 minutes
- Difficulty Level: Medium
Jump to:
Ingredients for the Rolls
The rolls used simple ingredients.

Making the Dough for the Easter Bunny Rolls
My food processor did most of the work in making these rolls.
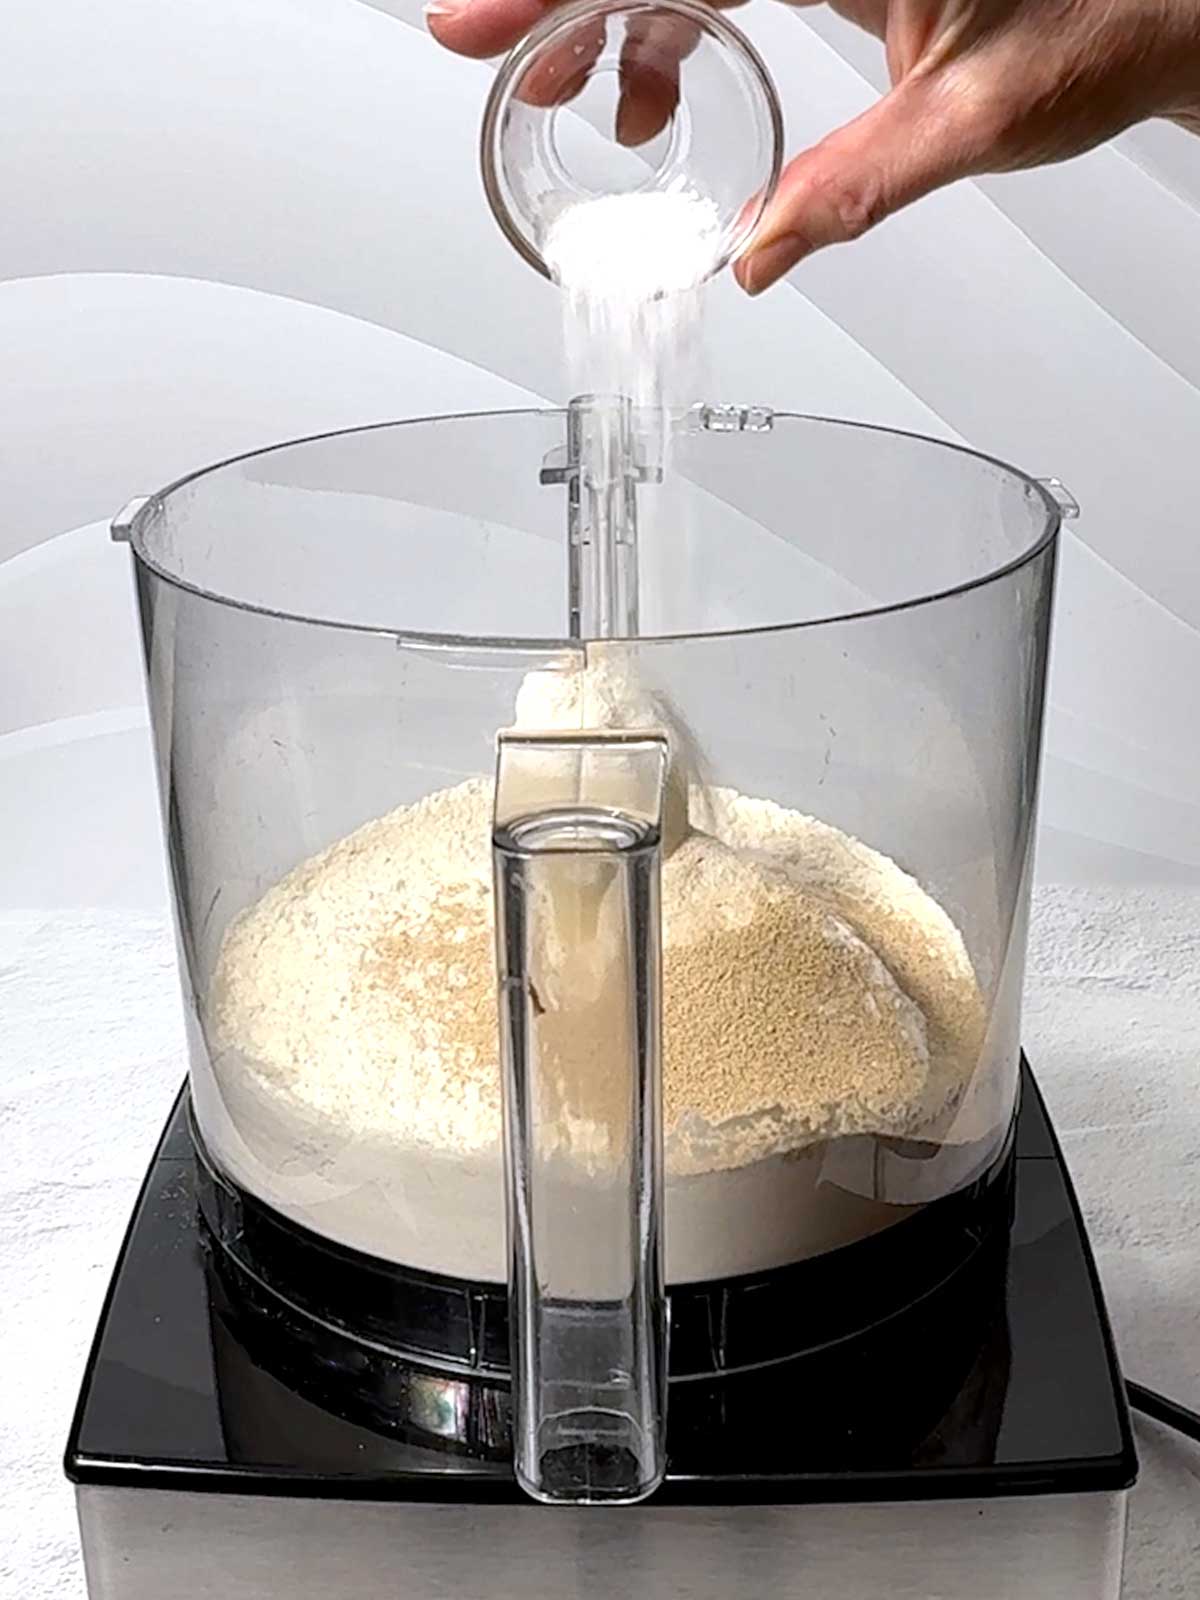
- First, I added the flour, sugar, yeast, and salt to the food processor with the steel blade. After securing the top, I pulsed the mixture five or six times to combine the ingredients.
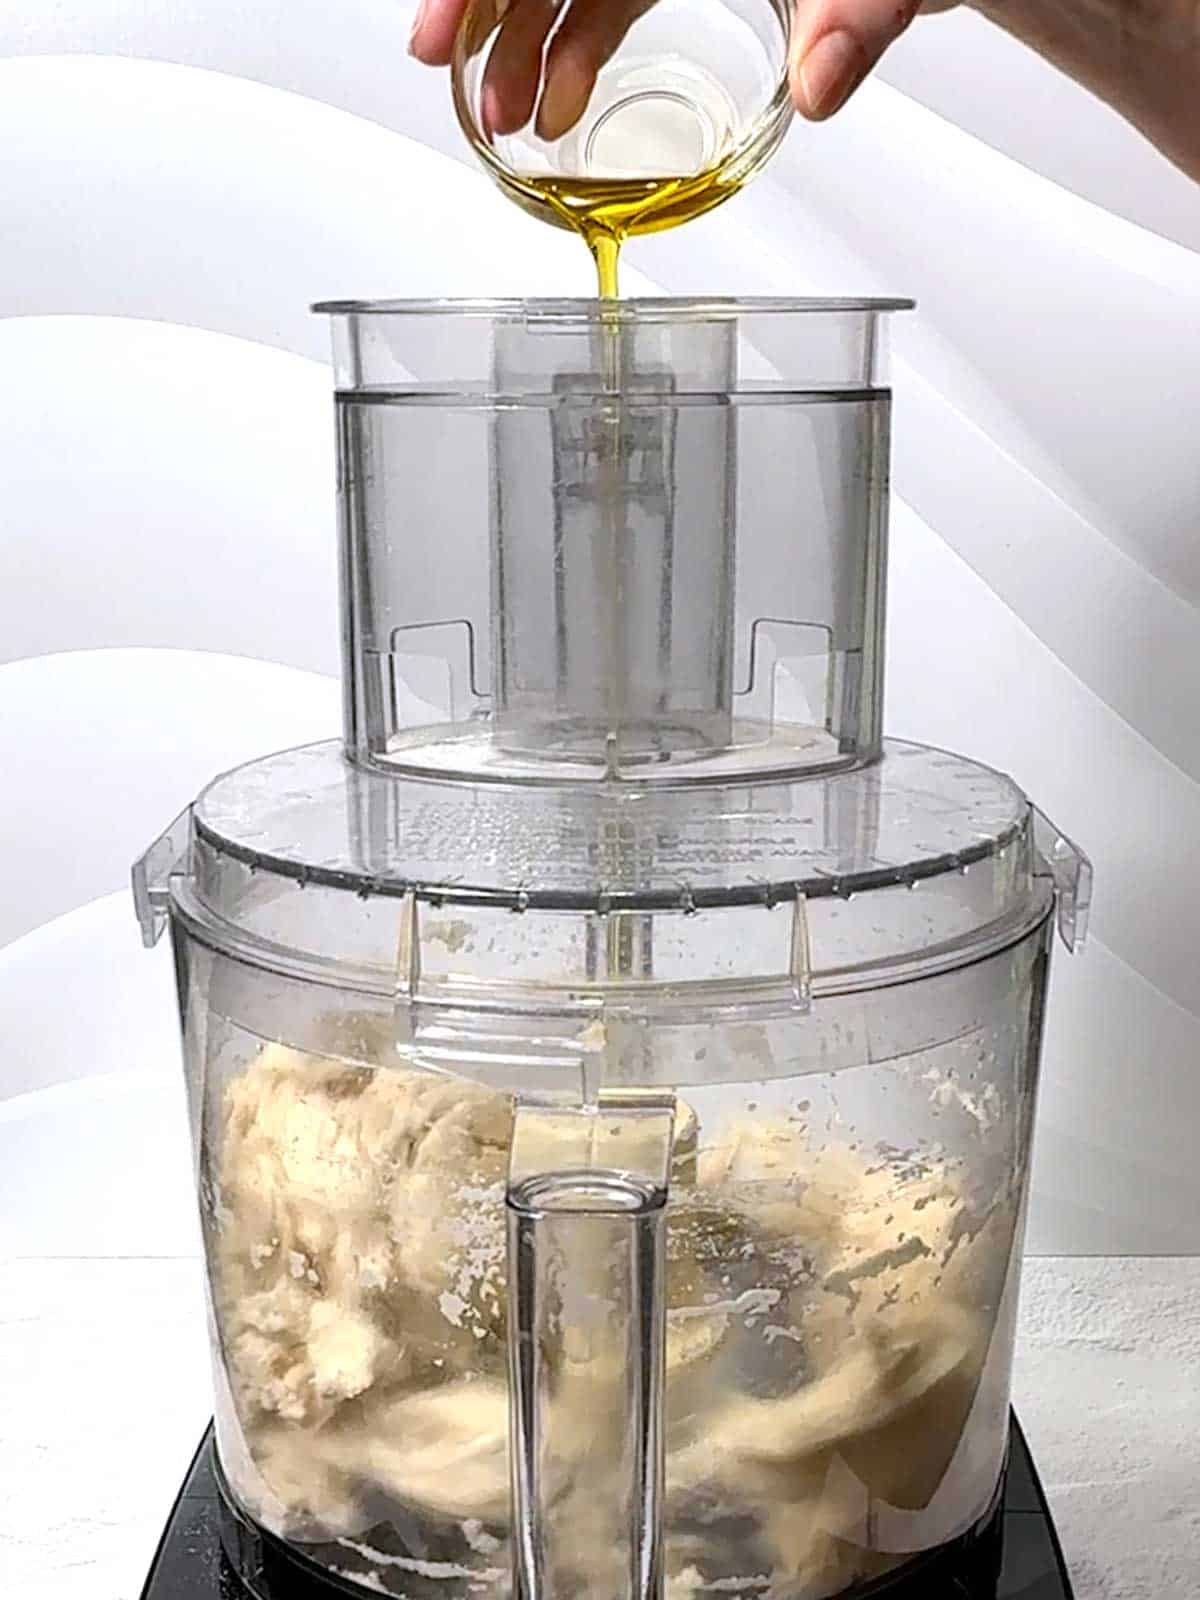
- With the food processor running, I slowly added cool water and two teaspoons of olive oil through the feed tube. I continued to process the mixture for about 20 seconds until the dough formed a satiny, tacky ball that cleared the sides of the bowl.
- Once the dough had formed, I let it sit for 10 minutes. Then, I processed it for another 20 to 30 seconds.

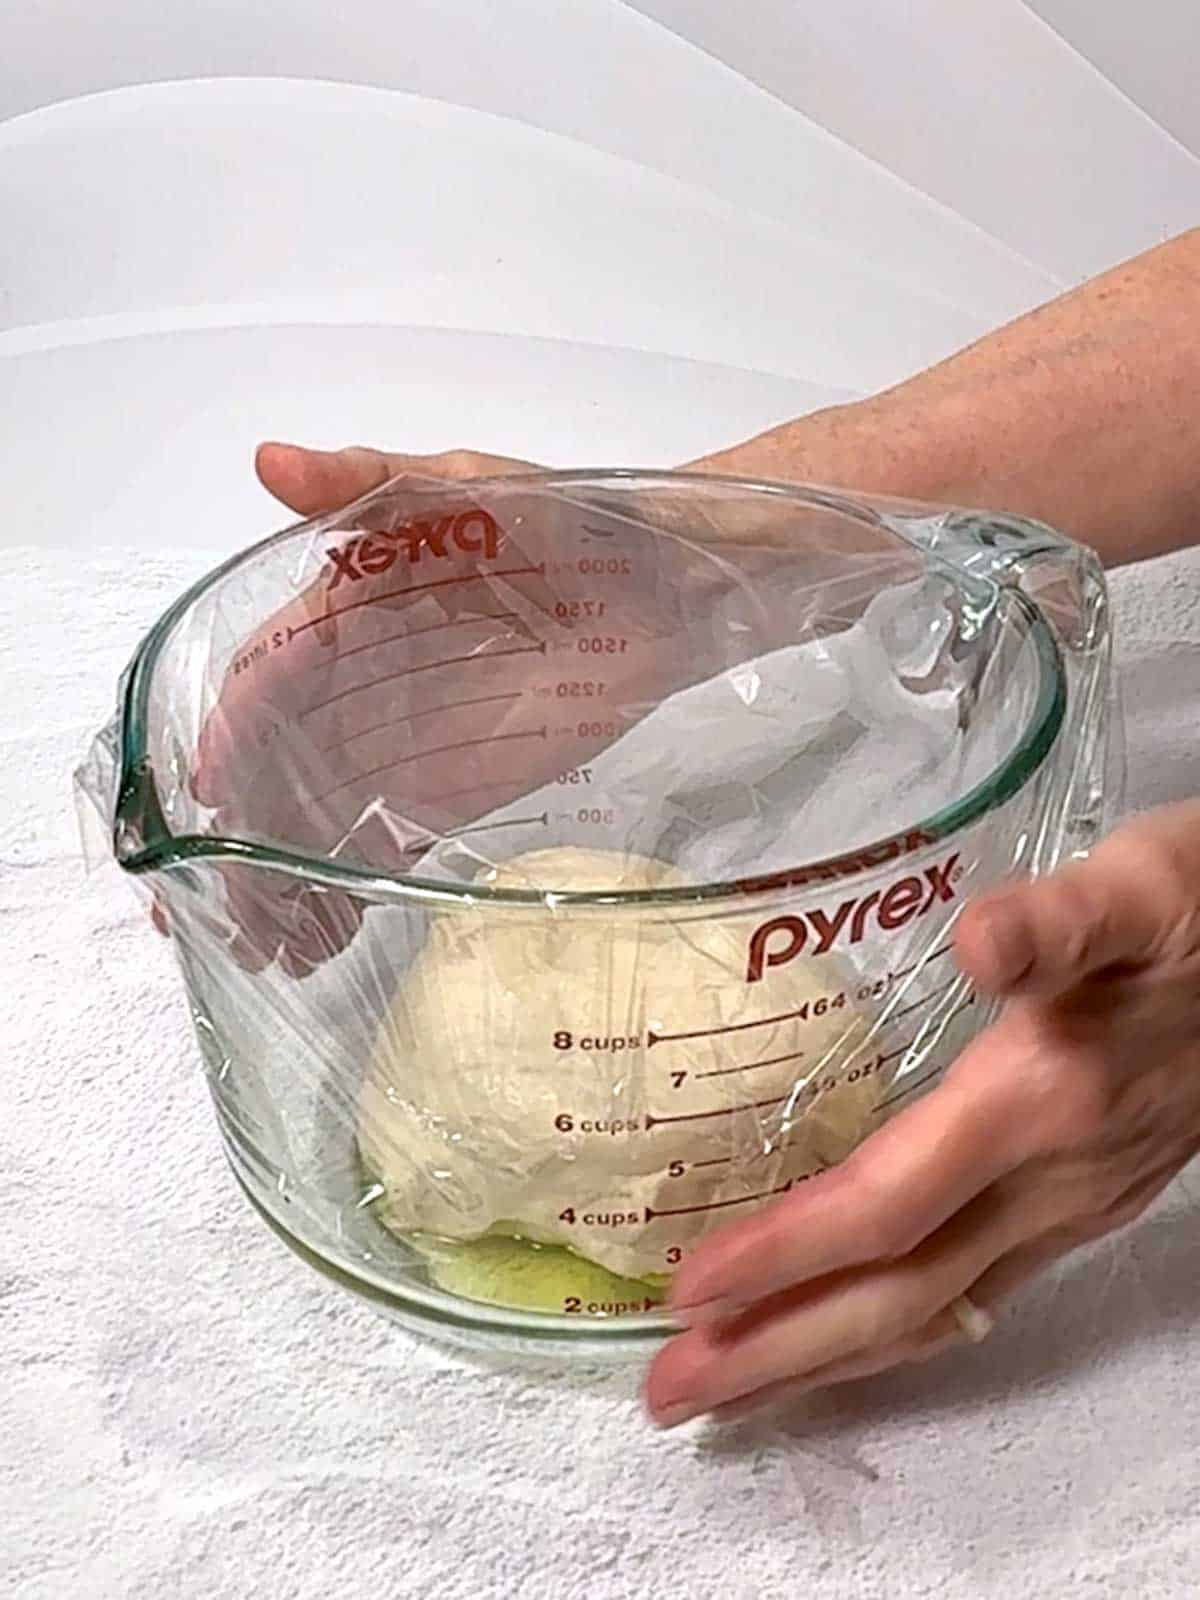
- I transferred the dough to a 4-cup oiled measuring cup and covered it with plastic wrap. I placed the dough in my electric oven using the proof function for about 45 minutes until it had doubled in size.
Forming the Bunny
- Once the dough had risen, I transferred it to a floured surface and cut it into pieces for the bunny.
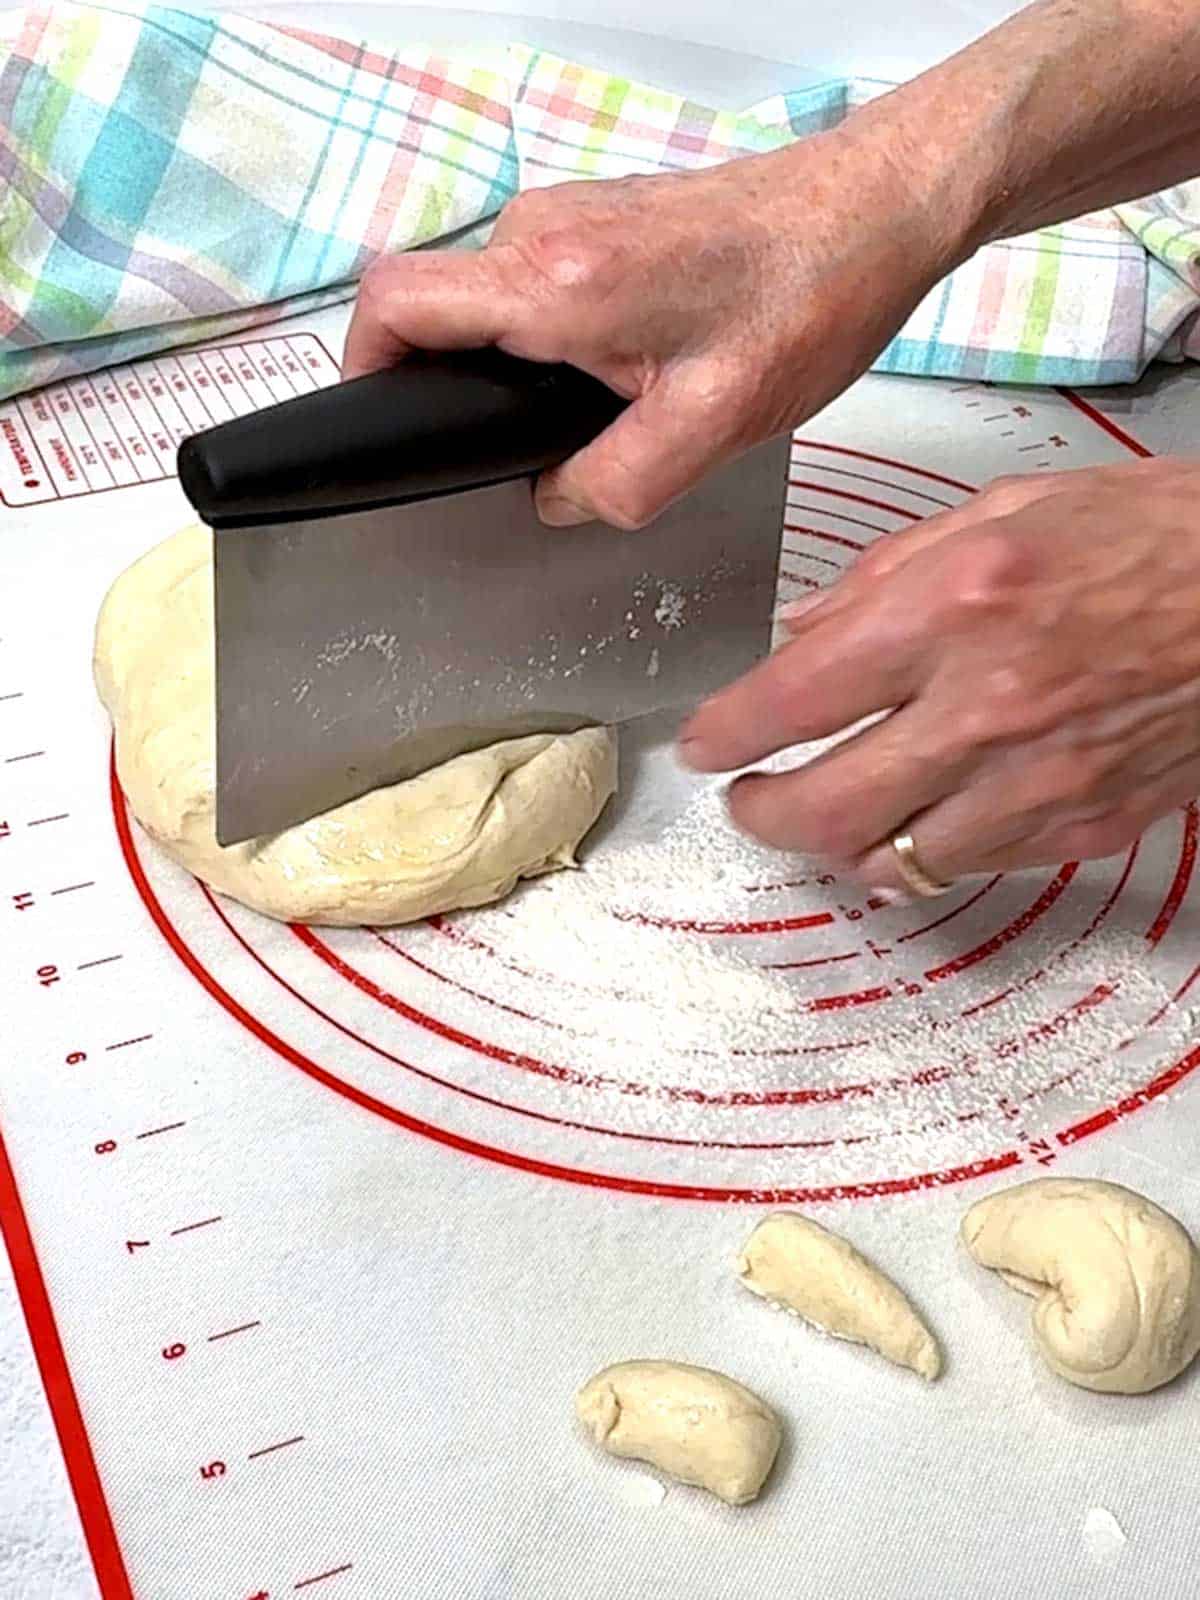
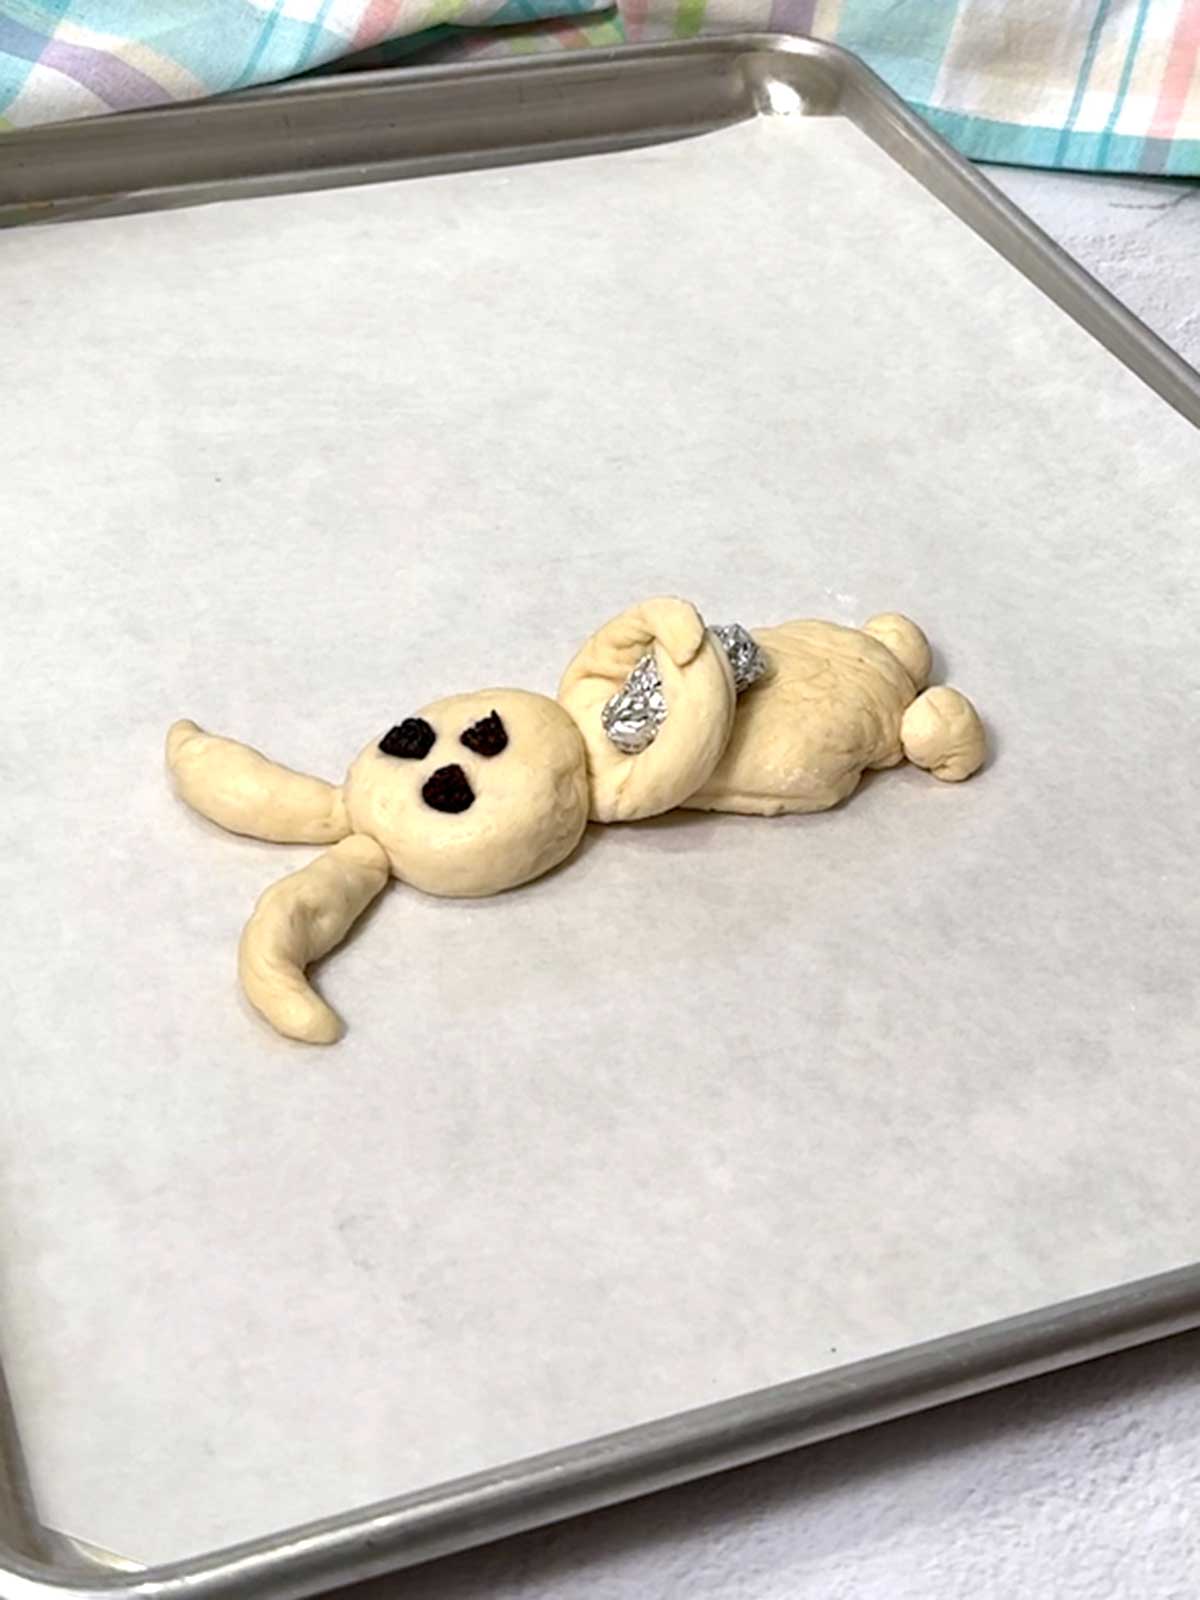
- Based on experience, I cut the dough into the following weights for each bunny: body - 1.5 ounces; arms - cut from the body; head - 0.75 ounces; ears - 0.16 ounces each; feet - 0.10 ounces each. I built the bunnies on a parchment-lined half-sheet pan.
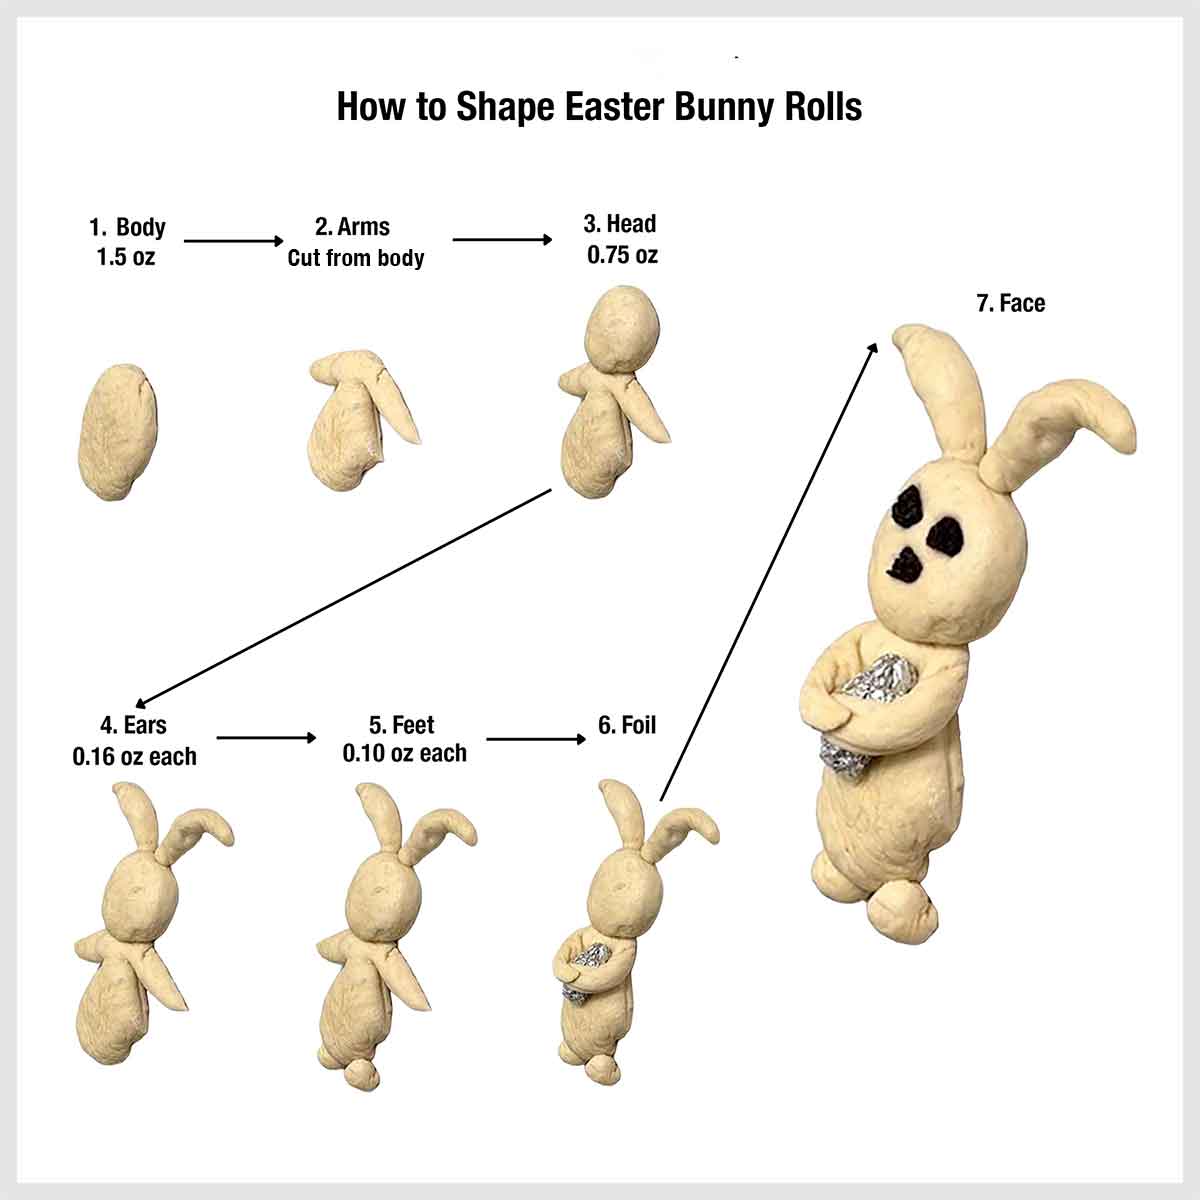
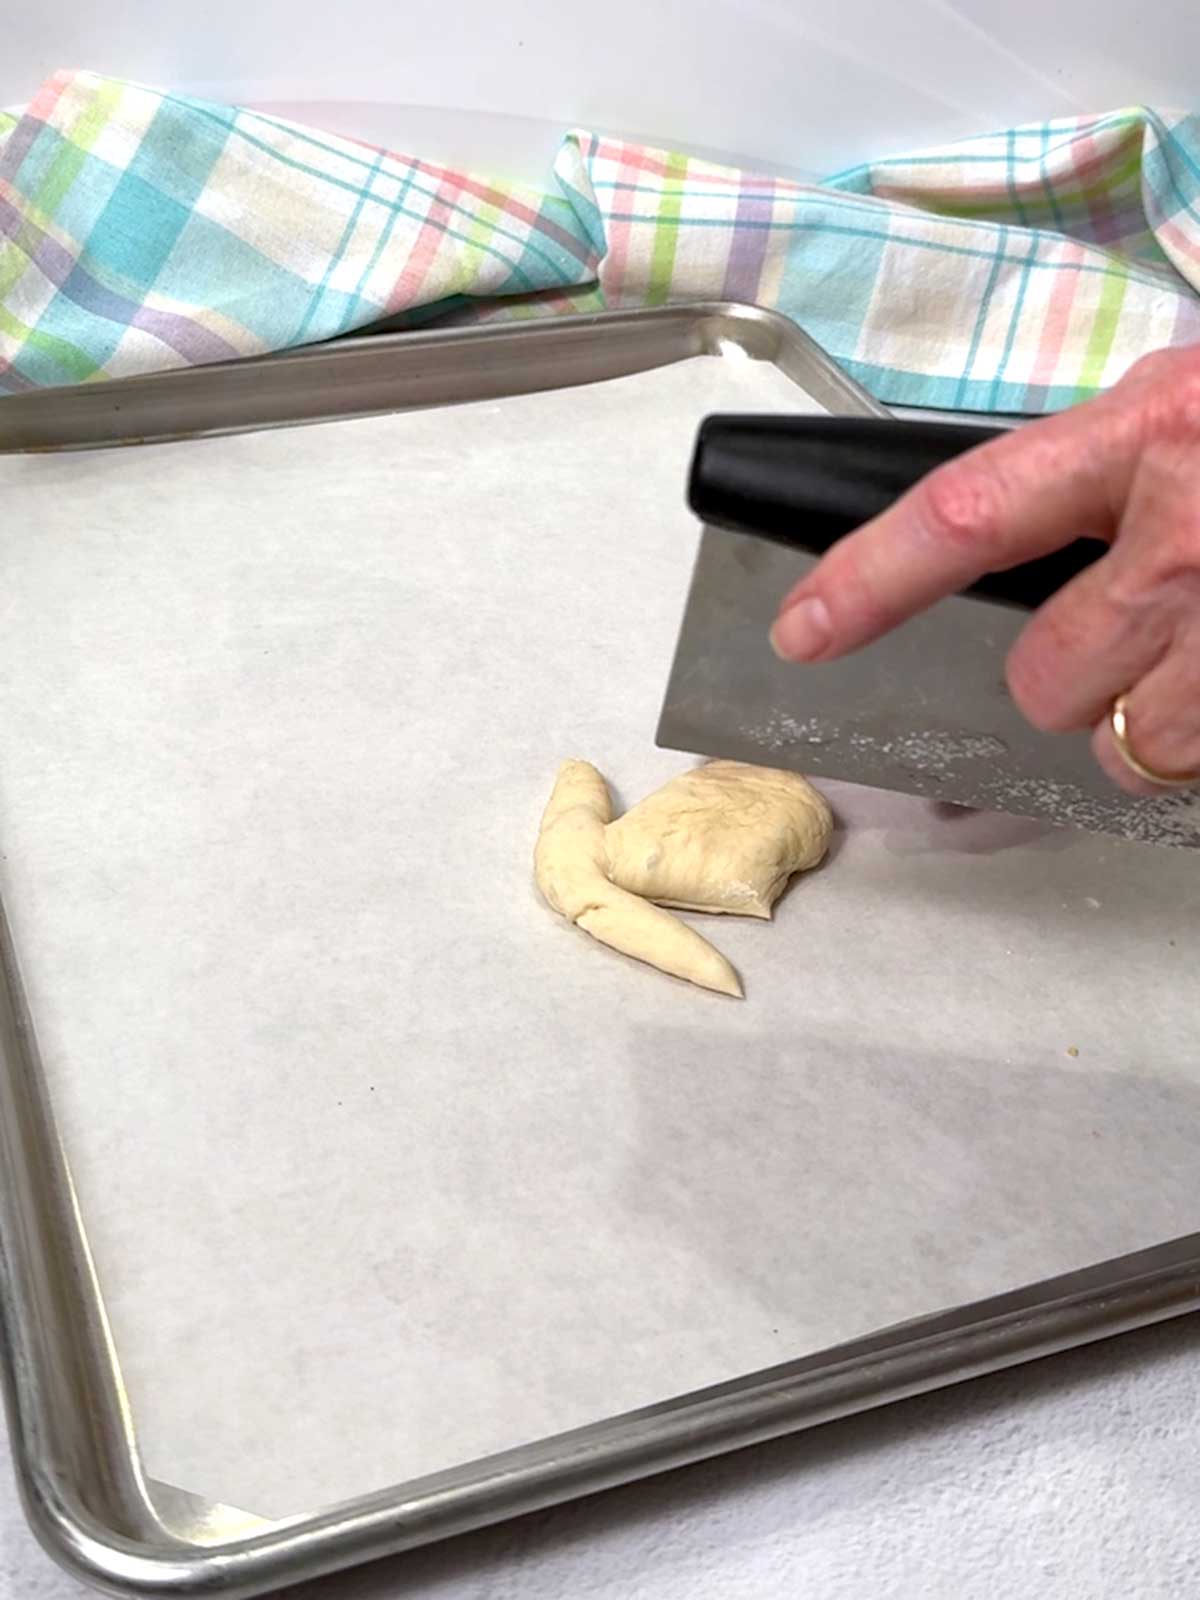
- When I was experimenting with making these adorable rolls, I cut individual pieces of dough for the bunny's arms. However, I think it works better to cut parts of each side of the body for the arms, which is shown here.
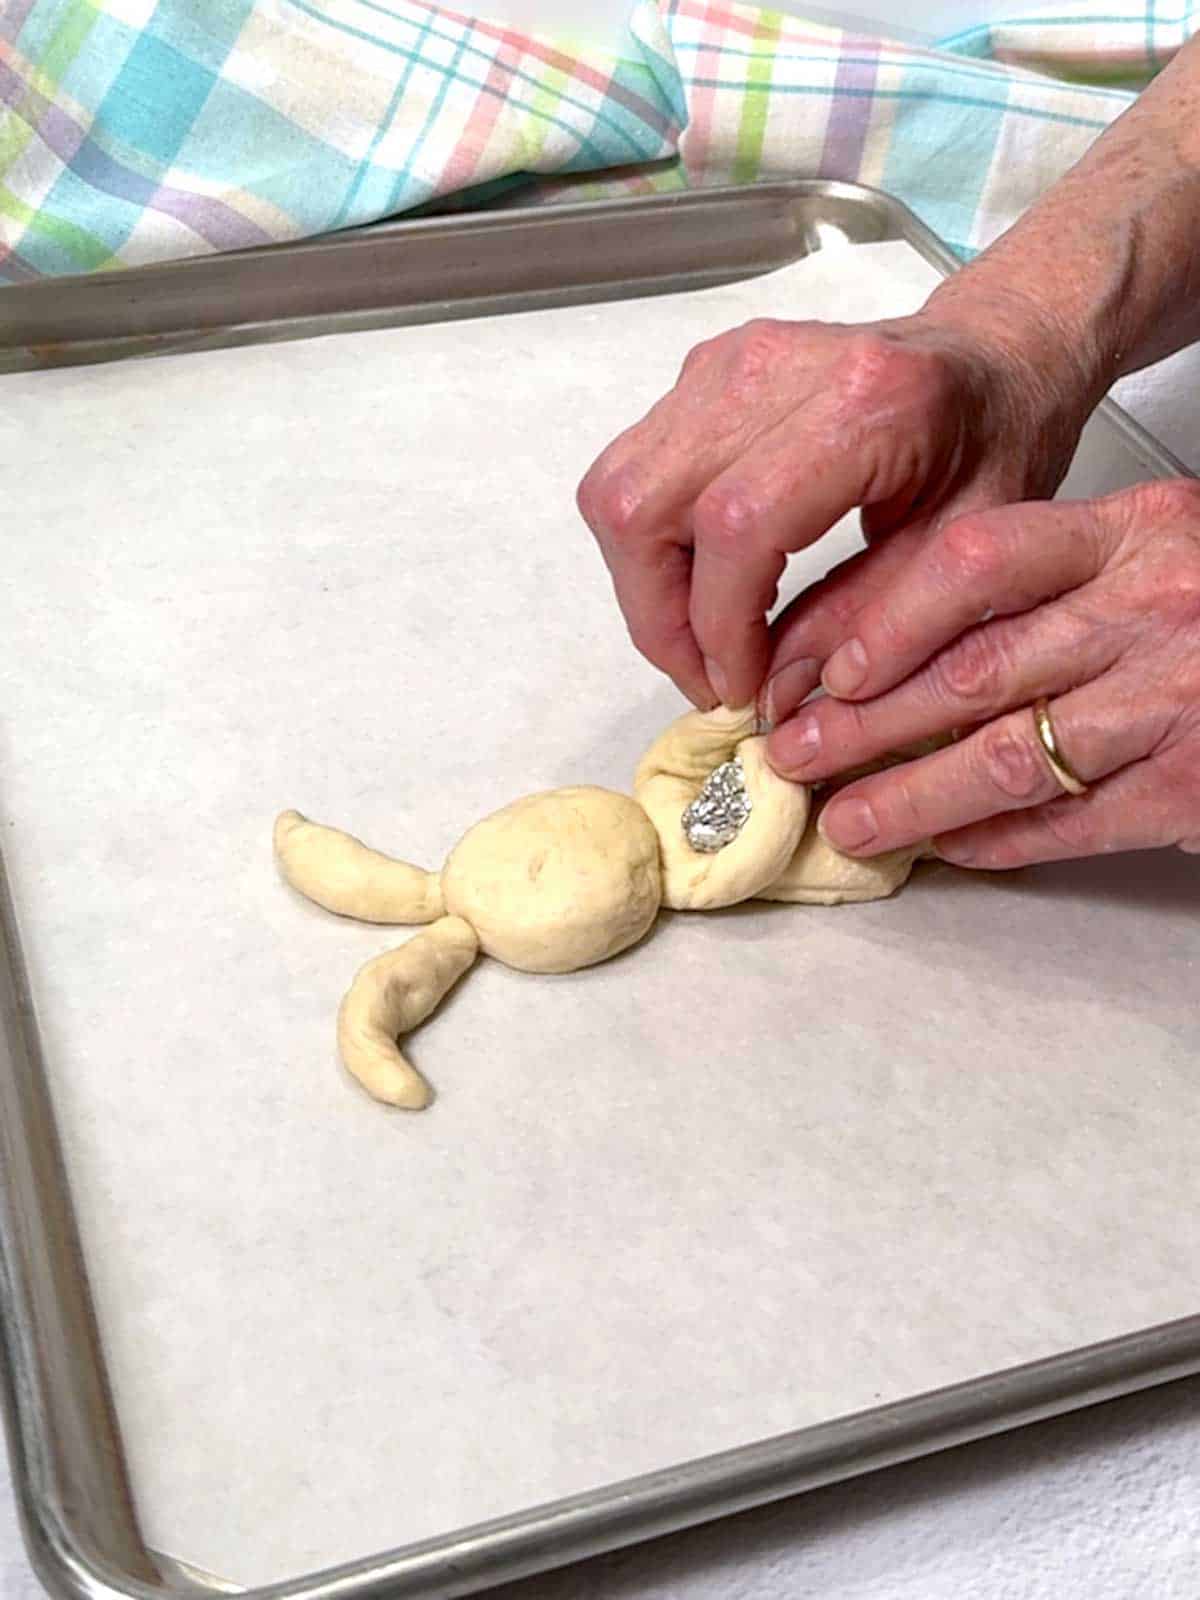
- I wanted the bunnies to be holding a small carrot. Therefore, I wrapped the arms around a balled-up piece of nonstick aluminum foil that I had formed into a tight cylinder, roughly the same diameter as the carrot.
- I used raisins for the bunny's eyes and nose, but could have also used mini chocolate chips.
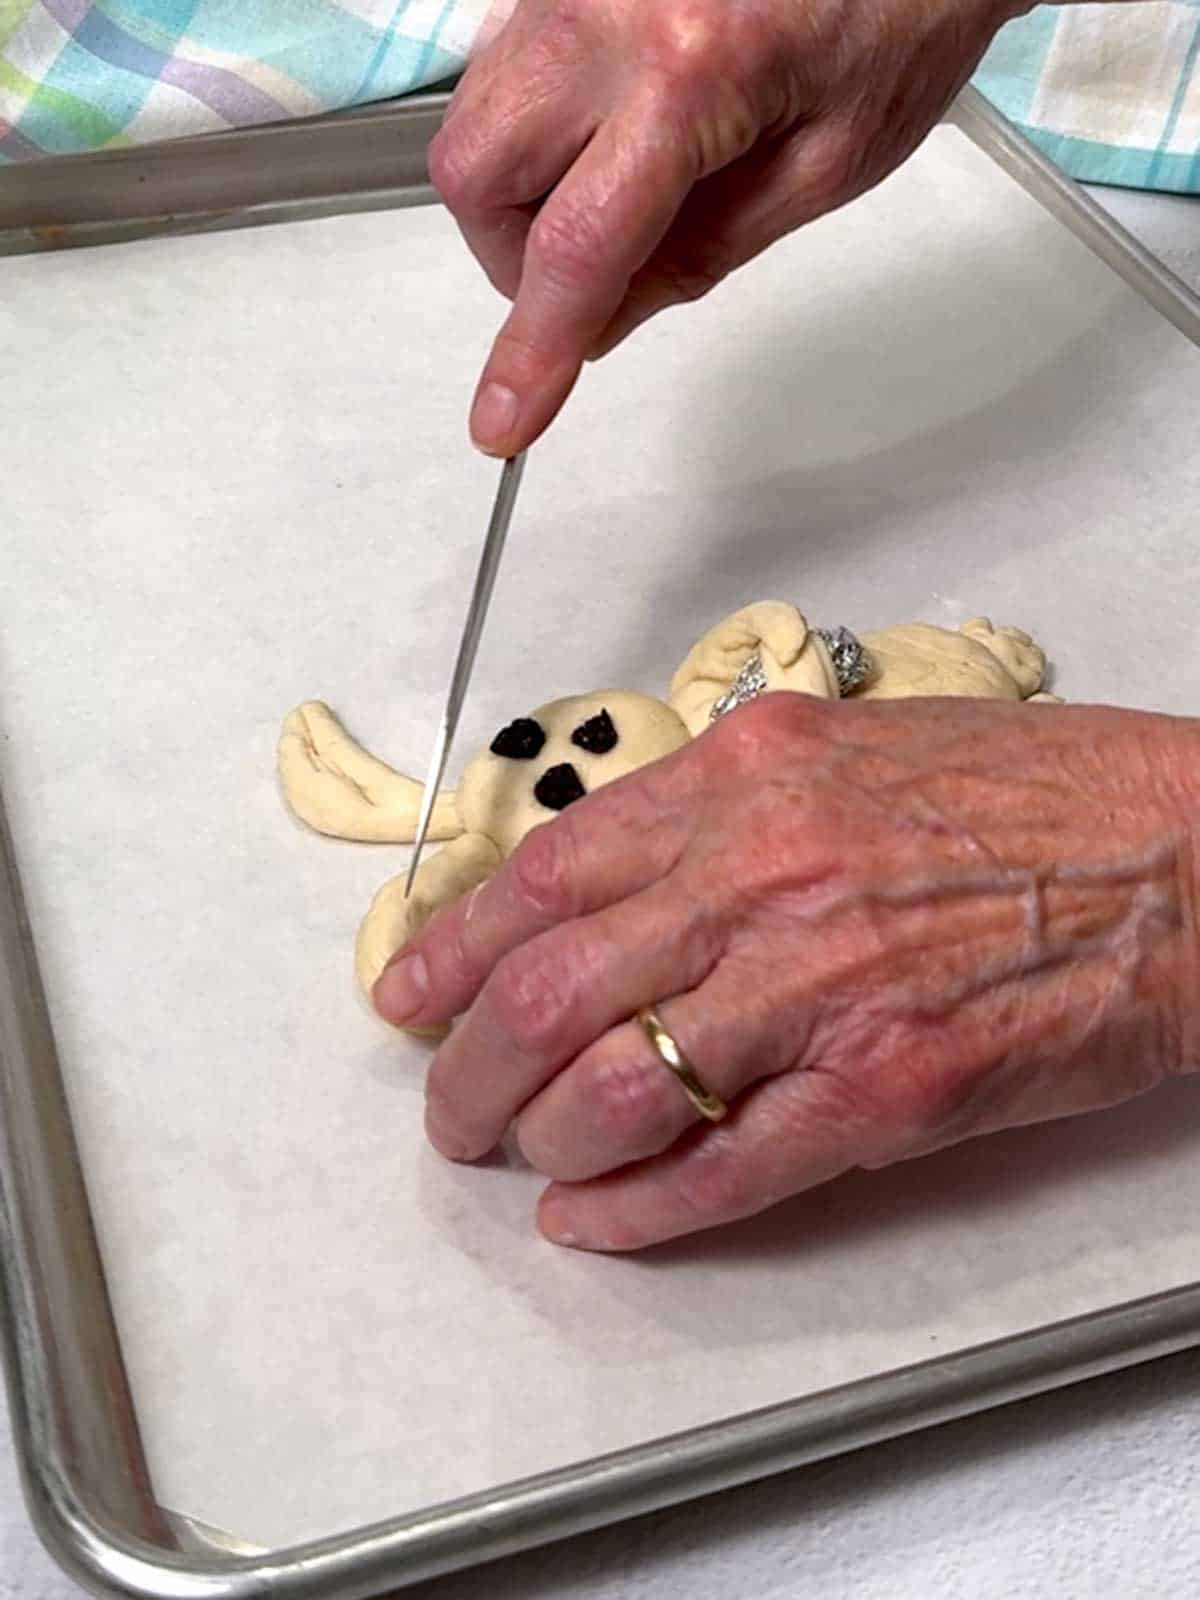
- Finally, to provide some detail, I used kitchen shears to make cuts in the bunny's feet and a paring knife to make shallow cuts in the bunny's ears.
Finishing the Easter Bunny Rolls
I covered the rolls with a kitchen towel and let them proof for about 20 minutes.
Before baking the rolls, I brushed them with egg wash.

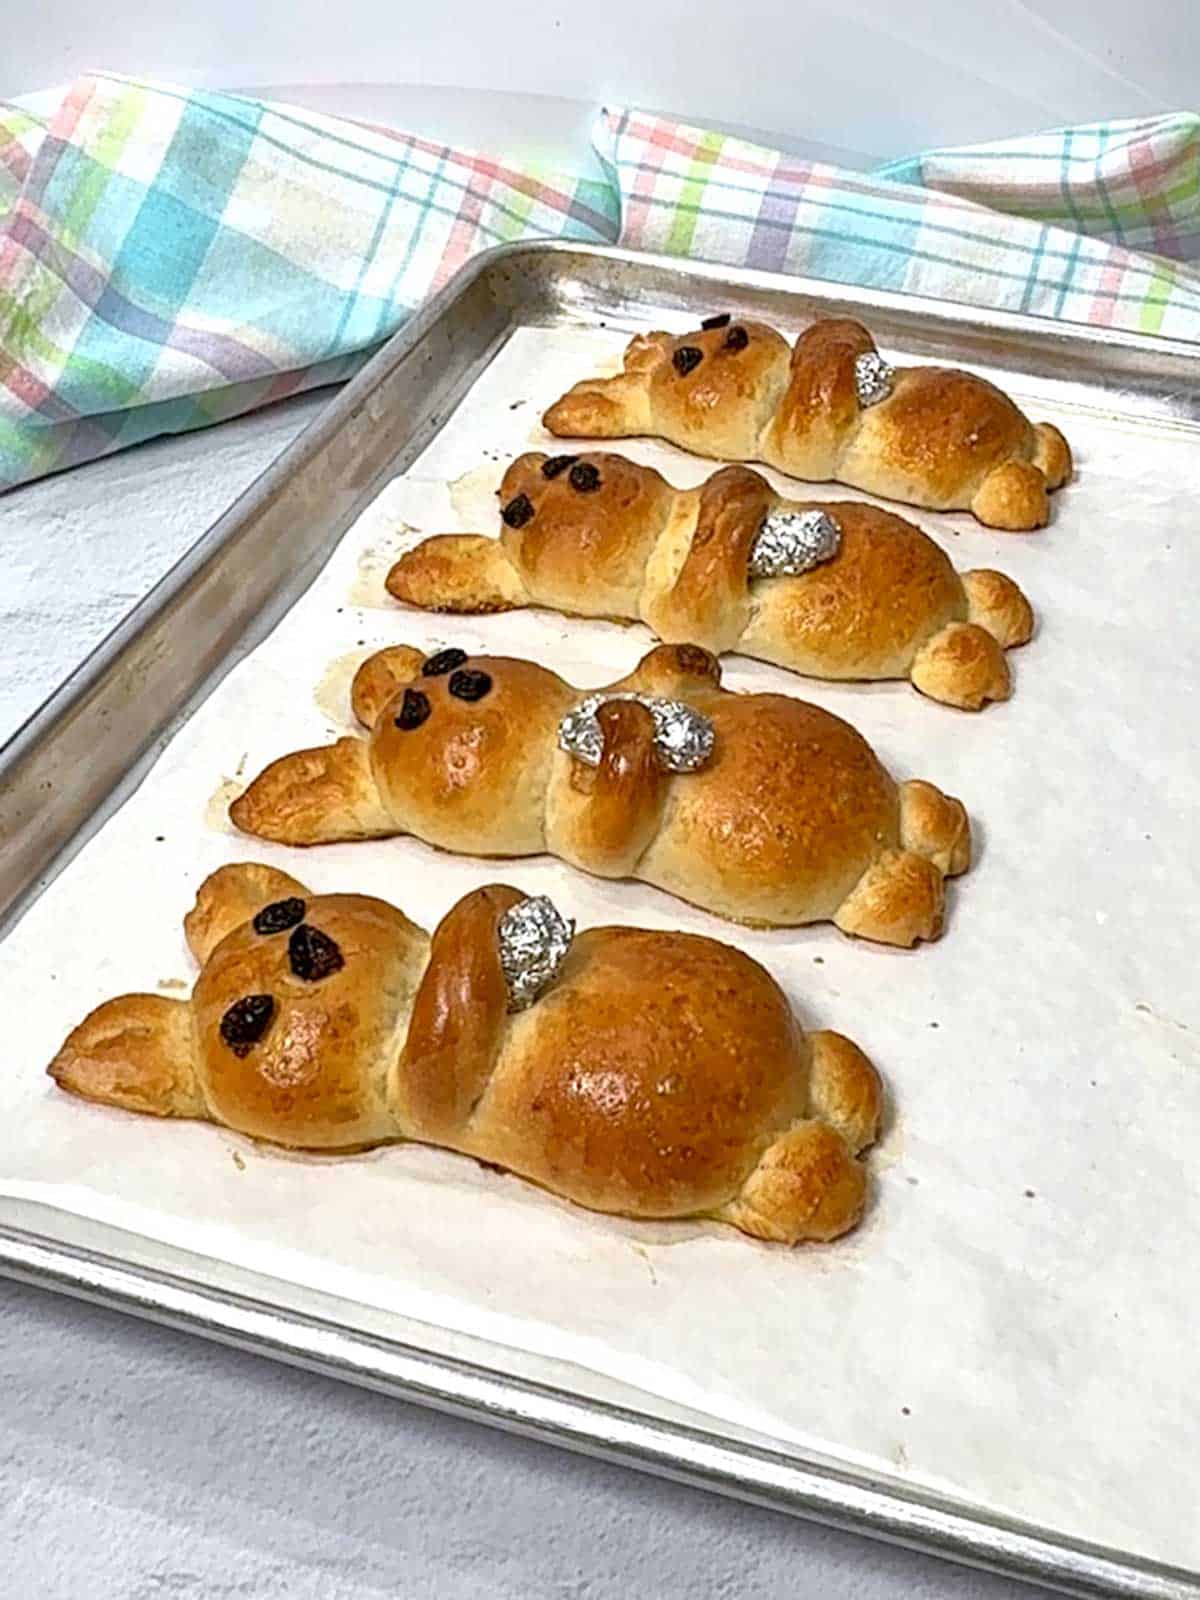
I baked the bunny rolls in a preheated 375°F oven for 20 minutes until they were golden brown. Then, I removed the rolls from the oven.
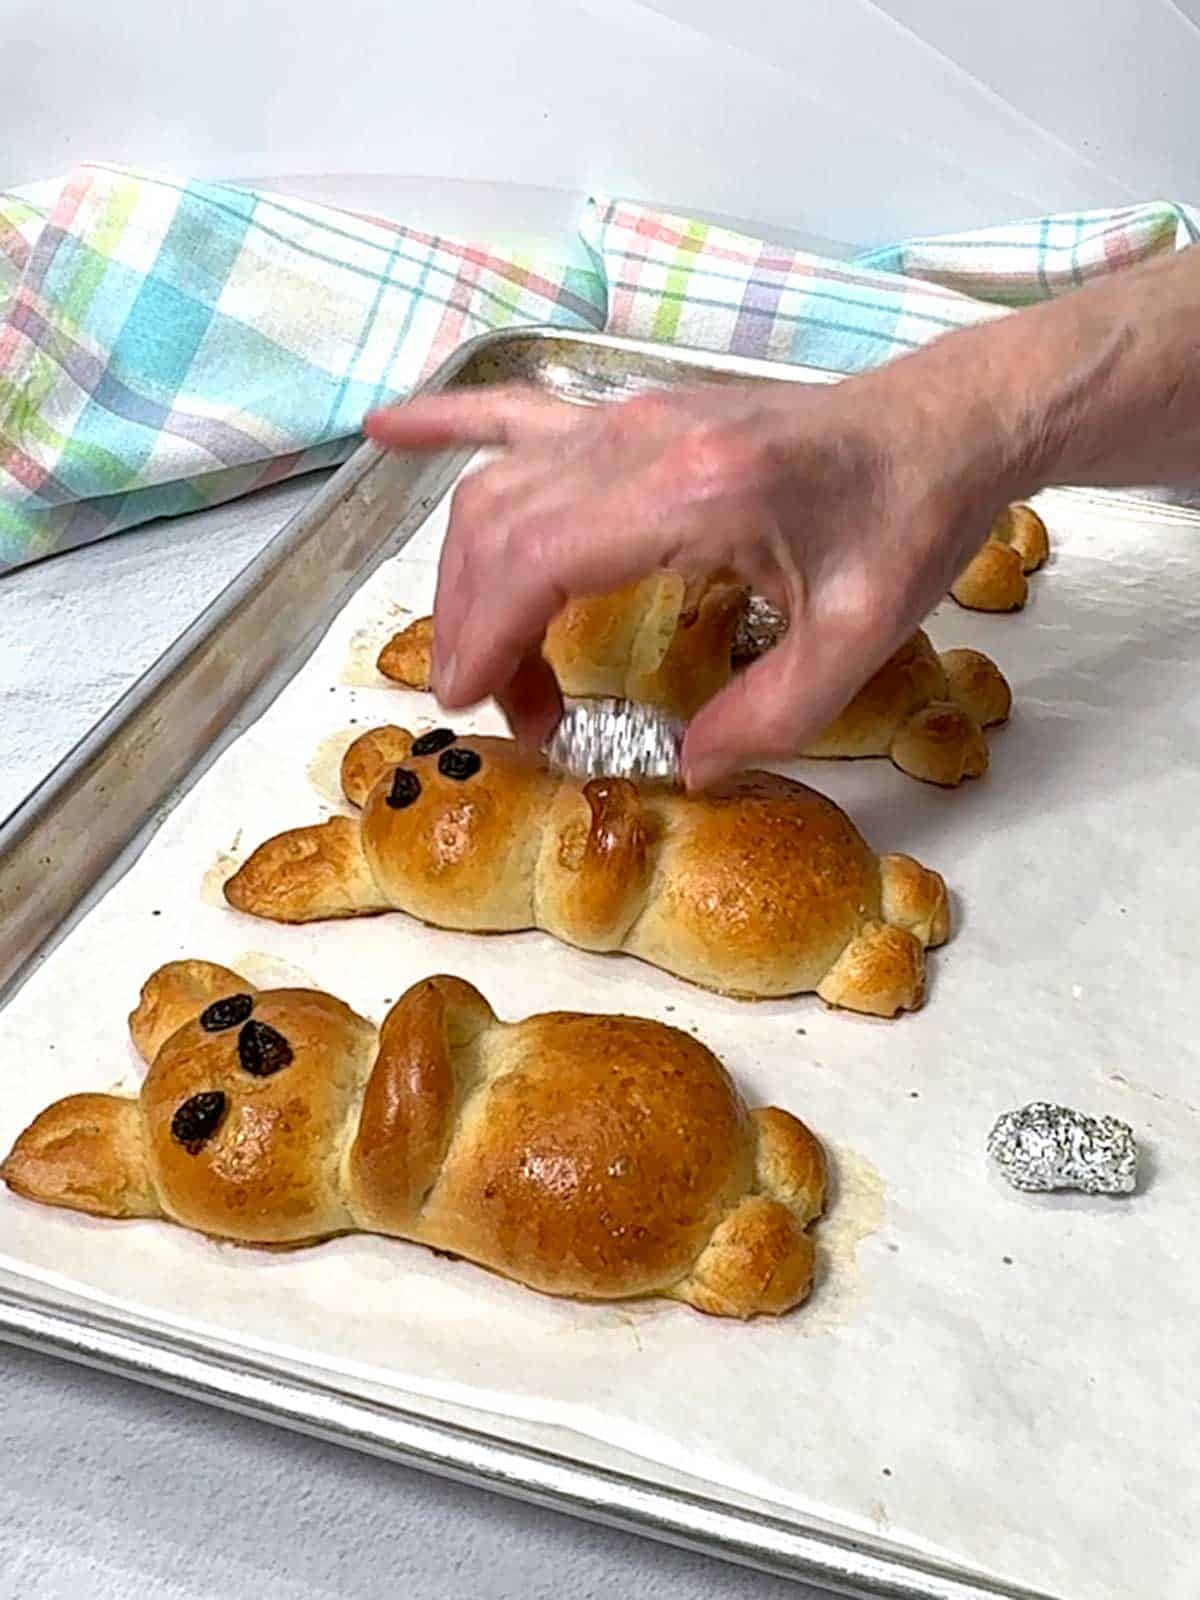
I let the rolls cool for about five minutes. Then, I carefully removed the foil from under the arms.
I transferred the bunnies to a wire rack and used a red food marker to draw the mouth. Finally, I replaced the foil with a small carrot topped with a parsley leaf.

These Easter Bunny Rolls are guaranteed to steal the spotlight at your springtime table. Whether you're making them for Easter brunch, surprising little ones with a fun snack, or gifting a basket of fresh-baked cuteness, these bunnies bring smiles with every bite.
The soft, fluffy dough is easy to work with, and the creative shaping process turns an ordinary roll into a festive masterpiece. Don't forget to snap a photo before they disappear-these bunnies are almost too cute to eat! Yum!
Recipe Tips and Tricks
- You can use either raisins or mini chocolate chips for the eyes and nose.
- Use a small paring knife to mark where to place the eyes and nose, and then press the eyes and nose into the dough to ensure that they stick
- If the dough becomes too soft to work with, chill it for 10 minutes to make shaping easier.
- Don't overbake-the rolls should be golden, not dark brown.
- Let kids help with shaping and decorating for a fun family activity!
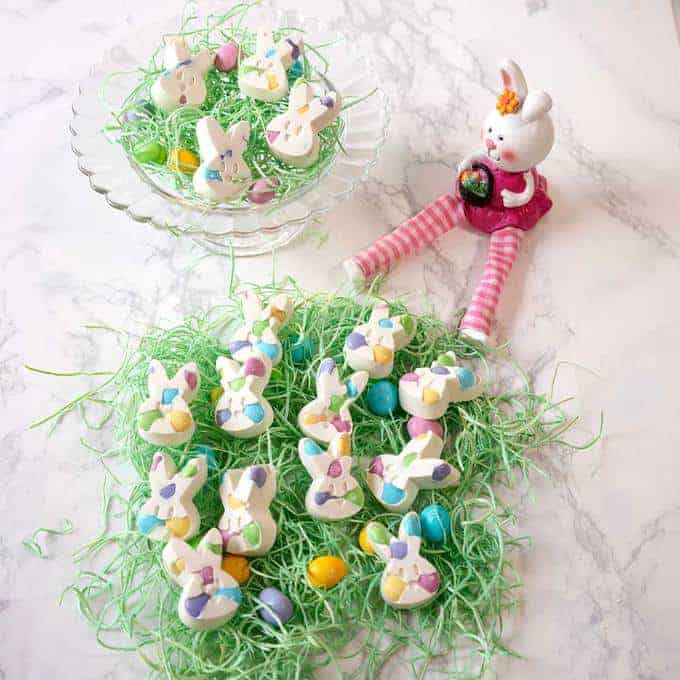
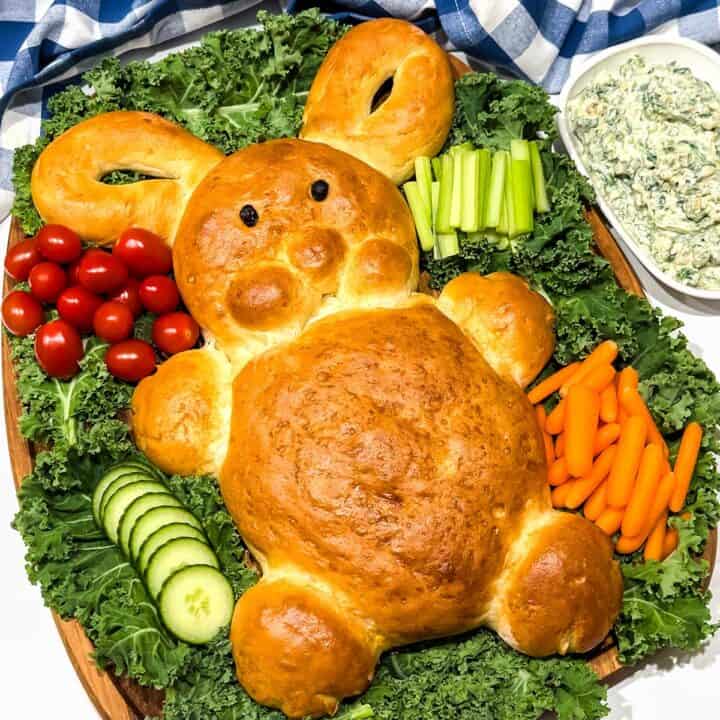
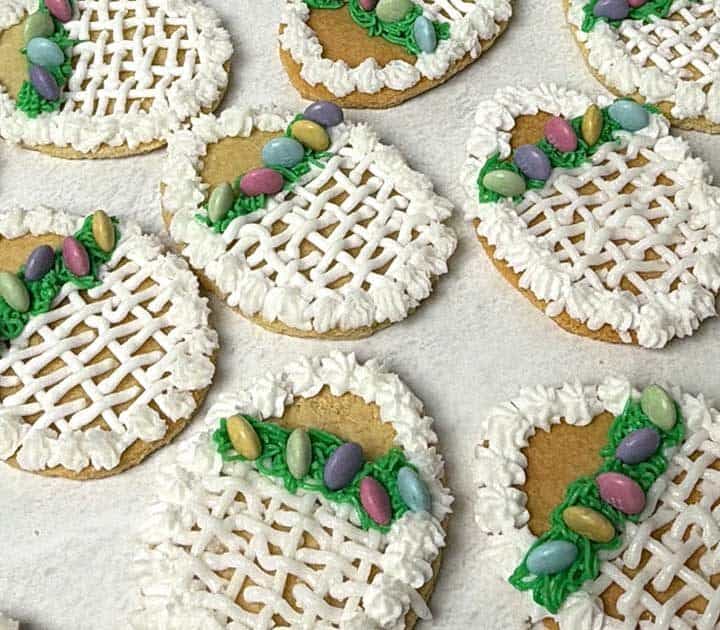
Other Easter Goodies
Looking for more creative Easter goodies? Check these out!
Did you make this recipe? We'd love to know how it turned out! Leave a review below. Then, share a picture on Instagram and tag @pudgefactor so we can see it.
Don't forget to follow us on Pinterest, Facebook, YouTube, Flipboard, and Instagram.
Thank you so much for visiting PudgeFactor. We hope you'll come back!
Recipe
Want to Save This Recipe?
Enter your email & I'll send it to your inbox. Plus, enjoy weekly doses of culinary inspiration as a bonus!
By submitting this form, you consent to receive emails from Pudge Factor.

Easter Bunny Rolls
Equipment
- Food Processor with Steel Blade
- Kitchen scale
- 2 half sheet pans
- Parchment paper
- Bench scraper
- Kitchen shears
- Paring Knife
- Red food marker
- 6 Pieces of nonstick aluminum foil, roughly 5 inches square.
Ingredients
- 10 ounces (2 cups) bread flour (See Tip 1)
- 2 teaspoons granulated sugar
- 2 teaspoons Instant yeast (See Tip 2)
- 1 teaspoon Kosher salt
- 6.33 ounces (⅔ cup plus 2 tablespoons) cool filtered water (See Tips 3 and 4)
- 2 teaspoons olive oil
- 15 raisins or mini chocolate chips for the eyes and nose
- Egg wash made with a large egg whisked together with one tablespoon of water
- 6 baby carrots
- 6 Italian parsley leaves
Instructions
The Dough
- Place bread flour, sugar, yeast, and salt in the bowl of food processor fitted with the steel blade. Pulse process 5 or 6 times to combine ingredients.
- With the food processor running, slowly add the cool water and olive oil through the feed tube. Continue to process for about 20 seconds until the dough forms a satiny, tacky ball that clears the sides of the bowl. (See Tip 5)
- Once the dough has formed a satiny, tacky ball, allow it to sit for 10 minutes. Then, process the dough for another 20 to 30 seconds.
- Transfer the dough to an oiled bowl, cover it with plastic wrap, and place it in a warm location until doubled in size, about 30 to 45 minutes.
Forming the Bunnies
- Transfer the dough to a floured surface and cut it into the following pieces for six bunnies: The body and arms - 6 pieces that are 1.5 ounces each; the head - 6 pieces that are 0.75 ounces each; the ears - 12 pieces that are 0.16 ounces each; the feet - 12 pieces that are 0.10 ounces each. (See Tip 6)
- Form each bunny on a parchment-lined half-sheet pan. (See Tip 7)
- Take a 1.5-ounce piece of dough and form it into a flat oval that's about 2 1-2 inches by 1 1.2 inches for the body. Cut the arms about 1 ¼ inches at about a 30° angle on both sides of the body. Form a 0.75-ounce piece of dough into a flat round piece for the head. Take two 0.16-ounce pieces of dough and roll them into cylinders about 1 ½ inches long for the ears. Place the ears on top of the bunny's head. Roll two 0.10 pieces of dough into small balls for the bunny's feet and place them at the bottom of the body.
- Take a piece of nonstick aluminum foil and ball it up into a cylinder to serve as a placeholder for the baby carrot. Place the foil cylinder on the top left side of the bunny's body and bring the arms up and over the cylinder.
- Place two raisins on the face for the eyes, and one raisin for the nose.
- If desired, add some detail to the feet by making three cuts at the bottom with kitchen shears. Take a paring knife and make a shallow cut on each of the bunny's ears.
- Cover the pans with a dish towel and place in a warm location for about 20 minutes to allow the bunnies to rise slightly.
- Preheat the oven to 375F. Brush the bunnies with an egg wash made with a large egg whisked together with a tablespoon of water.
- Bake the bunnies in a preheated oven for 20 minutes or until golden brown.
- Remove from the oven and allow to cool for about five minutes. Then, remove the aluminum foil cylinders.
- Transfer to a wire rack to cool completely. Use a red food marker to draw the mouth. Place a baby carrot between the bunnies' arms. Use a sharp skewer to make a hole at the top of the baby carrot and insert a parsley leaf.
- Yield: 6 Easter Bunny Rolls
Video
Tips/Notes
- When making bread, I always weigh the flour and the liquid to ensure proper consistency. If you don't have a digital scale, you should purchase one.
- Active dry yeast, which needs to bloom before being added to the other ingredients, is not the same as instant yeast, which can be added directly to the ingredients. Use instant or bread machine yeast.
- You should use cool water because the dough is heated by the rapid rotation of the food processor blade, and if the water is not cool, the dough could overheat.
- Always use filtered water as opposed to tap water when making bread. The reason is that tap water contains chlorine which can retard the growth of the yeast.
- If you weigh your ingredients, the dough should be perfect. However, if after 20 seconds, the dough is still sticky and sticks to the blade, add 1 to 2 tablespoons of flour and continue processing. If the dough appears dry and crumbly, add 1 to 2 tablespoons of cold water and process until the dough forms a ball.
- This recipe makes approximately 17.14 ounces of dough.
- I used two half-sheet pans because I didn't want to crowd the bunnies.
Leave a Reply