
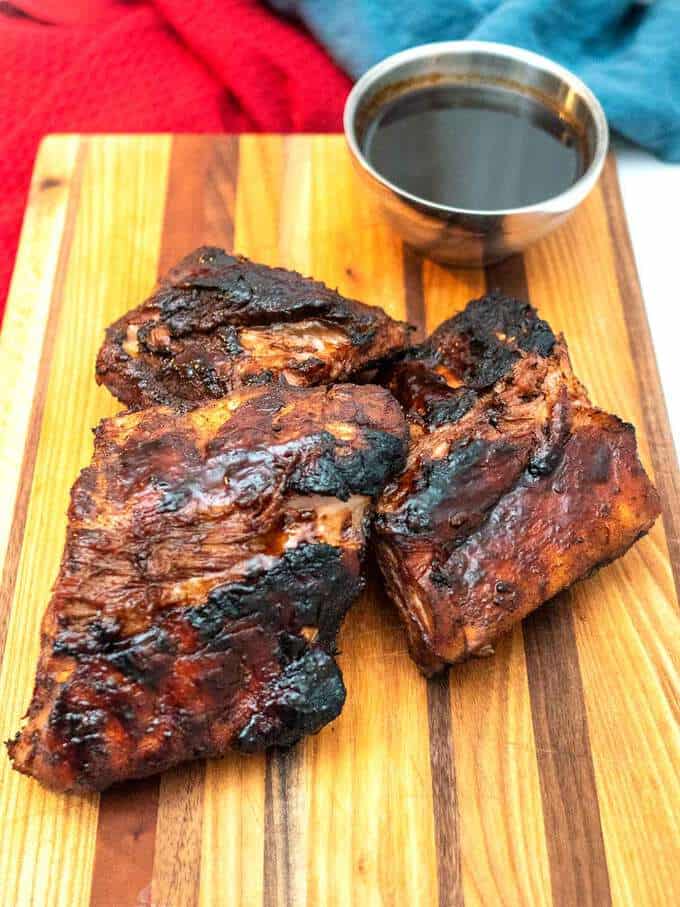
Sous Vide Baby Back Ribs with Balsamic Honey Barbecue Sauce are nothing short of amazing. The ultra slow cooking from the Sous Vide process produces unbelievably moist and tender ribs that melt in your mouth. The ribs are finished off over hot coals with a basting of delicious Balsamic Honey Barbecue Sauce.
About Sous Vide
If you've ever wondered how up-scale restaurants are able to produce such tender steaks that are cooked to perfection, the answer is most likely Sous Vide. Sous Vide, French for "under vacuum" may sound like an ultra-fancy cooking technique out of the reach of most home cooks. However, it's really quite simple.
At its most fundamental level, the Sous Vide process cooks food sealed in an airtight container in a water bath. The temperature of the water bath is precisely controlled. Generally, the airtight container is a vacuum sealed bag. However, a gallon-size freezer Ziploc bag can also be used with the air forced from it before it's sealed.
Because the temperature is precisely controlled, the cooking process is very gradual. The meat slowly heats up until the exterior and interior reach the temperature of the water. Since the temperature of water never goes past the set temperature, the meat will never be overcooked! In addition, enzymes break down the proteins in meat. This enzyme activity tenderizes the meat. Since the heating is gradual, the enzymes have a longer period of time to do their magic. Cooks Illustrated has an excellent article that explains the importance of enzymes to meat tenderness and also the science behind Sous Vide.
My Sous Vide Setup
I've been using Sous Vide for over four years. During that time, I have consistently been able to take what would otherwise have been a tough steak, roast or piece of chicken and transform it into a restaurant-quality meal. These Sous Vide Baby Back Ribs are no exception!
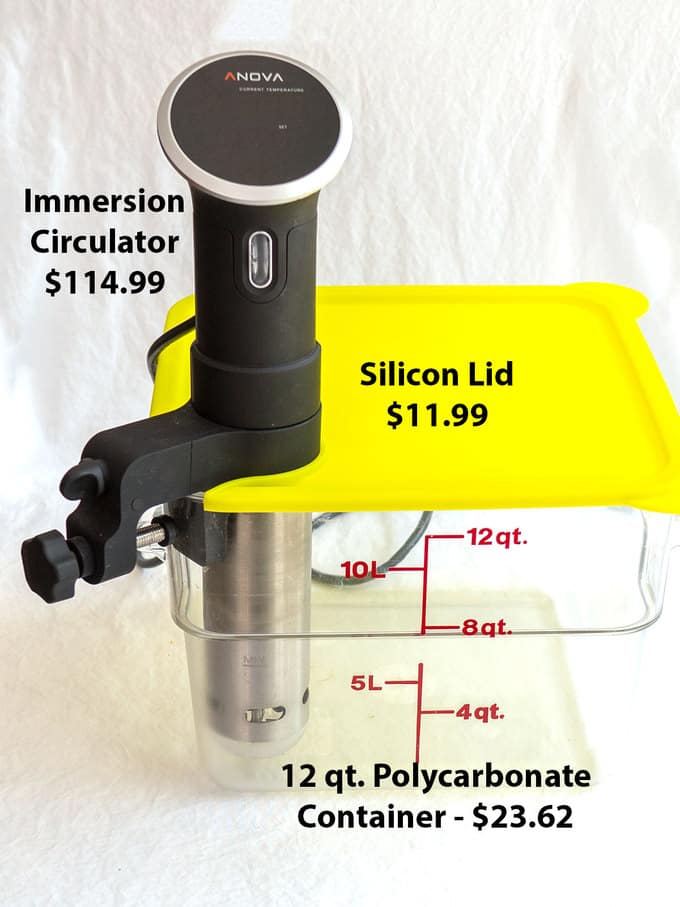
For my Sous Vide setup, I use a polycarbonate container for holding the water, a silicon lid to minimize water evaporation during the cooking, and an immersion circulator that precisely regulates the temperature of the water! I agree that it's a bit of an investment - total cost was $150.60. However, both the Master Taste Tester and I agree that the investment is totally worth not having to chew our way through tough meat and chicken.
Ingredients
I used the following ingredients for the Sous Vide Baby Back Ribs: Baby back ribs and a dry rub. For the dry rub, I used paprika, brown sugar, Kosher salt, garlic powder, dry mustard, onion powder, dried oregano, dried thyme and freshly ground black pepper.
I used the following ingredients for the Balsamic Honey Barbecue Sauce: Balsamic vinegar, Chili sauce, honey, light brown sugar, Worcestershire sauce, Dijon mustard, garlic, Kosher salt and freshly ground black pepper. You could certainly use your choice of a store-bought barbecue sauce rather than making your own. However, I think that the little extra effort of making my own barbecue sauce is totally worth it!

Preparing Ribs
I started by adding water to my Sous Vide container and setting the immersion circulator to 165° F.
After that, I rinsed the ribs and patted them dry with a paper towel. Then, I cut each of the ribs into 3 pieces. Each piece had 4 to 5 ribs. Next, I removed the membrane on the underside of the ribs.
To remove the membrane, I used a small knife to loosen one corner. Then, using a piece of paper towel, I grasped the loosened corner and carefully pulled the membrane away from the ribs. Sometimes it's quite easy to remove the membrane in one piece. Other times, it takes a bit of effort to remove the membrane.

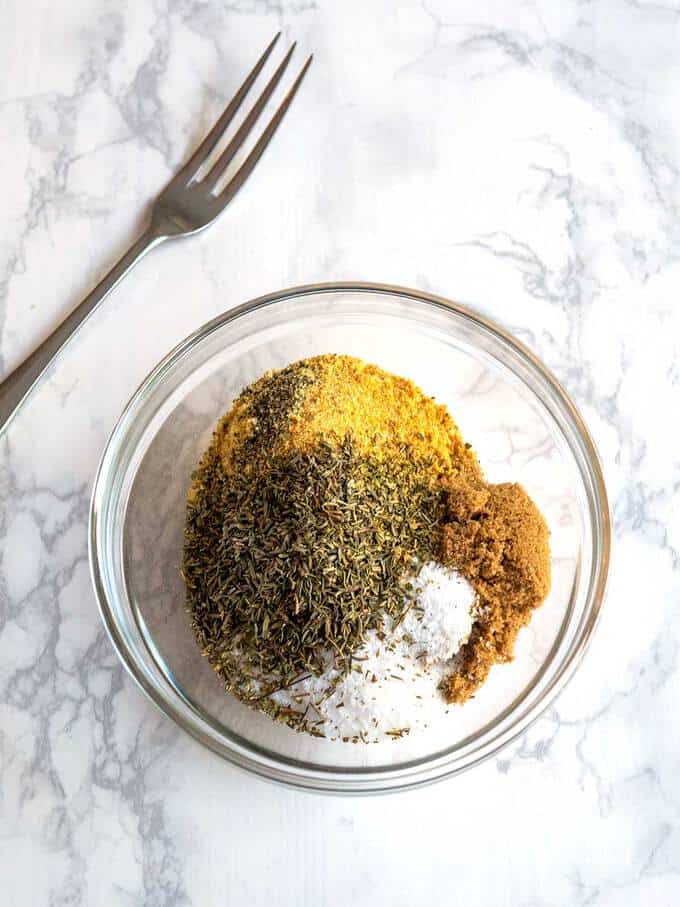
After I had removed the membrane from the ribs, I made the dry rub. I combined the paprika, brown sugar, salt, garlic powder, dry mustard, onion powder, dried oregano, dried thyme and freshly ground black pepper in a small bowl.
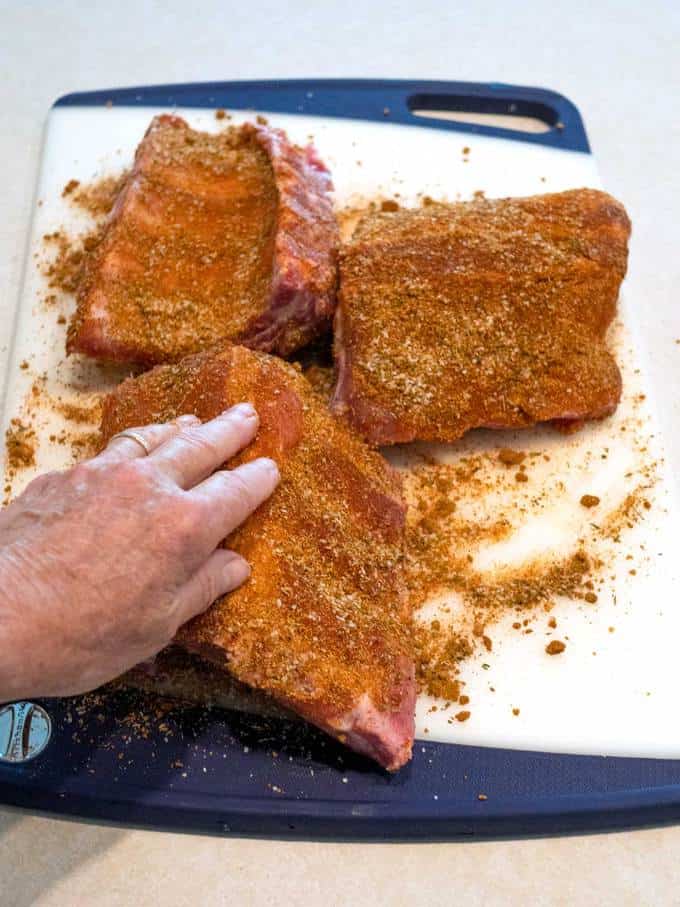
Then, I sprinkled the dry rub onto the top and bottom of the rib pieces. I used my hand to rub the dry rub onto the meat.
Vacuum Sealing and Cooking the Sous Vide Ribs
Before vacuum sealing the ribs, I folded the top of the vacuum seal bags down about 2-inches. The reason that I did this was to ensure that none of the dry rub got on the inside of the bag where the seal would be made. Then I placed one of the prepared ribs into the bag and vacuum sealed it. I repeated this with the remaining ribs.

If I hadn't had a vacuum sealer, I could have used gallon-sized freezer Ziploc bags. Once I put the ribs in the Ziploc bag, I would then submerge the bag in water to force the air out before sealing.
After all of the ribs were vacuum sealed, I placed them into the Sous Vide container with the water heated to 165° F. I covered the container with the silicon lid to minimize water evaporation, and walked away! After 12 hours, the ribs were cooked to perfection!

I actually cooked the ribs via Sous Vide the day before their final grilling. Therefore, after the 12 hours, I removed the ribs from the water bath. I dried the outside of the vacuum sealed bags. With the ribs still in their vacuum sealed bags, I put them in the refrigerator until we were ready for the the grilling.
Making the Balsamic Honey Barbecue Sauce
To make the Balsamic Honey Barbecue Sauce, I whisked together the balsamic vinegar, honey, brown sugar, Worcestershire sauce, Dijon mustard, garlic, salt and pepper in a small pan set over medium heat.

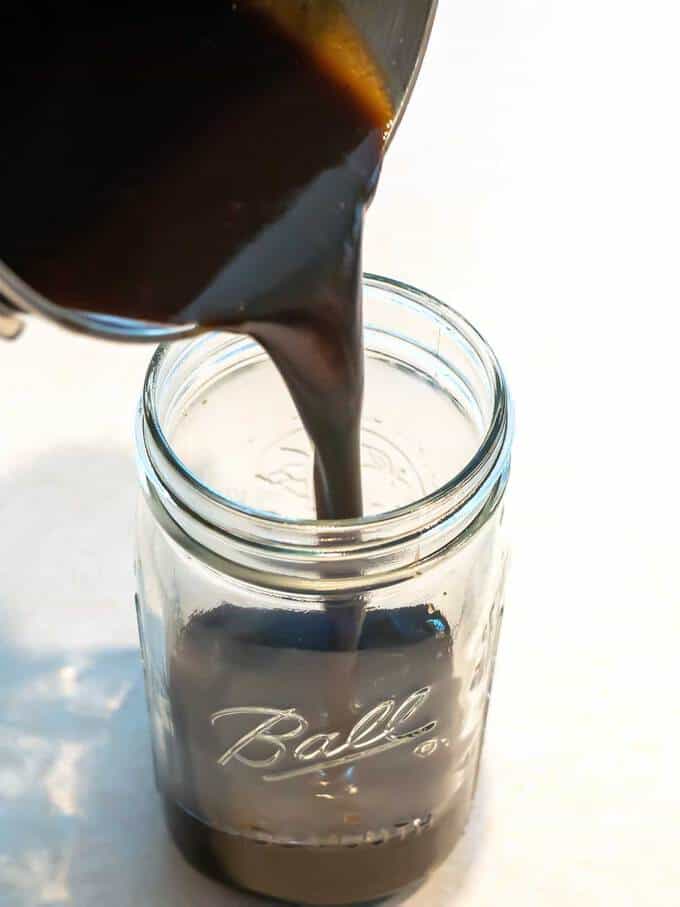
Once the sauce came to a boil, I let it simmer for about 20 minutes. After 20 minutes, the sauce had thickened up a bit and was reduced by about ⅓. I let the sauce cool for a bit and transferred it to a jar.
Finishing the Sous Vide Baby Back Ribs with Balsamic Honey Barbecue Sauce
A somewhat negative feature of Sous Vide is that the outside of the meat has not undergone the Maillard Reaction. The Maillard Reaction is a chemical reaction. It occurs on the outside of the meat when it is cooked at a high temperature. It has the effect of significantly enhancing the flavor of the meat. Therefore, the final step in using the Sous Vide method of cooking the Baby Back Ribs was to introduce the Maillard Reaction. The Master Taste Tester did this by grilling the ribs basted with the barbecue sauce over hot coals.
About an hour before the grilling the Baby Back Ribs, I removed them from the refrigerator so that they could come to room temperature. I cut open the vacuum sealed bags, removed the ribs, rinsed them well and patted them dry. When the ribs come out of the vacuum sealed bags, there's a fair amount of "gunk" on them from the combination of the dry rub and the fat that is released in the cooking. Therefore, I like to rinse them to remove this "gunk". Also, the ribs need to be dry so that they can quickly crisp up when placed on the grill.

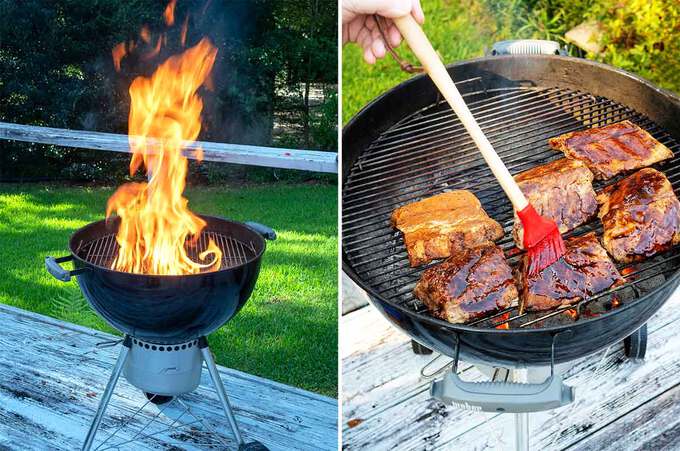
When the time came, the Master Taste Tester prepared the coals. After the coals were ready, he placed the ribs on the grill and basted them on both sides several times with the Balsamic Honey Barbecue Sauce. The purpose of the grilling was to heat the ribs and crisp them up.
The Sous Vide Baby Back Ribs with Balsamic Honey Barbecue Sauce were outstanding. They were fall-off-the-bone tender with a crispy exterior from the grilling. Yum!
 If you're interested in the Sous Vide cooking method, you should check out some of my other Sous Vide recipes:
- Sous Vide Corned Beef with Irish Fried Cabbage with Onions and Bacon
- Sous Vide Chicken Salad Véronique
- Sous Vide Crème Caramel
- Sous Vide Bacon and Gruyère Egg Cups
- Sous Vide Chicken Thighs with Mushroom Cream Sauce
- Sous Vide Yogurt Fruit Cups
Recipe
Want to Save This Recipe?
Enter your email & I’ll send it to your inbox. Plus, enjoy weekly doses of culinary inspiration as a bonus!
By submitting this form, you consent to receive emails from Pudge Factor.

Sous Vide Baby Back Ribs with Balsamic Honey Barbecue Sauce
Equipment
- Immersion Circulator
- Container for Water Bath
Ingredients
Sous Vide Baby Back Ribs
- 2 racks Baby Back Ribs, about 2 pounds each
- 3 Tablespoons paprika (See Tip 1)
- 3 Tablespoons light brown sugar
- 2 Tablespoons Kosher salt (See Tip 2)
- 1 ½ Tablespoons garlic powder
- 2 teaspoons dry mustard
- 2 teaspoons onion powder
- 2 teaspoons dried oregano
- 2 teaspoons dried thyme
- ¾ teaspoons freshly ground black pepper
- 2 cups Balsamic Honey Barbecue Sauce (recipe below), or barbecue sauce of your choice
Balsamic Honey Barbecue Sauce
- 1 cup (8 ounces) balsamic vinegar
- ¾ cup (7 ounces) Chili sauce
- ½ cup (6 ounces) honey
- ⅓ cup (2.5 ounces) light brown sugar
- 1 Tablespoon Worcestershire sauce
- 1 Tablespoon Dijon mustard
- 1 clove garlic, minced
- ½ teaspoon Kosher salt
- ¼ teaspoon freshly ground black pepper
Instructions
Sous Vide Baby Back Ribs
- Fill Sous Vide container with water; set immersion circulator to 165° F.
- Rinse and pat ribs dry. Cut each rack into 3 pieces, 4 to 5 ribs per piece. Remove membrane from back of ribs. Set aside. (See Tip 3)
- Dry Rub: Combine paprika, brown sugar, salt, garlic powder, dry mustard, onion powder, oregano, thyme and pepper in a small bowl.
- Sprinkle Dry Rub on both sides of ribs; rub in with hand so that it adheres to the ribs. Vacuum seal each of the 6 pieces of ribs. (See Tip 4)
- Place the vacuum sealed ribs in Sous Vide water bath set to 165° F. Cook for 12 hours. (See Tip 5)
- After 12 hours, remove ribs from water bath. Can be made in advance up to this point and refrigerated for several days.
- Remove ribs from vacuum sealed bags; rinse well and pat dry. (See Tip 6)
- Grill, basting with Balsamic Honey Sauce or barbecue sauce of your choice over hot coals for 10 to 15 minutes, basting and turning frequently.
- Yield: 6 servings
Balsamic Honey Barbecue Sauce
- Whisk together balsamic vinegar, Chili sauce, honey, brown sugar, Worcestershire sauce, Dijon mustard, garlic, salt and pepper in a saucepan over medium heat. Bring to a boil; simmer for 15 to 20 minutes or until the sauce has thickened and is reduced by about ⅓. Yield: 2 cups.
Tips/Notes
- You can use either smoked paprika or regular paprika with no real difference in the taste of the ribs.
- If you use regular table salt, reduce the amount to 1 ½ tablespoons.
- To remove the membrane from the underside of the ribs, use a small knife to loosen one corner. Grab the loosened corner with a piece of paper towel and carefully peel the membrane away from the ribs.
- Before placing the rib in the vacuum sealed bag, fold down the top 2 or more inches. The reason for doing this is that otherwise some of the rub could end up on the inside of the bag where the seal is made. If this happens, the bag may not seal properly.
- To minimize the amount of water evaporation, cover the Sous Vide container with a top or aluminum foil. If the water level goes down during cooking add more water. If any of the ribs float to the top, weigh them down with a heavy object. I generally use a small rectangular Pyrex dish as a weight.
- There are several reasons for rinsing the ribs when they come out of the vacuum sealed bag. First, they are likely to be too salty from the dry rub. Second, there's a fair amount of "gunk" covering the ribs from the combination of the dry rub and the fat that is released from the cooking. Third, in order to get the crispy exterior from grilling, the ribs need to be dry.
Russ Franey says
Cooler not cooker
Russ Franey says
You're doing it wrong.get a 1 handed cooker, cut a hole in the top the size of your immersion cooker. I bought 1 from goodwill for $5. If immersion cooking a insulated container makes a huge difference