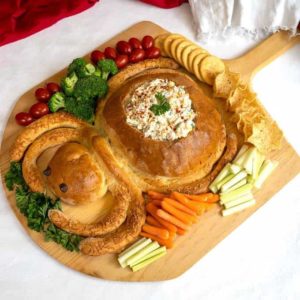
Spider Bread with Mexican Corn Dip is the ultimate Halloween appetizer. By itself, the Mexican Corn Dip is totally addictive. When paired with the beyond cute Spider Bread, it will dazzle your friends and family.
My inspiration for this amazing Spider Bread came from It’s Always Autumn.
How to Make Mexican Corn Dip
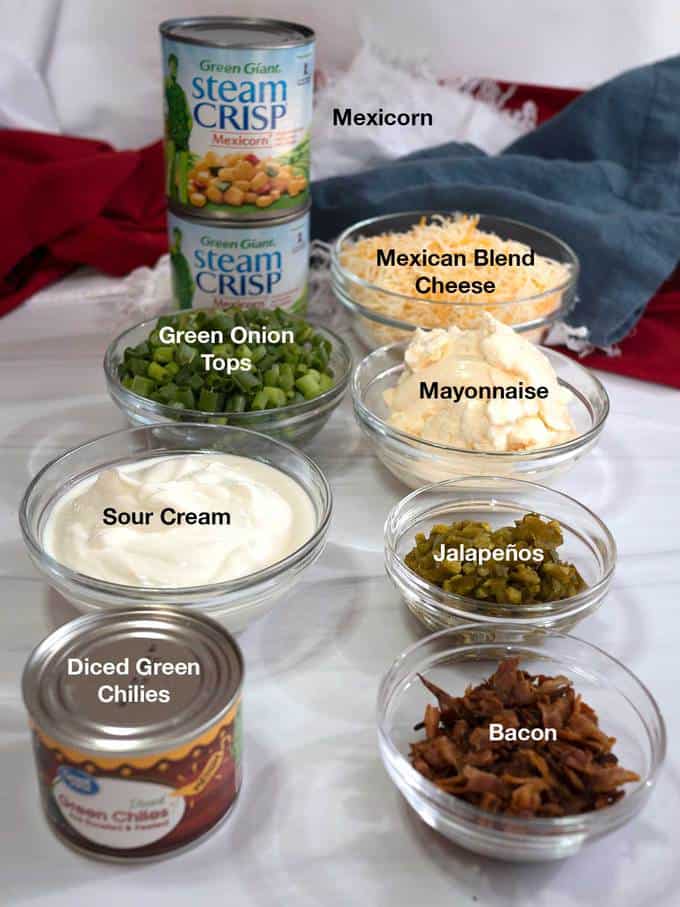
You can actually fill this adorable spider bread with whatever dip you want. I decided to use the Mexican Corn Dip because – well because it’s amazing. The ingredients produce the perfect blend of taste and bite.
Making the Mexican Corn Dip is super easy. Basically, I combined all of the ingredients in a large bowl. Then I covered the bowl and put it in the refrigerator overnight to allow the flavors to blend together. That’s it!
Making the Dough for the Spider Bread
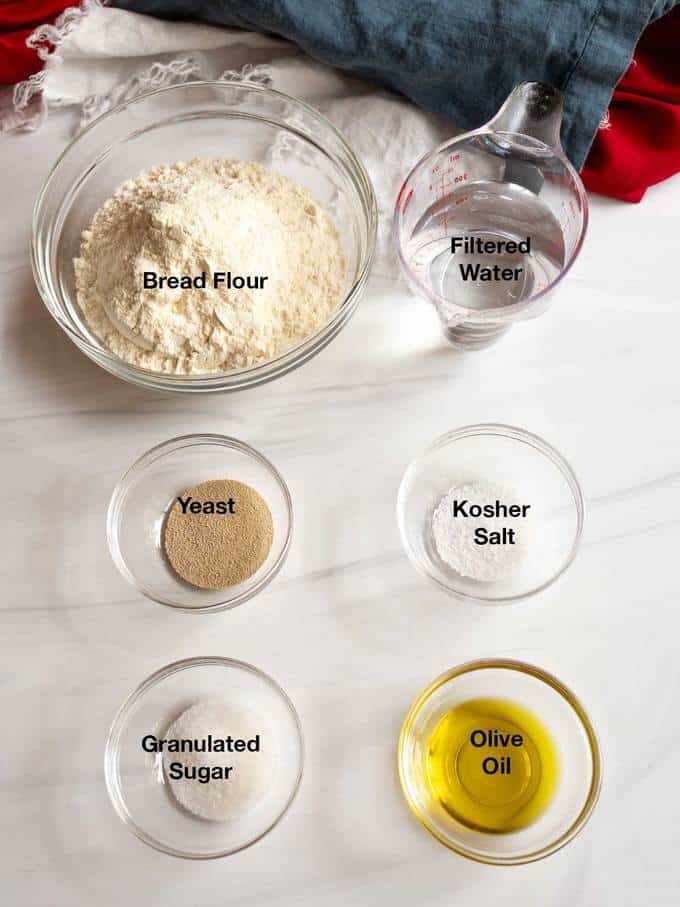
The adorable spider bread is really the star of the show here. The ingredients for the spider bread included bread flour, granulated sugar, Kosher salt, instant yeast, filtered water and olive oil.
It takes no time at all to make the dough for the spider bread in the food processor. However, if you wanted to, you could use pre-made pizza dough or frozen bread dough that you can buy at a grocery store.
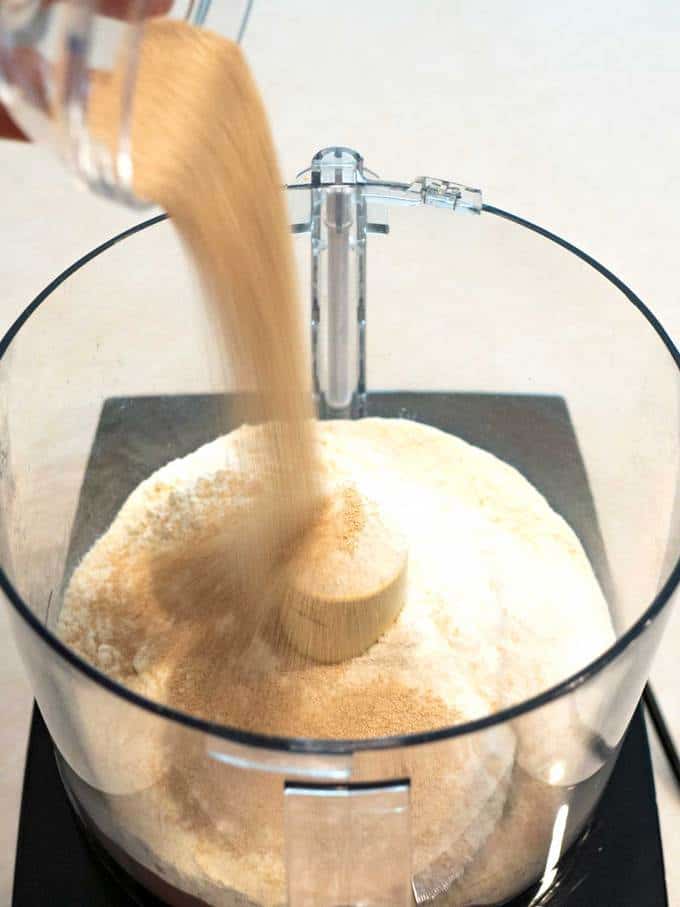
I started by adding the bread flour, sugar, salt and yeast to the bowl of my food processor that was fitted with the steel blade. Then, I pulse processed the ingredients 5 or 6 times to ensure that they were thoroughly combined.
Next, with the food processor running, I added the water and the olive oil through the feed tube. I let the food processor run for about 20 seconds. After 20 seconds, the dough had cleared the sides of the bowl, was not sticking to the blade, and had formed a cohesive mass. I let the dough rest for about 10 minutes. Then, I processed it for an additional 30 seconds. The dough was perfectly kneaded!
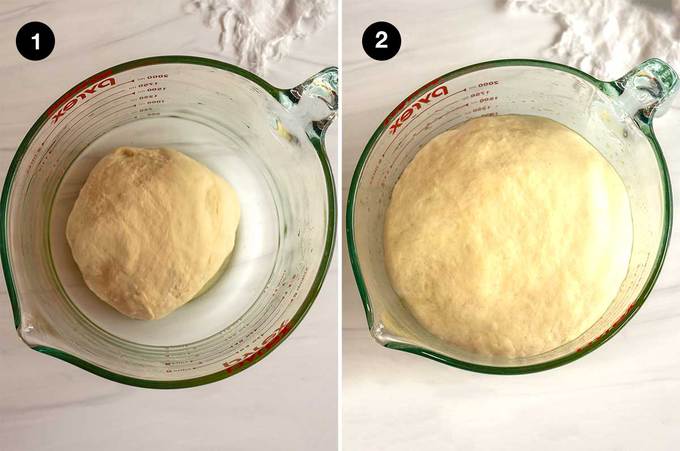
I removed the dough from the food processor, and formed it into a ball. I placed the dough into an 8-cup measuring cup that I had coated with oil (Photo 1). The reason that I used the measuring cup was that it made it easier to see how much the dough had risen.
After that, I covered the measuring cup with plastic wrap and placed it in a warm spot to allow the dough to double in size (Photo 2). This took about 30 minutes.
Making the Spider Bread
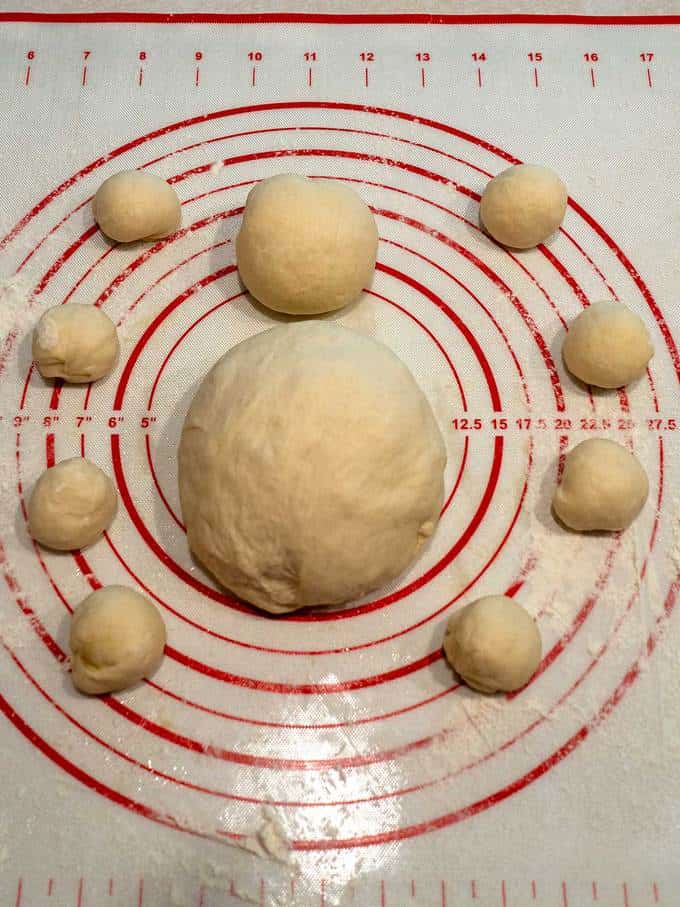
Now that the dough had nicely risen, I divided it into 10 pieces as follows: One 2-ounce piece for spider head; Eight ½-ounce pieces for spider legs; Remainder (about 10 ounces) for spider body. I used my kitchen scale to weigh the dough to ensure that the pieces were of the proper size.
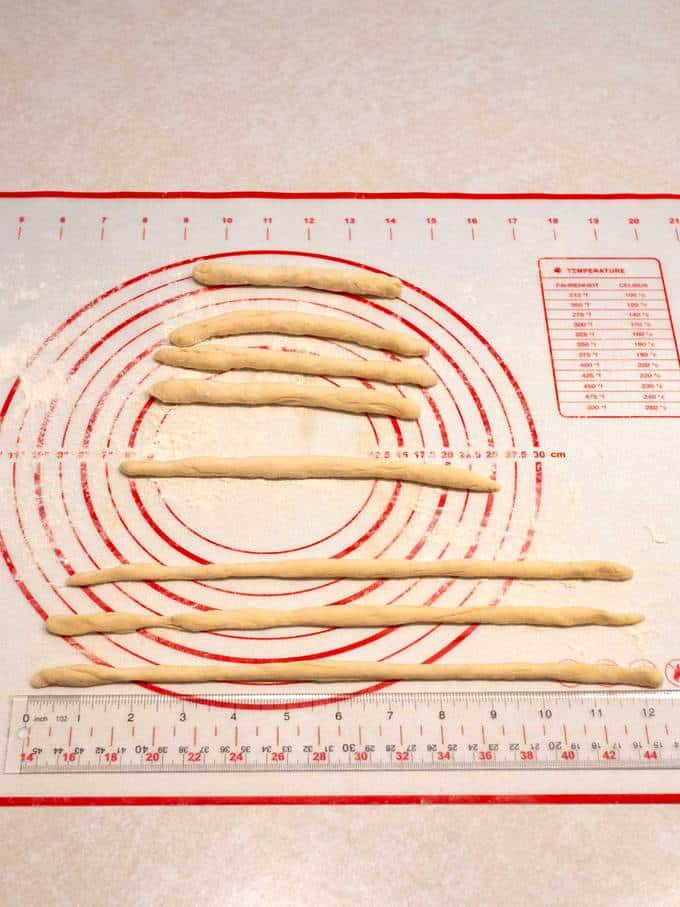
For the legs, I needed four 12-inch ropes and four 10-inch ropes. Because the bread dough had a tendency to spring back, I started by rolling the balls into four-inch ropes. I let the dough rest a bit and kept rolling until I had four 12-inch ropes and four 10-inch ropes.
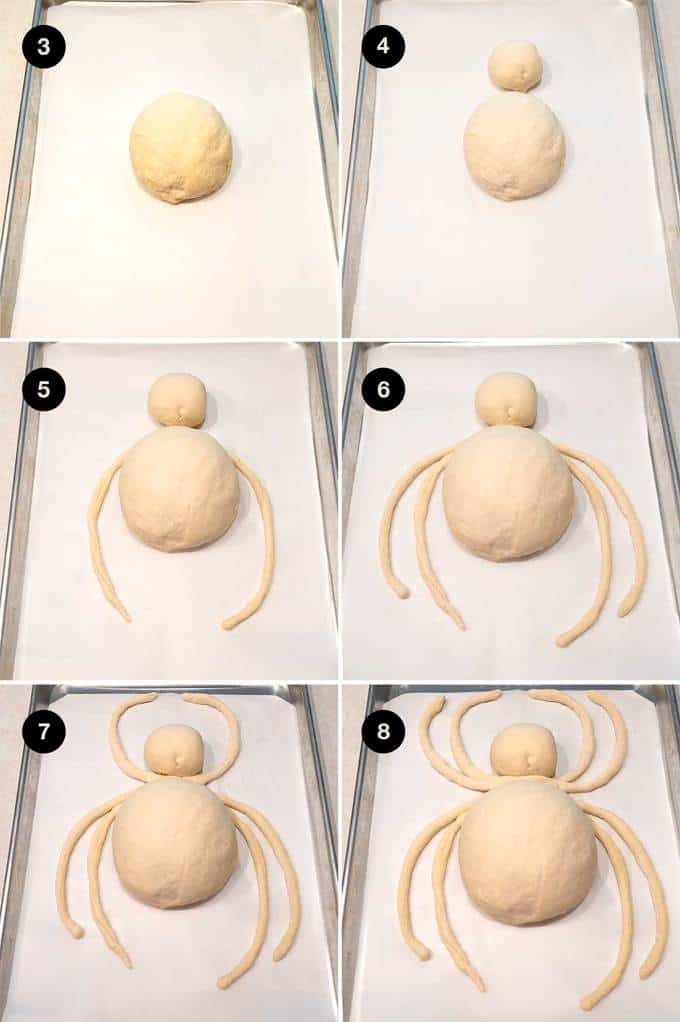
To make the spider, I started by putting the large ball of dough for the spider’s body just below the center of a parchment lined large baking sheet (Photo 3). Then, I placed the smaller dough ball for the spider’s head about ½-inch from the large dough ball (Photo 4).
To make the hind legs, I placed one of the 12-inch ropes between the head and the body of the spider and curved it down away from the spider’s body, and repeated this on the other side of the spider’s body with another 12-inch rope (Photo 5). Next, I placed another 12-inch rope between the head and body of the spider and curved it down away from the spider’s body, leaving room between it and the first hind leg. I repeated this on the other side of the spider’s body with the final 12-inch rope. (Photo 6).
For the front legs, I placed one of the 10-inch ropes between the head and body of the spider and curved it up away from the spider’s head, and repeated on the other side of the head this with another 10-inch rope (Photo 7). Finally, I placed the third 10-inch rope between the head and the body and curved it up away from the spider’s head, leaving room between it and the first front leg. I repeated this with the final 10-inch rope. (Photo 8)
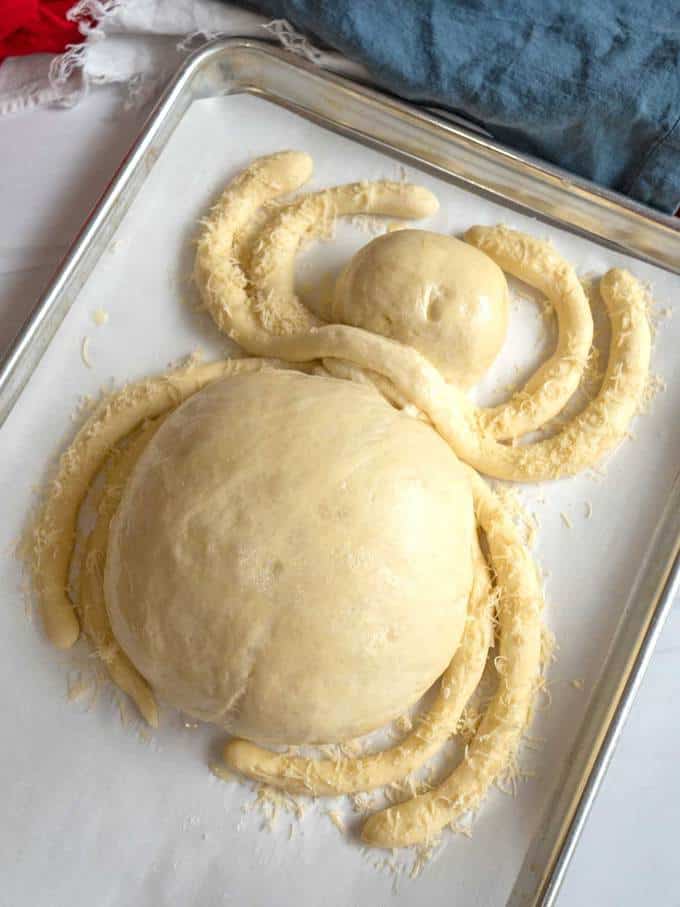
I covered the spider with a piece of plastic wrap that I had sprayed with non-stick spray, and placed it in a warm place for it to rise. After about 45 minutes, the spider had plumped up nicely.
I brushed the spider bread with an egg wash and sprinkled some freshly grated Parmesan cheese on its legs to give them a “hairy” appearance.
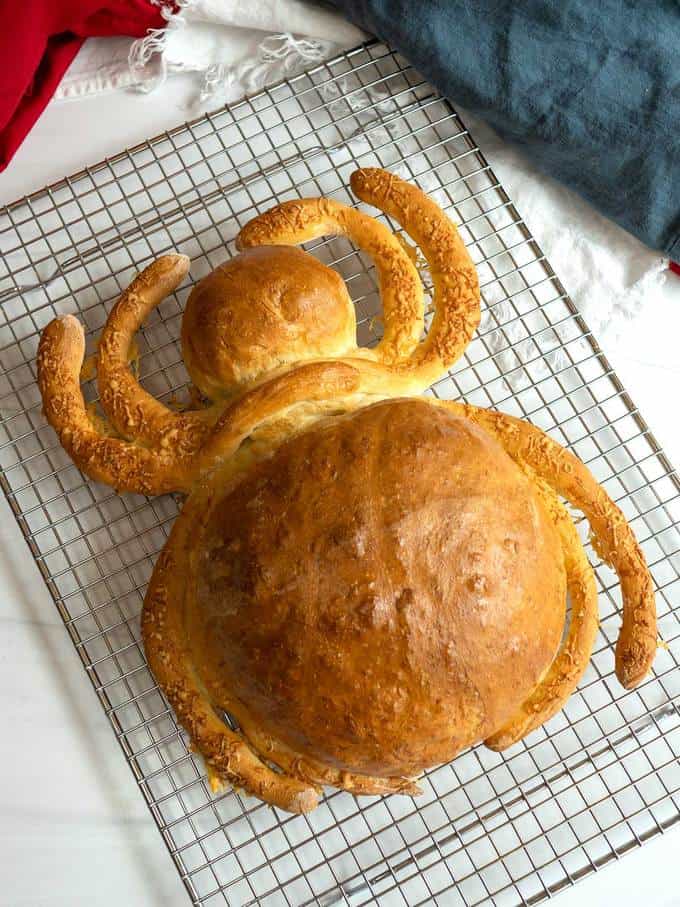
I popped the spider bread into a preheated 350°F oven for about 28 minutes. After 28 minutes, the spider bread was golden brown and perfectly cooked.
I removed the bread from the oven and let it cool on the baking sheet for about 10 minutes. Then, I removed it to a wire rack to cool completely.
Serving the Spider Bread with Mexican Corn Dip
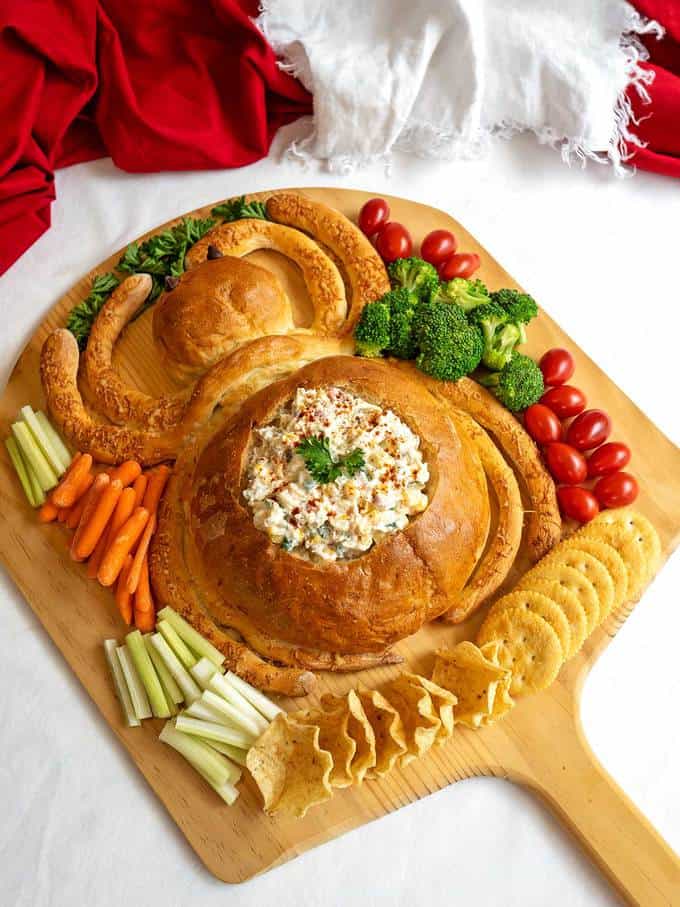
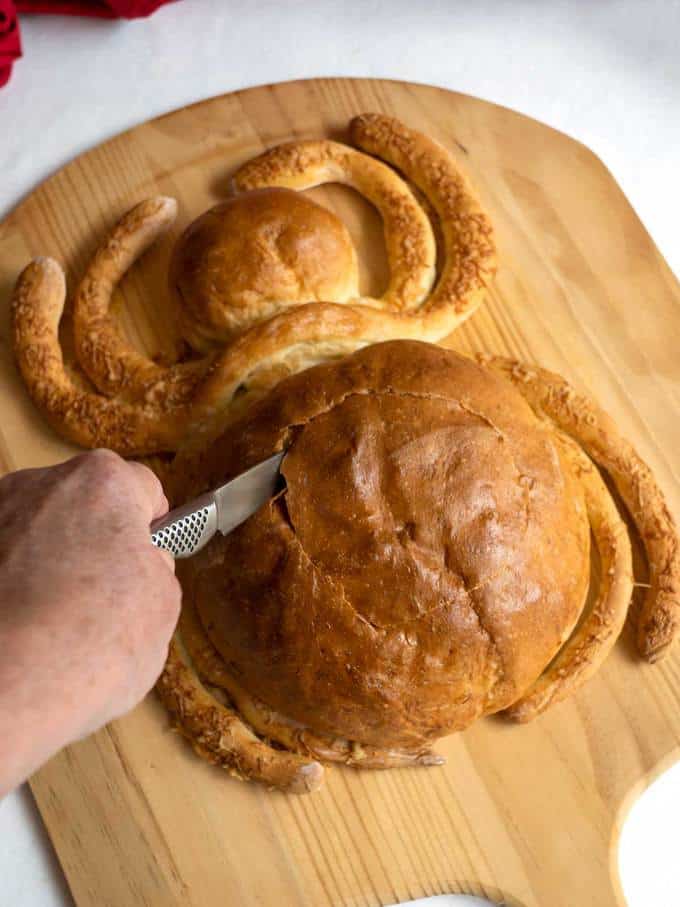
Using a small paring knife, I cut the center out of the spider’s body to make a bowl.
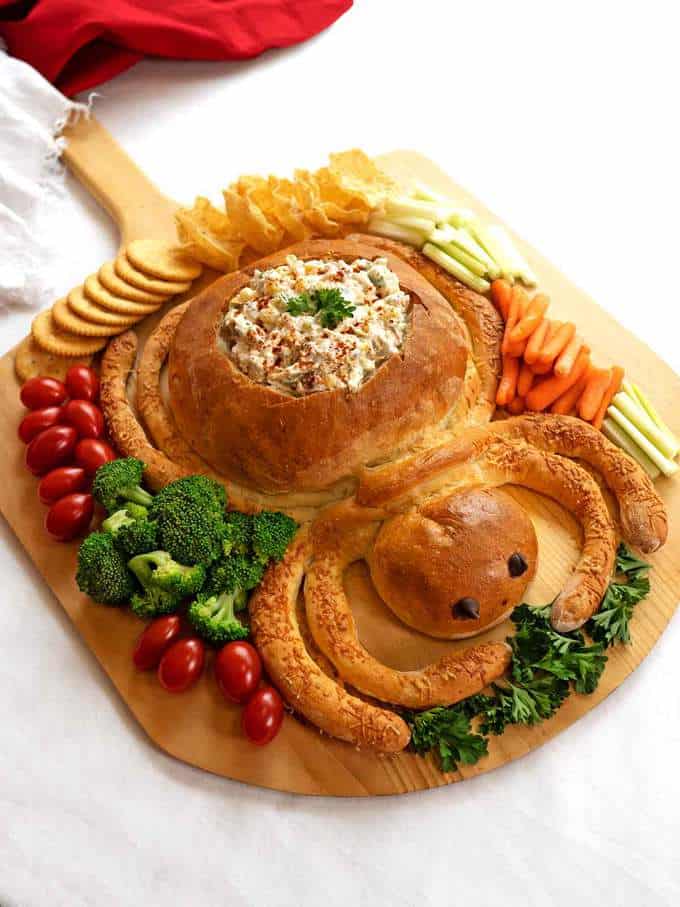
Then, I filled it with some of the Mexican Corn Dip, and arranged blanched broccoli, carrots, celery, salad tomatoes, curly parsley, Ritz crackers and Tostitos scoops around the body. You could use whatever wanted to adorn the Spider Bread!
I know that this really doesn’t fit, but I used two chocolate chips for the spider’s eyes. To make them stick, I very briefly placed melted the bottom by holding them in a hot pan.
Spider Bread with Mexican Corn Dip will make the perfect centerpiece for your Halloween gatherings. It is not only show-stopping gorgeous, but also amazingly delicious. Yum!
Chula’s Expert Tips
- The recipe for the Mexican Corn Dip makes a lot. You can definitely cut the recipe in half. If you do, go ahead and use an entire can of diced green chilies.
- I used low fat sour cream in the Mexican Corn Dip, but you could also use full fat sour cream.
- The flavor of the Mexican Corn Dip improves greatly if it is refrigerated overnight to allow the flavors to blend together.
- Rather than making your own dough for the spider bread, you can use one pound of refrigerated pizza dough or one pound of frozen bread dough that you can purchase at the grocery store. Do not, however, use rolled pizza dough that comes in a can.
- When I’m making bread, I always weigh the flour and the liquid to ensure proper consistency. If you don’t have a digital scale, you should actually purchase one.
- The ultra-fast rotation of the steel blade in the food processor generates quite a bit of heat. Therefore, you should start with cold water to ensure that the dough doesn’t get too warm. If the dough is too warm, it could kill the yeast. Also, you should always use filtered water when making any type of bread. The reason is that the chlorine in tap water can kill the yeast.
Other Show-Stopping Halloween Treats
If you’re looking for other show-stopping Halloween treats, you should check out the following:
- Halloween Ghost Pizza: Halloween Ghost Pizza is the ultimate in simplicity and taste. Its crisp crust is topped with a simple home-made pizza sauce, Parmesan cheese, and Mozzarella cheese, and finished with adorable Mozzarella ghosts. One bite of this classic pizza and you’ll never opt for the store-bought pizza again!
- Spooky 8-Layer Taco Dip: Spooky 8-Layer Taco Dip is the perfect appetizer and party food for all of your Halloween festivities. This no-bake dip is a winner every time and is the first dip devoured at any party. It only takes 5 minutes to put together, but your guests will think that you spent all day in the kitchen!
- Halloween Kettle Corn: Who doesn’t love Kettle Corn – crunchy popcorn that is slightly sweet and slightly salty? Halloween Kettle Corn is the perfect homemade treat to dazzle trick or treaters both young and old. If you can make popcorn, you can make Halloween Kettle Corn!
- Jack O’Lantern Ham an Swiss Hand Pies: For a quick bite during the hectic Halloween season, grab one of these delicious Jack O’Lantern Ham and Swiss Hand Pies. They are way easier to make than carving a pumpkin, and taste as good as they look!
- Spooktacular Chocolate Covered Peanut Butter Treats: If you like Reese’s Peanut Butter Cups, you’ll love these easy to make Spooktacular Chocolate Covered Peanut Butter Treats. They only require four ingredients, and are a perfect combination of chocolate and peanut butter. As an added bonus, you can also make this super easy two ingredient Halloween Bark. Both are sure to delight your family and friends who gather for your Halloween celebration!
- Mac O’Lantern Salad: Mac O’Lantern Salad is an adorable addition to your Halloween table. I “carved” orange bell peppers and stuffed them with creamy delicious macaroni salad.
- Cornucopia Halloween Treats: Wow your friends with these adorable and easy to prepare Cornucopia Halloween Treats. They’re great for kids and adults alike! These little cornucopias can be filled with all sorts of munchies, and can do double duty as Thanksgiving approaches.
- Halloween Surprise Bundt Cake: Brighten your Halloween festivities with this moist Halloween Surprise Bundt Cake. You’d never believe that this amazing cake is made from a store-bought mix. With the Halloween colors of orange, purple, and green, swirled into the cake, every piece is a surprise.
- Monster Munch: Monster Munch is perfect if you’re looking for an easy, no cook treat for an afternoon snack, Halloween party, or trick or treat surprise for neighborhood kids young and old. It is sweet and salty, and can be made with any combination of cereals, salty munchies, candies and nuts.
- Pumpkin Patch Cookie Cups: How cute is this? With only four ingredients, these adorable Pumpkin Patch Cookie Cups are super simple to make, and taste delicious! They’re the perfect treat for Halloween!
I hope you liked this recipe for Spider Bread with Mexican Corn Dip as much as I do. If so, please consider rating it and leaving a comment. Also, if you’d like to receive notifications of new posts by email, ever your email address in the Subscribe box.
Thank you so much for visiting Pudge Factor. I hope you’ll come back!
Recipe
Want to Save This Recipe?
Enter your email & I’ll send it to your inbox. Plus, enjoy weekly doses of culinary inspiration as a bonus!
By submitting this form, you consent to receive emails from Pudge Factor.
Spider Bread with Mexican Corn Dip
Ingredients
Mexican Corn Dip (See Tip 1)
- 1 cup (8 ounces) sour cream (See Tip 2)
- 1 cup (8 ounces) mayonnaise
- 2 cans (11 ounces each) Mexicorn, drained
- 1 cup green onion tops, sliced (about 1 bunch)
- 4.5 ounce can diced green chilies, undrained
- ¼ cup chopped jalapeño slices (from a jar)
- 6 slices bacon, cooked, drained and crumbled (about ¼ cup)
- 2 cups (8 ounces) shredded Mexican blend cheese
Spider Bread (See Tips 3 and 4)
- 2 cups (10 ounces) bread flour
- 2 teaspoons granulated sugar
- 2 teaspoons bread machine or instant yeast
- 1 teaspoon Kosher salt
- ⅔ cup 2 Tablespoons (6.33 ounces) cold filtered water (See Tip 5)
- 2 teaspoons olive oil
- egg wash
- 1 Tablespoon freshly grated Parmesan cheese (optional)
Instructions
Mexican Corn Dip
- Combine all ingredients in a large bowl. Cover and refrigerate. (See Tip 6)
Spider Bread
- Place bread flour, sugar, yeast, and salt in bowl of food processor fitted with the steel blade. Pulse process 5 or 6 times to combine ingredients.
- With food processor running, slowly add cool water and 2 teaspoons of olive oil through feed tube. Continue to process for about 20 seconds until dough forms satiny, tacky ball that clears sides of bowl. After 20 seconds, if dough is sticky and sticks to blade, add 1 to 2 tablespoons flour and continue processing. If dough appears dry and crumbly, add 1 to 2 tablespoons cold water and process until dough forms ball.
- Once the dough has formed a satiny tacky ball, allow it to sit for 10 minutes. Then process for another 20 to 30 seconds.
- Transfer to oiled bowl; cover with plastic wrap, and place in warm location until doubled in size, about 30 minutes.
- Divide the dough as follows: One 2-ounce piece for spider head; Eight ½-ounce pieces for spider legs; Remainder (about 10 ounces) for spider body. Roll pieces for spider head and body into balls. Roll each four of the ½-ounce pieces into 12-inch ropes; roll remaining four ½-ounce pieces into 10-inch ropes.
- Place large ball for spider body below the center of a large parchment lined baking sheet. Place the small ball for the spider head about ½-inch from the spider body. Use the 12-inch ropes to make the spider's back legs, and the 10-inch ropes for the spider's front legs. Curve the legs out and around the body and head leaving room in between the legs for the dough to rise. Cover with plastic wrap that has been sprayed with non-stick spray and let rise until doubled in size, about 1 hour.
- Preheat oven to 350°F.
- Brush spider body with egg wash. If desired, sprinkle grated Parmesan cheese on spider legs to give them a "hairy" appearance. Bake in preheated 350°F oven for 25 to 30 minutes, or until golden brown.
- Let cool for 10 minutes on baking sheet; transfer to a wire rack to cool completely.
- When ready to serve, cut a bowl out of the spider's body and fill with Mexican Corn dip. Arrange assorted crudites and crackers around the body. For the eyes, I used chocolate chips, but you could also use black olives.
- Yield: 12 servings.
Tips/Notes
- This recipe makes a lot of dip. You can definitely cut the recipe in half. If you do, go ahead and use an entire can of diced green chilies.
- I used low fat sour cream, but you could also use full fat sour cream.
- Rather than making your own dough for the spider bread, you can use one pound of refrigerated pizza dough or one pound of frozen bread dough that you can purchase at the grocery store. Do not, however, use rolled pizza dough that comes in a can.
- When I'm making bread, I always weigh the flour and the liquid to ensure proper consistency. If you don't have a digital scale, you should actually purchase one.
- The ultra-fast rotation of the steel blade in the food processor generates quite a bit of heat. Therefore, you should start with cold water to ensure that the dough doesn't get too warm. If the dough is too warm, it could kill the yeast. Also, you should always use filtered water when making any type of bread. The reason is that the chlorine in tap water can kill the yeast.
- The flavor of the Mexican Corn Dip improves greatly if it is refrigerated overnight. to allow the flavors to blend together.



The Book of Food says
Really cool !
Chula King says
Thanks!
Marilyne says
What a cute idea! I will certainly make this for Halloween. I made the dip early this morning for a small gathering this afternoon. I know that the flavours need time in the frig to blend together (and they are doing just that right now) but it was still delicious when I tasted it after I combined it all together!
Thank you for another delicious recipe.
Chula King says
Thanks so much Marilyne! It was a lot of fun making the spider! I agree that the dip is delicious.
Chula